Table of Contents
Advertisement
Available languages
Available languages
Quick Links
H-5334
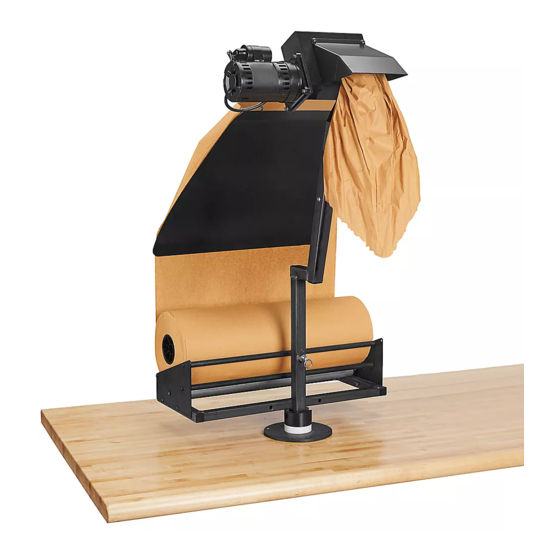
TABLETOP PAPER
MACHINE
TOOLS INCLUDED
1/8"
5/16"
Allen Wrench
1.
Remove all parts from the three shipping cartons.
2. Position the tabletop base on flat workstation
surface.
3. Rotate the base so the
shaft channel is facing
the direction you want the
paper to exit the machine
from. (See Figure 1)
4. Fasten the base to
workstation using holes
in base. (See Figure 1)
NOTE: Mounting
bolts not included.
5. Rotate black collar so
the shaft channel is on
the opposite side of
the groove in the collar.
(See Figure 1)
6. Fasten spring-loaded
pin and spacer using a
1/2" wrench all the way
into the welded nut on
the front of the bottom
mast. (See Figure 2)
PAGE 1 OF 9
1-800-295-5510
uline.com
TOOL NEEDED
1/2" Wrench
ASSEMBLY
Figure 1
Shaft
Chan-
Black
Collar
Collar
Groove
Tabletop Base
Figure 2
Pour le français, consulter les pages 7-9.
7.
While pulling
spring-loaded
pin, place bottom
mast onto the
shaft of the
tabletop base.
Lower the body
so crossbar fits
into black collar
groove.
(See Figure 3)
8. Release spring-loaded pin and rotate body until the
pin clicks into the channel on the shaft.
9. Position top mast
so the paper exit
is facing front.
Insert the top mast
into the top of
the bottom mast.
Secure with
3/8-16 x 3/4" bolts
and 3/8" lock
washers (2 each).
(See Figure 4)
10. Pull spring-loaded
pin out and turn
unit 180 degrees.
Para Español, vea páginas 4-6.
Figure 3
Bottom
Mast
Black
Collar
Groove
Figure 4
Top
Mast
Bottom
Mast
0521 IH-5334
Advertisement
Table of Contents

Related Manuals for U-Line H-5334


Summary of Contents for U-Line H-5334
- Page 1 Para Español, vea páginas 4-6. Pour le français, consulter les pages 7-9. H-5334 1-800-295-5510 uline.com TABLETOP PAPER MACHINE TOOLS INCLUDED TOOL NEEDED 1/8" 5/16" 1/2" Wrench Allen Wrench ASSEMBLY Remove all parts from the three shipping cartons. While pulling Figure 3 spring-loaded 2.
-
Page 2: Operation
ASSEMBLY CONTINUED 11. Place paper ramp onto paper entrance funnel 12. Rotate unit 180 degrees back to original position, and secure with 10-32 x 1/2" bolts (6), ensuring bolt with paper exit shoot facing front. head is on the inside of the funnel. Secure with #10 13. -
Page 3: Troubleshooting
TROUBLESHOOTING OPERATING ISSUE CAUSE RECOMMENDATIONS No power to machine. Unit not plugged in. Connect power cord to standard 115V outlet. Motor not connected to power Connect blue motor connector box. plug to the blue plug on the power box; make sure it has clicked into place. -
Page 4: Herramientas Incluidas
H-5334 800-295-5510 uline.mx PLEGADORA DE PAPEL – MESA HERRAMIENTAS INCLUIDAS HERRAMIENTA NECESARIA 1/8" 5/16" Llave de 1/2" Llave Allen ENSAMBLE Saque todas las partes de las tres cajas. 7. Jale el pin con Diagrama 3 resorte y coloque 2. Coloque la base sobre una superficie de trabajo el mástil inferior en... - Page 5 CONTINUACIÓN DE ENSAMBLE 11. Coloque la rampa de papel en el embudo de 12. Gire la unidad 180 grados para regresar a la entrada y fíjela con seis pernos de 10-32 x 1/2", posición original, con la salida de papel hacia asegurándose de que las cabezas de los pernos adelante.
-
Page 6: Solución De Problemas
SOLUCIÓN DE PROBLEMAS PROBLEMA DE CAUSA RECOMENDACIONES FUNCIONAMIENTO La máquina no recibe La unidad no está enchufada. Enchufe el cablee eléctrico a un electricidad. tomacorrientes estándar de 115V. Conecte el enchufe azul del motor en el El motor no está conectado a la enchufe azul de la caja del interruptor;... -
Page 7: Outils Inclus
H-5334 1-800-295-5510 uline.ca FROISSE-PAPIER DE COMPTOIR OUTILS INCLUS OUTIL REQUIS 1/8 po 5/16 po Clé de 1/2 po Clés Allen MONTAGE Retirez toutes les pièces des trois boîtes d'expédition. 7. Tout en tirant Figure 3 sur la tige à 2. Placez la base sur la surface plane d'un poste de ressort, posez travail. - Page 8 MONTAGE SUITE 11. Placez la rampe à papier sur l'entonnoir d'entrée du 12. Retournez l'unité de Figure 6 papier et fixez à l'aide de boulons de 10-32 x 1/2 po 180 degrés jusque dans (6) en veillant à ce que les têtes des boulons soient à sa position initiale, en l'intérieur de l'entonnoir.
-
Page 9: Dépannage
DÉPANNAGE PROBLÈME CAUSE RECOMMANDATIONS La machine n'a pas d'alimentation L'appareil n'est pas branché. Branchez le cordon d'alimentation dans une électrique. prise standard de 115 V. Le moteur n'est pas connecté au bloc Branchez la fiche de connexion du moteur d'alimentation. bleue à la prise bleue du bloc d'alimentation, en veillant à...