Table of Contents
Advertisement
Quick Links
Advertisement
Table of Contents

Related Manuals for Coby TF-DVD7700


Summary of Contents for Coby TF-DVD7700
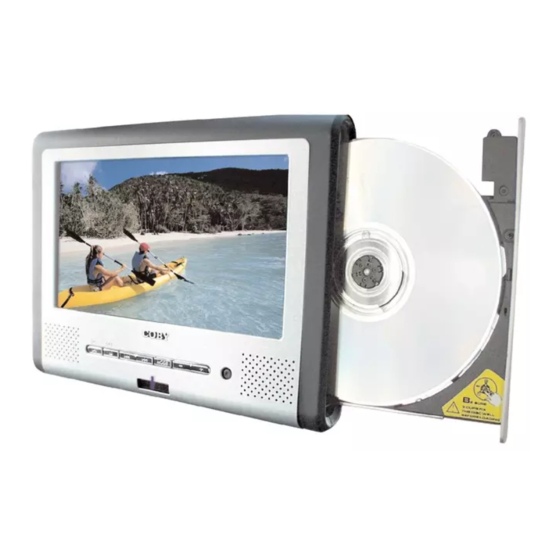
- Page 1 PORTABLE DVD PORTABLE DVD PLAYER PLAYER Operating Instructions...
-
Page 2: Precautions
Precautions Thank you for purchasing Portable DVD player. Please read this manual carefully before operating and reserve it for future reference. It will be helpful to you if you encounter any operational problem. TO REDUCE THE RISK OF FIRE OR ELECTRIC SHOCK,... - Page 3 Precautions WARNING: To reduce the risk of fire or electric shock, do not expose this appliance to rain or moisture. CAUTION: Use of controls or adjustments or performance of procedures those specified may result in hazardous radiation exposure. CAUTION RISK OF ELECTRIC SHOCK. DO NOT OPEN To reduce the risk of electric shock, do not remove cover (or back).
- Page 4 Precautions MACROVISION: This product incorporates copyright protection technology that is protected by U.S. patents and other intellectual property rights. Use of this copyright protection technology must be authorized by Macrovision, and is intended for home and other limited viewing uses only unless otherwise authorized by Macrovision.
-
Page 5: Table Of Contents
Table Of Contents INTRODUCTION PRECAUTIONS... TABLE OF CONTENTS... CAUTIONS ON USING THIS PLAYER... PRECAUTIONS FOR BATTERY PACK OPERATION ... Operation of the battery pack...8 Storage... Service life and disposal ... TYPES OF DISCS PLAYABLE ON THIS PLAYER... Marks indicated on DVDs...9 Disc structure ... - Page 6 Table Of Contents BASIC OPERATIONS TURNING ON THE POWER... PLAYBACK FUNCTIONS... Loading ..Playing... If a menu screen appears... Stopping playback... Pausing playback... Returning to the previous chapter or track(DVDs, video CDs and CDs)...34 Moving to the next chapter or track(DVDs, video CDs and CDs)...34 Removing the disc...
-
Page 7: Cautions On Using This Player
Cautions on Using this Player Do not move the player during playback During playback, the disc spins at high speed, so do not lift or move the player. Doing so may damage the disc. Transpor ting the player When transporting the player be sure to remove the disc and turn off the power, then unplug the power cord . - Page 8 Cautions on Using this Player Cleaning the player Normally clean the player using a soft, dry cloth. For tough dirt, apply some neutral detergent diluted in 5 to 6 parts water to a soft cloth, wring out thoroughly, wipe off the dirt, then wipe the player with a dry cloth.
-
Page 9: Precautions For Battery Pack Operation
If the portable DVD player is switched on while the battery pack is not fully charged, the operation may sometimes be unstable. Be sure to charge the battery pack fully before use. -
Page 10: Types Of Discs Playable On This Player
Types of Discs Playable on this Player The discs listed on the table below can be played on this player without an adapter. The marks shown on the table below are indicated on the disc's label, package or jacket. Types of playable discs and their Diameter/Playable sides marks... -
Page 11: Disc Structure
Types of Discs Playable on this Player Disc structure CDs are divided in units called tracks. (Generally one track corresponds to one song. Tracks are sometimes further divided into indexes.) Track1 Track2 DVDs are divided in units called titles, which are further divided in chapters. They also include menu screens that do not belong to any title. -
Page 12: Using These Operating Instructions
Using These Operating Instructions Be sure to read the operating instructions carefully before using the player. It can ensure you taking maximum advantage of all functions of this player. When this player is connected to a TV or AV amplifier, the setup screen should be displayed. -
Page 13: Checking The Accessories
Checking the Accessories After unpacking, check that all the accessories listed below are included. AC/DC adapter AV cable Ear phone Car power cable * Only some models have this accessory. * Only some models have this accessory. Card-type remote control unit Operating instructions (this manual) Soft carrying bag Accessories bag... -
Page 14: Remote Control Unit And Main Unit Preparations
Remote Control Unit and Main Unit Preparations Notes on using the remote control unit Do not drop or step on the remote control unit or subject it to shocks. Doing so may damage it. Note that the romote control unit may not work if there are obstacles between it and the remote sensor. -
Page 15: Remote Control Unit Operating Range
Remote Control Unit and Main Unit Preparations Remote control unit operating range The remote control unit can operate within a distance of approximately 5 meters. Note: Most of the player s operations can be done by using the remote control unit. Some operations, however, can only be done by using the main unit buttons. -
Page 16: Parts And Functions
Parts and Functions Liquid cr ystal display The portable DVD player is equipped with a liquid crystal display. 3 4 5 Liquid cr ystal display Speakers Control section Control buttons Remote sensor The remote control signals are received here. Power indicator Off: No power connection. -
Page 17: Main Unit Left Side
Parts and Functions Play/pause button Press it to play. When pressing during playback mode, pause mode is set. Press again to resume playback. Keep pressing it for about 1.5 seconds to power on the unit. Stop /off button Press it to stop playback. Keep pressing it for about 1.5 seconds to turn off the unit (standby status). -
Page 18: Main Unit Right Panel
Parts and Functions Phone jack For connecting stereo headphone or an amplifier. Volume control Use it to adjust the volume of the speakers or headphone. Video in/out jack Input or output video signals to connected device by setting AV IN/OUT mode value. The included AV cable is connected here. -
Page 19: Main Unit Rear Side
Parts and Functions Main unit rear side Open-stick You can use it to open the tray. How to stand Pull out the support. Draw out the support to a proper position . Pull down the button to lock it. Main unit bottom side Hole for Batter y Pack Nut for Batter y Pack Batter y connector... -
Page 20: Remote Control Unit (Frequently Used Buttons)
Parts and Functions Remote control unit (frequently used buttons) AUDIO SUBTITLE OPEN SETUP ANG E L SEARCH PREV NEXT STOP PLAY/PAUSE STEP/SLOW MENU TITLE CLEAR ZOOM REPEAT SHIFT STANDBY button Press this button to turn on or off the power. PREVIOUS/NEXT button Use these buttons to search for the beginnings of tracks or chapters. -
Page 21: Remote Control Unit (Other Buttons)
Parts and Functions Remote control unit (other buttons) AUDIO SUBTITLE OPEN SETUP ANG E L SEARCH PREV NEXT STOP PLAY/PAUSE STEP/SLOW MENU TITLE CLEAR ZOOM REPEAT SHIFT AUDIO button Press this button to switch the audio language. SETUP button Press this button to display setup screen when at stop status. -
Page 22: Names Of Battery Parts And Their Functions
Parts and Functions Names of battery parts and their functions DC IN connector Connect the power adapter to recharge. Batter y knob Twist to tighten/detach the battery pack. Batter y indicator LED. When the battery is discharging, LED is off. When recharging the battery, LED is red. -
Page 23: Connecting The Player To Other Devices
Connecting the Player to Other Devices Before connecting Turn off the power of the player and the devices to be connected. Connecting to a TV AUDIO IN VIDEO IN -22-... -
Page 24: Connecting To A Dolby Digital/ Dts/ Mpeg Decoder Or An Amplifier With Built-In Decoder
Connecting the Player to Other Devices Connecting to a Dolby Digital / DTS / MPEG decoder or an amplifier with built-in decoder With this player, you can enjoy powerful Dolby Digital, DTS or MPEG sound. Output the digital signals from the player's digital output to a decoder or amplifier with built-in decoder. -
Page 25: Connecting To A Digital Amplifier That Is Not Dolby Digital/ Dts/ Mpeg Compatible
Connecting the Player to Other Devices Connecting to a digital amplifier that is not Dolby Digital / DTS / MPEG compatible Output the digital signals from the player's digital output to a digital amplifier that is not Doby/DTS/MPEG compatible. Main unit left panel Optical digital cable (not included) To digital audio... -
Page 26: Connecting To Active Speaker Systems
Connecting the Player to Other Devices Connecting to active speaker systems Main unit left side VIDEO IN VIDEO IN -25-... -
Page 27: Connecting Earphone
Connecting the Player to Other Devices Connecting ear phone Connect the earphone' s plug securely to the PHONE JACK on the player. To listen to music through the earphone, first use the VOLUME CONTROL on the left side of the main unit to lower the volume to minimum level, then adjust the volume to comfortable level. -
Page 28: Using The Battery
Using the Battery Recharging the batter y pack Recharging the battery pack as described below. Connect the DC output plug of AC adapter to the batter y pack. Connect the AC adapter to the power outlet. When recharging starts, the recharge LED lights in red. The recharge LED lights in green when recharging completes. -
Page 29: Notes For Recharging
Using the Battery Notes for recharging When the battery pack is hot, it may take longer time than usual for recharging or may sometimes be unusable to be recharged. Wait for the battery pack to cool down before retrying recharging. If the recharge LED can not be lit, check whether the AC adapter and battery pack are connected firmly to have perfect contact. -
Page 30: Ac Power Operation
" " CAUTION: Be sure to use the AC adapter provided with the player. Before inserting or removing the DC output plug of the AC adapter, always be sure to turn off the power of the portable DVD player. -29-... -
Page 31: Turning On The Power
Turning On the Power Main unit (front panel) Remote control unit Connect the AC adapter to a power outlet. Connect the DC output plug of the adapter to the DC input jack on the main unit. Keep pressing the ON button on the main unit for about 1.5 seconds. -
Page 32: Playback Functions
Playback Functions Loading Press OPEN button to open. (If no disk is placed in, the tray will open automatically after power on.) If no power supply, the tray will not open, you must inser t the open-stick into the hole to open it. Place in disc and press down the disc with your fingers near the center hole. -
Page 33: Playing
Playback Functions Playing Load the disc. One of the following messages appears on the screen: DVD, VCD, CD. For some discs, playback starts automatically when the tray is closed. For the disc which had been programmed and stored in memories, playback starts automatically in the programmed order. -
Page 34: Stopping Playback
Playback Functions TITLE MENU 1 POP 2 JAZZ 3 COUNTRY 4 R&B 5 CLASSICAL Video CD number buttons number buttons Select by pressing the SHIFT SHIFT after pressing the button to switch to display NUMBER on screen. Example: For video CDs with playback control (PBC) To display the menu screen The way in which the menu screen is displayed differs from disc to disc. -
Page 35: Returning To The Previous Chapter Or Track(Dvds, Video Cds And Cds)
Playback Functions Returning to the previous chapter or track(DVDs, video CDs and CDs) Press the previous button during playback. After pressing the previous button, playback returns to the beginning of the previous chapter or track. Moving to the next chapter or track(DVDS, video CDs and CDs) Press the next button during playback. -
Page 36: Turning Off The Power
Turning Off the Power When the power is on, press OFF and hold it for about 1.5S. The power LED becomes red and the standby mode is set. The power can also be turned off by pressing the STANDBY button on the remote control unit. -
Page 37: Various Language And Subtitle Settings
Various Language and Subtitle Settings Please stop playback when you are going to change system settings. Press SETUP Please stop playback when you are going to change system settings. Press SETUP button on the remote control unit to display setup screen when playback is stopped. button on the remote control unit to display setup screen when playback is stopped. -
Page 38: Advanced Functions
Advanced Functions Searching for a specific scene Press the SEARCH button. Press the number button to input specific time or title/chapter. Press the PLAY button or ENTER button. Playback starts from the specified position. Viewing in slow motion (DVDs and video CDs) Press the SLOW button during playback, the playback speed changes to 1/2, 1/4, 1/6 or 1/7 of the normal speed. -
Page 39: Changing From Av Out To Av In
Advanced Functions Changing from AV OUT to AV IN You can change the player from AV OUT(output AV signal to TV, etc) to AV IN(input AV signal from other device)and use it as a TFT Monitor. Default setting is AV OUT. Press MODE button on main unit and switch LCD mode to AV IN/OUT. -
Page 40: Cautions On Using
Cautions on Using Handling discs Handling When holding When holding with both hands with one hand Do not use damaged (cracked or warped) discs. Do not scratch the signal surface or let it get dirty. Do not attach paper or seals to discs. The player may be damaged if there is any exposed glue, etc., on discs. -
Page 41: Trouble Shooting
Trouble shooting Picture is disturbed when playing a DVD recorded by a VCR. This player incorporates copyright protection technology. Some discs include signals protected against copied by a VCR. Such recorded discs can not be played properly. Player cannot be operated with the remote control unit Remote control unit is too far from the main unit or have too large angle... - Page 42 -SDV17A3-ENG-NB-V1.3-...