Siemens SINAMICS PERFECT HARMONY GH180 Operating Instructions Manual
Medium-voltage drive for type 6sr5
Hide thumbs
Also See for SINAMICS PERFECT HARMONY GH180:
- Function manual (538 pages) ,
- Operating instructions manual (224 pages) ,
- Reference manual (48 pages)
Table of Contents
Advertisement
Advertisement
Table of Contents

Related Manuals for Siemens SINAMICS PERFECT HARMONY GH180


Summary of Contents for Siemens SINAMICS PERFECT HARMONY GH180
- Page 1 Operating Instructions www.siemens.com/drives...
- Page 3 Introduction Security information Safety notes Description Type 6SR5 Air-Cooled Preparing for Use Assembly Operating Instructions Electrical Connections Commissioning Operation Maintenance Spare Parts Disposal and Recycling Service and Support Technical Data Quality List of symbols and abbreviations A5E39390112...
- Page 4 Note the following: WARNING Siemens products may only be used for the applications described in the catalog and in the relevant technical documentation. If products and components from other manufacturers are used, these must be recommended or approved by Siemens. Proper transport, storage, installation, assembly, commissioning, operation and maintenance are required to ensure that the products operate safely and without any problems.
-
Page 5: Table Of Contents
Table of contents Introduction ............................9 Introduction......................... 9 Security information..........................11 Safety notes ............................13 General Safety Information ....................13 Observing the Five Safety Rules..................14 Safety Information and Warnings ..................15 ESD-sensitive Components ....................17 Description............................19 Cabinet Details........................19 4.1.1 Supply Scope ........................ - Page 6 Table of contents Associated Protection provided by the Customer..............49 Commissioning ............................ 51 Residual Current Device (RCD) Compatibility............... 51 Cell Reforming ........................52 Pre-Commissioning Process ....................53 Operation............................. 55 Operating the Drive ......................55 Resetting the Protection Scheme ..................56 Maintenance............................
- Page 7 Table of contents Service and Support .......................... 103 Field Service Operation ....................103 Technical Data............................ 105 Storage, Transport and Operation Ambient Conditions............105 Power Cell Specifications Table ..................107 9-Cell System Specifications ..................... 108 12-Cell System Specifications ................... 110 15-Cell System Specifications ................... 111 18-Cell System Specifications ...................
- Page 8 Proper Anchoring in Concrete Technique ................. 34 Figure 6-2 Combining Several Shipping Splits (Transport Units) ..............36 Figure 7-1 SINAMICS Perfect Harmony GH180™ Drive System ..............42 Figure 7-2 Earthing (Grounding) cable screens (shields) when multiple sections are used......44 Figure 7-3 Recommended Cable Segregation ...................
- Page 9 Table of contents Figure 10-26 Torque Connections for 200-260A, 4Q 120 A-160 A Power Cells ..........93 Figure 10-27 Torque Connections for 340-430A, 4Q 325 A Power Cells ............93 Figure 10-28 Torque Connections for 340-430A 4Q Power Cells ..............94 Figure 10-29 Fuse Location (40 - 260 A) ......................
- Page 10 Table of contents Type 6SR5 Air-Cooled Operating Instructions, AK, A5E39390112...
-
Page 11: Introduction
Introduction Introduction About This Manual This manual provides customer documentation for the SINAMICS Perfect Harmony™ GH180 Variable Frequency Drive (VFD). The content of this manual provides standard information as well as descriptions of all available options for this product line. The contents also provides safety warning and notes, preparation for use, assembly/installation, electrical, commissioning, operation, maintenance, spare parts, and disposal information. - Page 12 Introduction 1.1 Introduction Type 6SR5 Air-Cooled Operating Instructions, AK, A5E39390112...
-
Page 13: Security Information
Siemens’ products and solutions undergo continuous development to make them more secure. Siemens strongly recommends that product updates are applied as soon as they are available and that the latest product versions are used. Use of product versions that are no longer supported, and failure to apply the latest updates may increase customer’s exposure to cyber... - Page 14 Security information Type 6SR5 Air-Cooled Operating Instructions, AK, A5E39390112...
-
Page 15: Safety Notes
Safety notes General Safety Information Proper Use SINAMICS Perfect Harmony™ GH180 medium voltage drives must always be installed in closed electrical operating areas. The drive is connected to the industrial network via a circuit-breaker or contactor that is electrically connected to the VFD control to enable the drive protection features. -
Page 16: Observing The Five Safety Rules
Safety notes 3.2 Observing the Five Safety Rules Observing the Five Safety Rules There are five safety rules that must always be observed to assure not only personal safety, but to prevent material damage as well. Always obey safety-related labels located on the product itself and always read and understand each safety precaution prior to operating or working on the drive. -
Page 17: Safety Information And Warnings
Safety notes 3.3 Safety Information and Warnings Safety Information and Warnings DANGER Hazardous Voltage! • Always follow the proper lock-out/tag-out procedures before beginning any maintenance or troubleshooting work on the VFD. • Always follow standard safety precautions and local codes during installation of external wiring. - Page 18 – for the applications defined as suitable in the technical description. – in combination with equipment and components supplied by other manufacturers which have been approved and recommended by Siemens. • Always follow the facility / installation site rules / guidelines for Personal Protectiive Equipment (PPE) based on the Arc Flash study of that facility.
-
Page 19: Esd-Sensitive Components
• Avoid plastic Styrofoam™, vinyl and other non-conductive materials. They are excellent static generators and do not give up their charge easily. • When returning components to Siemens Industry, Inc. always use static-safe packing. This limits any further component damage due to ESD. -
Page 20: Figure 3-1 Esd Protective Measures
Safety notes 3.4 ESD-sensitive Components • Avoid physical contact with electronic components. If you need to perform absolutely essential work on these components, then you must wear one of the following protective gear: – Grounded ESD wrist strap – ESD shoes or ESD shoe grounding strips if there is also an ESD floor. •... -
Page 21: Description
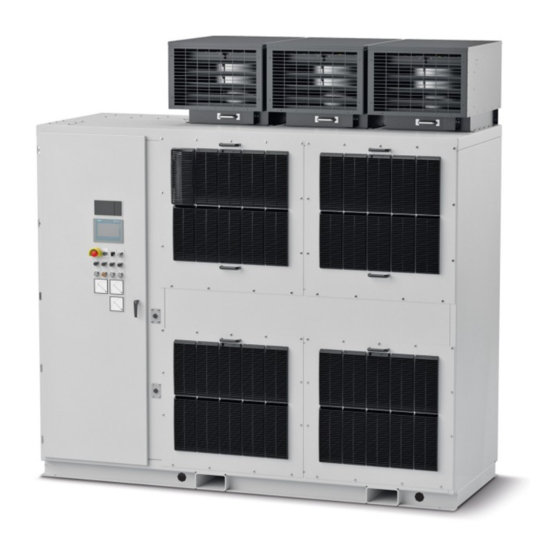
Description Cabinet Details 4.1.1 Supply Scope Standard Scope of Supply The scope of supply for the air-cooled SINAMICS Perfect Harmony™ GH180 VFD System Basic unit consists of multiple sections: • Input / Output section • Transformer section • Cell section •... -
Page 22: Cell Section
Description 4.1 Cabinet Details Depending upon order specifications, the transformer is configured for 18 or 54-pulse for 9-cell systems, 30-pulse for 15-cell systems, and 42/48-pulse for 21/24-cell systems power quality by using extended delta 750 V or 450 V secondary windings. The transformer is a dry type forced air-cooled unit, and polyglass air baffles are used to direct air movement across the coils. -
Page 23: Control Section
As a preventive maintenance measure for drives that experience daily power cycling, Siemens recommends replacing all power fuses that have been in operation for ten years. Note E-rated Fuses The core drive does not include primary fuses. When E-rated fuses are required, consult Siemens Engineering. 4.1.5 Control Section Coordinated Input Protection Scheme The SINAMICS Perfect Harmony™... -
Page 24: Figure 4-1 Input Protection Interface For Trip Contacts
Description 4.1 Cabinet Details ① Ratings PB4 / S3 E-Stop: 600 VAC, 10 Amp Cont., 12 Amp make, 1.2 Amp break ② Digital Outputs: 230 VAC, 1 AC ③ LFR / K1 N.C. Contacts: 30 VDC and 120 VAC, 10 A 100 VDC, 0.5 A 240 VAC, 7.5 A Figure 4-1... - Page 25 Description 4.1 Cabinet Details K41 Circuit Ratings • Circuit rating 125VDC 8A, 24VDC 10A, 250VAC, 10A • These signals MUST be integrated into the drive main input line circuit breaker. Input Protection Scheme for Drives with Precharge Contacts CIMV (Close Input MV) and TIMV (Trip Input MV) provide a CLOSE and TRIP hardwired signal interface to the drive input line circuit breaker The control of the input current interrupting devices also ensures that input power is applied only after pre-charging the cell DC links.
-
Page 26: Control Door Cabinet Components
Description 4.1 Cabinet Details Figure 4-3 Standard Contacts K3 / CIMV (Close Input MV) and K4 / TIMV (Trip Input MV) Note: For 6SR5x02: • Contact rating 24VDC 10A, 250VAC, 10A • This signal MUST be integrated into the drive main input line circuit breaker. For 6SR5x04:Contact K3 / CIMV (Close Input MV) and K4 / TIMV (Trip Input MV) •... -
Page 27: Figure 4-4 Simatics Touchpad
Description 4.1 Cabinet Details Keypad Functions Figure 4-4 SIMATICS Touchpad Use the keypad to: • navigate through the menu system • activate control functions • reset the system after faults have occurred • edit parameter values • enter security access codes •... - Page 28 Description 4.1 Cabinet Details Off-Local-Remote Selector Switch The Off-Local-Remote Selector is the default three-position mode select switch that is mounted on the front of the drive. If the switch is in the OFF position, the inverter output is inhibited. If the switch is in the Remote position, the control uses either a remote 4-20 mA DC speed demand or a network demand, depending on how the project SOP is written.
-
Page 29: Cooling System Section
Description 4.1 Cabinet Details 4.1.6 Cooling System Section Cooling System Components The cooling system consists of several parts including blower(s). Each blower has a suitably rated three-phase combination starter (circuit breaker & contactor combination). There is an optional line reactor that is connected upstream to the combination starter in the circuit that feeds an EMI filter. -
Page 30: Air-To-Air Heat Exchanged (W41) Drive Preparation
Applying Medium Voltage without air flow will result in a trip from the Coordinated Input Protection Scheme. To remove the unit's latent heat, Siemens recommends running the blower for ten minutes after removing Medium Voltage. 4.1.6.3... - Page 31 Description 4.1 Cabinet Details Before starting any work on the unit, be sure to review the heat exchanger manual. While working with heat exchangers some items may require special attention. The following items include, but are not limited to, those listed below: •...
- Page 32 Description 4.1 Cabinet Details Type 6SR5 Air-Cooled Operating Instructions, AK, A5E39390112...
-
Page 33: Preparing For Use
Preparing for Use Transportation, Handling, and Storage Preparation for Use Please refer to the manual titled "Transportation, Handling, and Safety Instructions" (A5E36522783) for details on how to prepare the drive for use. Please refer to customer outline drawings for weights and dimensions information. Type 6SR5 Air-Cooled Operating Instructions, AK, A5E39390112... - Page 34 Preparing for Use 5.1 Transportation, Handling, and Storage Type 6SR5 Air-Cooled Operating Instructions, AK, A5E39390112...
-
Page 35: Assembly
Assembly General Mounting Standard Work Practice Prior to performing any type of work on the equipment, refer to the "Safety Notes" chapter of this manual. Handling and Mounting the Drive Adhere to the following general information with respect to installation: •... -
Page 36: Proper Cabinet Anchoring Methods
Assembly 6.2 Proper Cabinet Anchoring Methods Proper Cabinet Anchoring Methods Holes for anchor bolts are located on the base mounting channel typically 1" (25.4 mm) from front and back edges, and 4" (102 mm) from the sides. Refer to supplied drawings for mounting details. -
Page 37: Combining Several Shipping Splits
Electrical interconnections are also identified on the interconnection drawing. All electrical connections can be made by front access only. For installations with no rear access, Siemens recommends connecting the shipping splits before the VFD is installed in the final location. -
Page 38: Figure 6-2 Combining Several Shipping Splits (Transport Units)
Assembly 6.3 Combining Several Shipping Splits 7. Secure to the floor. If access to rear cabinet mounting bolts is limited, top angles can be used. Refer to section "Proper Cabinet Anchoring Methods". 8. Reinstall the VFD blowers on top of the cabinets using the Cell/ Blower lift and make all electrical connections. -
Page 39: Electrical Connections
Electrical Connections General Electrical Standard Work Practice Prior to performing any type of electrical work on the equipment, be sure to read and understand all vendor supplied information and all information presented in the Safety Notes chapter of this manual. DANGER Ensure the entire drive is earth grounded. -
Page 40: Installation External Wiring
Electrical Connections 7.2 Installation External Wiring Installation External Wiring Customer-supplied medium voltage cables enter the drive by means of an access plate in the top or bottom of the VFD enclosure. Customer-supplied low-voltage cables #8 - #28 (4.0 - 0.8 mm ) AWG for the control enter an access plate in the top or bottom of the VFD enclosure. -
Page 41: Table 7-1 Drive Torque Specifications (Zinc-Plated Hardware And Electrical Connections Only)
Electrical Connections 7.2 Installation External Wiring OBJECT INPUT OUTPUT PROTECTIVE CONDUCTOR Maximum Cross- 15-cell 1 x 95 mm 1 x 95 mm 70 mm Section of Exter‐ 340 430A 1 x 262 MCM 1 x 262 MCM 2/0 AWG nal Wires 15-cell 1 x 95 mm 1 x 95 mm... -
Page 42: Table 7-2 Drive Torque Specifications (Stainless Steel Hardware, Mechanical Connections)
480.0 * These values do not apply when this hardware is used on installing SINAMICS Perfect Harmony GH180 power cells or power modules. For the required torque values in these instances, refer to the maintenance chapter of this manual or to the System drawings provided with this drive. -
Page 43: Grounding The Drive
Electrical Connections 7.3 Grounding the Drive Grounding the Drive Grounding the Drive DANGER Grounding the Drive The VFD must be grounded to allow safe operation. If not sufficiently grounded during operation, the protection and monitoring functions can fail. Failure to install proper grounding connections may result in death or cause damage to the drive. -
Page 44: Emc Installation Guidelines
SINAMICS Perfect Harmony GH180™ Drive System Earthing Siemens recommends the drive be bonded to earth (ground) at only one point using the shortest length conductor possible. This conductor must be properly sized per applicable local guidelines / regulations / laws. - Page 45 Drive Medium Voltage Input (Mains) and Medium Voltage Output (Motor) Cable Siemens recommends the input and output medium voltage power cable, regardless of operating voltage, used for all SINAMICS Perfect Harmony™ GH180 drives be screened (shielded) to mitigate RFI and achieve EMC. The cable screen (shield) should be electrically continuous for the entire cable length and constructed of nonmagnetic metal, a tape screen (shield) is preferred.
-
Page 46: Figure 7-2 Earthing (Grounding) Cable Screens (Shields) When Multiple Sections Are Used
Electrical Connections 7.4 EMC Installation Guidelines Figure 7-2 Earthing (Grounding) cable screens (shields) when multiple sections are used Alternatively, if the drive is solidly bonded to an earthing (grounding) grid located directly beneath it, the cable screens (shields) can be earthed (grounded) at both ends, preferably using lead lengths less than 24 inches. -
Page 47: Figure 7-3 Recommended Cable Segregation
Electrical Connections 7.4 EMC Installation Guidelines • Route control and signal cables in separate cable trunks at least 200 mm (8 in) away from motor and power cables. • If control and signal cables must cross power cables, it must be at an angle as near to 90 degrees as possible. -
Page 48: Cable Gland Plates Removal And Installation Guidelines
Electrical Connections 7.5 Cable Gland Plates Removal and Installation Guidelines Cable Gland Plates Removal and Installation Guidelines Cable Gland Plates Removal and Installation Guidelines Removal of gland plates is necessary to complete input and output power cable installation. Gland plates are attached to the drive enclosure and can be removed by unfastening the hardware. -
Page 49: Terminal Blocks
Refer to the wiring diagram or schematic for terminal block information. Terminal block size and rating may vary based on VFD configuration. Note Spare Terminal Availability Consult Siemens for customized systems requiring additional terminals. DANGER Electrical Hazard! Standard safety precautions and local codes must be followed during installation of external wiring. -
Page 50: E-Stops
Electrical Connections 7.7 E-Stops E-Stops Refer to the section of this manual entitled "Control Section" for information about E-Stop incorporation into the Coordinated Input Protection Scheme. Type 6SR5 Air-Cooled Operating Instructions, AK, A5E39390112... -
Page 51: Associated Protection Provided By The Customer
Electrical Connections 7.8 Associated Protection provided by the Customer Associated Protection provided by the Customer To ensure adequate protection for VFDs, the associated protection (that is, the circuit breaker or fused contactor) provided by the customer must fulfill the following requirements: •... - Page 52 Electrical Connections 7.8 Associated Protection provided by the Customer Type 6SR5 Air-Cooled Operating Instructions, AK, A5E39390112...
-
Page 53: Commissioning
Commissioning Residual Current Device (RCD) Compatibility CAUTION RCD Incompatibility Connecting this device to a power supply protected by a residual-current device can result in damage to property and minor personal injury. This product can produce a DC current in the grounding conductor. When using a Residual Current Device (RCD) in cases where direct or indirect contact can be made, only a Type-B RCD shall be permissible on the line side of this product. -
Page 54: Cell Reforming
Power Cell that is outside of the Cell Cabinet enclosure. Please contact the Siemens factory for further information about the Power Cell Reforming. Type 6SR5 Air-Cooled Operating Instructions, AK, A5E39390112... -
Page 55: Pre-Commissioning Process
VFD for the commissioning procedure. 2. Ensure the Pre-Commissioning checklist procedure is complete prior to arrival of Qualified Siemens Personnel for commissioning of the VFD. Note The VFD must be commissioned by Qualified Siemens Personnel only. Type 6SR5 Air-Cooled Operating Instructions, AK, A5E39390112... - Page 56 Commissioning 8.3 Pre-Commissioning Process Type 6SR5 Air-Cooled Operating Instructions, AK, A5E39390112...
-
Page 57: Operation
Operating the Drive Prior to performing any type of work on the equipment, refer to the "Safety Notes' chapter of this manual. The VFD must be commissioned by Qualified Siemens Personnel only. DANGER Qualified Personnel ONLY Only trained personnel may operate a SINAMICS Perfect Harmony™ GH180. Improperly operating the drive can cause damage to property, serious injury, and possible death. -
Page 58: Resetting The Protection Scheme
Failure to obey all safety precautions may cause death and equipment damage and drive failure. Prior to resetting the protection scheme, read the section of this manual titled "Faults and Alarms", and then contact Siemens technical personnel. ( 1-800-333-7421) Refer to the Appendix "Service and Support". -
Page 59: Maintenance
Refer to Figure: Drive System Schematic and the factory drawings furnished with each drive. Siemens strongly recommends that only qualified personnel be allowed to perform maintenance on SINAMICS Perfect Harmony™ Systems. Refer to Appendix Service and Support for customer service contact information. -
Page 60: Drive (Bdm) Maintenance And Protective Earthing (Pe) Procedure
Refer to figure "Drive System Schematic" and the factory drawings furnished with each drive. Siemens strongly recommends that only qualified personnel be allowed to perform maintenance on SINAMICS Perfect Harmony™ Systems. Perform the steps as indicated: 1. -
Page 61: Vfd Power Down And Door Access
Maintenance 10.3 VFD Power Down and Door Access 10.3 VFD Power Down and Door Access 10.3.1 Mechanical Interlock System (if provided) Mechanical Interlock System The drive can be locked mechanically using a key interlock system. For safety, the drive may be delivered with a key transfer system that interlocks the doors to restrict personnel access. -
Page 62: Figure 10-1 Dc Bus Voltage Indicator
Maintenance 10.3 VFD Power Down and Door Access 6. Use the coded K1 key (released from the customer circuit breaker) to release the K2 keys for the cabinet door (located in the key transfer unit on the VFD) if mechanical key interlocks are provided. -
Page 63: Figure 10-2 Dc Bus Voltage Indicator (340-430A)
Maintenance 10.3 VFD Power Down and Door Access Figure 10-2 DC Bus Voltage Indicator (340-430A) Figure 10-3 DC Bus Voltage Indicator (550-780A) Type 6SR5 Air-Cooled Operating Instructions, AK, A5E39390112... -
Page 64: Figure 10-4 Vfd Cabinet (Front View)
Maintenance 10.3 VFD Power Down and Door Access Figure 10-4 VFD Cabinet (front view) Type 6SR5 Air-Cooled Operating Instructions, AK, A5E39390112... -
Page 65: Figure 10-5 Vfd Cabinet - (Front View) From Left To Right: (100-140A, 600-1000Hp) And
Maintenance 10.3 VFD Power Down and Door Access Opening the Door for the Control Cabinet Figure 10-5 VFD Cabinet - (Front View) from left to right: (100-140A, 600-1000Hp) and (200-260A, 1100-2000Hp) The location of the control section, emergency stop button, key transfer unit, and blower control section are identical for each VFD cabinet shown. -
Page 66: Figure 10-6 Vfd Cabinet - (Front View): (340-430A, 1250-3500Hp)
Maintenance 10.3 VFD Power Down and Door Access Figure 10-6 VFD Cabinet - (Front View): (340-430A, 1250-3500Hp) The control section, blower control section, and emergency stop button location are identical for 12 and 15-Cell 40-260A (150-3500HP) VFDs and all 340-430A (1250-9000HP) VFD cabinets. Note M58 option code layout If the M58 option code is selected, see the supplied customer outline prints for drive layout. -
Page 67: Closing The Make-Proof Grounding Switch
Maintenance 10.3 VFD Power Down and Door Access 10.3.3 Closing the make-proof grounding switch The converter is optionally equipped with make-proof grounding switches (N44 or N45). The make-proof grounding switches can be closed when the medium voltage doors or panels have been closed and the following prerequisites are fulfilled: •... -
Page 68: Figure 10-7 Make-Proof Grounding Switch
Maintenance 10.3 VFD Power Down and Door Access Procedure 1. Take the socket spanner, which can be found in the tool set, and turn it from position "O" to position "I". The current position is marked by a red dot or position indicator on the enclosure. Figure 10-7 Make-proof grounding switch 2. -
Page 69: Preventive Maintenance
10.4.2 Inspection Regularly scheduled inspections are required to evaluate the current status of your equipment. Customer inspection actions are comprised mainly of visual checks. Refer to the Siemens Preventive Maintenance Manual (A5E029443101A) for additional details. Note For complete inspection information, Siemens Customer Service support is required. -
Page 70: Preventive Maintenance Checklist
The actual intervals at which maintenance procedures are to be performed depend on ambient environmental and operating conditions for your specific installation. Siemens offers its customers support in the form of a service contract. For further details, contact your regional office or sales office. -
Page 71: Touch-Up Paint
Maintenance 10.5 Touch-Up Paint 10.5 Touch-Up Paint Touch -Up Paint Use touch-up paint, as needed, on any rusty or exposed parts on the cabinet enclosure. Clean surface of any rust prior to painting. Type 6SR5 Air-Cooled Operating Instructions, AK, A5E39390112... -
Page 72: Cleaning
10.6 Cleaning 10.6 Cleaning 10.6.1 Contact for Cleaning Measures If contamination occurs, contact Siemens customer service. Refer to the appendix "Service and Support". 10.6.2 Removing Dust Deposits Dust Deposits Dust deposits inside the cabinet unit must be removed at regular intervals (or at least once a year) by qualified personnel in accordance with the relevant safety regulations. -
Page 73: Remove And Replace
• Ensure that the cable shields are intact. • Insulate shields that are damaged. Note Component Replacement Unless otherwise indicated by Siemens, always replace components with the same part number and revision level or newer. Note Drive Failure When the power supply is switched off, data about error message statuses is lost. -
Page 74: Part Replacement
Part Replacement WARNING Siemens Recommendation of Qualified Personnel Only Siemens strongly recommends that only qualified personnel be allowed to perform maintenance and replacements on SINAMICS Perfect Harmony™ drives. Failure to comply with recommendations: • will invalidate any warranty claims should the drive not perform as designed or parts become damaged •... -
Page 75: Figure 10-8 Type 6Sr5 40A, 70A Only (Blower Cage Louver Installation)
Maintenance 10.7 Remove and Replace Filter Media Replacement Following photographs depict the procedure for replacing a filter. Note For Type 6SR5 40/70A ONLY The blower cage louver shall be installed as shown in the photograph below this note. Figure 10-8 Type 6SR5 40A, 70A ONLY (Blower Cage Louver Installation) Type 6SR5 Air-Cooled Operating Instructions, AK, A5E39390112... -
Page 76: Figure 10-9 Installed Filter
Maintenance 10.7 Remove and Replace Figure 10-9 Installed Filter The photograph above shows a filter as installed on the cabinet enclosure. Type 6SR5 Air-Cooled Operating Instructions, AK, A5E39390112... -
Page 77: Figure 10-10 Screwdriver Insertion Points
Maintenance 10.7 Remove and Replace Figure 10-10 Screwdriver Insertion Points Insert a screwdriver into the slots provided (insertion points) at the top of the filter cover. Take care not to scratch the paint. Type 6SR5 Air-Cooled Operating Instructions, AK, A5E39390112... -
Page 78: Figure 10-11 Filter Cover Removal
Maintenance 10.7 Remove and Replace Figure 10-11 Filter Cover Removal Remove the filter cover by pulling it forward and outward. Type 6SR5 Air-Cooled Operating Instructions, AK, A5E39390112... -
Page 79: Figure 10-12 Filter With Cover Removed
Maintenance 10.7 Remove and Replace Figure 10-12 Filter with Cover Removed The image above shows the filter media that is underneath the cover. Type 6SR5 Air-Cooled Operating Instructions, AK, A5E39390112... -
Page 80: Figure 10-13 Filter Media Removal
Maintenance 10.7 Remove and Replace Figure 10-13 Filter Media Removal To remove the filter media, simply pull it away from the frame. Replacing Filter Media • After replacing the filter media, carefully place and align the filter cover to the filter frame that is attached to the VFD. -
Page 81: Air-To-Air Heat Exchanger Cleaning
Maintenance 10.7 Remove and Replace 10.7.4 Air-to-Air Heat Exchanger Cleaning Air-to-Air Heat Exchanger Cleaning Drives with option code M58 are equipped with air-to-air heat exchangers. They isolate internal air from external air and may be cleaned while installed in the drive. To clean the air-to-air heat exchanger, perform the steps as indicated: 1. -
Page 82: Replacing The Control Fuse (6Sr5 40-260A, 9-Cell)
Maintenance 10.7 Remove and Replace 5. Let the heat exchanger dry. 6. Re-install any guards removed in the process. 10.7.5 Replacing the Control Fuse (6SR5 40-260A, 9-cell) The control fuses are located inside the Blower Control section of the VFD. Refer to Figure "VFD Cabinet (front view)"... -
Page 83: Removing The Power Cell Procedure
Removing the Power Cell Procedure Power Cell Removal CONTACT SIEMENS for PROPER Cell lifter information. • Refer to the "VFD Power Down and Door Access" chapter, section "Unlocking the Doors", prior to removing power cells. Be sure to obey all standard electrical and safety instructions. -
Page 84: Figure 10-15 Fiber Optic To Remove
Maintenance 10.7 Remove and Replace • Remove the fiber optic from the Cell Control Board (CCB) as follows: Figure 10-15 Fiber Optic to Remove Type 6SR5 Air-Cooled Operating Instructions, AK, A5E39390112... -
Page 85: Figure 10-16 Fiber Optic Removed
• Be sure to wear proper Personal Protective Equipment (PPE). • Use the Siemens cell lifter to remove cell from System. • Disconnect all system bus and cables from the front of the cell. This includes T1,T2 L1, L2, and L3 connections. - Page 86 • For 40, 70, 100, and 140 A cells, grab the two handles and pull the cell approximately 1/4 of the way out letting the cell slide on the cell rails as shown in the top figure. Using the Siemens cell lifter, slide the cell completely out of its slot and onto the lifer.
-
Page 87: Replacing The Compact Flash Card
1. Remove the Compact Flash card from the compact flash slot located on the NXGpro Digital Control Rack (DCR). 2. Copy the stored data of the old card to the new original Siemens card. 3. Place the new card into the compact flash slot on the DCR. -
Page 88: Installing Perfect Harmony Power Cells
1. Be sure to use proper PPE. 2. Using the Siemens cell lifter, line up the power cell with its slot. 3. Push the cell into its slot. Do not lift up on the cell, but instead let it slide in on the power cell mounting rails. -
Page 89: Figure 10-18 40 A - 140 A - Proper Alignment Of Power Cell Mounting With Receiving Holes
Maintenance 10.7 Remove and Replace 4. Ensure that the cell chassis mounting edges are sitting inside the edge of the groove rails, and align the cell mounting holes (one on each side), with the corresponding rail receiver holes, as shown in the figures labeled "...proper alignment of power cell mounting with receiving holes". -
Page 90: Figure 10-20 340 - 430 A, 4Q 325 A - Proper Alignment Of Power Cell Mounting With Receiving Holes
Maintenance 10.7 Remove and Replace Figure 10-20 340 - 430 A, 4Q 325 A - proper alignment of power cell mounting with receiving holes Note Properly Remove and Install Power Cells When removing and / or installing power cells, be sure to use the handle as shown as shown in figures "... -
Page 91: Figure 10-21 Fiber Optic Location
Maintenance 10.7 Remove and Replace 5. Reinstall the Fiber Optic. Figure 10-21 Fiber Optic Location Type 6SR5 Air-Cooled Operating Instructions, AK, A5E39390112... -
Page 92: Figure 10-22 Fiber Optic Location
Maintenance 10.7 Remove and Replace Fiber Optic Figure 10-22 Fiber Optic Location Note Refer to the figures entitled Fiber Optic Connector Location. Type 6SR5 Air-Cooled Operating Instructions, AK, A5E39390112... - Page 93 Maintenance 10.7 Remove and Replace 6. Connect the cables to the L1, L2 and L3 input terminals of the power cell by means of bolted connections. 7. Connect the cables to the T1 and T2 output terminals of the power cell by means of bolted connections.
-
Page 94: Figure 10-23 40-140 Fiber Optic And Dc Bus Indicator
Maintenance 10.7 Remove and Replace 8. Optional: When bypass option is applicable, the T1 and T2 output bolted connections are made on the bypass contactor. 9. Torque connections and their respective DC bus voltage indicators as shown below: Figure 10-23 40-140 Fiber Optic and DC Bus Indicator Figure 10-24 Torque Connections for 40 A, 70 A, 100 A, 140 A Power Cells... -
Page 95: Figure 10-25 200 - 260 A, 4Q 120 A-160 A Fiber Optic And Dc Bus Indicator
Maintenance 10.7 Remove and Replace Figure 10-25 200 - 260 A, 4Q 120 A-160 A Fiber Optic and DC Bus Indicator Figure 10-26 Torque Connections for 200-260A, 4Q 120 A-160 A Power Cells Figure 10-27 Torque Connections for 340-430A, 4Q 325 A Power Cells Type 6SR5 Air-Cooled Operating Instructions, AK, A5E39390112... - Page 96 Figure 10-28 Torque Connections for 340-430A 4Q Power Cells WARNING Siemens strongly recommends that only qualified personnel be allowed to perform maintenance and replacements on SINAMICS GH180 Perfect Harmony™ drives. Failure to comply with recommendation: • will invalidate any warranty claims should the drive not perform as designed or parts become damaged •...
-
Page 97: Fuse Location
Maintenance 10.7 Remove and Replace 10.7.10 Fuse Location The secondary fuses are located on the front panel of the power cells as shown in photograph captioned "40 - 260 A, 4Q 120 A - 160 A Location". The location is circled in red. Figure 10-29 Fuse Location (40 - 260 A) The secondary fuses are located on the front panel of the power cells as shown in photograph... -
Page 98: Replacing Cell Input Power Fuses
Note Primary and E-Rated Fuses The core drive does not include primary fuses. When E-rated fuses are required, contact Siemens Engineering. Cell Input Power Fuse Replacement Procedure To replace an open cell input fuse: 1. -
Page 99: Printed Circuit Board Replacement Procedure (Nxgpro Or Nxgpro+)
Maintenance 10.7 Remove and Replace 3. Use an appropriately sized AC voltage detector to ensure that the power is removed. WARNING Electrical Hazard The secondary rating of a SINAMICS GH180 Perfect Harmony™ transformer to the input of the cell power fuse is 750 V or 450 V . - Page 100 4. Prior to servicing any printed circuit board (PCB), ensure proper ESD protection is followed. – All circuit boards shipped by Siemens are done so in an ESD protective bag. They must stay inside this bag during transport and storage. They can only be removed after placing the bag on a dissipative ESD workbench surface.
-
Page 101: Spare Parts
Spare Parts 11.1 Replaceable Spare Parts Customer replaceable spare parts include: • Power Cells • Cell Input Power Fuses • Blower • Blower VFD • DCR Rack (NXGpro or NXGpro+ entire unit) • NXGpro Power Supply • Flash Card • Keypad •... - Page 102 Customer Documentation Package • For spare parts lists, refer to the custom documentation package shipped with the drive or call Siemens technical support (1-800-333-7421). Refer to Appendix of this manual entitled "Service and Support" for contact information. • When calling for spare part information, please have your sales order number and drive part number readily available.
-
Page 103: Disposal And Recycling
Disposal and Recycling 12.1 Disposing of Device Components Before dismantling the drive, ensure that it is de-energized. Refer to the chapter "VFD Power Down and Door Access" prior to disposing of and recycling the components as listed in the following paragraph. When disposed of properly, none of the material in the following list pose any threat to the environment. - Page 104 Disposal and Recycling 12.1 Disposing of Device Components Type 6SR5 Air-Cooled Operating Instructions, AK, A5E39390112...
-
Page 105: Service And Support
Siemens accepts no liability for any damage that occurs because these instructions have not been observed, e.g. if an untrained person carries out a repair or replaces components. - Page 106 Service and Support A.1 Field Service Operation Type 6SR5 Air-Cooled Operating Instructions, AK, A5E39390112...
-
Page 107: Technical Data
Technical Data Storage, Transport and Operation Ambient Conditions Table B-1 General Ambient Conditions Storage Transport Operating CLIMATIC AMBIENT CONDITIONS Ambient temperature +5 °C to +40 °C –25 °C to +60 °C +5 °C to +40 °C in accordance with IEC 60721 3-2, Class 2K2 Relative air humidity <... - Page 108 Technical Data B.1 Storage, Transport and Operation Ambient Conditions Storage Transport Operating Biological ambient condi‐ tions in accordance with in accordance with in accordance with in accordance with class IEC 60721-3-1 IEC 60721-3-2 IEC 60721-3-3 Mechanical active substan‐ 1S1 in acc. with IEC 2S1 in acc.
-
Page 109: Power Cell Specifications Table
Technical Data B.2 Power Cell Specifications Table Power Cell Specifications Table Table B-2 Power Cell Power Cell Specifications Size Output Nameplate 40 A 70 A 100 A 140 A 200 A 260 A 340 A 430 A Current Weight 30 lbs 35 lbs 45 lbs 50 lbs... -
Page 110: 9-Cell System Specifications
Technical Data B.3 9-Cell System Specifications 9-Cell System Specifications Table B-4 9-Cell System Parameters Cells in Drive Output Voltage Hp Range Power Cell Types (without Redundancy) Available L-L (with O-M) (Continuous Current Rating) 4000 V (4160 V) 150-6500 2Q 40A, 70A, 100A, 140A, 200A, 260A, 340A, 430A, 550A, 600A, 780A, 4Q 120A, 160A, 325A... - Page 111 Ventilated, forced air-cooled with integrated fans 1. 780A Power Cells do not have 110% overload capability 2. For high speed projects (>167 Hz), consult Siemens 3. Consult factory for availability of auxiliary voltages other than shown 4. Input Transformer Winding Conductor Material (CU or AL) Note The general ambient conditions shown in Table B-1 are applicable to spare parts.
-
Page 112: 12-Cell System Specifications
Ventilated, forced air-cooled with integrated fans 1. 780A Power Cells do not have 110% overload capability 2. For high speed projects (>167 Hz), consult Siemens 3. Consult factory for availability of auxiliary voltages other than shown 4. Input Transformer Winding Conductor Material (CU or AL) -
Page 113: 15-Cell System Specifications
Ventilated, forced air-cooled with integrated fans 1. 780A Power Cells do not have 110% overload capability 2. For high speed projects (>167 Hz), consult Siemens 3. Consult factory for availability of auxiliary voltages other than shown 4. Input Transformer Winding Conductor Material (CU or AL) -
Page 114: 18-Cell System Specifications
Ventilated, forced air-cooled with integrated fans 1. 780A Power Cells do not have 110% overload capability 2. For high speed projects (>167 Hz), consult Siemens 3. Consult factory for availability of auxiliary voltages other than shown 4. Input Transformer Winding Conductor Material (CU or AL) -
Page 115: 24-Cell System Specifications
Ventilated, forced air-cooled with integrated fans 1. 780A Power Cells do not have 110% overload capability 2. For high speed projects (>167 Hz), consult Siemens 3. Consult factory for availability of auxiliary voltages other than shown 4. Input Transformer Winding Conductor Material (CU or AL) -
Page 116: Synchronous Transfer
They are sized, based upon the continuous current rating of the power cells and maximum voltage available of the drive. Please consult Siemens Engineering for the Synchronous Transfer sizing, electrical and mechanical interfacing to the VFD. -
Page 117: Output Filter
The filter components are sized based upon the continuous current rating of the power cells and maximum voltage available (without over-modulation) of the drive Please consult Siemens Engineering for the VFD output filter sizing, electrical and mechanical interfacing details to the VFD. -
Page 118: Drive Input Energization
– Two (2) within any five minute period – Maximum eight (8) per 24 hour period 2. After commissioning is complete the average number of SINAMICS Perfect Harmony transformer medium voltage energizations Siemens recommends limiting medium voltage energizations to one (1) per day. Note If excessive repeated energizations are witnessed at site or are present in the event log please highlight this in your field service report and let your local office know as soon as possible. -
Page 119: Quality
Quality CE Marking and Directives The CE marking identifies products that are in compliance with the appropriate EU directives. The CE marking is not a seal of quality. It was created to guarantee end users safe products in the free flow of goods within the European Economic Community (EEC) and the European Community (EC). -
Page 120: Ce Marking
Quality C.2 CE Marking CE Marking Applying the CE marking confers the presumption of conformity to the EU directive(s). The CE marking is required for all products which fall in the scope of a European Directive (which foresees the CE marking for those products) which are placed on the market in the European Economic Area. -
Page 121: Ce Marking On Power Drive Systems (Pds)
Siemens LD's responsibility. Siemens Industry, Inc. I DT LD SINAMICS Perfect Harmony™ GH180 designs always include the Basic Drive Module (BDM) that includes a SINAMICS Perfect Harmony™ transformer, converter/ inverter (power cell) section, and control section. -
Page 122: Emc Factory Certificate
Quality C.4 EMC Factory Certificate EMC Factory Certificate An installation in accordance with EU Directive 2014/30/EU (EMV guideline) can only be evaluated at the final installation location. The provided factory certificate declares compliance to IEC 61800-3 for the SINAMICS Perfect Harmony GH180. -
Page 123: List Of Symbols And Abbreviations
List of symbols and abbreviations Symbols and Abbreviations This appendix contains a list of symbols and abbreviations commonly used throughout this manual group. Table D-1 Commonly Used Abbreviations Abbreviation Meaning • Boolean AND function Addition or Boolean OR function ∑ Summation µ... - Page 124 List of symbols and abbreviations D.1 Symbols and Abbreviations Abbreviation Meaning Decibel Direct Current Digital Control Rack Distributed Control System decel Deceleration deg, ° Degrees Division Demand Error Extra Low Voltage Electromagnetic Compatibility Electromotive Force Electromagnetic Interference Encoder Power Supply Electrostatic Discharge Electrical Submersible Pump ESTOP, e-stop...
- Page 125 List of symbols and abbreviations D.1 Symbols and Abbreviations Abbreviation Meaning Input Protection 1,000 (e.g., Kohm) KiloHertz Kilo Volts One Thousand Volt Amps Kilowatt Inductor Local Area Network Pounds (weight) Liquid Crystal Display Load Light-emitting Diode Latch Fault Relay LOTO Lock-Out-Tag-Out Limit Loss Of Signal...
- Page 126 List of symbols and abbreviations D.1 Symbols and Abbreviations Abbreviation Meaning Printed Circuit Board Proportional Integral Derivative Programmable Logic Controller Phase Locked Loop Potentiometer Peak-to-peak Parts per Million Pulses per Revolution Power Quality Meter ProToPS Process Tolerant Protection Strategy PSDBP Power Spectral Density Break Point Pounds Per Square Inch PSIG...
- Page 127 List of symbols and abbreviations D.1 Symbols and Abbreviations Abbreviation Meaning TCP/IP Transmission Control Protocol/Internet Protocol Total Harmonic Distortion Thermal Overload Test Point trq, τ Torque Transmit (RS232 Communications) Uninterruptable Power Supply Voltage, Volts Volt-Amperes Volts AC Variable Volts DC Velocity (speed) Variable Frequency Drive V/Hz...
- Page 128 List of symbols and abbreviations D.1 Symbols and Abbreviations Type 6SR5 Air-Cooled Operating Instructions, AK, A5E39390112...
-
Page 129: Glossary
Glossary AND is a logical Boolean function whose output is true if all of the inputs are true in SOP notation, AND is represented as "∗" (e.g., C=A∗B), although sometimes it may be omitted between operands with the AND operation being implied (e.g., C=AB). ASCII ASCII is an acronym for American Standard Code for Information Interchange, a set of 8-bit computer codes used for the representation of text. - Page 130 Glossary Refer to the glossary term SOP. Comparator A comparator is a device that compares 2 quantities and determines their equality. The comparator submenus allow the programmer to specify two variables to be compared. The results of the custom comparison operations can be used in the system program. Configuration Update see Tool Suite definition.
- Page 131 Glossary devices. The use of a PC for downloading requires special serial communications software to be available on the PC, which may link to the drive via RS232 or through the Host Simulator via an ethernet connection. DRCTRY Directory file for system tokens and flags used in the compilation of system programs. It provides a direct lookup table of ASCII names to internal ID numbers.
- Page 132 Glossary Flash Card Non-volatile memory storage device for the control. It stores the drive program, system program, logs, parameters, and other related drive files. FPGA Field Programmable Gate Array. An FPGA is an integrated circuit that contains thousands of logic gates.
- Page 133 Glossary I/O is an acronym for input/output. I/O refers to any and all inputs and outputs connected to a computer system. Both inputs and outputs can be classified as analog (e.g., input power, drive output, meter outputs, etc.) or digital (e.g., contact closures or switch inputs, relay outputs, etc.).
- Page 134 Glossary Loss of signal feature The loss of signal feature is a control scheme that gives the operator the ability to select one of three possible actions in the event that the signal from an external sensor, configured to specify the speed demand, is lost.
- Page 135 Glossary OLTM An acronym for Open Loop Test Mode, one of the control modes of the drive. OLVC An acronym for Open Loop Vector Control, also known as Encoderless Vector Control. OLVC is a flux vector control that is one of the control modes of the drive. The drive computes the rotational speed of the rotor and uses it for speed feedback.
- Page 136 Glossary Qualified user A qualified user is a properly trained individual who is familiar with the construction and operation of the equipment and the hazards involved. RAM is an acronym for Random Access Memory, a temporary storage area for drive information. The information in RAM is lost when power is no longer supplied to it.
- Page 137 (2) SOP, when used as a filename extension, refers to System Operating Program. SOP Utilities The program within the Siemens Tool suite used for converting between text and machine loadable code. It can also be used for uploading and downloading files over the RS232 connection.
- Page 138 Siemens ToolSuite. Tool Suite Is the suite of programs developed by Siemens that allows easier access to the drive for programming and monitoring. It is comprised of the following components: • Tool Suite Launcher - also referred to as Tool Suite; used for coordinating other tools.
- Page 139 Glossary Is an acronym for Volts per Hertz control, one of the control modes in the drive. This mode is intended for multiple motors connected in parallel. Therefore, it disables spinning load and fast bypass. This is essentially open-loop vector control with de-tuned (smaller bandwidth obtained by reducing the gain) current regulators.
- Page 140 Glossary Type 6SR5 Air-Cooled Operating Instructions, AK, A5E39390112...
-
Page 141: Index
Index abbreviations, 121 electromagnetic compatibility, 42 Access plates, 38 earthing, 42 Anchoring Cabinets, 34 filtering, 44 Arcing, 16 guideline, 45 Asynchronous motors, 13 shielding, 43 Auxiliary power supply, 13 wiring, 44 Electrostatic discharge, 17 Electrostatic Protective Measures, 18 EMC-compliant installation, 13 EU directives, 117, 118 basic drive module, 119 Five safety rules, 14... - Page 142 Index Low Voltage Directive, 117 Variable-Speed Drives, 13 Main entry, 119 medium input voltage circuit breaker Coordinated Input Protection Scheme, 21 medium voltage, 27 Power Cell Specifications, 107 Replacement of parts Compact Flash card, 85 Replacement of Parts, 72 residual current device, 51 Secondary Circuit Fault Coordinated Input Protection Scheme, 21 Selector Switch...