Table of Contents
Advertisement
Quick Links
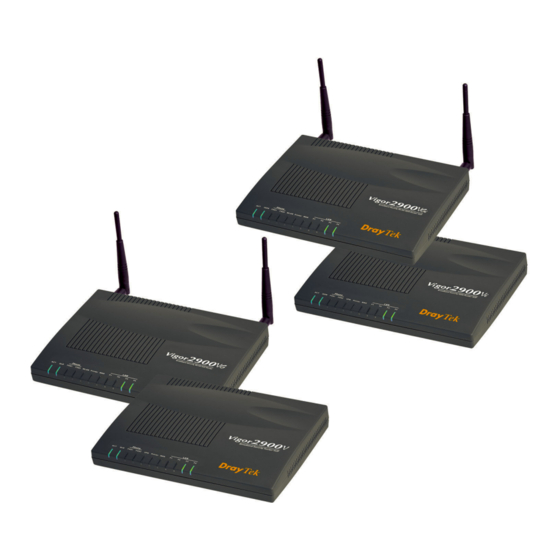
Vigor2900V series Quick Installation Guide
Copyright Information
Copyright
Declarations
Trademarks
Safety Instructions and Approval
S a f e t y
Instructions
Warranty
Copyright 2004 All rights reserved. This publication contains information that
is protected by copyright. No part may be reproduced, transmitted, transcribed,
stored in a retrieval system, or translated into any language without written
permission from the copyright holders.
The following trademarks are used in this document:
Microsoft is a registered trademark of Microsoft Corp.
l
Windows, Windows 95, 98, Me, NT, 2000, XP and Explorer are trademarks of
l
Microsoft Corp.
Apple and Mac OS are registered trademarks of Apple Computer Inc.
l
Other products may be trademarks or registered trademarks of their respective
manufacturers.
Read the installation guide thoroughly before you set up the router.
l
The router is a complicated electronic unit that may be repaired only be
l
authorized and qualified personnel. Do not try to open or repair the router
yourself.
Do not place the router in a damp or humid place, e.g. a bathroom.
l
The router should be used in a sheltered area, within a temperature range of +5
l
to +40 Celsius.
Do not expose the router to direct sunlight or other heat sources. The housing
l
and electronic components may be damaged by direct sunlight or heat sources.
Keep the package out of reach of children.
l
When you want to dispose of the router, please follow local regulations on
l
conservation of the environment.
We warrant to the original end user (purchaser) that the router will be free from
any defects in workmanship or materials for a period of three (3) years from the
date of purchase from the dealer. Please keep your purchase receipt in a safe
place as it serves as proof of date of purchase. During the warranty period, and
upon proof of purchase, should the product have indications of failure due to
faulty workmanship and/or materials, we will, at our discretion, repair or replace
the defective products or components, without charge for either parts or labor, to
whatever extent we deem necessary tore-store the product to proper operating
condition. Any replacement will consist of a new or re-manufactured
functionally equivalent product of equal value, and will be offered solely at our
discretion. This warranty will not apply if the product is modified, misused,
tampered with, damaged by an act of God, or subjected to abnormal working
conditions. The warranty does not cover the bundled or licensed software of
other vendors. Defects which do not significantly affect the usability of the
product will not be covered by the warranty. We reserve the right to revise the
manual and online documentation and to make changes from time to time in the
contents hereof without obligation to notify any person of such revision or
changes.
Advertisement
Table of Contents

Related Manuals for Draytek Vigor2900V Series


Summary of Contents for Draytek Vigor2900V Series
- Page 1 Vigor2900V series Quick Installation Guide Copyright Information Copyright Copyright 2004 All rights reserved. This publication contains information that is protected by copyright. No part may be reproduced, transmitted, transcribed, Declarations stored in a retrieval system, or translated into any language without written permission from the copyright holders.
- Page 2 Web registration is preferred. You can register your Vigor router via http:// O w n e r www.draytek.com/. Alternatively, fill in the registration card and mail it to the address found on the reverse side of the card. Firmware & Tools Due to the continuous evolution of DrayTek ADSL &...
-
Page 3: Table Of Contents
1.2 Highlights ..................1.3 Front Panel LEDs and Rear Panel Interfaces ........1.4 Package Contains ................2. Quick Install Your Vigor2900V series Router ....... 2.1 Hardware Installation ................ 2.2 Configure Your Router via Quick Start Wizard ........3. Wireless LAN Settings ................ -
Page 4: Introduction
Wireless AP ISDN Backup The Vigor2900V series router, an Internet access solution for your LAN, which provides you the shared web surfing and countless value-added features, such as Firewall / Security, VPN, VoIP, USB interface printer server support, and 802.11g Wireless LAN(up to... -
Page 5: Highlights
1.2 Highlights VoIP Virtual Private Network (VPN) G.168 Line Echo-cancellation Up to 32 simultaneous VPN tunnels Dial-in or dial-out, LAN-to-LAN or Teleworker-to- Gain Control Jitter Buffer (125ms) Voice Codec: G.711 A/u law, G.726, G.723.1, Protocol support for PPTP, IPSec, L2TP, L2TP over IPSec G.729 A/B, VAD/CNG Tone Generation and Detection: DTMF, Dial,... -
Page 6: Front Panel Leds And Rear Panel Interfaces
1.3 Front Panel LEDs and Rear Panel Interfaces 1.3.1 Vigor2900V LED Indicators Status Descriptions blinking The router is powered on and running properly. ACT (Activity) The QoS function is active. The phone is off hook (the handset of phone is picked up). Phone (FXS1,FXS2) blinking... - Page 7 1.3.2 Vigor2900VG LED Indicators Status Descriptions ACT (Activity) blinking The router is powered on and running properly. The QoS function is active. The phone is off hook (the handset of phone is picked up). Phone (FXS1,FXS2) blinking A phone call is incoming The Wireless LAN function is enabled.
- Page 8 1.3.3 Vigor2900VGi LED Indicators Status Descriptions ACT (Activity) blinking The router is powered on and running properly. The ISDN network is correctly setup. ISDN A successful remote connection on the ISDN BRI B1/B2 channel. blinking The phone is off hook (the handset of phone is picked up). Phone (FXS1,FXS2) A phone call is incoming.
- Page 9 1.3.4 Vigor2900Vi Status Descriptions LED Indicators ACT (Activity) blinking The router is powered on and running properly. The ISDN network is correctly setup. ISDN A successful remote connection on the ISDN BRI B1/B2 channel. blinking The phone is off hook (the handset of phone is picked up). Phone (FXS1,FXS2) A phone call is incoming.
-
Page 11: Quick Install Your Vigor2900V Series Router
2. Quick Install Your Vigor2900V series Router 2.1 Hardware Installation Before starting to configure the router, you have to connect your devices correctly. 1. Connect the WAN interface to the external ADSL/Cable modem with a RJ-45 cable. 2. Connect one port of 4-port switch to your computer with a RJ-45 cable. -
Page 12: Configure Your Router Via Quick Start Wizard
2.2 Configure Your Router via Quick Start Wizard Step1 Open the web browser on a PC which is connected to the router and then link to the gateway IP address of the router (the default setting is 192.168.1.1). Once your Connection (http://192.168.1.1) is successful, a pop-up window will open to ask for username and password. - Page 13 Step3 Now Quick Start Wizard is launched on. Enter login password. Then click Next to continue. Step4 Select the appropriate time zone for your location. Then click Next to continue. Step5 Select the appropriate connection type to connect to your ISP. Then click Next to continue.
- Page 14 a. PPPoE Enter the username and password provided by your ISP. Then click Next to go to Setp6. b. PPTP Fill out all the information originally provided by your ISP. Then click Next to go to Setp6. c. Static IP Enter the IP address information originally provided by your ISP.
- Page 15 d. DHCP If your ISP requires you to enter a specific host name or specific MAC address, please enter it in. Then click Next to go to Setp6. Step6 This screen appears to indicate that your setup is complete. Click Finish and then restart the router.
-
Page 16: Wireless Lan Settings
3. Wireless LAN settings This section will guide you how to operate the capabilities of Wireless LAN on the router. Use the following setup links on the configuration Main Menu to setup Wireless LAN functions. Basic Setup > Wireless LAN Setup The Frequency Domain is set as Europe and the MAC address is shown as above. - Page 17 4. SSID and Channel: The default SSID is “default”. We suggest you change it to a particular name. In this case, SSID was changed to “DrayTek”. - SSID (Service Set Identifier): It is used to name the wireless LAN, and must be the same content in client PC/notebook wireless card(s).
-
Page 18: Security Settings
3.2 Security Settings Click Security Settings to configure the security options. 1. Mode: Select an appropriate encryption to improve the security and privacy of your wireless data packets. - Disable: Turn off the encryption mechanism. - WEP Only: Accepts only WEP clients and the encryption key should be entered in WEP Key. - Page 19 NOTE: You should also set RADIUS Server simultaneously if WEP/802.1x or WPA/802.1x , WEP/802.1x Only or WPA/802.1x Only mode is selected. 2. WPA Encryption: -The WPA encrypts each frame transmitted from the radio using the pre- shared key (PSK) which entered from this panel or a key got dynamically through 802.1x.
-
Page 20: Access Control
3.3 Access Control For additional security, Access Control allows restricting the network access to a list of pre-determined network clients. 1. Enable Access Control: Check the box to turn the function on. 2. MAC Address: Specify MAC Address which could be added on, removed from or edited from the access list above. -
Page 21: Voip Settings
4. VoIP Settings Caution Each of the FXS ports can be connected to an analog phone only. Do not connect the FXS ports to the telephone wall jack. This connection might damage your router. This section explains the capabilities of VoIP on the router. Use the following setup links on the configuration Main Menu to setup VoIP functions. -
Page 22: Sip Related Function Setup
Example 1: If Tom gives you a SIP URL as sip:63065@fwd.pulver.com then you can input the number just as the previous figure, except you can change any number in the Phone Number field. Example 2: If Aaron gives you a sip url as sip:aaron@203.69.175.19 then you can enter the DialPlan as: Phone Number: 1234 (any number you like) -
Page 23: Calling Scenario
4.3 Calling Scenario 4.3.1 Peer-to-peer calling There are two people, say Kevin and Aaron. They both have Vigor2900V series router in hand, so here’s their settings in order to call each other. Kevin’s IP address is: 214.61.172.53 Aaron’s IP address is: 203.69.175.19 A. - Page 24 4.3.2 Calling via SIP proxy Here’s the scenario that two people call each other via sip proxy; this is a good way to calling when they use dynamic public IP addresses. Again, here’s the setting for each other: Kevin’s sip url is: sip:kevinyu@iptel.org Irene’s sip url is: sip:irene@iptel.org A.
-
Page 25: Trouble Shooting
5.Trouble Shooting This section will guide you how to shoot troubles on abnormal situations. Please follow the order of subsections as below to check your installation. 5.1 Is the Hardware Status OK? 1. Check that if the power line and WAN/LAN cable are connected correctly. 2. -
Page 26: Are The Network Connection Settings On Your Pc Ok
5.2 Are the Network Connection Settings on Your PC OK? The following example is based on Windows XP case, regarding the other OS examples, please refer to the similar steps or support notes in www.draytek.com. 1. Go to Control Panel and then double 2. -
Page 27: Can You Ping The Router From Pc
5.3 Can You Ping the Router from PC? The default gateway IP of the router is 192.168.1.1. Please check that if you can ping the router correctly. A. For Windows 1. Open the Command Prompt window (from start menu> Run ) 2. -
Page 28: Are The Isp Settings Ok
5.4 Are the ISP Settings OK 1. Enter the web configuration UI to check your ISP settings (please refer to section2.2 setp1). 2. Click Internet Access Setup item in the “Quick Setup” group and then the UI will switch to the following window. A. - Page 29 B. For Static or Dynamic Users 1. Check that if the Enable option is selected. 2. Check that if WAN IP Network Settings is set appropriately. If you select “Specify an IP address”, IP Address, Subnet Mask, and Gateway IP Address have to be entered the correct value.
-
Page 30: Report To Isp And Dealer For Further Technical Support
1. If the router settings are correct at all, and the router still does not connect, please contact your ISP technical support representative to help you for configuration. 2. If the router does not work correctly, please contact your dealer for help. For anyfurther questions, please send e-mail to support@draytek.com www.draytek.com Tel: 886-3-5972727 Fax: 886-3-5972121 Email: support@draytek.com...