
Related Manuals for Canon MD120


Summary of Contents for Canon MD120
-
Page 1: Instruction Manual
Mini Digital Video Cassette Digital Video Camcorder Instruction Manual PUB.DIE-274 English Introduction Prerparations Basic Functions Advanced Functions External Connections Additional Information... -
Page 2: Cleaning The Video Heads
Cleaning the Video Heads Introduction Digital video camcorders record video signals on the tape in very thin lines (as thin as 1/8 of the width of a hair). The following symptoms may appear if the video heads become dirty even a little. -
Page 3: Important Usage Instructions
For more information about where you can drop off your waste equipment for recycling, please contact your local city office, waste authority, approved WEEE scheme or your household waste disposal service. For more information regarding return and recycling of WEEE products, please visit www.canon-europe.com/environment. (EEA: Norway, Iceland and Liechtenstein) -
Page 4: Table Of Contents
Table of contents Introduction About this Manual ... 6 Getting to Know the Camcorder Supplied Accessories... 8 Components Guide ... 9 Screen Displays ... 11 Preparations Getting Started Charging the Battery Pack ... 13 Installing the Backup Battery ... 14 Inserting and Removing a Tape ... - Page 5 Image Effects...35 Audio Recording and Playback Audio Recording Mode ...35 Audio Playback Modes ...36 Other Functions Data Code ...37 Self Timer ...37 Digital Effects...38 External Connections Connecting to a TV or VCR Connection Diagrams ...40 Playback on a TV Screen ...42 Recording to a VCR or Digital Video Recorder ...42 Digital Video Dubbing...43 Connecting to a Computer...
-
Page 6: About This Manual
About this Manual Thank you for purchasing the Canon MD120/MD111/MD110/MD101. Please read this manual carefully before you use the camcorder and retain it for future reference. Should your camcorder fail to operate correctly, refer to the Troubleshooting table 47). Conventions Used in the Manual IMPORTANT: Precautions related to the camcorder’s operation. - Page 7 The functions assigned to the joystick change according to the operation mode. You can display the joystick guide to remind you of the joystick’s functions in each operating mode. Recording: Playback: FOCUS About the Operating Modes The camcorder’s operating mode is determined by the position of the manual, indicates that a function is available in the operating mode shown and indicates that the function is not available.
-
Page 8: Getting To Know The Camcorder
Getting to Know the Camcorder Supplied Accessories Getting to Know the Camcorder CA-590E Compact BP-2L5 Battery Pack Power Adapter (incl. power cord) Lithium Button Battery STV-250N Stereo Video CR1616 Cable... -
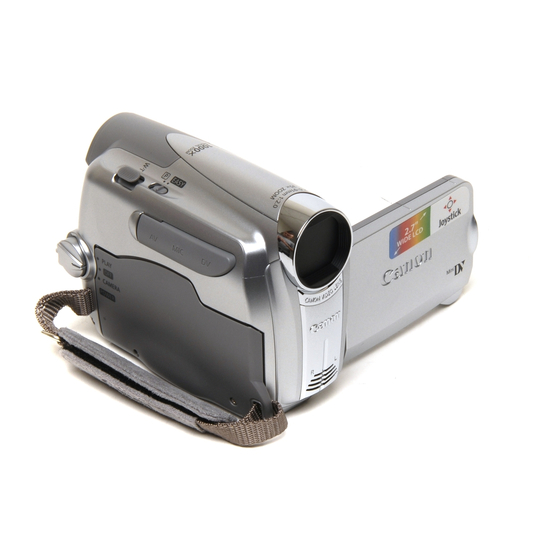
Page 9: Components Guide
Components Guide Left side view Right Side View Front view Getting to Know the Camcorder Lens cover switch ( open, closed) CHARGE indicator ( Speaker AV terminal ( MIC (microphone) terminal ( DV terminal ( 40, 45) Terminal cover Grip belt ( Strap mount ( Lock button switch (... - Page 10 Getting to Know the Camcorder Back view Top view Bottom view Viewfinder ( Dioptric adjustment lever ( BATT. (battery release) switch ( LCD screen ( Backup battery compartment ( Start/stop button ( Serial number, Battery attachment unit DC IN terminal ( D.EFFECTS button ( FUNC.
-
Page 11: Screen Displays
Screen Displays Recording Playback Getting to Know the Camcorder Zoom ( 22), Exposure Recording program ( White balance ( Image effect ( Digital effects ( Condensation warning ( Shutter speed ( Self timer ( Exposure adjustment ( Manual focus ( Image stabilizer ( Recording mode ( Tape operation... - Page 12 Getting to Know the Camcorder Tape operation Record, Record pause, Stop, Eject, Fast forward, Rewind, Playback, Playback pause, Fast forward playback, Rewind playback Remaining tape Indicates the remaining time of the tape in minutes. “ ” moves during recording. When the tape reaches its end, the display changes to “...
-
Page 13: Getting Started
Preparations Getting Started Getting Started Charging the Battery Pack The camcorder can be powered with a battery pack or directly using the compact power adapter. Charge the battery pack before use. Remove the battery terminal cover before attaching the battery BATT. -
Page 14: Installing The Backup Battery
Getting Started Connect the compact power adapter to the camcorder’s DC IN terminal. • The CHARGE indicator starts flashing. The indicator will stay on when the charging is completed. • You can also use the compact power adapter without attaching a battery pack. -
Page 15: Inserting And Removing A Tape
If a battery pack is attached, remove it first. Open the backup battery cover. Insert the backup battery with the + side facing out. Close the cover. NOTES The backup battery has a life span of about a year. flashes in red to inform you that it needs to be replaced. -
Page 16: Preparing The Camcorder
Getting Started Preparing the Camcorder Turn on the camcorder. Move the lens cover switch down to to open the lens cover. Adjust the viewfinder. Keep the LCD panel closed to use the viewfinder and adjust the dioptric adjustment lever as necessary. Fasten the grip belt. -
Page 17: Using The Menus
LCD Backlight You can set the brightness of the LCD screen at normal or bright. FUNC. FUNC. Press Select ( ) the icon and press ) to open the setup menus. Select ( DISPLAY SETUP/ ] and press ( Select ( ) [BACKLIGHT] and press ( Select (... -
Page 18: Selecting An Option From The Setup Menus
Using the Menus FUNC. Press to save the settings and close the menu. FUNC. • You can press to close the menu at any time. • With some settings you will need to press ) and make further selections. Follow the additional operation guides that will appear on the screen (such as the joystick icon... -
Page 19: First Time Settings
First Time Settings First Time Settings Changing the Language The language for on-screen and menu displays can be changed. The list of available languages depends on the region where you purchased the camcorder. Language Set A English, German, Spanish, French, Italian, Polish, Romanian, Turkish, Russian, Ukrainian, Arabic and Persian. -
Page 20: Setting The Date And Time
First Time Settings Setting the Date and Time DATE/TIME SETUP DATE/TIME 1.JAN.2007 12:00 AM FUNC. FUNC. Press Select ( ) the icon and press ) to open the setup menus. Select ( ) [DATE/TIME SETUP] and press ( Select ( ) [DATE/TIME] and press Blinking arrows will be displayed around the first field of the date. -
Page 21: Recording
Basic Functions Recording Recording Recording Movies Before You Begin Recording Make a test recording first to check if the camcorder operates correctly. If necessary, clean the video heads ( Move the lens cover switch down to to open the lens cover. Holding the lock button pressed down, set the switch to... -
Page 22: Zooming
Recording quality and as a result, also the available recording time ( 27). Previous recordings overwritten by a new recording cannot be recovered. Before you start recording, search for the end of the last recording ( 24). To protect the tape and video heads, the camcorder will enter the stop mode ( record pause ( ) mode for 4 minutes 30... -
Page 23: Playback
Playback Playback Playing Back Movies Play back the tape on the LCD display or close the LCD panel to use the viewfinder. You can also turn the LCD panel and close it with the screen facing out. Holding the lock button pressed down, set the switch to PLAY. -
Page 24: Locating The End Of The Last Scene
Playback Locating the End of the Last Scene After playing back a tape, use this function to locate the end of the last scene recorded in order to continue recording from that point. POINTS TO CHECK Stop the playback before using this function. -
Page 25: Menu Options Lists
Advanced Functions Menu Options Lists Menu Options Lists Menu items not available appear grayed out. For details about how to select an item, refer to Using the Menus ( FUNC. Menu Recording programs Mode switch: [ PROGRAM AE],[ PORTRAIT], SPORTS], [ NIGHT], [ BEACH], [ SUNSET],... - Page 26 Menu Options Lists If a trailing afterimage appears, set the slow shutter to [ OFF]. D.ZOOM OFF], [ 105X], [ OFF], [ 90X], [ Determines the operation of the digital zoom. When activated, the camcorder will switch automatically to the digital zoom when you zoom in beyond the optical zoom range.
-
Page 27: Vcr Setup (Recording Mode, Tv Type, Etc.)
VCR Setup (Recording Mode, TV Type, etc.) VCR SETUP REC MODE STD PLAY], [ LONG PLAY] Recording in LP mode extends the available recording time on the tape 1.5 times. Depending on the condition of the tape (long usage, imperfections, etc.) you may notice some video problems (blocky video artifacts, banding, etc.) in the playback picture when playing back recordings... -
Page 28: Display Setup (Lcd Brightness, Language, Etc.)
Menu Options Lists Display Setup (LCD Brightness, Language, etc.) DISPLAY SETUP BRIGHTNESS Adjust ( ) the brightness of the LCD display with the joystick. Changing the brightness of the LCD display does not affect that of the viewfinder or the recordings. BACKLIGHT NORMAL]*, [ BRIGHT]... -
Page 29: System Setup (Beep, Etc.)
DATA CODE OFF], [ DATE], [ TIME], DATE & TIME] LANGUAGE The list of available languages depends on the region where you purchased the camcorder. Language Set A: [DEUTSCH], [ENGLISH], [ESPAÑOL], [FRANÇAIS], [ITALIANO], [POLSKI], ], [TÜRKÇE], [ ], [ ], [ Language Set B: [ENGLISH], [ ], [... -
Page 30: Recording Programs
Recording Programs Using the Recording Programs Recording Programs The camcorder adjusts the focus, exposure and other settings automatically, allowing you to just point and shoot. : Recording Programs ( PROGRAM AE] The camcorder sets the aperture and shutter speed. PORTRAIT] The camcorder uses a large aperture, achieving a focus on the subject while... -
Page 31: Changing The Shutter Speed And Special Scene Programs
: Changing the Shutter Speed and Special Scene Programs Use the automatic exposure (AE) program to set the shutter speed or select one of the special scene recording programs. POINTS TO CHECK Mode switch: FUNC. Icon of the currently selected FUNC. -
Page 32: Adjusting The Picture: Exposure, Focus And Color
Adjusting the Picture: Exposure, Focus and Color NIGHT] - Moving subjects may leave a trailing afterimage. - Picture quality may not be as good as in other modes. - White points may appear on the screen. - Autofocus may not work as well as in other modes. -
Page 33: Manual Focus Adjustment
Manual Focus Adjustment Autofocus may not work well on the following subjects. In such case, focus manually. Reflective surfaces Subjects with low contrast or without vertical lines Fast moving subjects Through wet windows Night scenes POINTS TO CHECK Mode switch: BACK FOCUS Adjust the zoom. -
Page 34: White Balance
Adjusting the Picture: Exposure, Focus and Color White Balance The white balance function helps you accurately reproduce colors under different lighting conditions so that white objects will always look truly white in your recordings. POINTS TO CHECK Mode switch: Options AUTO] Settings are automatically set by the camcorder. -
Page 35: Image Effects
Image Effects You can use the image effects to change the color saturation and contrast to obtain different results. POINTS TO CHECK Mode switch: Options IMAGE EFFECT OFF] Records with no image enhancing effects. VIVID] Emphasizes the contrast and color saturation. -
Page 36: Audio Playback Modes
Audio Recording and Playback O USE AN EXTERNAL MICROPHONE Connect the external microphone to the MIC terminal. Use commercially available condenser microphones with their own power supply and a cable no longer than 3 m. You can connect almost any stereo microphone with a ∅... -
Page 37: Other Functions
FUNC. FUNC. MENU AUDIO SETUP 12bit AUDIO FUNC. Desired option* * When you select [ MIX/VAR.], adjust the mix balance with the [MIX BALANCE] setting 27). Other Functions Other Functions Other Functions Data Code The camcorder keeps a data code containing the date and time of recording. -
Page 38: Digital Effects
Other Functions FUNC. FUNC. MENU CAMERA SETUP SELF TIMER FUNC. • appears. • Set [SELF TIMER] to [ cancel the self timer. Start/Stop Press The camcorder starts recording after a 10-second countdown. The countdown appears on the screen. NOTES Once the countdown has begun, you can also Start/Stop press to cancel the self timer. - Page 39 Applying D.EFFECTS Press to activate the fader/effect. • The icon of the selected effect turns green. • Press D.EFFECTS again to deactivate the fader/effect. D.EFFECTS Press : ...in record pause mode, then press Start/Stop to start recording with a fade in. : ...in playback pause mode, then push the joystick ( ) towards...
-
Page 40: Connecting To A Tv Or Vcr
Connecting to a TV or VCR Connecting to a TV or VCR External Connections Connection Diagrams Turn off all the devices when making the connections and refer also to the instruction manual of the connected device. Open the terminal cover to access. Terminal on the Camcorder Output connection (Signal Flow STV-250N Stereo Video Cable... - Page 41 Terminal on the Camcorder Output connection (Signal Flow Input connection (Signal Flow a DV (IEEE1394) output. * Be careful to correctly insert the 6-pin plug into the DV terminal. Inserting it in the wrong direction can result in damage to the camcorder. Output connection (Signal Flow You will need to connect beforehand a commercially available SCART adapter to the SCART terminal on the TV or VCR and then connect the STV-250N Stereo Video...
-
Page 42: Playback On A Tv Screen
Connecting to a TV or VCR Playback on a TV Screen The quality of the playback picture will vary depending on the connected TV and the type of connection used. Before making the connections, select the [TV TYPE] setting according to the TV set to which you will connect the camcorder 27). -
Page 43: Digital Video Dubbing
When recording to a digital video recorder using the DV terminal –connection type 40)–: - If the picture does not appear, disconnect the DV cable and restore the connection after a short while or turn the camcorder off and then on again. - Page 44 Connecting to a TV or VCR recording of these materials may violate copyright protection laws. Copyright Signals During playback: If you try to play back a tape that contains copyright control signals for protection of software, “COPYRIGHT PROTECTED PLAYBACK IS RESTRICTED”...
-
Page 45: Connecting To A Computer
Connecting to a Computer Connecting to a Computer PC Connection Diagrams Terminal on the Camcorder Output connection (Signal Flow DV capture board. * Be careful to correctly insert the 6-pin plug into the DV terminal. Inserting it in the wrong direction can result in damage to the camcorder. -
Page 46: Transferring Video Recordings
Connecting to a Computer Transferring Video Recordings You can transfer recordings to a computer using the DV terminal. Equipment and System Requirements A computer equipped with an IEEE1394 (DV) terminal or an IEEE1394 (DV) capturing board. A DV cable (Use the optional CV-150F (4 pin-4 pin) or CV-250F (4 pin-6 pin) DV Cable). -
Page 47: Additional Information Trouble
Additional Information Troubleshooting Trouble? If you have a problem with your camcorder, refer to this checklist. Consult your dealer or a Canon Service Center if the problem persists. Power Source Problem • Camcorder will not turn on. • The camcorder switches off by itself. - Page 48 Trouble? Problem Video noise appears on the TV screen. The tape stops during record pause or playback pause. Recording Problem Image will not appear on the screen. “SET THE TIME ZONE, DATE AND TIME” appears on the screen. Pressing the start/stop button will not start recording.
-
Page 49: List Of Messages
Problem No sound from the built-in speaker. Image will not appear on the TV screen. Tape is running, but image will not appear on the TV screen. Editing Problem Cannot record with this camcorder video input from an external video device connected using a DV cable. - Page 50 Trouble? Message The digital device connected with the DV cable is incompatible with INPUT SIGNAL NOT the camcorder. SUPPORTED HEADS DIRTY, USE Video heads are dirty. Clean the video heads. CLEANING CASSETTE COPYRIGHT PROTECTED You attempted to play back a copyright protected tape. PLAYBACK IS RESTRICTED COPYRIGHT PROTECTED...
-
Page 51: Do's And Don'ts
Handling Precautions Do’s and Don’ts Camcorder Do not carry the camcorder by the LCD panel. Be careful when closing the LCD panel. Do not leave the camcorder in places subject to high temperatures (like the inside of a car under direct sunlight), or high humidity. - Page 52 Do’s and Don’ts Replace the battery pack if the usable time after full charge diminishes substantially at normal temperatures. About the battery terminal cover The battery terminal cover has a [ shaped hole. This is useful when you wish to differentiate between charged and uncharged battery packs.
-
Page 53: Maintenance/Others
assistance immediately. The battery case may break and the battery fluids may cause internal damage. Do not disassemble, heat or immerse the battery in water to avoid the risk of explosion. Do’s and Don’ts Maintenance/Others Cleaning the Camcorder Camcorder Body Use a soft, dry cloth to clean the camcorder body. - Page 54 Do’s and Don’ts Condensation Moving the camcorder rapidly between hot and cold temperatures may cause condensation (water droplets) to form on its internal surfaces. Stop using the camcorder if condensation is detected. Continued use may damage the camcorder. Condensation may form in the following cases: When the camcorder is moved from an air-conditioned room to a warm, humid...
-
Page 55: Using The Camcorder Abroad
100 and 240 V AC, 50/60 Hz. Consult the Canon Service Center for information on plug adapters for overseas use. Playback on a TV Screen You can only play back your recordings on TVs compatible with the PAL system. -
Page 56: General Information
General Information System Diagram General Information (Availability differs from area to area) WS-20 Wrist Strap SS600/SS650 Shoulder Strap MiniDV Video Cassette * The BP-2L5 is not available as a separate optional accessory. CBC-NB2 Car Battery Charger STV-250N Stereo Video Cable CV-150F/CV-250F DV Cable SC-2000 Soft... -
Page 57: Optional Accessories
This product is designed to achieve excellent performance when used with genuine Canon accessories. Canon shall not be liable for any damage to this product and/or accidents such as fire, etc., caused by the malfunction of non-genuine Canon accessories (e.g., a leakage and/or explosion of a battery pack). - Page 58 SC-2000 Soft Carrying Case A handy camcorder bag with padded compartments and plenty of space for accessories. This mark identifies genuine Canon video accessories. When you use Canon video equipment, we recommend Canon-brand accessories or products bearing the same mark.
-
Page 59: Specifications
Specifications MD120/MD111/MD110/MD101 System Video Recording System Audio Recording System Television System Image Sensor Compatible Tapes Tape Speed Maximum Recording Time (60 min. tape) LCD Screen Viewfinder Microphone Lens Lens Configuration AF system Minimum Focusing Distance White Balance Minimum Illumination Recommended Illumination... - Page 60 General Information Power/Others Power supply (rated) Power consumption (AF on) Operating temperature Dimensions (W x H x D) Weight (camcorder body only) CA-590E Compact Power Adapter Power input Rated output Operating temperature Dimensions Weight BP-2L5 Battery Pack Battery type Rated voltage Operating temperature Battery capacity Dimensions...
-
Page 61: Index
Index 6-second auto date ....28 Abroad, using the camcorder ..55 Audio mode ..... 35 Audio output channel . - Page 62 General Information Selecting the on-screen displays ..37 Self timer ......37 Serial number ..... 9 Setup menus .
- Page 63 P.O. Box 2262, 1180 EG Amstelveen, the Netherlands Canon UK Ltd. CCI Service Centre, Unit 130 Centennial Park, Borehamwood, Hertfordshire, WD6 3SE, England Telephone 0870-241-2161 Canon Australia Pty. Ltd. Info-Line: 131383 www.canon.com.au Canon New Zealand Ltd. Customer Care: (09) 489 0470 www.canon.co.nz...