Advertisement
Quick Links
Advertisement

Related Manuals for Spirit CRW800


Summary of Contents for Spirit CRW800
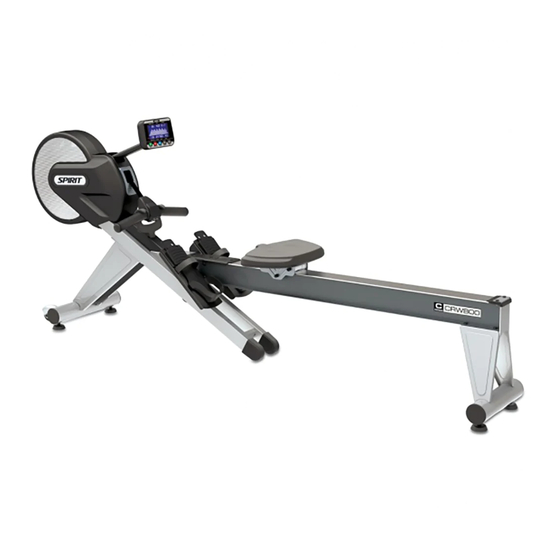
- Page 1 CRW800 ROWER OWNER’S MANUAL...
- Page 2 Spirit Fitness...
-
Page 3: Table Of Contents
TABLE OF CONTENTS PRODUCT REGISTRATION IMPORTANT SAFETY INSTRUCTIONS IMPORTANT ELECTRICAL INSTRUCTIONS IMPORTANT OPERATION INSTRUCTIONS CRW800 ASSEMBLY INSTRUCTIONS CONSOLE OPERATION PROGRAMMABLE FEATURES HEART RATE MONITORING GENERAL MAINTENANCE BATTERY CHANGING INSTRUCTIONS MANUFACTURER’S LIMITED WARRANTY EXPLODED VIEW PARTS LIST Thank you for purchasing our product, please save these instructions. Please do not perform or attempt any customizing, adjustments, repair or maintenance that is not described in this manual. - Page 4 Congratulations on your new Rower and welcome to the Spirit Fitness family! Thank you for your purchase of this quality Rower from Spirit Fitness. Your new Rower was manufactured by one of the leading fitness manufacturers in the world and is backed by one of the most comprehensive warranties available.
- Page 5 Please record the serial number of this fitness product in the space provided below. Serial Number: REGISTER YOUR PURCHASE The self-addressed product registration card must be completed in full and returned to Spirit Fitness. You can also go to https://www.spiritfitness.com/commercialwarrantyregistration.html under the Support tab to register online. www.spiritfitness.com...
-
Page 6: Important Safety Instructions
Use of a chest strap transmitter (sold separately) is • is 40 to 120 degrees Fahrenheit, and humidity is 95% an accurate method of heart rate analysis. Various non-condensing (no water drops forming on surfaces). factors, including the user’s movement, may affect the Spirit Fitness... -
Page 7: Important Operation Instructions
IMPORTANT OPERATION INSTRUCTIONS NEVER operate this Rower without reading • and completely understanding the results of any operational change you request from the computer. Understand that changes in resistance do not occur • immediately. Set your desired resistance level on the computer console and release the adjustment key. - Page 8 CRW800 PRE-ASSEMBLY UNPACKING TOOLS INCLUDED: ‰ 13/14mm Wrench 1. Cut the straps, then lift the box over the unit and unpack. ‰ Combination Wrench 2. Carefully remove all parts from the carton and inspect for any damage or missing ‰ 4mm L Allen Wrench parts.
- Page 9 CRW800 STEP ONE HARDWARE FOR STEP 1 PART TYPE DESCRIPTION FLAT WASHER 3/8”X19X1.5T 3/8”X3/4” BOLT SPRING WASHER 10X2T 1. Gather HARDWARE FOR STEP 1. 2. Use the WRENCH (128) to tighten 4 HEX HEAD BOLTS (120) together with 4 SPRING...
- Page 10 CRW800 STEP TWO HARDWARE FOR STEP 2 PART TYPE DESCRIPTION BOLT M6XP1.0X18 M6XP1.0x10 BOLT 1. Gather HARDWARE FOR STEP 2. 2. Use ALLEN WRENCH (126) to remove 2 BUTTON HEAD SOCKET BOLTS (89) on ALUMINUM TRACK (51), then attach SEAT...
- Page 11 CRW800 STEP THREE HARDWARE FOR STEP 3 PART TYPE DESCRIPTION FLAT WASHER 5/16”X18X1.5T M8XP1.25X12 BOLT 1. Gather HARDWARE FOR STEP 3. 2. Attach the other end of the ALUMINUM TRACK (51) to FOLDING END ASSEMBLY (6) and use COMBINATION WRENCH (127) to tighten the 5 BUTTON HEAD SOCKET BOLTS (123) together with 4 FLAT WASHERS (122).
- Page 12 CRW800 STEP FOUR HARDWARE FOR STEP 4 PART TYPE DESCRIPTION SCREW M5X10 5/16”X18X1.5T BOLT BOLT M8XP1.25X12 SCREW M6X15 SPRING WASHER 1/4” 1. Gather HARDWARE FOR STEP 4. 2. Install left and right PEDALS (4,5) on the MAIN FRAME (1) with 6 BUTTON HEAD SOCKET...
-
Page 13: Console Operation
CRW800 CONSOLE OPERATION www.spiritfitness.com... - Page 14 Wake the console by pressing any button and the LCD will turn on. If speed is sensed by speed sensor, manual work- out mode will begin. After 30 seconds of inactivity, the LCD will turn off, and then 270 second later, the console will automatically go to sleep. Spirit Fitness...
- Page 15 BATTERY INSTALLATION The console operates on 2*C batteries (not included). The battery compartement is on the back side of the console. WINDOW FUNCTIONS STROKE/MIN S/m value shows the equivalent strokes per minute. • TIME Shows the Time. • Range of time: 00:00~99:59(minute: second) •...
- Page 16 The console goes directly into Scan mode after start. If Mode button is pressed, it shows the wave pattern. Pressing • the Mode button again, it displays 500M/TIME and repeat again by pressing Mode button it goes back with Scan function (recyclable). Spirit Fitness...
- Page 17 BUTTON FUNCTION MODE BUTTON Under idle mode, pressing MODE button each time switches the workout mode with the following sequence: MANUAL » • DISTANCE » TIME » CALORIES » 20/10 INTERVAL » 10/20 INTERVAL » CUSTOM INTERVAL » FAT BURN » CARDIO »...
-
Page 18: Programmable Features
NTERVAL » Fat Burn » Cardio » Strength » Game The program name will scroll from left to right to tell the user what it is. MANUAL DISTANCE TIME CALORIES 20/10 INTERVAL 10/20 INTERVAL CUSTOM INTERVAL FAT BURN CARDIO STRENGTH GAME Spirit Fitness... - Page 19 MANUAL MODE To choose Manual mode (Fig. 1-1) Pressing Start/Stop button begins the workout mode or pulling the paddle under the idle mode enters directly into Manual workout mode. The image at the center of LCD will scan every 5 seconds to show the stroke speed with wave pattern (Fig.
- Page 20 Under the workout mode, pressing Up or Down button adjusts the resistance level. When the distance is counted down to 0, the workout completes and the buzzer sounds with a long beep. If paddling continues, the distance count-down repeats. Fig 2-1 Fig 2-2 Fig 2-3 Spirit Fitness...
- Page 21 TARGET TIME To choose target time count-down Time workout mode (Fig. 3-1). Use Up/Down buttons to adjust and set the workout time. The default distance is 1:00 with 1-minute increment of up or down (99:00 maximum). Press Start/Stop button to confirm the setting and start the workout mode. The image at the center of LCD will scan every 5 seconds to show the stroke speed with wave pattern (Fig.
- Page 22 Under the workout mode, pressing Up or Down button adjusts the resistance level. When calorie is counted down to 0, the workout completes and the buzzer sounds with a long beep. If paddling continues, the time count-down repeats Fig 4-1 Fig 4-2 Fig 4-3 Spirit Fitness...
- Page 23 20/10 INTERVAL To choose 20/10 Interval workout mode (Fig. 5-1). The image at the center of LCD: 20 seconds (Exercise)/10 seconds (Rest). Pressing Start/Stop button starts the workout mode. The image at the center of LCD shows time count-down of current workout and wave (Fig. 5-2) or rest time count-down and mark (Fig.
- Page 24 Under the workout mode, pressing Up or Down button adjusts the resistance level. There are 10 Exercise/ Rest cycles for each workout time. When workout completes, the buzzer sounds with a long beep. If paddling continues, the time count-down repeats. Fig 6-1 Fig 6-2 Fig 6-3 Spirit Fitness...
- Page 25 CUSTOM INTERVAL To choose Custom Interval workout mode (Fig. 7-1). User-defined time (Exercise)/time (Rest): the default is 10 seconds (Exercise)/10 seconds (Rest) The value at left side of the matrix window flashes for setting the exercise time. Use Up/Down buttons to adjust and set the workout time.
- Page 26 Time window starts count-down from the setting time and shows the remaining workout time. When time is counted down to 0:00, the workout completes and the buzzer sounds with a long beep. If paddling continues, the time count-down repeats. Fig 8-1 Fig 8-2 Spirit Fitness...
- Page 27 CARDIO WORKOUT To choose cardio workout mode (Fig. 9-1). Pressing Start/Stop button and begins the workout mode or setting the workout time. Use Up or Down buttons to adjust the time. The increment of adjustment is 5-minute (99:00 maximum). Press Start/Stop button to start the workout mode.
- Page 28 When time is counted down to 0:00, the workout completes and the buzzer sounds with a long beep. If paddling continues, the time count-down repeats. Fig 10-1 Fig 10-2 Spirit Fitness...
- Page 29 GAME WORKOUT To choose Game workout mode (Fig. 11-1). Pressing Start/Stop button and begins the Game workout mode (11-2). Three dots at left side represents the user position and the image shift one profile left per second and continue to scroll. The position of the user will not shift.
- Page 30 180 x .6 = 108 beats per minute (60% of maximum) 180 X .85 = 153 beats per minute (85% of maximum) So for a 40 year old the training zone would be 108 to 153 beats per minute. Spirit Fitness...
- Page 31 The two most popular reasons for, or goals, of exercise are cardiovascular fitness (training for the heart and lungs) and weight control. The black columns on the chart represent the MHR for a person whose age is listed at the bottom of each column. The training heart rate, for either cardiovascular fitness or weight loss, is represented by two different lines that cut diagonally through the chart.
- Page 32 18 Very hard + 7 Very, very light 11 Fairly light 15 Hard 19 Very, very hard 8 Very, very light + 12 Comfortable 16 Hard + 20 Maximal 9 Very light 13 Somewhat hard 17 Very hard Spirit Fitness...
- Page 33 WEARING THE CHEST STRAP (SOLD SEPARTELY) Attach the transmitter to the elastic strap using the interlocking button. Adjust the strap as tightly as possible while ensuring it is still comfortable. Position the transmitter with the logo centered in the middle of your torso facing away from your chest (some people must position the transmitter slightly left of center).
- Page 34 Some people have problems with the transmitter picking up a signal from their skin. If you have problems try wearing the transmitter upside down. Normally the transmitter will be oriented so the Spirit Fitness logo is right side up. The antenna that picks up your heart rate is very sensitive. If there is an outside noise source, turning the whole machine 90 degrees may de-tune the interference.
-
Page 35: General Maintenance
WIRELESS HANDLE CODING STEPS 1. After replacing the battery (CR2032), the wireless handle control needs to be coded again. 2. When the console is turned on again, press and hold the Up or Down handle button for 3 seconds to complete the coding between console and handlebar. -
Page 36: Battery Changing Instructions
2. Remove the battery cover. 3. Replace the battery with new one, put on the cover and secure. 1. Remove the battery cover screw 2. Remove the battery cover. 3. Replace the battery with new one, put on the cover and secure. Spirit Fitness... - Page 37 FOLDING/UNFOLDING PROCEDURES 1. Turn the knob counterclockwise to release. 2. Fold up the aluminum rail assembly. MOVING PROCEDURES 3. Turn the knob clockwise to tighten. 1. Fold the aluminum rail assembly up. 2. Lift the rear and roll away. www.spiritfitness.com...
- Page 38 – EFFECTIVE APRIL 20, 2020 Spirit Fitness, Inc. (Spirit Fitness) warrants all its Rower parts for a period of time listed below from the date of retail sale, as determined by sale receipt, or in the absence of a sales receipt eighteen (18) months from the original factory shipping date.
- Page 39 5. Products that have been: sold, transferred, bartered, or given to a third party. 6. Products that do not have a warranty registration card on file at Spirit Fitness. Spirit Fitness reserves the right to request proof of purchase if no warranty record exists for the product.
- Page 40 Jonesboro, AR 72402-2037 Product features or specifications as described or illustrated are subject to change without notice. All warranties are made by Spirit Manufacturing, Inc. This warranty applies only in the 48 contiguous United States. NOTE: This does not apply to Alaska or Hawaii.
- Page 41 www.spiritfitness.com...
- Page 42 Aluminum Board Spring Cover Aluminum Track Pulley Generator/Brake Controller Pulley Ribbon Roll Ø32(1.8T)_Button Head Plug Bearing(6201 UOU) Axle End Cover Bearing(HK2012) Bushing Unidirectional Bearing(HF2016) Ø65 _Transportation Wheel Board Adjustment Foot Pad Gear Motor Square End Cap Drive Pulley Spirit Fitness...
- Page 43 M5 × P0.8 × 15L_Phillips Head Screw 3/8" × UNC16 × 1"_Socket Head Cap Bolt Connecting Cover Ø3/8" × 20 × 3.0T_Flat Washer End Cover M6 × 6T_Nyloc Nut Seat Stop Cover 3/8" × UNC16 × 4-1/4"_Socket Head Cap Bolt Steel Cable 3/8"...
- Page 44 800.258.4555 Spirit Fitness spiritservice@spiritfitness.com 3000 Nestle Road www.spiritfitness.com Jonesboro, AR 72401 CRW800 Owners Manual © 2020 All Rights Reserved Revision: 04.20.2020...