Table of Contents
Advertisement
Quick Links
Advertisement
Table of Contents

Related Manuals for Brother FAX-235


Summary of Contents for Brother FAX-235
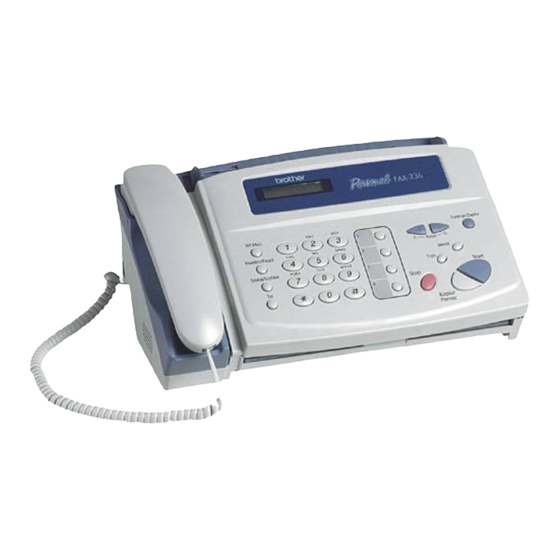
- Page 1 FAX-235 FAX-236 FAX-335MC ®...
-
Page 2: Compilation And Publication Notice
The contents of this manual and the specifications of this product are subject to change without notice. Brother reserves the right to make changes without notice in the specifications and materials contained herein and shall not be responsible for any damages (including consequential) caused by reliance on the materials presented, including but not limited to typographical and other errors relating to the publication. -
Page 3: Table Of Contents
About fax machine ... 1-1 Fax Tones and Handshake ... 1-2 ECM (Error Correction Mode) (For FAX-335MC Only) .. 1-2 FAX-235 and FAX-236 Control Panel Overview ... 1-3 FAX-335MC Control Panel Overview ... 1-4 Location and Connections ... 2-1 Caution ... 2-1 Packing List ... - Page 4 Operation from External or Extension Telephone... 5-6 For FAX/TEL Mode Only ... 5-6 Remote Call Transfer (Semi-DECT Management) ... 5-6 To transfer telephone call to the fax machine ... 5-6 Changing Remote Codes ... 5-7 Polling ... 5-7 Setting Up Polling Receive ... 5-8...
- Page 5 Setup for Polling Receive with Secure Code ... 5-9 Setting Up Sequential Polling Receive (For FAX-335MC Only) ... 5-9 Setup Send ... 6-1 Automatic Document Feeder (ADF) ... 6-1 ADF (Automatic Document Feeder) ... 6-1 Manual Transmission ... 6-2 Automatic Transmission ... 6-2 Manual and Automatic Fax Redial ...
- Page 6 Storing Speed Dial Numbers/Storing Junk Fax/Call Numbers ... 7-2 Changing One Touch and Speed Dial Numbers ... 7-3 Setting Up Groups for Broadcasting (For FAX-335MC Only) ... 7-3 Dialing Options ... 7-4 Manual Dialing ... 7-4 One Touch Dialing ... 7-5 Speed Dialing ...
- Page 7 Making a Single Copy ... 10-1 Copy Options: Single or Multiple Copies, Sort/Stack (For Fax-335MC Only) ... 10-1 Printing Reports ... 11-1 Fax machine Settings and Activity ... 11-1 To Print a Report ... 11-1 Transmission Verification Report ... 11-2 JOURNAL Interval ... 11-2 Important Information ...
- Page 8 If You Are Having Difficulty with Your Fax Machine ... 13-4 Printing or Receiving Faxes ... 13-4 Phone Line or Connections ... 13-5 Sending Faxes ... 13-5 Handling Incoming Calls ... 13-6 Specifications ... S-1 Glossary ... G-1 Index ...I-1...
-
Page 9: Introduction
Introduction Using This Manual Thank you for purchasing a Brother fax machine. This fax machine has been designed to be simple to use, with LCD screen prompts to guide you through functions. However, you can use your fax machine to its fullest potential by taking a few minutes to read this manual. -
Page 10: Fax Tones And Handshake
40 seconds over the phone line, and the screen displays RECEIVE. If your fax machine is set to the FAX ONLY Mode, it will answer every call automatically with fax receiving tones. Even if the other party hangs up, your fax machine continues to send the “chirps”... -
Page 11: Fax-235 And Fax-236 Control Panel Overview
FAX-235 and FAX-236 Control Panel Overview (FAX-236 panel is the same as FAX-235) LCD (Liquid Crystal Display) Displays messages to help you set up and operate your fax machine. Hold Lets you put calls on hold. Also, lets you view or print the Caller ID list. -
Page 12: Fax-335Mc Control Panel Overview
Function/Set Lets you access the function and programming mode. Also, stores a function setting into the fax machine. (Left Arrow) (Right Arrow) Volume Moves the LCD cursor to the left or right. Adjusts speaker and ring volume. -
Page 13: Location And Connections
Location and Connections Caution Never install telephone wiring during a lightning storm. We recommend that this product be used with a surge protection device to protect the product against lightning storms. Never install a telephone jack in a wet location unless the jack is specifically designed for a wet location. -
Page 14: Choosing A Location
Choosing a Location Place your fax machine on a flat, stable surface, such as a desk. Select a place that is free of vibration and shocks. Locate the fax machine near a telephone jack and a standard, grounded power outlet. - Page 15 When you use 210mm recording paper roll size... There are two different types of recording paper roll size (216mm/210mm). If you use 210mm recording paper roll size, please set recording paper after attaching the paper guides as below. Paper Guide Setting position Raise the paper enough to pass it over the...
-
Page 16: About Brother Paper
About Brother Paper For the best print quality, use Brother Therma Plus Paper, Item Numbers 6890 (two 98’ rolls) or 6840 (four 98’ rolls). Therma Plus paper is thicker, like plain paper, and produces the best print quality. The recording paper roll size for your fax machine is limited to a diameter of 2.76 inches (70 mm). -
Page 17: Attach The Document Support
Connect the handset Connect the curled handset cord to the bottom of the handset and the side of the fax machine. Connect the power cord. Connect the telephone line. Connect one end of the telephone line cord to the jack labeled LINE on the left side of the machine. -
Page 18: Multi-Line Connections (Pbx)
It is advisable to have a separate line for the fax machine. You can then leave the fax machine in FAX ONLY Mode to receive faxes any time of day or night. -
Page 19: Connecting An External Telephone Answering Device (Tad) (Tad Cannot Be Connected In Some Countries)
TAD on the same telephone line as the fax machine, the TAD answers all calls. The fax machine “listens” for fax calling (CNG) tones. If it hears them, the fax machine takes over the call and receives the fax. If it doesn’t hear CNG tones, the fax machine lets the TAD continue playing your outgoing message so your caller can leave you a voice message. -
Page 20: Connections
EXT. Your fax machine cannot work properly if you plug the TAD into a wall jack. Plug the telephone line cord from the wall jack into the left side of the fax machine, in the jack labeled LINE. Plug the telephone line cord from your TAD into the left side of the fax machine, in the jack labeled EXT. -
Page 21: On-Screen Programming
Since your fax programming is done on the LCD, we created step-by-step on-screen prompts to help you program your fax machine. All you need to do is follow the prompts as they guide you through the function menu selections and programming options and settings. -
Page 22: Function Selection Table
Function Selection Table If you have a basic understanding of how to program your fax machine, you can perform most of the programming settings without the Owner’s Manual. To help you understand the function selections, options, and settings that are found in your fax programs, use the Function Selection Table below. - Page 23 You can send a fax, then speak. PRINT SAMPLE — Send originals later. STANDARD Sets up your fax machine with an SECURE original to be retrieved by another fax machine. NEXT FAX ONLY You can send faxes from memory .
- Page 24 2. KEY LOCK 3 - 4 O N - S C R E E N P R O G R A M M I N G Description EVERY 15 FAXES (FOR FAX-235/236) EVERY 30 FAXES (FOR FAX-335MC) 2/7 Days 6/12/24 Hours OFF —...
-
Page 25: Initial Setup
Press Stop to exit. Setting Date and Time Your fax machine displays the date and time, and prints it on every fax you send. In the event of a power failure, you may have to reset the date and time. All other settings remain unaffected. -
Page 26: Setting Station Id
When you are setting certain functions, such as the Station ID, you may need to enter text into the fax machine. Most keys on the dial pad have three or four letters printed above them. The keys for 0, # and for special characters or operations. -
Page 27: Making Corrections
page... -
Page 28: Setting Beeper Volume
You can set the beeper to LOW, MED, HIGH or OFF. The default setting is LOW. When the beeper is set to LOW, MED or HIGH, the fax machine beeps every time you press a key or make an error, and at the end of fax sending or receiving. -
Page 29: Key Lock System
Key Lock System This feature allows you to prevent unauthorised access to the fax machine. When switched ON, Key Lock System prohibits most functions. The following functions listed are available while Key Lock System is switched ON. Receiving faxes Answering Calls... -
Page 30: Changing The Key Lock System Password
If the password you enter at Step 8 is incorrect, the screen would display WRONG PASSWORD. After 2 seconds the display will then return to select menu for Function 0. You must then try again to switch Key Lock System ON. Changing the Key Lock System Password Press Function/Set, 0, 2. -
Page 31: Switching Off Key Lock System
PASSWORD. After 2 seconds the display will then return to displaying KEY LOCK MODE. You must then start from Step 1 to switch OFF Key Lock System. If you forget the Key Lock System password, please contact your Brother dealer for service. -
Page 32: Setup Receive
TAD can not be connected in some countries. NIGHT (For FAX-235 and FAX-236)––This is the Night Mode setting. The fax machine receives incoming fax calls without ringing. In case of a voice call, the fax machine does not ring and it doesn’t receive the voice call. -
Page 33: To Select Or Change Your Answer Mode
MSG CTR (For FAX-335MC only)—The fax machine provides you with a built-in digital Message Center for fax and voice. When you set the machine to answer calls, it will record up to 15 minutes of messages. For more information about Message Center (MSG CTR) operation, please see Chapter 9. -
Page 34: Setting Ring Delay
(See Fax Detect, page 5-5 and Operation from External or Extension Telephone, page 5-6 and For FAX/TEL Mode Only, page 5-6.) Press Function/Set, 2, 1. If you have a FAX-235 or FAX-236, go to Step 3. Press to select RING DELAY and press Function/Set. -
Page 35: Setting F/T Ring Time
Ring Delay. You can let the fax machine pick up and detect if it’s a fax or voice call. If it’s a fax call, the machine prints the fax. If it’s a voice call, the machine signals you with a F/T pseudo-ring for the length of time you selected in F/T Ring Time. -
Page 36: Fax Detect
Selecting SEMI lets the machine receive the call only if you’ve answered it at the fax machine. Selecting OFF means you’ll have to activate the fax machine yourself, by pressing Start or by pressing External or Extension Telephone, and For FAX/TEL Mode Only, page 5-6.) -
Page 37: Advanced Receiving Operations
For FAX/TEL Mode Only When the fax machine is in FAX/TEL mode, it will use the F/T Ring Time (F/T pseudo-ring) to alert you to a voice call. If you’re at the fax machine, you can lift the handset to answer. -
Page 38: Changing Remote Codes
Don’t hang up the call from the cordless phone until the voice call has been transferred to the fax machine. You will know when this is because you will no longer be able to hear or talk to the caller via the cordless phone. If you do not wait until this point before hanging up from the cordless phone, the call will be lost. -
Page 39: Setting Up Polling Receive
Enter the fax number you are polling. Press Start. The screen displays DIALING. Setting Up Delayed Polling Receive You can set your fax machine to begin Polling Receive at a later time. (See Canceling a Scheduled Job, page 6-10.) Press Function/Set, 2, 5. The screen... -
Page 40: Setup For Polling Receive With Secure Code
SECURE and press Function/Set. Enter a four-digit number. This is the same as the security code of the fax machine you are polling. Press Function/Set. The screen prompts you to enter the fax number you want to poll, and then to press Start. -
Page 41: Setup Send
Originals must be between 5.8 and 8.5 inches (148 and 216 mm) wide, and 5.9 and 23.7 (150 and 600 mm) inches long. Your fax machine can only scan an image 8.2 inches (208 mm) wide, regardless the paper width. -
Page 42: Manual Transmission
If you’re sending a fax manually and the line is busy, press Redial/Pause to retry the number. If you’re sending a fax automatically and the line is busy, the fax machine will redial automatically up to three times at five minute intervals. -
Page 43: Basic Sending Operations
Press 1 to select additional settings. The display returns to the SETUP SEND menu—OR—Press 2 if you are finished choosing settings and go to Step 6. Enter fax number and press Start. If you get a OUT OF MEMORY message while scanning the first page of a fax, press Stop to cancel the scan. -
Page 44: Cover Page For Next Fax Only (For Fax-236/335Mc Only)
Make sure Station ID is set up (See Setting Station ID, page 4-2.). This feature does not work without the Station ID. You can set the fax machine to send a cover page whenever you send a fax. The number of pages in your fax is not included when you use this setting. -
Page 45: Using A Printed Cover Page (For Fax-236/335Mc Only)
Press to select PRINT SAMPLE. Press Function/Set when the screen displays your selection. Press Start. Your fax machine prints a copy of your cover page. Cover Page Message (For FAX-236/335MC Only) You can set up two custom comments. to view possible... -
Page 46: Composing Your Own Comments (For Fax-236/335Mc Only)
S. FINE—good for small print or artwork; transmits slower than fine resolution. PHOTO—use when original has varying shades of gray; slowest transmission time. If the receiving fax machine does not have the resolution you select, the transmission will fall back to the next available resolution on receiving machine. -
Page 47: Advanced Sending Operations
You can send a fax and let the other party know that you want to have a conversation after the fax transmission is complete. The other fax machine will ring as if it were receiving a telephone call; if the other party picks up the handset, your fax machine will ring. -
Page 48: Print Sample Call Back Message (For Fax-236/335Mc Only)
Enter the time, in 24-hour format, that you want the fax to be sent and press Function/Set. (For example, enter 19:45 for 7:45 PM) If you have a FAX-235 or FAX-236, go to Step 5. Press 1 to leave the originals waiting in the ADF—OR—Press 2 to scan the original into... -
Page 49: Next-Fax Reservation (For Fax-236/335Mc Only)
Next-Fax Reservation (For FAX-236/335MC Only) Even if your fax machine is receiving another fax, you can set your machine to send your fax next. This way, you don’t have to wait for it to finish sending or receiving the other fax. You can dial this fax call manually, or by using Redial, One Touch, Speed Dial, or Chain dialing. -
Page 50: Setting Up For Polled Transmit
Setting Up for Polled Transmit Polled Transmit is when you set up your fax machine to wait with a document so another fax machine can retrieve it. Place the document to be retrieved face down in the ADF. Press Function/Set, 3, 8. -
Page 51: Interrupting Timer And Polled Transmit Jobs
Interrupting Timer and Polled Transmit Jobs You can send a fax or make a copy now, even if you have the fax machine set to send a fax later, or if you have it set to be polled. However, you cannot use automatic redial or the function mode. -
Page 52: Quick-Dial Numbers And Dialing Options
Dialing Options Storing Numbers for Easy Dialing You can set up your fax machine to do three types of easy dialing: One Touch, Speed Dial, and Groups for Broadcasting of faxes (For Fax-335MC only). If you use the Caller ID subscriber service offered by your local phone company (For Singapore and Hong Kong only), you can register the number for Anti-Junk Fax/Call in One Touch and Speed Dial locations. -
Page 53: Storing Speed Dial Numbers/Storing Junk Fax/Call Numbers
You can store Speed Dial numbers, when you dial by pressing only four keys. There are 60 (FAX-235), 100 (FAX-236/FAX-335MC) Speed Dial locations. If you want to store a Junk number, you have to set ANTI JUNK to ON in Step 6. -
Page 54: Changing One Touch And Speed Dial Numbers
Enter the number (up to 20 digits) and press Function/Set. Use the dial pad to enter the name or company (up to 15 characters) and press Function/Set—OR—Press Function/Set to store the number without a name. (See Details for Entering Text, page 4-2.) to select the type of number and press Function/Set. -
Page 55: Dialing Options
Chapter 11. Dialing Options You can use your fax machine to make voice telephone calls, by dialing manually, or by using Search, One Touch or Speed Dial memory. You can use the handset or, if you have FAX-335MC, you can use the Speaker Phone to make and receive calls. -
Page 56: One Touch Dialing
If you are sending a fax, press Start after pressing the One Touch key. If you picked up the handset, press Start when the receiving fax machine answers with fax tones. Speed Dialing Pick up the handset—OR—Press Hook or Speaker Phone. (See Storing Speed Dial Numbers/Storing Junk Fax/Call Numbers, page 7-2.) -
Page 57: Search
Answering Calls with the Speaker phone (For FAX-335MC Only) When the fax machine rings, instead of lifting the handset, press Speaker Phone. Speak clearly, toward the microphone If you have a bad telephone line connection, the other party might hear your voice echoed during the call. -
Page 58: Pause
Enter the One Touch and Speed Dial numbers (one after the other) or a Group Number you have stored. Press Start. The fax machine stores the original in memory, then transmits it to all the numbers you entered. Press Stop during transmission to cancel the current fax broadcast. -
Page 59: Telephone Services
The fax machine will answer only calls to the Distinctive Ringing number. To have your TAD answer only the main number, the fax machine must be in Manual Mode. In FAX/TEL or FAX ONLY mode, the fax machine will answer all numbers on the phone line. -
Page 60: Setting The Distinctive Ring
Caller ID Log Your fax machine stores up to 10 (FAX-235 and FAX-236) or 30 (FAX-335MC) of the last Caller IDs received into the fax machine’s memory in the Caller ID Log. When the 11th (FAX-235 and FAX-236) or 31st (FAX-335MC) call comes in, information about the first call is erased. -
Page 61: Printing The Caller Id Log
Printing the Caller ID Log Press Hold. To print the Caller ID Log, press Start. Viewing the Caller ID Log Press Hold. After 2 seconds, press through the Caller ID Log. When you want to see more detailed information for a displayed ID (phone number and date and time call was received) press Function/Set. -
Page 62: Registering A Caller Id Number
To register the caller as a Speed Dial number, press Search/Speed Dial and use the dial pad to press the two-digit location code (01– 60 (FAX-235) or 00-99(FAX-236/335MC)), and press Function/Set. If the LCD shows REGISTERED, the auto dial location already has a number. -
Page 63: Message Center (For Fax-335Mc Only)
Message Center (For FAX-335MC Only) Message Center Mode Message Center Mode allows you to store incoming fax and voice messages in a flexible memory. The memory stores 15 minutes of voice messages, or up to 20 pages of fax memory. Any voice or fax message can be retrieved remotely. Memory is shared between fax and voice messages, which are stored on a “first-come, first- served”... -
Page 64: Setting Up The Message Center
Setting Up the Message Center You must set up the Message Center in the following order: Setting Message Storage. (See Setting Message Store, page 9-2.) Record Message Center Outgoing Message (MSG CTR OGM). (See Recording Message Center Outgoing Message, page 9-2.) Activate Message Center Mode. -
Page 65: Listening To Outgoing Message (Ogm)
Listening to Outgoing Message (OGM) Press Function/Set, 8, 3. Press to select MSG CTR OGM (or FAX/TEL OGM or PAGING OGM) and press Function/Set. Press to select PLAY MSG and press Function/Set. Adjust volume by pressing Volume Press Stop to exit. Erasing Outgoing Message (OGM) Press Function/Set, 8, 3. -
Page 66: Playing Voice Messages
Function/Set. Press Stop to exit. Erasing Messages If you choose to erase all fax messages, the fax machine will print any previously unprinted faxes before erasing them from memory. Fax messages cannot be erased individually. You can erase voice messages individually, or all at once. -
Page 67: To Erase Voice Messages Individually
This way, when you call the fax machine, if it rings three times, you know you have no messages, and can hang up, to avoid a toll charge. -
Page 68: Icm Recording Monitor
Message Center memory. When Fax Forwarding is set to ON, your fax machine dials the fax machine phone number you’ve programmed, and forwards any faxes you’ve received. -
Page 69: Recording The Paging Outgoing Message (Ogm)
Recording the Paging Outgoing Message (OGM) Before paging can work, you should first record the Paging OGM. Press Function/Set, 8, 3. The screen prompts you to choose an OGM. Press to reach PAGING OGM and press Function/Set. to Select RECORD MSG and press Function/Set. Press Then pick up the handset to record a message. -
Page 70: Remote Retrieval
3 long beeps—Fax and Voice message(s) No beeps—no messages The fax machine then prompts you with two short beeps to enter a command. If you wait longer than 30 seconds to enter a command, the MFC hangs up. If you enter an invalid command, the fax machine beeps three times. -
Page 71: Remote Commands
Remote Commands Follow the commands below to access features remotely. When you call the fax machine and enter your Remote Retrieval Access Code (159 ), the system will signal you with two short beeps to enter a remote command. Remote Commands... - Page 72 M E S S A G E C E N T E R ( F O R F A X - 3 3 5 M C O N L Y ) Operation Details Enter the number of a remote fax machine to receive a report or stored fax messages. (See page 9-11.)
-
Page 73: Retrieving Memory Status List
Retrieving Memory Status List You can retrieve the Memory Status List from a remote fax machine to see if you have any fax messages. Dial your fax number. When you hear the beep, immediately enter your Remote Retrieval Access Code (1 5 9 When you hear two short beeps, use the dial pad to press 9 6 1. -
Page 74: Changing Fax Forwarding Number
To retrieve the Memory Status List, when you hear two short beeps, use the dial pad to press 9 6 1. Use the dial pad to enter the number of the remote fax machine (up to 20 digits), then press # #. -
Page 75: Making Copies
Making Copies Copy Functions To make a single copy that is not reduced, enlarged or sorted, you only have to press one key. The default resolution for a single copy is Super Fine. Set the resolution to PHOTO for photographs. Remember, your machine cannot scan anything closer than one-eighth inch from the edge of the paper. - Page 76 If you are making multiple copies and get a OUT OF MEMORY message while you are scanning the first page, press Stop to cancel the job. Then make a single copy. If you selected SORT and the OUT OF MEMORY message appears while scanning subsequent pages, you can press Copy/Help to copy the portion that is in memory, or press Stop to cancel.
-
Page 77: Printing Reports
Printing Reports Fax machine Settings and Activity You can print the following lists and reports: (For FAX-335MC Only) To Print a Report Press Function/Set, 7. Enter the number of the report you want to print. For example, press 4 to print the TEL.INDEX. -
Page 78: Transmission Verification Report
Press Stop to exit. JOURNAL Interval You can set the fax machine to print journals at specific intervals (6, 12, 24 hours, 2, 7 days). If you set the interval to OFF, you can print the report by following the steps in the previous section. -
Page 79: Important Information
Do not place anything in front of the fax machine that will block the exit- path of sent documents, originals and received faxes. - Page 80 This equipment may not be used on coin service lines provided by the telephone company or connected to party lines. Brother cannot accept any financial or other responsibilities that may be the result of your use of this information, including direct, special or consequential damages.
-
Page 81: Troubleshooting And Maintenance
Error Messages You may occasionally encounter a difficulty with your fax machine or telephone line. If this happens, your fax machine often identifies the problem and displays an error message. The list below explains the most common error messages. Open the cover. - Page 82 Pull up the tab on the left side of the print head unit to open the print head cover. Remove the jammed paper if there is any left. Press down on the middle of the print head cover to close it. Use scissors to cut off the wrinkled portion of the paper.
- Page 83 Open the cover. Pull the documents toward the front of the fax machine, in the same direction they were feeding. Close the cover. Front cover Front cover T R O U B L E S H O O T I N G A N D M A I N T E N A N C E...
-
Page 84: Recording Paper Jam
If You Are Having Difficulty with Your Fax Machine If you think there is a problem with your fax machine, make a copy first. If the copy looks good, the problem is probably not your fax machine. Check the difficulties below and follow the troubleshooting tips. -
Page 85: Phone Line Or Connections
Start. Vertical Black Lines When Sending Use your fax machine to make a copy. If the copy shows the same problem, the scanner area is dirty. Lift the front cover and check the document path. Clean the scanner’s white pressure bar and the glass under the bar using isopropyl alcohol and a lint-free cloth (see page 13-1). -
Page 86: Handling Incoming Calls
Handling Incoming Calls F/T pseudo-ring in FAX/TEL Mode The fax machine knows the incoming call is not a fax so it is signaling you to answer the telephone call. Pick up the fax machine handset or answer from an extension phone and press your fax machine’s Telephone Answer Code (default setting is #51). -
Page 87: Specifications
Specifications are subject to change without prior notice. Desktop facsimile transceiver ITU-T Group 3 Modified Huffman (MH) 9600/7200/4800/2400; Automatic Fallback (FAX-235, FAX-236) 14400/12000/9600/7200/4800/2400; Automatic Fallback (FAX-335MC) 5.8 inches to 8.5 inches (148 mm to 216 mm) 8.2 inches (208 mm) 8.5 inches (216 mm) - Page 88 Communication Source Operating Environment Power Source Power Consumption Dimensions Weight S - 2 S P E C I F I C A T I O N S Public switched telephone network 41 - 95° F (5° - 35°C) 220~240V AC 50/60Hz Standby: under 3.5 watts —...
-
Page 89: Glossary
Distinctive Ring A service purchased from the Telephone Company that provides another phone number on an existing phone line. The Brother fax machine uses the new number to simulate a dedicated fax line. - Page 90 OGM (Out-Going Message) The message callers hear when you call your external answering machine. One Touch Keys on the fax machine control panel where you can store numbers for easy dialing. You must use a separate key for each number.
- Page 91 Timer Sends your fax at a later time that day. Tone A form of dialing on the telephone line used for Touch Tone telephones. transmission The process of sending originals over the phone lines from your fax machine to the receiving fax machine.
-
Page 92: Index
Index Alternating Displays ...3-1 Answer Mode ... 5-1, 5-2 Answering Machine ...2-7 Automatic Transmission ...6-2 Backup Printing ...9-4 Beeper Volume ...4-4 Beeps ...9-8 Broadcasting ...7-6 Broadcasting (Set Up Groups) ...7-3 CALL PICKUP ...8-2 Caller ID ...8-2 Caller ID (Printing Log) ...8-3 Caller ID (Viewing Log) ...8-3 Canceling Job ...6-10 Chain Dialing ...7-2... - Page 93 JOURNAL ...11-2 Manual Dialing ...7-4 MANUAL Mode ...5-1 Manual Transmission ...6-2 Maximum Message Time ...9-5 MEMORY STATUS REPORT ...11-1 Memory Storage ...4-4 Memory Transmission ...6-2 Message Center ...9-1 Message Center Mode ...9-1 Message Indicator ...9-3 Message Storage ...9-1 Multi-Line Connections ...2-6 One Touch Dial (Changing) ...7-3 One Touch Dial (Storing) ...7-1 One Touch Dialing ...7-5...
- Page 94 Troubleshooting ...13-1 Verification Report ...11-1 WARNING ... 12-1, 12-2 I - 3 I N D E X...
-
Page 95: Using Remote Retrieval Access Code (For Fax-335Mc Only
Using Remote Retrieval Access Code (For FAX-335MC Only) If you plan to retrieve voice or fax messages while away from your fax machine, carrying the Remote Retrieval Access Card printed below will serve as a convenient reminder of the retrieval procedures. Simply cut out the card and fold it to fit in your wallet or organizer. - Page 96 R - 2 R E M O T E R E T R I E V A L A C C E S S C A R D...
- Page 97 ® LF8878040 AS.GU Printed in Malaysia...