Brother FAX-2840 Basic User's Manual
Hide thumbs
Also See for FAX-2840:
- Service manual (276 pages) ,
- Basic user's manual (143 pages) ,
- Advanced user's manual (56 pages)
Table of Contents
Advertisement
Quick Links
Advertisement
Table of Contents

Related Manuals for Brother FAX-2840


Summary of Contents for Brother FAX-2840
- Page 1 Basic User’s Guide FAX-2840 MFC-7290 Version 0 TWN-ENG...
- Page 2 The serial number is on the back of the unit. Retain this User’s Guide with your sales receipt as a permanent record of your purchase, in the event of theft, fire or warranty service. Register your product on-line at http://www.brother.com/registration/ © 2012 Brother Industries, Ltd. All rights reserved.
- Page 3 Brother ControlCenter utility. Download optional software from the Brother Solutions Center (FAX-2840 users) You can download a printer driver for free from the Brother Solutions Center, enabling you to use your Brother Fax machine as a printer. Visit us at http://solutions.brother.com/.
-
Page 4: Table Of Contents
Viewing Documentation (For MFC-7290) ............3 ® Accessing Brother Support (Windows ) (MFC-7290 only) ........4 Accessing Brother Support (Macintosh) (MFC-7290 only) ........5 Control panel overview ..................6 Loading paper Loading paper and print media ................9 Loading paper in the standard paper tray............9 Loading paper in the manual feed slot ............11... - Page 5 External and extension telephones..............38 Connecting an external or extension telephone ..........38 Using external and extension telephones ............. 39 Using a non-Brother cordless external handset ..........39 Using Remote Codes ..................39 Dialing and storing numbers How to dial ......................41 Manual dialing ....................
- Page 6 How to scan to a computer (MFC-7290 only) Before scanning....................47 ® Scanning a document as a PDF file using ControlCenter4 (Windows ) .....47 How to change the SCAN key settings for PDF scanning ........51 How to scan a document as a PDF file using the SCAN key ......53 Routine maintenance Replacing the consumable items.................54 Replacing the toner cartridge ................55...
- Page 7 Scanner (For MFC-7290) .................. 119 Printer (For MFC-7290) ..................120 Interface......................120 Computer requirements (For MFC-7290) ............121 Consumable items ..................... 122 Appendix Brother numbers ....................123 Index...
- Page 8 Table of Contents (Advanced User’s Guide) The Advanced User’s Guide explains the following features and operations. You can view the Advanced User’s Guide on the CD-ROM. General Setup Cleaning the machine Checking the machine IMPORTANT NOTE Packing and shipping the machine Memory Storage Volume settings Glossary...
-
Page 9: General Information
Bold Bold style identifies keys on the documentation machine control panel or computer screen. Thank you for buying a Brother machine! Italics Italicized style emphasizes an Reading the documentation will help you important point or refers you to make the most of your machine. -
Page 10: Accessing The Advanced User's Guide And Software User's Guide
Documentation CD-ROM or the Installer CD- Guide, and then click the guide you ROM. want to read. For MFC-7290 Viewing Documentation (For FAX-2840) Turn on your computer. Insert the Documentation CD-ROM into your ® CD-ROM drive. For Windows users, go to step c. -
Page 11: Viewing Documentation (For Mfc-7290)
CD-ROM by following the instructions below: Turn on your computer. Insert the Installer CD-ROM into your CD-ROM drive. Note If the Brother screen does not appear automatically, go to My Computer (Computer), double-click the CD-ROM icon, and then double-click start.exe. Double-click the Documentation icon. -
Page 12: Accessing Brother Support (Windows ® ) (Mfc-7290 Only)
Home Page. For the latest news and product support information (http://solutions.brother.com/), click Brother Solutions Center. To visit our Web site for genuine Brother supplies (http://www.brother.com/original/), click Supplies Information. To access the Brother CreativeCenter (http://www.brother.com/creativecenter/) for FREE photo projects and printable downloads, click Brother CreativeCenter. -
Page 13: Accessing Brother Support (Macintosh) (Mfc-7290 Only)
The following screen will appear: To download and install Presto! PageManager, click Presto! PageManager. For the latest news and product support information (http://solutions.brother.com/), click Brother Solutions Center. To visit our Web site for genuine Brother Supplies (http://www.brother.com/original/), click Supplies Information. -
Page 14: Control Panel Overview
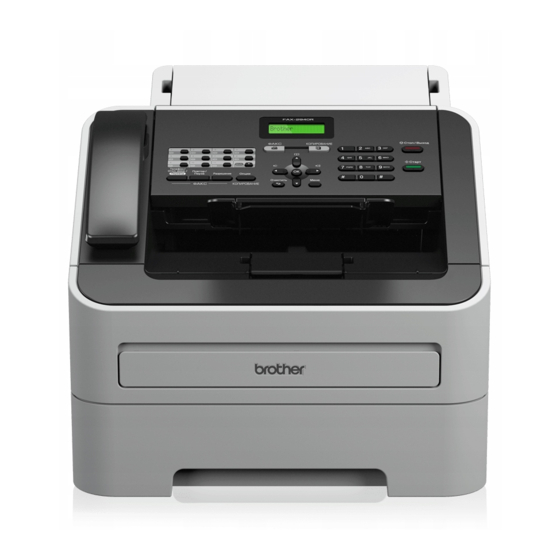
Chapter 1 Control panel overview FAX-2840 MFC-7290... - Page 15 General information...
- Page 16 Chapter 1 1 One Touch keys a or b These 11 keys give you instant access to 22 Press to scroll through the menus and options. previously stored numbers. Address Book Shift Let you access speed dial numbers directly. Lets you access One Touch numbers 12 to 22 8 COPY key: when held down.
-
Page 17: Loading Paper
Loading paper Loading paper and Printing on plain paper, thin paper or recycled paper from the standard print media paper tray Pull the paper tray completely out of the The machine can feed paper from the machine. standard paper tray or manual feed slot. (For MFC-7290) When you put paper into the paper tray, note the following:... - Page 18 Chapter 2 While pressing the green paper-guide Note release lever, slide the paper guides to For Legal or Folio size paper, press the fit the paper size you are loading in the release button in the bottom of the paper tray.
-
Page 19: Loading Paper In The Manual Feed Slot
Loading paper Loading paper in the manual feed slot You can load envelopes and special print media one at a time into this slot. Use the manual feed slot to print or copy on labels, envelopes or thicker paper. Note The machine automatically turns on the Manual Feed mode when you put paper in the manual feed slot. - Page 20 Chapter 2 Open the manual feed slot cover. Using both hands, put one sheet of paper in the manual feed slot until the front edge of the paper touches the paper feed roller. When you feel the machine pull in the paper, let go. Using both hands, slide the manual feed slot paper guides to the width of the paper that you are going to use.
- Page 21 Loading paper Open the back cover (back output tray). Note <For envelopes only> Pull down the two green levers, one on the left-hand side and one on the right-hand side, as shown in the following illustration. Open the manual feed slot cover.
- Page 22 Chapter 2 Using both hands, slide the manual feed slot paper guides to the width of the paper that you are going to use. Note • Put the paper into the manual feed slot Using both hands, put one sheet of with the side to be printed face up.
-
Page 23: Unscannable And Unprintable Areas
Loading paper Unscannable and unprintable areas The figures below show maximum unscannable and unprintable areas. The unscannable and unprintable areas may vary depending on the paper size or settings in the application you are using. Usage Document Top (1) Left (2) Size Bottom (3) Right (4) -
Page 24: Paper Settings
Chapter 2 Paper settings Acceptable paper and other print media Paper Type Print quality may vary according to the type of Set up the machine for the type of paper you paper you are using. are using. This will give you the best print You can use the following types of print quality. -
Page 25: Type And Size Of Paper
Loading paper Type and size of paper The machine loads paper from the installed standard paper tray or manual feed slot. (For MFC-7290) The name for the paper trays in the printer driver in this Guide are as follows: Trays Name Standard Paper Tray Tray1... - Page 26 Chapter 2 Recommended paper specifications The following paper specifications are suitable for this machine. Basis weight 75-90 g/m 80-110 m Thickness Roughness Higher than 20 sec. Stiffness 90-150 cm /100 Grain direction Long grain Volume resistivity -10e Surface resistivity -10e ohm-cm CaCO (Neutral)
-
Page 27: Handling And Using Special Paper
• that is multipart or carbonless • that is designed for inkjet printing If you use any of the types of paper listed above, they may damage your machine. This damage is not covered under any Brother warranty or service agreement. - Page 28 Chapter 2 Envelopes • with edges that are not straight or consistently square Most envelopes designed for laser printers • with windows, holes, cut-outs or will be suitable for your machine. However, perforations some envelopes may have feed and print- quality problems because of the way they •...
- Page 29 Do not use labels that are damaged, curled, machine. This damage may not be wrinkled or an unusual shape. covered under any Brother warranty or service agreement. Labels The machine will print on most types of labels designed for use with a laser machine.
-
Page 30: Loading Documents
Loading documents How to load Important documents • DO NOT use paper that is curled, wrinkled, folded, ripped, stapled, paper- clipped, pasted or taped. You can send a fax, make copies, and scan • DO NOT use cardboard, newspaper or from the ADF (Automatic Document Feeder). - Page 31 Loading documents Stagger the pages of your document face down top edge first, in the ADF until the LCD display message changes and you feel it touch the feed rollers. Adjust the paper guides (1) to fit the width of your document. Important To avoid damaging your machine while using the ADF, DO NOT pull on the...
-
Page 32: Sending A Fax
Sending a fax How to send a fax Enter the fax number using the dial pad, a One Touch key or (Address Book) The following steps show how to send a fax. and enter three-digit Speed Dial number. When you want to send a fax, or change Press Start. -
Page 33: Transmission Verification Report
Sending a fax Transmission Verification Note Report • If you choose On+Image or Off+Image, the image will only appear on the You can use the Transmission Verification Transmission Verification Report if Real Report as proof that you sent a fax. This Time Transmission is set to Off. -
Page 34: Receiving A Fax
Will you be using Voice Mail on the same telephone line as your Brother machine? If you have Voice Mail on the same telephone line as your Brother machine, there is a strong possibility that Voice Mail and the Brother machine will conflict with each other when receiving incoming calls. (See Voice Mail uu page 33 for instructions on setting up your machine using this service.) - Page 35 Receiving a fax To set the receive mode follow the instructions below: Press Menu, 0, 1. Initial Setup 1.Receive Mode Press a or b to choose Fax Only, Fax/Tel, External TAD or Manual. Press OK. Press Stop/Exit. The LCD will display the current receive mode.
-
Page 36: Using Receive Modes
Chapter 5 Using Receive Modes External TAD External TAD mode lets an external Some receive modes answer automatically answering device manage your incoming (Fax Only and Fax/Tel). You may want to calls. Incoming calls will be handled in the change the Ring Delay before using these following ways: modes. -
Page 37: Receive Modes Settings
Receiving a fax Receive Modes F/T Ring Time (Fax/Tel mode only) settings When somebody calls your machine, you and Ring Delay your caller will hear the normal telephone ring sound. The number of rings is set by the Ring Delay setting. The Ring Delay setting sets the number of times the machine rings before it answers in If the call is a fax, then your machine will... -
Page 38: Easy Receive
Chapter 5 Easy Receive If Easy Receive is On: The machine can receive a fax automatically, even if you answer the call. When you see Receiving on the LCD or hear a click on the phone line through the handset you are using, just replace the handset. -
Page 39: Using Pc-Fax (For Mfc-7290)
Using PC-FAX (For MFC-7290) PC-Fax Receive Important ® (For Windows only) If you choose Backup Print On, the machine will also print the fax at your machine so you will have a copy. This is a If you turn on the PC-Fax Receive feature safety feature in case if there is a power your machine will store received faxes in failure before the fax is forwarded or a... -
Page 40: Pc-Fax Send
Chapter 6 PC-Fax Send The Brother PC-FAX feature lets you use your PC to send a document from an application as a standard fax. You can send a file created in any application on your PC as a PC-FAX. You can even attach a cover page. -
Page 41: Telephone Services And External Devices
(Address Book) and enter the three-digit Speed Dial number. If you have Voice Mail on the same telephone line as your Brother machine, Voice Mail and Making a telephone call the Brother machine will conflict with each other when receiving incoming calls. -
Page 42: Distinctive Ring
To avoid conflicts between your Brother machine and your Voice Mail service, do one of the following: Distinctive Ring is a function of your Brother machine that allows a person with one line to Get the Distinctive Ring service from your receive fax and voice calls through two telephone company. - Page 43 What does Brother’s ‘Distinctive Ring’ Before you choose the ring pattern to register The Brother machine has a Distinctive Ring You can only register one Distinctive Ring feature that allows you to use your machine to pattern with the machine. Some ring patterns take full advantage of the telephone cannot be registered.
- Page 44 Press OK. Mode. You cannot change it to another receive mode while Distinctive Ring is set to Press Stop/Exit. On. This ensures the Brother machine will only answer the Distinctive Ring number and Note not interfere when your main telephone If you do not want to receive faxes on your number is called.
-
Page 45: Connecting An External Tad (Telephone Answering Device)
Telephone services and external devices Connecting an external Note TAD (telephone If you have problems receiving faxes, reduce the ring delay setting on your answering device) external TAD. You can connect an external Telephone Connections Answering Device (TAD) to the same line as your machine. -
Page 46: Recording An Outgoing Message (Ogm)
Chapter 7 External and extension Recording an outgoing message (OGM) telephones Record 5 seconds of silence at the Connecting an external or beginning of your message. This allows extension telephone your machine time to listen for fax tones. Limit your speaking to 20 seconds. You can connect a separate telephone directly to your machine as shown in the End your 20-second message by giving... -
Page 47: Using External And Extension Telephones
Using external and extension Using a non-Brother cordless telephones external handset If your non-Brother cordless telephone is Using extension telephones connected to the EXT. jack of the machine (see Connecting an external or extension If you answer a fax call at an extension... - Page 48 Chapter 7 Changing the Remote Codes The preset Fax Receive Code is l51. The preset Telephone Answer Code is #51. If you are always disconnected when accessing your External TAD, try changing the three-digit remote codes, for example ### and 999. Make sure you are in FAX mode Press Menu, 2, 1, 4.
-
Page 49: Dialing And Storing Numbers
Dialing and storing numbers How to dial Speed Dialing You can dial in any of the following ways. Press (Address Book) and enter the three-digit Speed Dial number. (See Storing Manual dialing Speed Dial numbers uu page 43.) Use the dial pad to enter all the digits of the telephone or fax number. -
Page 50: Search
Chapter 8 Storing numbers Search You can search alphabetically for names you You can set up your machine to do the have stored in the One Touch and Speed Dial following types of easy dialing: One Touch, memories. (See Storing One Touch Dial Speed Dial and Groups for Broadcasting numbers uu page 43 and Storing Speed Dial faxes. -
Page 51: Storing One Touch Dial Numbers
Dialing and storing numbers Storing One Touch Dial Storing Speed Dial numbers numbers You can store your frequently used numbers as Speed Dial numbers, so that when you dial Your machine has 11 One Touch keys where you will only have to press a few keys you can store 22 fax or telephone numbers for automatic dialing. -
Page 52: Changing One Touch And Speed Dial Numbers
Chapter 8 Changing One Touch and Deleting One Touch and Speed Dial numbers Speed Dial numbers If you try to change a One Touch or Speed If you try to delete a One Touch or Speed Dial Dial number, the LCD will show the name or number, the LCD will show the name or number already stored there. -
Page 53: Making Copies
Making copies How to copy Copy settings Press the temporary COPY key Options. The following steps show the basic copy operation. For details about each option, see For details about changing the following copy Advanced User’s Guide on the CD-ROM. settings and how to make two-sided copies, see Advanced User’s Guide: Copy settings. -
Page 54: How To Print From Your Computer (For Mfc-7290)
® Windows or Printing and Faxing for Macintosh in Software User’s Guide for details about the print settings.) Install the Brother printer driver from the Installer CD-ROM. (See Quick Setup Guide.) From your application, choose the Print command. Choose the name of your machine in the... -
Page 55: How To Scan To A Computer (Mfc-7290 Only)
You can use ControlCenter4 on your computer. Load your document. (See How to load documents uu page 22.) Open ControlCenter4 by clicking Start/All Programs/Brother/XXX-XXXX (where XXX- XXXX is your model name)/ControlCenter4. The ControlCenter4 application will open. If the ControlCenter4 Mode screen appears, choose the Advanced Mode and then click OK. - Page 56 Chapter 11 Make sure the machine you want to use is selected from the Model pull-down list. Set the scanning configuration. Click Configuration, and then select Button settings, Scan and File.
- Page 57 How to scan to a computer (MFC-7290 only) The configuration dialog box appears. You can change the default settings. 1 Choose PDF (*.pdf) from the File Type pull-down list. 2 You can enter the file name you want to use for the document. 3 You can save the file to the default folder, or choose your preferred folder by clicking the Browse button.
- Page 58 Chapter 11 Click File. The machine starts the scanning process. The folder where the scanned data is saved will open automatically.
-
Page 59: How To Change The Scan Key Settings For Pdf Scanning
® You can change your machine’s SCAN key settings using ControlCenter4 (Windows Open ControlCenter4 by clicking Start/All Programs/Brother/XXX-XXXX (where XXX- XXXX is your model name)/ControlCenter4. The ControlCenter4 application will open. Make sure the machine you want to use is selected from the Model pull-down list. - Page 60 Chapter 11 Choose the File tab. You can change the default settings. 1 Choose PDF (*.pdf) from the File Type pull-down list. 2 You can enter the file name you want to use for the document. 3 You can save the file to the default folder, or choose your preferred folder by clicking the Browse button.
-
Page 61: How To Scan A Document As A Pdf File Using The Scan Key
How to scan to a computer (MFC-7290 only) How to scan a document as a PDF file using the SCAN key Load your document. (See How to load documents uu page 22.) Press (SCAN). Press a or b to choose Scan to PC. Press OK. -
Page 62: A Routine Maintenance
Note • Go to http://www.brother.com/original/index.html for instructions on how to return your used consumable items to the Brother collection program. If you choose not to return your used consumable, please discard the used consumable according to local regulations, keeping it separate from domestic waste. -
Page 63: Replacing The Toner Cartridge
The machine will stop printing until you approximately 700 pages replace the toner cartridge. A new genuine Approx. cartridge yield is declared in accordance Brother toner cartridge will reset the Replace with ISO/IEC 19752. Toner mode. Note Note •... - Page 64 Replacing the toner cartridge Open the front cover, and then leave the machine turned on for 10 minutes for the internal fan to cool the internal parts of the machine that are extremely hot. WARNING Take out the drum unit and toner cartridge assembly.
- Page 65 Routine maintenance DO NOT use flammable substances, any type of spray, or an organic solvent/liquid containing alcohol or ammonia to clean the inside or outside of the machine. Doing so could cause a fire. Instead, use only a dry, lint-free cloth. (See Product Safety Guide: To use the product safely.) Push down the green lock lever and take...
- Page 66 Note cartridges. Use or attempted use of third • Be sure to seal up the toner cartridge party toner and/or cartridges in the Brother tightly in a suitable bag so that toner machine may cause damage to the powder does not spill out of the cartridge.
- Page 67 Routine maintenance Pull off the protective cover. Put the new toner cartridge firmly into the drum unit until you hear it lock into place. If you put it in properly, the green lock lever will lift automatically. Important Put the toner cartridge in the drum unit immediately after you have removed the protective cover.
-
Page 68: Cleaning The Corona Wire
Clean the corona wire inside the drum Note unit by gently sliding the green tab from After replacing the toner cartridge, DO left to right and right to left several times. NOT turn off the machine’s power switch or open the front cover until the LCD clears the Please Wait message and returns to Ready mode. - Page 69 Routine maintenance • To prevent damage to the machine caused by static electricity, DO NOT touch the electrodes shown in the illustration. Clean the corona wire inside the drum unit by gently sliding the green tab from Slowly take out the drum unit and toner left to right and right to left several times.
-
Page 70: Replacing The Drum Unit
Put the drum unit and toner cartridge • Printing with a non-Brother drum unit may assembly back into the machine. Close reduce not only the print quality but also the front cover. the quality and life of the machine itself. - Page 71 Routine maintenance Replacing the drum unit Important • While removing the drum unit, handle it carefully because it may contain toner. If toner scatters on your hands or clothes, immediately wipe or wash it off with cold water. • Every time you replace the drum unit, clean the inside of the machine.
- Page 72 Important WARNING • We recommend that you place the drum DO NOT put a toner cartridge or a toner unit and/or the toner cartridge on a clean, cartridge and drum unit assembly into a fire. flat, level, stable surface with a sheet of It could explode, resulting in injuries.
-
Page 73: Resetting The Drum Counter
• Go to http://www.brother.com/original/ index.html for instructions on how to return your used consumable items to the Brother collection program. If you choose not to return your used consumable, please discard the used consumable according to local regulations, keeping it separate from domestic waste. -
Page 74: Cleaning The Scanner Glass
AC power outlet first, connect all cables, and then plug in the telephone Note line cord. Turn on the machine’s power (For FAX-2840) switch. To prevent you from losing any important messages, see Transferring your faxes or Fax Journal report uu page 74. -
Page 75: Troubleshooting
If you think there is a problem with your machine, check each of the items below first and follow the troubleshooting tips. You can correct most problems by yourself. If you need additional help, the Brother Solutions Center offers the latest FAQs and troubleshooting tips.Visit us at http://solutions.brother.com/. - Page 76 Scanning problems (For MFC-7290): Scanning difficulties (For MFC-7290) uu page 89 Software problems (For MFC-7290): Software difficulties (For MFC-7290) uu page 89 ...
-
Page 77: Error And Maintenance Messages
The most common error and maintenance messages are shown below. You can correct most errors and perform routine maintenance by yourself. If you need more help, the Brother Solutions Center offers the latest FAQs and troubleshooting tips: Visit us at http://solutions.brother.com/. Error Message... - Page 78 The machine has a mechanical Open the front cover and close it again. EL Error problem. The temperature of the fuser unit (For FAX-2840) Fuser Error does not rise to a specified Received fax messages still in memory will temperature within the specified be lost when the machine is turned off.
- Page 79 Leave the machine for 15 minutes with the power on. If the problem continues, call Brother Customer Service. The paper is jammed inside the (See Paper is jammed inside the machine Jam Inside machine.
- Page 80 Leave the machine for 15 minutes with the power on. If the problem continues, call Brother Customer Service. It is time to replace the drum unit. Replace the drum unit. Replace Drum (See Replacing the drum unit uu page 62.)
- Page 81 The machine will stop replace the toner cartridge with a new and printing until you replace the toner unused original Brother toner cartridge. This cartridge. will reset the Replace Toner mode. (See Replacing the toner cartridge uu page 55.) While memory is available, faxes will be stored in the memory.
-
Page 82: Transferring Your Faxes Or Fax Journal Report
Print Unable XX turn on PC-FAX Receiving on the PC. Scan Unable XX (For details about PC-Fax Receive, see (For FAX-2840) Software User’s Guide: PC-FAX If it is necessary to disconnect the machine receiving.) from the AC power outlet, we recommend... -
Page 83: Document Jams
Troubleshooting Document Jams Paper Jams Always remove all paper from the paper tray Document was not inserted or and straighten the stack when you add new fed properly, or was too long paper. This helps prevent multiple sheets of paper from feeding through the machine at the same time and prevents paper jams. -
Page 84: Paper Is Jammed At The Back Of The Machine
Use both hands to slowly pull out the Make sure the paper is below the jammed paper. maximum paper mark (b b b) (1) of the paper tray. While pressing the green paper-guide release lever, slide the paper guides to fit the paper size. Make sure that the guides are firmly in the slots. - Page 85 Troubleshooting Slowly take out the drum unit and toner WARNING cartridge assembly. The jammed paper may be pulled out with the drum unit and toner cartridge assembly, or this may HOT SURFACE release the paper so you can pull it out After you have just used the machine, some from inside of the machine.
- Page 86 Pull down the tabs at the left and right Important hand sides to open the fuser cover (1). • We recommend that you place the drum unit and the toner cartridge on a clean, flat surface with a sheet of disposable paper or cloth underneath it in case you accidentally spill or scatter toner.
-
Page 87: Paper Is Jammed Inside The Machine
Troubleshooting Paper is jammed inside the Using both hands, gently pull the jammed paper out of the fuser unit. machine If the LCD shows Jam Inside, follow these steps: Open the front cover, and then leave the machine turned on for 10 minutes for the internal fan to cool the internal parts of the machine that are extremely hot. - Page 88 Slowly take out the drum unit and toner cartridge assembly. The jammed paper may be pulled out with the drum unit and toner cartridge assembly, or this may release the paper so you can pull it out from inside of the machine. Important •...
- Page 89 Troubleshooting • To prevent damage to the machine from Important static electricity, DO NOT touch the To avoid print quality problems, DO NOT electrodes shown in the illustration. touch the shaded parts shown in the illustrations. Push down the green lock lever and take the toner cartridge out of the drum unit.
- Page 90 Put the toner cartridge back into the If you could not pull the jammed paper drum unit until you hear it lock into place. out of the inside of the machine, take the If you put the cartridge properly, the paper tray completely out of the green lock lever will lift automatically.
- Page 91 Troubleshooting Put the drum unit and toner cartridge assembly back in the machine. Close the front cover of the machine. If the machine does not start printing automatically, press Start. Note (MFC-7290 only) If you turn off the machine while the LCD shows Jam Inside, the machine will print incomplete data from your computer.
-
Page 92: If You Are Having Difficulty With Your Machine
• If you think there is a problem with your machine, check the chart below and follow the troubleshooting tips. You can solve most problems by yourself. • If you need additional help, the Brother Solutions Center offers the latest FAQs and troubleshooting tips. -
Page 93: Receiving Faxes
If your Brother machine is on a line with the Distinctive Ring subscriber service, please see Distinctive Ring uu page 34. If your Brother machine shares a line with other telephones and you want it to automatically answer all incoming faxes, you should select the Fax/Tel mode. In Fax/Tel mode, your Brother machine will automatically receive faxes and produce a pseudo/double-ring to alert you to answer voice calls. - Page 94 If you are using a telephone answering machine (External TAD mode) on the same line as the Brother machine, make sure your answering machine is set up correctly. (See Connecting an external TAD (telephone answering device) uu page 37.)
-
Page 95: Sending Faxes
For Example: If you subscribe to Call Waiting or some other custom service and its signal comes through the line while your machine is sending or receiving a fax, the signal can temporarily interrupt or disrupt the faxes. Brother’s ECM feature should help overcome this problem. This condition is related to the telephone system industry and is common to all devices that send and receive information on a single, shared line with custom features. - Page 96 (Windows 7) Click the Start button and Devices and Printers. Right-click Brother MFC-XXXX Printer and click See what’s printing. Click Printer in the menu bar. Make sure that Use Printer Offline is unchecked. (Windows Vista ® ) Click the Start button, Control Panel, Hardware and Sound, and then Printers.
- Page 97 Difficulties Suggestions TWAIN or ICA errors appear when Make sure the Brother TWAIN driver is chosen as the primary source. In starting to scan. PageManager, click File, Select Source and choose the Brother TWAIN driver. Mac OS X 10.6.x and 10.7.x users can also scan documents using the ICA Scanner Driver.
- Page 98 Paper handling difficulties (continued) Difficulties Suggestions (For MFC-7290) You can load envelopes in the manual feed slot. Your application must be set up How do I print on envelopes? to print the envelope size you are using. This is usually done in the Page Setup or Document Setup menu of your application.
-
Page 99: Setting Dial Tone Detection
Troubleshooting Setting Dial Tone detection Telephone line interference/ VoIP Setting the Dial Tone to Detection will shorten the Dial Tone detect pause. If you are having difficulty sending or receiving a fax due to possible interference Press Menu, 0, 4. on the telephone line, we recommend that you adjust the Equalization for compatibility Initial Setup... -
Page 100: Improving The Print Quality
Note Using non-Brother supplies may affect the print quality, hardware performance, and machine reliability. To get the best print quality, we suggest using the recommended paper. Check that you use paper that meets our specifications. - Page 101 Put in a new drum unit. (See Replacing the drum unit uu page 62.) The fuser unit may be contaminated. Call Brother Customer Service. Make sure that you use paper that meets our specifications. Rough-surfaced paper may cause the problem. (See Acceptable paper and other print media uu page 16.)
- Page 102 The drum unit may be damaged. Put in a new drum unit. (See Replacing the drum unit uu page 62.) The fuser unit may be contaminated. Call Brother Customer Service. All black Make sure that you use paper that meets our specifications. A rough surfaced paper or thick print media can cause problems.
- Page 103 Troubleshooting Examples of poor print quality Recommendation Check the machine’s environment. Conditions such as high humidity and high temperatures may cause this print quality problem. (See Product Safety Guide: Choosing a location.) If the problem is not solved after printing a few pages, put in a new drum unit.
- Page 104 The toner cartridge may be damaged. Put in a new toner 0 1 2 3 4 cartridge. (See Replacing the toner cartridge uu page 55.) The fuser unit may be contaminated. Call Brother Customer Black lines down the page Service. Printed pages have toner stains down the page.
- Page 105 Troubleshooting Examples of poor print quality Recommendation Check the paper type and quality. High temperatures and high humidity will cause paper to curl. (See Acceptable paper and other print media uu page 16.) If you do not use the machine often, the paper may have been in the paper tray too long.
- Page 106 Examples of poor print quality Recommendation Make sure that the two green envelope levers inside the back cover are pulled down when you print the envelope. Envelope creases Note When you have finished printing, open the back cover and reset the two green levers back to their original position.
- Page 107 Troubleshooting Examples of poor print quality Recommendation Open the back cover and make sure that the two green envelope levers on the left and right hand sides are in the up position. ABCDEFGHIJKLMNOPQRSTUVWXYZ. 0123456789. abcdefghijklmnopqrstuvwxyz. ABCDEFGHIJKLMNOPQRSTUVWXYZ. 0123456789. abcdefghijklmnopqrstuvwxyz. ABCDEFGHIJKLMNOPQRSTUVWXYZ. 0123456789. abcdefghijklmnopqrstuvwxyz. ABCDEFGHIJKLMNOPQRSTUVWXYZ.
- Page 108 Examples of poor print quality Recommendation (For MFC-7290) Choose Reduce Paper Curl mode in the printer driver when you do not use our recommended paper. (See Software User’s Guide: ® Other Print Options (for Windows ) or Print Settings (For Macintosh).) ...
-
Page 109: Machine Information
2 All Settings You can reset all the machine settings back to the settings that were set at the factory. Brother strongly recommends you perform this operation when you dispose of the machine. Note Unplug the interface cable before you... -
Page 110: How To Reset The Machine
How to reset the machine Press Menu, 0. Press a or b to display Reset. Press OK. Press a or b to choose the type of reset function - Address & Fax or All Settings. Press OK. Do one of the following: ... -
Page 111: C Menu And Features
Menu and features On-screen How to access the menu mode programming Press Menu. Your machine has been designed to be easy to use. The LCD provides on-screen Choose an option. programming using the menu keys. Press 1 for General Setup menu. We have created step by step on-screen instructions to help you program your ... -
Page 112: Menu Table
Menu table The factory settings are shown in Bold with an asterisk. Choose & OK Choose & OK to accept to exit Level 1 Level 2 Level 3 Level 4 Options Descriptions Page — — Sets the time to 1.General 1.Mode 0 Sec See . - Page 113 -nnnno+ of the LCD. Contrast -nnnon+ -nnonn+* -nonnn+ -onnnn+ — — Prohibits most 6.Security 1.TX Lock operations except (FAX-2840 ) receiving faxes. — — Prohibits most 1.Mem operations except Security receiving faxes into (MFC-7290) the memory. — — Stops unauthorized 2.Setting...
- Page 114 Level 1 Level 2 Level 3 Options Descriptions Page Sets the number of 2.Fax 1.Setup 1.Ring Delay rings before the Receive machine answers in (In Fax mode only) Fax Only or Fax/Tel mode. Sets the 2.F/T Ring 20 Secs* pseudo/double-ring Time 30 Secs time in Fax/Tel mode.
- Page 115 Menu and features Level 1 Level 2 Level 3 Options Descriptions Page Changes the 2.Fax 2.Setup Send 1.Contrast Auto* See . lightness or darkness (Continued) (In Fax mode only) Light of faxes you send. Dark Sets the default 2.Fax Standard* resolution for Resolution Fine...
- Page 116 Level 1 Level 2 Level 3 Options Descriptions Page — Stores up to 22 One 2.Fax 3.Address Book 1.One Touch Touch Dial numbers, Dial (Continued) so you can dial by pressing one key (and Start.) — Stores up to 200 2.Speed Dial Speed Dial numbers, so you can dial by...
- Page 117 Menu and features Level 1 Level 2 Level 3 Options Descriptions Page — Prints incoming faxes 2.Fax 5.Remote Fax 3.Print Fax See . stored in the memory. (Continued) (Continued) You can set the 6.Dial 1.Dial Pad Enter # twice machine to restrict Restrict.
- Page 118 Level 1 Level 2 Level 3 Options Descriptions Page — You can choose the 3.Copy 1.Quality Auto* See . Copy resolution for Text your type of document. Photo Graph — Adjust the brightness 2.Brightness -nnnno+ for copies. -nnnon+ -nnonn+* -nonnn+ -onnnn+ —...
- Page 119 Menu and features Level 1 Level 2 Level 3 Options Descriptions Page — — You can check the 5.Machine 1.Serial No. serial number of your Info. machine. — You can check the 2.Page Counter Total See . number of total Fax/List pages the machine has printed during its...
- Page 120 Level 1 Level 2 Level 3 Options Descriptions Page Restores all stored 0.Initial 6.Reset 1.Address & 1.Reset phone numbers and Setup 2.Exit fax settings. (Continued) Restores all the 2.All 1.Reset machine settings to Settings 2.Exit the factory settings. See Advanced User’s Guide. See Quick Setup Guide.
-
Page 121: Entering Text
Menu and features Entering text When setting certain menu selections, such as the Station ID, you will need to type text characters. The dial pad keys have letters printed on them. The keys: 0, # and l do not have printed letters because they are used for special characters. -
Page 122: D Specifications
Specifications General Note This chapter provides a summary of the machines’ specifications. For additional specifications visit us at http://www.brother.com/ for details. Model FAX-2840 MFC-7290 Printer Type Laser Print Method Electrophotographic Laser Printer Memory Capacity 16 MB 16 characters 2 lines... -
Page 123: Document Size
Specifications Document Size Model FAX-2840 MFC-7290 Document Size Width 147.3 to 215.9 mm (Single-sided) Length 147.3 to 355.6 mm... -
Page 124: Print Media
Print media Model FAX-2840 MFC-7290 Paper Paper Paper Type Plain Paper, Thin Paper or Recycled Paper Input Tray Paper Size Letter, A4, B5 (ISO/JIS), A5, A5 (Long Edge), B6 (ISO), A6, Executive, Legal, Folio Paper Weight 60 to 105 g/m... -
Page 125: Fax
Specifications Model FAX-2840 MFC-7290 Compatibility ITU-T Super Group 3 Modem Speed 33,600 bps (with Automatic Fallback) Scanning Width Max. 208 mm Printing Width Max. 208 mm Gray Scale 8 bit/256 levels Resolution Horizontal 8 dot/mm Vertical Standard: 3.85 line/mm Fine: 7.7 line/mm Photo: 7.7 line/mm... -
Page 126: Copy
Copy Model FAX-2840 MFC-7290 Color/Monochrome Monochrome Copy Width Max. 204 mm (A4 size) Multiple Copies Stacks or Sorts up to 99 pages Reduce/Enlarge 25% to 400% (in increments of 1%) Up to 300 600 dpi Resolution First Copy Out Time... -
Page 127: Scanner (For Mfc-7290)
Gray Scale 256 levels For the latest driver updates for the Mac OS X you are using, visit us at http://solutions.brother.com/. Maximum 1200 x 1200 dpi scanning with the WIA driver in Windows® XP, Windows Vista® and Windows® 7 (resolution up to 19200 × 19200 dpi can be chosen by using the scanner utility) -
Page 128: Printer (For Mfc-7290)
Less than 8.5 seconds (from Ready mode and standard tray) The print speed may vary depending on the type of document you print. Note (FAX-2840 only) You can download the printer driver from the Brother Solutions Center at http://solutions.brother.com/. Model FAX-2840 Resolution HQ1200 (2400 ×... -
Page 129: Computer Requirements (For Mfc-7290)
2 GB ® Intel 10.6.x Processor Mac OS X ® 2 GB 2 GB Intel 10.7.x Processor For WIA, 1200 x 1200 resolution. Brother Scanner Utility enables to enhance up to 19200 x 19200 dpi. Third-party USB ports are not supported. -
Page 130: Consumable Items
PC-Fax supports black and white only. For the latest driver updates, visit us at http://solutions.brother.com/. All trademarks, brand and product names are the property of their respective companies. Consumable items Model FAX-2840 MFC-7290 Order No. Toner Inbox — Approx. 700 pages (A4) -
Page 131: E Appendix
Frequently asked questions (FAQs) The Brother Solutions Center is our one-stop resource for all your machine needs. You can download the latest drivers, software and utilities, read FAQs and troubleshooting tips to learn how to get the most from your Brother product. -
Page 132: Index
ControlCenter4 (for Windows See Software User’s Guide. Copy ............45 Fax codes keys ............8 changing ..........40 Cordless telephone (non-Brother) ....39 fax receive code ........39 Custom Ringing ........34 telephone answer code ......39 Fax, stand-alone receiving ..........26 Easy Receive ........30 Data Ident-A-Call ........34... - Page 133 telephone answer code ......39 Folio ............16 One Touch changing ..........44 setting up ..........43 HELP using ............. 41 LCD messages ........103 OPC drum ..........95 Menu Table .........104 Out of Memory message ......72 Hook/Hold ........... 8 Paper ............16 Ident-A-Call ..........34 how to load ..........
- Page 134 speed dial difficulties ..........84 changing ..........44 interference .......... 91 setting up ...........43 multi-line (PBX) ........38 using ..........41 Text, entering ........113 Toner cartridge replacing ..........55 Troubleshooting ........67 Redial/Pause key ........42 document jam ........75 Register your product ......123 error messages on LCD .......
- Page 135 Visit us on the World Wide Web http://www.brother.com/ These machines are approved for use in the country of purchase only. Local Brother companies or their dealers will only support machines purchased in their own countries.