Table of Contents
Advertisement
SHARP SERVICE MANUAL
PARTS IDENTIFICATION AND SPECIFIC INFORMATION ......................................................
CAUTIONS FOR USE ...............................................................................................................
CLEANING AND CARE .............................................................................................................
WIRING DIAGRAM AND CIRCUIT DIAGRAM ..........................................................................
COMPONENT REPLACEMENT PROCEDURE .......................................................................
INSPECTION AFTER ASSEMBLING .......................................................................................
SIMPLIFIED TESTING METHOD .............................................................................................
PRECAUTIONS FOR WARM-KEEPING TO GET TASTY RICE ..............................................
TROUBLESHOOTING ..............................................................................................................
JAR RICE COOKER
MODELS
In the interests of user-safety (Required by safety
regulations in some countries) the set should be restore
to its original condition and only parts identical to those
specifi ed should be used.
TABLE OF CONTENTS
SHARP CORPORATION
KS-18EV / ETV
KS-181EV / ETV
KS-182ETV
Page
2
3
4
5
6 - 11
12 - 13
14 - 15
16
17 - 18
Advertisement
Table of Contents

Related Manuals for Sharp KS-18EV


Summary of Contents for Sharp KS-18EV
-
Page 1: Table Of Contents
SHARP SERVICE MANUAL JAR RICE COOKER MODELS KS-18EV / ETV KS-181EV / ETV KS-182ETV In the interests of user-safety (Required by safety regulations in some countries) the set should be restore to its original condition and only parts identical to those specifi... -
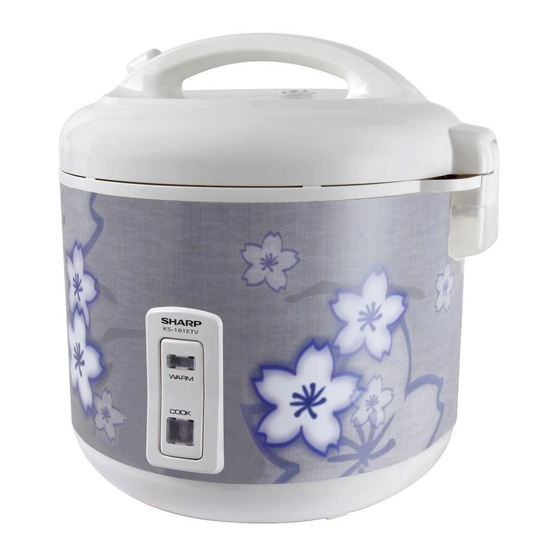
Page 2: Parts Identification And Specific Information
Spoon box Body Heater plate Thermostat Control panel Power supply cord Bottom cover SPECIFIC INFORMATION Model KS-18EV / ETV KS-181EV / ETV KS-182ETV Rated voltage (V) Power consumption (Cook) (W) Power consumption (Warm) (W) Capacity (l) Heating method Direct heating method Outside dimension (W x D x H) (mm.) -
Page 3: Cautions For Use
CAUTIONS FOR USE Never share the wall outlet with other appliances. Insert the plug into the wall outlet fi rmly and when disconnecting, hold the plug and pull it out without touching the power cord. In case the power cord is broken, it must be replaced by manufacturer or appointed service providers or equivalent professionals to avoid any damages. -
Page 4: Cleaning And Care
CLEANING AND CARE Always disconnect the plug from the wall outlet and let the cooker to cool down fi rst before cleaning. Be sure to use only the tableware detergent, and do not use nylon scrubbing brush which may cause cracks and rusts. -
Page 5: Wiring Diagram And Circuit Diagram
WIRING DIAGRAM Closed terminal Side heater ass’y Micro SW. Temp. fuse angle Connecting ring Neon lamp ass’y Tube- TA Tube-NA Temp. fuse ass’y Heater plate ass’y To TRS angle Connector P-2 Terminal AMP (I) Cord reel ass’y To outer pot To body CIRCUIT DIAGRAM Cooking... -
Page 6: Component Replacement Procedure
COMPONENT REPLACEMENT PROCEDURE REMOVE OF CORD REEL ASSEMBLY 1. Upside down the rice cooker. 2. Remove the screw holding the cord reel ass’y. 3. Remove the screw holding the contact plate cover from the cord reel ass’y. 4. Disconnect lead wires from cord reel ass’y. 5. - Page 7 REMOVE OF MICRO SWITCH 1. Remove the bottom cover in accordance with “REMOVE OF BOTTOM COVER”. 2. Upside down the rice cooker and disconnect lead wires from the micro switch. 3. Remove the screw holding the micro SW. from the switch leg ass’y. 4.
- Page 8 REMOVE OF HEATER PLATE ASSEMBLY 1. Upside down the rice cooker with inner pot inside. 2. Remove the bottom cover in accordance with “REMOVE OF BOTTOM COVER”. 3. Remove 2 screws holding the lead wires Heater plate ass’y from the heater plate ass’y. 4.
- Page 9 REMOVE OF CONTROL PANEL 1. Remove the body in accordance with “REMOVE OF BODY”. 2. Pry claws of the body lift up by a fl at type screwdriver or similar. 3. Remove the control panel from the body (position and position 4.
- Page 10 REMOVE OF TEMP. FUSE ASSEMBLY 1. Remove the body in accordance with “REMOVE OF BODY”. 2. Disconnect the lead wire from heater plate ass’y and remove the screw holding temp. fuse angle. 3. Remove the temp. fuse ass’y from the temp. fuse angle. 4.
- Page 11 DISASSEMBLING THE LID ASSEMBLY 1. Remove the lid assembly in accordance with “REMOVE OF LID ASSEMBLY”. 2. Insert 2 pieces of plastic ruler into the gap between the lid and the lid cover, taking care not to damage the lid. Then remove the lid away from the lid cover. 3.
-
Page 12: Inspection After Assembling
INSPECTION AFTER ASSEMBLING Basic requirement for cooking is to maintain the close contact of inner pot bottom with heater plate and thermostat. As the JAR RICE COOKER is of direct heating type, when the temperature of inner pot bottom reaches C to 149 C, the thermostat will operate to provide change-over to warm-keeping automatically. - Page 13 Temperature test Based on the temperature testing method explained earlier ensure proper performance for “COOK” and “WARM”. Inner pot to be normally in contact with Outer pot ass’y Outer pot ass’y Inner pot Inner pot Heater plate ass’y Work bench Thermostat ass’y Fig.
-
Page 14: Simplified Testing Method
SIMPLIFIED TESTING METHOD In case satisfactory cooking of rice is not accomplished (excessively overdone), conduct the temperature test in accordance with the following procedure. Simplifi ed Testing Method. (Simulated Rice-Cooking) 1. Testing conditions a. Power voltage 220V. b. Fill inner pot with 80 ml. of water. (Water temperature to be the same as ambient temperature.) c. - Page 15 The time required for the cook switch to be turned OFF is in the values as given in the table below. Model Time KS-18EV / ETV KS-181EV / ETV 10 minutes (approx.) KS-182ETV Note : As this test is nothing but a simplifi...
-
Page 16: Precautions For Warm-Keeping To Get Tasty Rice
PRECAUTIONS FOR WARM-KEEPING TO GET TASTY RICE Help yourself to the tasty rice under the proper use and maintenance of JAR RICE COOKER. Major Trouble Recommended Use and Maintenance Drying Smelling Dewing Sticking (Cautionary Instructions) Discoloring Before cooking, wash rice thoroughly. Take precautions against specifi... -
Page 17: Troubleshooting
TROUBLESHOOTING Those marked with black spots (*) are often confused with troubles. Give the customers proper operating instructions. 1. Trouble during Cooking Problem Possible Cause Corrective Action * Cook switch kept “OFF”. * Cook switch “ON”. Unable to cook. Cook indicator * Disconnected plug. - Page 18 2. Trouble during Warm-keeping (Capable of cooking) Problem Possible Cause Corrective Action * Plugged into the wall outlet. Unable to keep Warm indicator * Disconnected plug. Repair or replace. warm. lamp will not go ON. Faulty micro switch or maladjustment switch assembly.