Table of Contents
Advertisement
Quick Links
Advertisement
Table of Contents

Related Manuals for Grundig Sonoclock 790 DCF


Summary of Contents for Grundig Sonoclock 790 DCF
- Page 1 CLOCK RADIO Sonoclock 790 DCF EN FR...
- Page 2 ___________________________________________________________ SNOOZE -TUNING+ SLEEP RESET AL 1 AL 2 TIME ZONE / WEC HOUR/VOL+ MIN/VOL-...
- Page 3 ___________________________________________________________ DEUTSCH 05 -15 ENGLISH 16 - 26 FRANÇAIS 27 - 37 ITALIANO 38 - 48 РУССКИЙ 49 - 59 ESPAÑOL 60 - 70...
-
Page 4: Safety And Set-Up
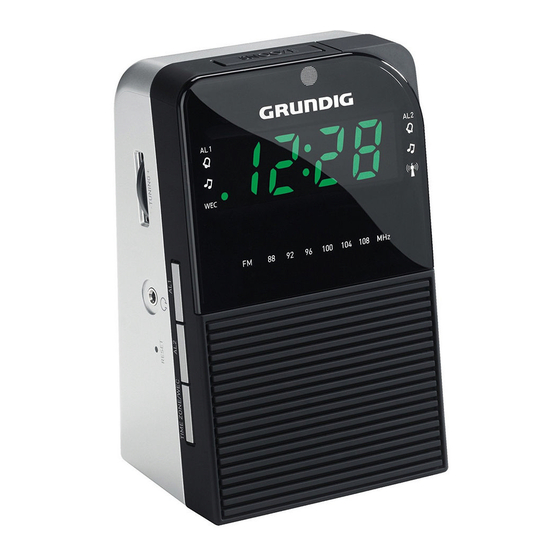
SAFETY AND SET-UP ____________________________ T his device is designed for the N ote, prolonged listen- playback of audio signals. Any ing at loud volumes with other use is expressly prohibited. the earphones can dam- age your hearing. P rotect the device from moisture (water drops or splashes). - Page 5 OVERVIEW ______________________________________ See the figure on page 3. H eadphone jack, to connect head- Controls on the top phones or earphones with a jack SNOOZE plug (ø 3.5 mm). Interrupts the alarm function; displays the day of the week; RESET displays the remaining snooze Resets the device.
- Page 6 OVERVIEW ______________________________________ Controls on the back Displays • Ü Power cord. Automatically adjusts the brightness of the display to the brightness of the surroundings. Wire antenna for FM reception. AL 1 DCF 77- Antenna. Displays that the alarm is activated with a signal tone or radio for alarm Controls on the bottom time 1.
-
Page 7: Power Supply
POWER SUPPLY ________________________________ Mains operation Inserting the back-up Check that the mains voltage on battery the type plate (on the bottom of the During mains operation, the back-up device) corresponds to your local battery ensures that stored settings mains supply. If this is not the case, are not lost in the case of a power contact your specialist dealer. -
Page 8: Radio-Controlled Clock
SETTINGS ________________________________________ Radio-controlled clock The installed microprocessor of the radio-controlled clock processes the With your built-in radio-controlled received time telegrams and controls clock, you are in possession of an the quartz clock fully automatically. absolutely precise alarm and meet- After the clock is first activated, the ing clock which is automatically set DCF synchronisation is performed to the radio-transmitted time signals of... -
Page 9: Setting The Time Zone
SETTINGS ________________________________________ Setting time and day of the Set the day of the week (» « = Monday, » «, » «, » «, » «, » « week or » « = Sunday) using »HOUR/ If the device has been switched on VOL+«... -
Page 10: Setting Alarm Time
SETTINGS ________________________________________ Setting alarm time 2 Note: If a back-up battery has not been Press »SET« three times. inserted, the time is automatically – Display: the last alarm time set, reset by DCF time synchronisa- »AL 2 « and » «... -
Page 11: Operation
OPERATION _____________________________________ Switching on and off Note: If no other button is pressed, the Press » « to switch on the device device switches back automati- from standby mode. cally to the current time after Press » « to switch the device to 10 seconds. - Page 12 OPERATION _____________________________________ Interrupting the alarm Activating the alarm interrup- tion for the weekend Press »SNOOZE« while the ZONE/WEC«. alarm is sounding. Press »TIME – The alarm signal (radio station – Display: the LED »WEC« lights up. or signal tone) stops. –...
-
Page 13: Timer Mode
OPERATION _____________________________________ Timer mode Deactivating the sleep timer To deactivate the sleep timer ear- The device has a sleep timer, which ly, press » «. switches it off in radio mode at a pre- set time. The switch-off time can be set –... -
Page 14: Environmental Note
The declaration of conformity can be uct and battery with normal domes- downloaded at tic waste at the end of its service life. www.grundig.com/downloads/doc. Take it to a collection point for the Power supply: recycling of electrical and electronic 230 V, 50/60 Hz equipment. - Page 15 Grundig Intermedia GmbH Beuthener Strasse 41 90471 Nürnberg www.grundig.com 72011 410 3500 13/08...