Table of Contents
Advertisement
Quick Links
Advertisement
Table of Contents

Related Manuals for Grundig SONOCLOCK 930 IP


Summary of Contents for Grundig SONOCLOCK 930 IP
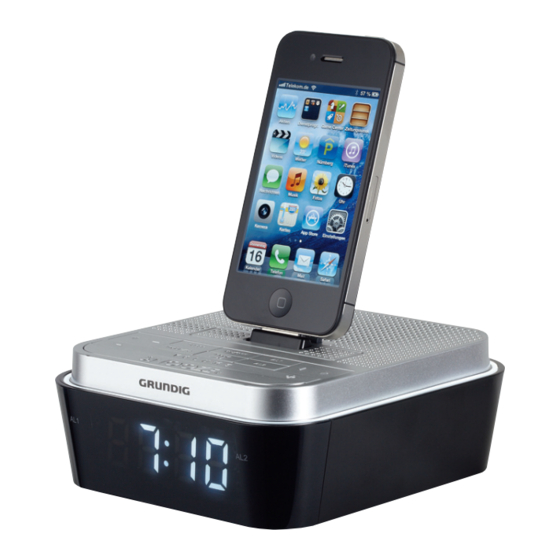
- Page 1 CLOCK RADIO SONOCLOCK 930 IP SONOCLOCK 935 IP...
-
Page 2: Table Of Contents
CONTENTS ---------------------------------------------------------------------------------------------------------------------------------- 3 SET-UPANDSAFETY 4 POWERSUPPLY Insert back-up battery (CR 2032) Mains operation 5 OVERVIEW 7 IPOD/IPHONEMODE Made for iPod/iPhone S upported iPod/iPhone models with SC 930 iP S upported iPod/iPhone models with SC 935 iP Playing the contents of an iPod/iPhone Repeating the current track Selecting another track Searching for a passage within a track 8 RADIOMODE Antenna Switching on/off Selecting the input source S earching for and saving radio stations – automatically S earching for and saving radio stations – manually Selecting stored stations Adjusting the volume Setting the brightness of the display Switch on/off the night light... -
Page 3: Set-Upandsafety
SET-UPANDSAFETY ----------------------------------------------------------------------------------------------- The device is designed for the playback of audio B atteries, including those which do not contain signals. Any other use is expressly prohibited. heavy metal, should not be disposed of with household waste. Always dispose of used bat- P rotect the device from moisture (water drops or teries in accordance with local environmental splashes). Do not place any vessels such as vas- regulations. es on the device. These may be knocked over and spill fluid on the electrical components, thus Never open the device casing. No warranty presenting a safety risk. -
Page 4: Powersupply
POWERSUPPLY --------------------------------------------------------------------------------------------------------------- Insertback-upbattery(CR2032) The back-up battery ensures that the stored settings are not lost in the case of a power failure. Caution: Danger of explosion if battery is incorrect- lyreplaced. Replace only with the same or equivalent type. 1 U nscrew safety bolt of the battery compartment cover panel and remove the cover panel. 2 I nsert the included backup battery with the posi- tive pole facing upwards. 3 C lose the battery compartment cover panel and screw in the safety bolt. Mainsoperation Check that the mains voltage on the type plate cor- responds to your local mains supply. If this is not the case, contact your specialist dealer. 1 I nsert the plug of the supplied power adapter 2A« socket. -
Page 5: Overview
OVERVIEW - --------------------------------------------------------------------------------------------------------------------------------- o p SLEEP ON/OFF AL1 MODE/ PROG II iPoddock AL2 r e DC5V > –VOLUME+ SNOOZE BATTERY ANTENNA 7 : 10 § § 5... - Page 6 OVERVIEW - --------------------------------------------------------------------------------------------------------------------------------- iPoddock –VOLUME+ C hanges the volume. T o connect an iPod/iPhone. SNOOZER I nterrupts the alarm signal. Choose program places. S witches on/off the appliance SLEEP A ctivates the sleep timer; lighting (nightlight). displays the switch-off time. AL1AL2 L ight display; the alarm standby ON/OFF S witches the appliance on from for alarm time 1 or 2 is activated. stand-by; s witches the appliance to stand- BATTERY B attery compartment for the back-up battery. AL1AL2 P ress and hold down: activates 7 : 10 S hows the time, the alarm time, the alarm setting;...
-
Page 7: Ipod/Iphonemode
IPOD/IPHONEMODE ------------------------------------------------------------------------------------------ MadeforiPod/iPhone SupportediPod/iPhonemodels withSC935iP The software is made to support the following iPod/iPhone models: – iPhone 5 – iPod touch (5th Generation) “Made for iPod/iPhone” means that an electronic – iPod nano (7th Generation) accessory has been designed to connect specifi- cally to an iPod/iPhone, and has been certified by PlayingthecontentsofaniPod/ the developer to meet Apple performance stand- iPhone ards. Apple is not responsible for the operation of 1 Connect your iPod/iPhone into the »iPoddock« this device or its compliance with safety and regu- until it latches into its place. latory standards. iPhone, iPod, iPod classic, iPod nano, iPod shuffle, 2 Switch on the device from stand-by mode by and iPod touch are trademarks of Apple Inc., reg- pressing »ON/OFF«. -
Page 8: Radiomode
RADIOMODE ------------------------------------------------------------------------------------------------------------------------ Antenna Settingthebrightnessofthe display For the best FM (UHF) reception it is suffcient to 1 In Stand-by adjust the brightness in four levels align the wire antenna accordingly. with »MODE/ «. Switchingon/off Switchon/offthenightlight 1 Switch the device from standby with »ON/ OFF«. 1 Switch on/off the lighting with »SNOOZER«. 2 Switch the device to standby with »ON/OFF«. Selectingtheinputsource 1 Select the input source with »MODE/ «. -
Page 9: Timermode
TIMERMODE -------------------------------------------------------------------------------------------------------------------------- Settingthetime Interruptingthealarm 1 Press »SNOOZER« while the alarm is sound. 1 Switch the device to standby with »ON/OFF«. – T he alarm signal (radio station or signal) stops 2 Press and hold »PROG II« to activate the set- and the Wake Up Light disappear. ting. – T he alarm signal goes on again at nine-minute – D isplay: The hour flashes. intervals. 3 Press » « or » « to set the hours and press Cancellingthealarm »PROG II« to confirm the setting. 1 Press »ON/OFF« while the alarm is sound. – D isplay: The minutes flashes. 4 Press » « or »... -
Page 10: Information
INFORMATION - ----------------------------------------------------------------------------------------------------------------- Technicaldata Environmentalnote This device is noise–suppressed This product has been made from according to the applicable EU high-quality parts and materials directives. which can be re-used and recy- cled. This product fulfils the European directives 2004/108/EC, 2006/95/EC, Therefore, do not throw the prod- 2009/125/EC and 2011/65/EU. uct away with normal household waste at the end of its service life. Take it to a collection point for Powersupply: recycling electrical and electronic devices. This is Power adapter 100 – 240V ~ , 50/60Hz,... - Page 11 Grundig Intermedia GmbH Beuthener Strasse 41 90471 Nürnberg www.grundig.com 72011 412 2100 13/37...