Table of Contents
Advertisement
Available languages
Available languages
Quick Links
Istruzioni per l'uso
IT
GB
English,13
Italiano, 1
ES
PT
Espanol, 35
Portuges, 46
NL
Nederlands, 68
MH 99.1 /HA
MH 99.1 IX/HA
Sommario
FR
Installazione, 2-3
Français, 24
DE
Display
Deutsch, 57
Avvio e utilizzo, 5-9
Sostituire la lampadina di illuminazione del forno
Assistenza, 12
FORNO
IT
Advertisement
Chapters
Table of Contents

Related Manuals for Hotpoint MH 99.1/HA


Summary of Contents for Hotpoint MH 99.1/HA
-
Page 1: Table Of Contents
Istruzioni per l’uso FORNO Sommario Installazione, 2-3 English,13 Français, 24 Italiano, 1 Descrizione dell’apparecchio, 4 Vista d’insieme Pannello di controllo Display Deutsch, 57 Espanol, 35 Portuges, 46 Avvio e utilizzo, 5-9 Impostare l’orologio Impostare il contaminuti Uso del forno Nederlands, 68 Programmi di cottura manuali Programmi di cottura automatici Programmare la cottura... -
Page 2: Installazione
Installazione Importante: qualsiasi intervento di regolazione, manutenzione etc. deve essere eseguito con il forno elettricamente disinserito. Installazione dei forni da incasso Per garantire un buon funzionamento dell'apparec- chio da incasso è necessario che il mobile sia di caratteristiche adatte. Nella figura vengono riportate le dimensioni del vano del mobile nell'inserimento sottotavolo. - Page 3 prolunghe conformi alle vigenti norme di sicurezza, facendo però attenzione a non superare il limite di portata in valore di corrente, marcato sull’adattatore semplice e sulle prolunghe, e quello di massima potenza marcato sull’adattatore multiplo. ! ! ! ! ! Ad apparecchio installato, il cavo elettrico e la presa della corrente devono essere facilmente raggiungibili.
-
Page 4: Descrizione Dell'apparecchio
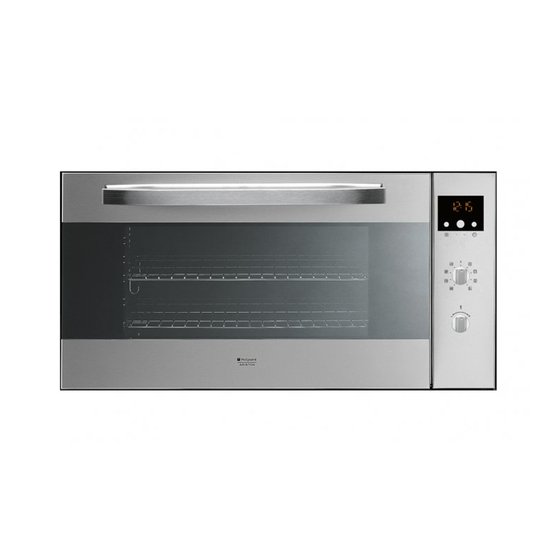
Descrizione dell’apparecchio Vista d’insieme Vetro porta forno Cruscotto comandi Pannello di controllo DISPLAY Tasto Tasto LUCE IMPOSTAZIONE TEMPI Manopola IMPOSTAZIONE TEMPI Manopola PROGRAMMI Manopola TERMOSTATO Display Icone PROGRAMMI Indicatore del Preriscaldamento AUTOMATICI Digit numerici TEMPERATURA Icona del ripiano e TEMPI di cottura consigliato Icona OROLOGIO... -
Page 5: Avvio E Utilizzo
Avvio e utilizzo Impostare l’orologio 4. Il DISPLAY visualizza l’icona che consiglia il livello sul quale posizionare la teglia. ! Si può impostare sia quando il forno è spento che 5. Durante la cottura è sempre possibile: quando è acceso, ma non si è programmata la fine - modificare il programma di cottura agendo sulla di una cottura. -
Page 6: Programmi Di Cottura Manuali
Programmi di cottura manuali prima guida più bassa del forno; infilare ora l’asta nel foro del girarrosto, portando in avanti la gola nella ! Tutti i programmi hanno una temperatura di cottura sede “D” “D” “D” “D” “D” ( vedi figure ). Azionare il girarrosto preimpostata. -
Page 7: Programmare La Cottura
secchi. Mettere l’insalatiera nel forno alla funzione Programma DOLCI manuale BASSA TEMPERATURA a 40°C e Questa funzione è ideale per la cottura di dolci sia a lasciar lievitare per circa 1 ora (il volume base di lievito naturale, sia a base di lievito chimico dell’impasto deve raddoppiare) e senza lievito.Infornare a forno freddo. -
Page 8: Consigli Pratici Di Cottura
• Esempio: sono le ore 9:00, viene programmata PIZZA una durata di 1 ora e 15 minuti e le 12:30 come ora di fine. Il programma inizia automaticamente • Utilizzare una teglia in alluminio leggero, alle ore 11:15. appoggiandola sulla griglia in dotazione. Con la leccarda si allungano i tempi di cottura Le icone accese segnalano che è... -
Page 9: Tabella Cottura In Forno
Tabella cottura in forno Programmi Alimenti Peso Posizione Preriscaldamento Temperatura Durata (Kg) dei ripiani consigliata cottura (˚C) (minuti) guide guide standard scorrevoli Multilivello* Pizza su 2 ripiani 2 e 4 1 e 3 220-230 20-25 Crostate su 2 ripiani/torte su 2 ripiani 2 e 4 1 e 3 30-35... -
Page 10: Precauzioni E Consigli
Precauzioni e consigli ! L’apparecchio è stato progettato e costruito in • Evitare che i bambini giochino con l'apparecchio. conformità alle norme internazionali di sicurezza. • L'apparecchio non è destinato a essere messo in Queste avvertenze sono fornite per ragioni di sicurezza e funzione per mezzo di un temporizzatore esterno devono essere lette attentamente. -
Page 11: Manutenzione E Cura
Manutenzione e cura Escludere la corrente elettrica Controllare le guarnizioni Prima di ogni operazione isolare l’apparecchio dalla Controllare periodicamente lo stato della guarnizione rete di alimentazione elettrica. attorno alla porta del forno. In caso risulti danneggiata rivolgersi al Centro Assistenza più Pulire l’apparecchio vicino ( vedi Assistenza ). -
Page 12: Assistenza
Assistenza Attenzione: L’apparecchio è dotato di un sistema di diagnostica automatica che consente di rilevare eventuali malfunzionamenti. Questi vengono comunicati dal display tramite messaggi del tipo: “F” seguito da numeri. In questi casi è necessario l’intervento dell’assistenza tecnica. ! Non ricorrere mai a tecnici non autorizzati. Comunicare: •... - Page 13 Operating Instructions OVEN Contents Installation, 14-15 Italiano, 1 Français, 24 English,13 Description of the appliance, 16 Overall view Control panel Display Espanol, 35 Portuges, 46 Deutsch, 57 Start-up and use, 17-21 Setting the clock Setting the timer Using the oven Nederlands, 68 Manual cooking modes Automatic cooking modes...
-
Page 14: Installation
Installation Important Important Important: The power supply to the appliance must Important Important be cut off before any adjustments or maintenance work is done on it. Installation of Built-in Ovens To ensure the proper working order of the built-in appliance, the kitchen unit must be of a suitable size. The sizes of the unit for installing the cooker under a worktop or in a column unit are shown in figure. - Page 15 current safety regulations. In these cases, never exceed the maximum current capacity indicated on the single adapter or extension and the maximum power indicated on the multiple adapter. ! Once the appliance has been installed, the power supply cable and the electrical socket must be easily accessible.
-
Page 16: Description Of The Appliance
Description of the appliance Overall view Glass oven door Control panel Control panel DISPLAY LIGHT TIME SETTING button button TIMER knob SELECTOR Knob THERMOSTAT knob Display AUTOMATIC COOKING Preheating indicator MODE icons TEMPERATURE and Recommended rack TIME digits position icon CLOCK icon END OF COOKING... -
Page 17: Start-Up And Use
Start-up and use The temperature may be changed by turning the Setting the clock THERMOSTAT knob ! The clock may be set when the oven is switched 3. When the preheating indicator switches off and a buzzer sounds the preheating process is off or when it is switched on, provided that a the end complete: you may now place the food in the oven. -
Page 18: Manual Cooking Modes
Manual cooking modes rack in the lowest position in the oven; next position the rod in the rotisserie spit hole, sliding the groove ! All cooking modes have a default cooking forwards to slot "D D D D D " (see figures). Start the rotisserie temperature which may be adjusted manually using the SELECTOR knob set to cooking mod between 40°C and 250°C as desired. -
Page 19: Programming Cooking
until it has a uniform consistency and is not too BAKING mode sticky. This function is ideal for cooking desserts which are • Form the dough into a ball shape, place it in a made using natural yeast, baking powder and large bowl and cover it with transparent plastic desserts which contain no yeast. -
Page 20: Practical Cooking Advice
BARBECUE 6. Press the button again to confirm; 7. When the set time has elapsed, the text END • Place the rack in position 3 or 4. Position the food appears on the DISPLAY, the oven will stop cooking in the centre of the rack. and a buzzer sounds. -
Page 21: Oven Cooking Advice Table
Oven cooking advice table Cooking Foods Weight Weight Preheating Recommended Cooking modes (Kg) (Kg) temperature duration (˚C) (minutes) standard sliding guide rails guide rails Multilivel* Pizza on 2 racks 2 and 4 1 and 3 220-230 20-25 Pies on two racks/cakes on 2 racks 2 and 4 1 and 3 30-35... -
Page 22: Precautions And Tips
Precautions and tips ! This appliance has been designed and manufactured safety or receive preliminary instructions relating to in compliance with international safety standards. the operation of the appliance. The following warnings are provided for safety reasons • Do not let children play with the appliance. and must be read carefully. -
Page 23: Care And Maintenance
Care and maintenance Switching the appliance off Inspecting the seals Check the door seals around the oven periodically. If Disconnect your appliance from the electricity the seals are damaged, please contact your nearest supply before carrying out any work on it. After-sales Service Centre (see Assistance). - Page 24 Mode d’emploi FOUR Sommaire Installation, 25-26 Italiano, 1 English,13 Français, 24 Description de l’appareil, 27 Vue d’ensemble Tableau de bord Afficheur Espanol, 35 Portuges, 46 Deutsch, 57 Mise en marche et utilisation, 28-32 Mise à l’heure de l’horloge Programmer la minuterie Utilisation du four Nederlands, 68 Programmes de cuisson manuels...
-
Page 25: Installation
Installation Important: débranchez le four avant de procéder à toute opération de réglage, d'entretien etc. Installation des fours à encastrer En vue du bon fonctionnement du four encastré, le meuble doit avoir des carattéristiques adéquates. La figure indique les dimensions du meuble pour l'encastrement sous-plan et en hauteur. - Page 26 et des rallonges conformes aux normes de sécurité, tout en veillant à ne pas dépasser la limite de la charge électrique indiquée sur l’adaptateur simple ou sur les rallonges et la puissance max. indiquée sur l’adaptateur multiple. ! Après installation de l’appareil, le câble électrique et la prise de courant doivent être facilement accessibles ! Le câble ne doit être ni plié...
-
Page 27: Description De L'appareil
Description de l’appareil Vue d’ensemble Vitre porte du four Bandeau de commandes Tableau de bord Afficheur Bouton Bouton ECLAIRAGE SELECTION TEMPS Manette SELECTION TEMPS Manette PROGRAMMES Manette THERMOSTAT Afficheur... -
Page 28: Mise En Marche Et Utilisation
Mise en marche et utilisation Mise à l’heure de l’horloge 3. L’extinction de l’indicateur de préchauffage et le déclenchement du signal sonore indiquent la fin ! Son réglage est possible que le four soit éteint ou du préchauffage : il est temps d’enfourner les plats. allumé... -
Page 29: Programmes De Cuisson Manuels
Programmes de cuisson manuels Brancher le tournebroche en amenant le sélecteur PROGRAMMES sur ! Tous les programmes ont une température de cuisson présélectionnée. Il est possible de la régler manuellement, entre 40°C et 250°C au choix. Pour le programme BARBECUE la valeur présélectionnée est un niveau de puissance exprimé... -
Page 30: Comment Programmer Une Cuisson
• Mélanger et pétrir jusqu’à obtenir une pâte Programme GÂTEAUX homogène et peu collante, l’étirer avec la paume Cette fonction est ce qu’il y a de mieux pour la de la main et la replier sur elle-même pendant 10 cuisson de gâteaux à base de levure de boulanger, minutes. -
Page 31: Conseils De Cuisson
Conseils de cuisson 4. appuyer à nouveau sur la touche jusqu’à ce que les deux autres digits numériques de ! Pour les cuissons ventilées ne pas utiliser les l’AFFICHEUR se mettent à clignoter ; gradins 1et 5 : ils sont directement frappés par l’air 5. -
Page 32: Tableau De Cuisson Au Four
Tableau de cuisson au four Programmes Aliments Poids Poids Préchauffage Température Durée (Kg) (Kg) préconisée cuisson (˚C) (minutes) glissières glissières standard coulissantes Multiniveaux* Pizza sur 2 niveaux 2 et 4 1 et 3 220-230 20-25 Tartes sur 2 niveaux/gâteaux sur 2 niveaux 2 et 4 1 et 3 30-35... -
Page 33: Précautions Et Conseils
Précautions et conseils ! Cet appareil a été conçu et fabriqué conformément aux • S'assurer que les enfants ne jouent pas avec normes internationales de sécurité. l'appareil. Ces consignes de sécurité sont très importantes et Le dispositif n'est pas destiné à être mis en œuvre Le dispositif n'est pas destiné... -
Page 34: Nettoyage Et Entretien
Nettoyage et entretien Mise hors tension Contrôle des joints Avant toute opération de nettoyage ou d’entretien Contrôlez périodiquement l’état du joint autour de la coupez l’alimentation électrique de l’appareil. porte du four. S’il est abîmé, adressez-vous au service après-vente le plus proche de votre domicile Nettoyage de l’appareil (voir Assistance). - Page 35 Manual de instrucciones HORNO Sumario Instalación, 36-37 Italiano, 1 English,13 Français, 24 Descripción del aparato, 38 Vista de conjunto Panel de control Display Portuges, 46 Deutsch, 57 Espanol, 35 Puesta en funcionamiento y uso, 39-43 Puesta en hora del reloj Programar el cuentaminutos Uso del horno Nederlands, 68...
-
Page 36: Instalación
Instalación Importante: Importante: Importante: cualquier intervención de regulación, Importante: Importante: mantenimiento etc. se debe realizar con el horno eléctricamente desconectado. Instalación de los hornos empotrables Instalación de los hornos empotrables Instalación de los hornos empotrables Instalación de los hornos empotrables Instalación de los hornos empotrables Para garantizar el correcto funcionamiento del aparato empotrable, es necesario que el mueble... - Page 37 de corriente marcado en el adaptador simple y en las prolongaciones, y el de máxima potencia marcado en el adaptador múltiple. ! Una vez instalado el aparato, el cable eléctrico y la toma de corriente deben ser fácilmente accesibles. ! El cable no debe doblarse ni comprimirse. ! El cable debe ser revisado periódicamente y sustituido sólo por técnicos autorizados (ver Asistencia).
-
Page 38: Descripción Del Aparato
Descripción del aparato Vista de conjunto Cristal puerta forno Cuadro de mandos Panel de control DISPLAY Botón Botón LUZ DEL HORNO FIJACIÓN DE TIEMPOS Mando de FIJACIÓN DE TIEMPOS Mando PROGRAMAS Mando TERMOSTATO Display Indicador de Iconos de PROGRAMAS AUTOMÁTICOS Precalentamiento Cifras TEMPERATURA Icono del nivel de... -
Page 39: Puesta En Funcionamiento Y Uso
Puesta en funcionamiento y uso Puesta en hora del reloj 3. Cuando se apaga el indicador de precalentamiento y se escucha una señal ! Se puede realizar con el horno encendido o sonora, el precalentamiento ha finalizado: introduzca apagado, pero no, si se ha programado el final de los alimentos. -
Page 40: Programas De Cocción Manuales
Programas de cocción manuales varilla en el orificio del asador automático, llevando hacia adelante la ranura en el asiento ''D D D D D '' (ver ! Todos los programas tienen una temperatura de figuras). Accione el asador automático cocción prefijada. La misma se puede modificar seleccionando con el mando PROGRAMAS manualmente eligiendo un valor entre 40°C y 250°C. -
Page 41: Programar La Cocción
Proceso: Programa PAN • Mezcle la harina y la sal en un recipiente grande. Utilice esta función para cocinar pan. Consulte el capítulo • Diluya la levadura en el agua ligeramente tibia siguiente para conocer la receta y los detalles. (aproximadamente 35 grados). -
Page 42: Consejos Prácticos Para Cocinar
Consejos prácticos para cocinar 3. gire el mando de FIJACIÓN DE TIEMPOS hacia “+” y “-” para regular la hora; ! En las cocciones ventiladas no utilice las 4. presione de nuevo el botón hasta que centelleen posiciones 1 y 5: son las que reciben directamente los otros dos números en el DISPLAY;... -
Page 43: Tabla De Cocción En El Horno
Tabla de cocción en el horno Programas Alimentos Peso Posición de las Pre-calentamiento Temperatura Duración (Kg) bandejas (Kg) aconsejada de la (˚C) cocción guías guías (minutos) estándar deslizables Multinivel* Pizza en 2 niveles 2 y 4 1 y 3 220-230 20-25 Tortas glaseadas en 2 niveles/tortas en 2 niveles... -
Page 44: Precauciones Y Consejos
Precauciones y consejos ! El aparato ha sido proyectado y fabricado en conformidad • Evitar que los niños jueguen con el aparato. con las normas internacionales sobre seguridad. • El aparato no se debe poner en funcionamiento a El aparato no se debe poner en funcionamiento a El aparato no se debe poner en funcionamiento a El aparato no se debe poner en funcionamiento a El aparato no se debe poner en funcionamiento a... -
Page 45: Mantenimiento Y Cuidados
Mantenimiento y cuidados Cortar el suministro eléctrico Controle las juntas Antes de realizar cualquier operación, desconecte el Controle periódicamente el estado de la junta que rodea la aparato de la red de alimentación eléctrica. puerta del horno. Si se encontrara dañada llame al Centro de Asistencia Técnica más cercano (ver Asistencia). - Page 46 Instruções de utilização FORNO Índice Instalação, 47-48 Italiano, 1 English,13 Français, 24 Descrição do aparelho, 49 Vista de conjunto Painel de comandos Display Espanol, 35 Deutsch, 57 Portuges, 46 Início e utilização, 50-54 Acertar o relógio Programe o contador de minutos Utilização do forno Nederlands, 68 Programas de cozedura manuais...
-
Page 47: Instalação
Instalação Importante: Importante: Importante: Importante: qualquer operação de regulação, Importante: manutenção etc., deve ser efectuada com o forno desligado da corrente eléctrica. Instalação dos fornos de encaixe Para garantir um bom funcionamento do aparelho de encastrar é necessário que o móvel tenha as dimensões adequadas. - Page 48 conformes às normas de segurança em vigor, porém tome cuidado para não ultrapassar o limite de capacidade da corrente, indicado no adaptador simples e nas extensões, nem o limite de potência máxima indicado no adaptador múltiplo. ! ! ! ! ! Depois de ter instalado o aparelho, o acesso ao cabo eléctrico e à...
-
Page 49: Descrição Do Aparelho
Descrição do aparelho Vista de conjunto Vidro da porta do forno Painel de comandos Painel de comandos DISPLAY Tecla Teclas de PROGRAMAÇÃO dos TEMPOS LUZ do FORNO Selector de PROGRAMAÇÃO dos TEMPOS Selector PROGRAMAS Selector do TERMÓSTATO Display Ícone de Indicador de PROGRAMAS AUTOMÁTICOS Pré-aquecimento... -
Page 50: Início E Utilização
Início e utilização Acertar o relógio 4. No DISPLAY aparecerá o ícone a aconselhar o nível para colocar a forma. ! Pode-se configurar, quando o forno estiver 5. Durante a cozedura é sempre possível: apagado, ou mesmo quando estiver aceso, mas não - modificar o programa de cozedura mediante o programar o fim de uma cozedura. -
Page 51: Programas De Cozedura Manuais
Programas de cozedura manuais na sede ''C'' e enfie a grade no primeiro trilho mais em baixo do forno; em seguida enfie a haste no furo ! Todos os programas têm uma temperatura de do espeto rotativo, a levar o gargalo para a frente na cozedura predefinida. -
Page 52: Programação Da Cozedura
• Abra a farinha. Programa deBOLOS • Deite a mistura de água e lêvedo. Esta função é ideal para a cozedura de doces à • Amasse até obter uma massa homogénea e base de lêvedo natural, químico e sem lêvedo. pouco pegajosa, alisando-a com a palma da mão Enfornar a frio. -
Page 53: Conselhos Práticos Para A Cozedura
Conselhos práticos para a cozedura 5. rodar o selector de CONFIGURAÇÃO de TEMPOS para “+” ou “-” para regular os minutos; ! Nas cozeduras ventiladas não utilize as posições 1 6. premir outra vez a tecla para confirmar. e 5: que recebem directamente ar quente porque 7. -
Page 54: Tabela De Cozedura No Forno
Tabela de cozedura no forno Programas Alimentos Peso Posição Pré-aquecimento Temperatura Duração (Kg) das prateleiras aconselhada (˚C) cozedura Guias Guias (minutos) padrão corrediças Multinível Pizza em 2 prateleiras 2 e 4 1 e 3 220-230 20-25 Tortas doces em duas prateleiras/bolos 2 e 4 1 e 3 30-35... -
Page 55: Precauções E Conselhos
Precauções e conselhos ! Este aparelho foi projectado e fabricado em conformidade • O aparelho não é destinado a ser colocado em O aparelho não é destinado a ser colocado em O aparelho não é destinado a ser colocado em O aparelho não é... -
Page 56: Manutenção E Cuidados
Manutenção e cuidados Desligar a corrente eléctrica • Mantenha a porta inteiramente aberta, desenganche as 2 alavancas “B” para baixo e, Antes de realizar qualquer operação, desligue o em seguida feche a porta. aparelho da alimentação eléctrica. Verificação das guarnições Limpeza do aparelho Verifique periodicamente o estado da guarnição ao •... - Page 57 Bedienungsanleitung BACKOFEN Inhaltsverzeichnis Installation, 58-60 Italiano, 1 English,13 Français, 24 Beschreibung des Gerätes, 61 Geräteansicht Bedienfeld Display Espanol, 35 Portuges, 46 Deutsch, 57 Inbetriebsetzung und Gebrauch, 62-66 Einstellung der Uhr Einstellung des Kurzzeitweckers Gebrauch des Backofens Nederlands, 68 Manuelle Garprogramme Automatik-Garprogramme Garzeit-Programmierung Praktische Back-/Brathinweise...
-
Page 58: Installation
Installation Wichtig: Wichtig: Vor jeder Einstellung, Wartung usw. ist der Wichtig: Wichtig: Wichtig: Backofen vom Stromnetz zu trennen. Installation der Einbaubacköfen Um einen einwandfreien Betrieb des Einbaugerätes zu gewährleisten, muß der Umbauschrank geeignete Merk-male aufweisen. Auf Abbildung sind die Abmessungen des Um-bauschrankes in der Version Unterbau angegeben. - Page 59 daß die auf dem Einfachadapter und den Verlängerungen angegebene Stromleistungsgrenze und die auf dem Vielfachadapter angegebene Höchstleistungsgrenze nicht überschritten wird. ! Das Netzkabel und die Steckdose müssen bei installiertem Gerät leicht zugänglich sein. ! Das Netzkabel darf nicht gebogen oder eingeklemmt werden.
-
Page 60: Beschreibung Des Gerätes
Beschreibung des Gerätes Geräteansicht Backofentürfenster Schalterblende Bedienfeld DISPLAY Taste Backofenbeleuchtung ZEITEINSTELLUNG Drehknopf ZEITEINSTELLUNG Reglerknopf PROGRAMME Reglerknopf THERMOSTAT Display VORHEIZZEIT-Anzeige Symbol Automatik-Garprogramme Empfohlene 4-Digit-Anzeige Einschubhöhe TEMPERATUR und ZEITEN Symbol Symbol GARZEITENDE Symbol Symbol KURZZEITWECKER DAUER... -
Page 61: Inbetriebsetzung Und Gebrauch
Inbetriebsetzung und Gebrauch Einstellung der Uhr 3. Sobald die Vorheizzeit-Anzeige erlischt, ertönt ein akustisches Signal. Die Vorheizzeit ist abgelaufen: ! Die Uhr kann bei ausgeschaltetem und auch bei Gargut in den Backofen geben. eingeschaltetem Backofen eingestellt werden, 4. Das DISPLAY zeigt die Ikone , eine Empfehlung jedoch nicht, wenn das Ende einer Garzeit hinsichtlich der Ebene, auf der das Backblech... -
Page 62: Manuelle Garprogramme
Manuelle Garprogramme Spießstange in die Öffnung der Antriebswelle stecken und an ihrer Aussparung in den Sitz C ! Für alle Programme ist eine Gartemperatur einlegen. voreingestellt. Diese kann von Hand auf einen beliebigen Durch Drehen des Reglerknopfes auf die Position Wert zwischen 40°C und 250°C verändert werden. -
Page 63: Garzeit-Programmierung
klebriger Teig entsteht. Plätten Sie hierfür den Teig mit Programm KUCHEN dem Handballen und kneten Sie ihn dann wieder Diese Funktion ist ideal zum Backen von Kuchen mit zusammen (für ca. 10 Minuten). Natur- oder chem. Hefe, oder ohne Hefe. Es kann •... -
Page 64: Praktische Back-/Brathinweise
5. Drehen Sie den Knopf ZEITEINSTELLUNG in Richtung Praktische Back-/Brathinweise “+” und “-” , um die Minuten einzustellen. ! Verwenden Sie beim Heißluftgaren nicht die 6. Drücken Sie erneut die Taste , um die Eingabe zu Einschubhöhen 1 und 5: sie sind der Heißluft zu direkt bestätigen;... -
Page 65: Tabelle Garen Im Backofen
Tabelle Garen im Backofen Programme Speisen Gew. (kg) Einschubhöhe Vorheizen Empfohlene Garzeit-Dauer Temperatur (Minuten) (°C) Standard- Gleitschienen Führungen Echte Heißluft* Pizza auf 2 Ebenen 2 e 4 1 e 3 220-230 20-25 Torten auf 2 Ebenen 2 e 4 1 e 3 30-35 Biskuitböden auf 2 Ebenen (auf Backblech) 2 e 4... -
Page 66: Vorsichtsmaßregeln Und Hinweise
Vorsichtsmaßregeln und Hinweise ! Das Gerät wurde entsprechend den strengsten • Stellen Sie bitte keine schweren Gegenstände auf der internationalen Sicherheitsvorschriften entworfen und geöffneten Backofentür ab. gebaut. Nachstehende Hinweise werden aus • Das Gerät ist nicht zur Verwendung durch Personen Sicherheitsgründen geliefert und sollten aufmerksam (einschließlich Kinder) mit eingeschränkten körperlichen, gelesen werden. -
Page 67: Reinigung Und Pflege
Reinigung und Pflege Abschalten Ihres Gerätes vom Stromnetz Vor jeder Reinigung und Pflege ist das Gerät vom Stromnetz zu trennen. Reinigung des Gerätes • Die emaillierten oder aus Edelstahl gefertigten Außenteile des Gerätes sowie die Gummidichtungen können mit einem mit lauwarmem Wasser und einem neutralen Reinigungsmittel getränkten Schwamm gereinigt werden. - Page 68 Gebruiksaanwijzing OVEN Samenvatting Het installeren, 69-70 Italiano, 1 English,13 Français, 24 Beschrijving van het apparaat, 71 Algemeen aanzicht Bedieningspaneel Display Deutsch, 57 Espanol, 35 Portuges, 46 Starten en gebruik, 72-76 De klok instellen De timer instellen Gebruik van de oven Nederlands, 68 Handmatige kookprogramma’s Automatische kookprogramma’s...
-
Page 69: Het Installeren
Het installeren Belangrijk: sluit altijd eerst de stroom af voordat u overgaat tot regelen, onderhoud enz. Het installeren van de inbouwoven Teneinde het goed functioneren van het apparaat te garanderen moet het meubel de juiste kenmerken hebben. In afbeelding zijn de afmetingen aangegeven van de uitsparing in het meubel voor inbouw onder de aanrecht. - Page 70 echter op de vermogensgrens van de stroom niet te overschrijden zoals deze is aangegeven op de enkele adapter en op de verlengsnoeren, en het maximum vermogen aangegeven op de meervoudige adapter. ! ! ! ! ! Wanneer het apparaat geïnstalleerd is, moeten de elektrische kabel en de contactdoos gemakkelijk te bereiken zijn.
-
Page 71: Beschrijving Van Het Apparaat
Beschrijving van het apparaat Algemeen aanzicht Ruit van ovendeur Bedieningspaneel Bedieningspaneel DISPLAY Toets Ovenverlichting INSTELLEN TIJDEN Knop INSTELLEN TIJDEN PROGRAMMAKNOP THERMOSTAATKNOP Display Symbolen AUTOMATISCHE Aanwijzer van de PROGRAMMA'S voorverwarming Cijfers TEMPERATUREN Symbool van het en TIJDEN aangeraden kookvlak Symbool KLOK Symbool EINDE BEREIDING Symbool... -
Page 72: Starten En Gebruik
Starten en gebruik ! Vóór gebruik is het strikt noodzakelijk het plastic van de voorverwarming gaat aan. folie aan de zijkanten van het apparaat te De temperatuur kan veranderd worden door te verwijderen. draaien aan de THERMOSTAATKNOP. 3. Als de aanwijzer van de voorverwarming De klok instellen uitgaat en u een geluidssignaal hoort, is de voorverwarming compleet: zet de etenswaren in de... -
Page 73: Handmatige Kookprogramma's
Handmatige kookprogramma’s onderste stand van de oven; steek de spitstaaf in het gat van de as van de motor met de nek op de ! Alle programma’s hebben een vooringestelde plaats C C C C C . kooktemperatuur. Deze kan handmatig worden Stel de motor in werking door de keuzeknop op de aangepast,en naar wens worden ingesteld tussen de 40°C positie grill... -
Page 74: De Bereiding Programmeren
voorkomen dat de buitenkant ervan uitdroogt. Doe Programma CAKE de slakom in de oven op de handmatige functie Deze functie is ideaal voor het bereiden van zowel taarten LAGE TEMPERATUUR op 40°C en laat het met bakkersgist als met gedroogde gist, of zonder gist. ongeveer 1 uur lang rijzen (het volume van het Plaats het gerecht in de koude oven. -
Page 75: Praktische Kooktips
7. als de ingestelde duur is verstreken verschijnt op het DISPLAY het woord END, beëindigt de oven de bereiding en klinkt een geluidssignaal. • B.v.: het is 9:00 uur, u programmeert een duur van 1 uur en 15 minuten en de eindtijd om 12:30. Het programma zal automatisch om 11:15 beginnen. -
Page 76: Kooktabel Oven
Kooktabel oven Programma's Gerechten Gewicht Roosterstanden Voorverwarmen Aanbevolen Duur (kg) temperatuur bereiding (°C) (minuten) standaard verschuifbar geleiders e geleiders Multilevel* Pizza op 2 roosters 2 e 4 1 e 3 220-230 20-25 Taarten op 2 roosters 2 e 4 1 e 3 30-35 Cake op 2 roosters (op lekplaat) 2 e 4... -
Page 77: Voorzorgsmaatregelen En Advies
Voorzorgsmaatregelen en advies ! Dit apparaat voldoet aan de geldende • Plaats geen zware voorwerpen op de open internationale veiligheidsvoorschriften. Deze ovendeur. aanwijzingen zijn geschreven voor uw veiligheid en u • Dit apparaat mag niet worden gebruikt door dient ze derhalve goed door te nemen. personen (kinderen inbegrepen) met een beperkt lichamelijk, sensorieel of geestelijk vermogen of Algemene veiligheidsmaatregelen... -
Page 78: Onderhoud En Verzorging
Onderhoud en verzorging De elektrische stroom afsluiten • Houd de deur geheel open, zet de 2 hendeltjes “B” omlaag en sluit de deur. Sluit altijd eerst de stroom af voordat u tot enige handeling overgaat. Controleer de afdichtingen Schoonmaken van de oven Controleer regelmatig de staat van de afdichting rondom de ovendeur. - Page 80 11/2010 - 195083143.03 XEROX FABRIANO...