Riello RL 70/M Installation, Use And Maintenance Instructions
Light oil burners
Hide thumbs
Also See for RL 70/M:
- Installation, use and maintenance instructions (88 pages) ,
- Installation, use and maintenance instructions (28 pages) ,
- Installation, use and maintenance instructions (52 pages)
Table of Contents
Advertisement
Available languages
Available languages
Quick Links
Istruzioni per installazione, uso e manutenzione
Installation, use and maintenance instructions
Bruciatori di gasolio
I
GB
Light oil burners
Funzionamento bistadio progressivo o modulante
Progressive two-stage or modulating operation
CODICE - CODE
3477022
3477023
3477222
3477223
3477422
3477423
MODELLO - MODEL
RL 70/M
RL 70/M
RL 100/M
RL 100/M
RL 130/M
RL 130/M
TIPO - TYPE
669 T1
669 T1
670 T1
670 T1
671 T1
671 T1
2915754 (9) - 10/2016
Advertisement
Chapters
Table of Contents

Related Manuals for Riello RL 70/M


Summary of Contents for Riello RL 70/M
- Page 1 Bruciatori di gasolio Light oil burners Funzionamento bistadio progressivo o modulante Progressive two-stage or modulating operation CODICE - CODE MODELLO - MODEL TIPO - TYPE 3477022 RL 70/M 669 T1 3477023 RL 70/M 669 T1 3477222 RL 100/M 670 T1...
-
Page 3: Table Of Contents
Indice Dichiarazioni ....................................2 Informazioni ed avvertenze generali ............................3 Informazioni sul manuale di istruzione ................................3 Garanzia e responsabilità .....................................4 Sicurezza e prevenzione................................5 Premessa ........................................5 Addestramento del personale ..................................5 Descrizione tecnica del bruciatore ............................6 Dati tecnici........................................6 Dati elettrici ........................................6 Descrizione bruciatore (Fig. -
Page 4: Dichiarazioni
La qualità viene garantita mediante un sistema di qualità e management certificato secondo UNI EN ISO 9001. Dichiarazione del costruttore RIELLO S.p.A. dichiara che i seguenti prodotti rispettano i valori limite di emissione di NOx imposti dalla normativa tedesca “1. BImSchV revisione 26.01.2010”. -
Page 5: Informazioni Ed Avvertenze Generali
Informazioni ed avvertenze generali Informazioni ed avvertenze generali Informazioni sul manuale di istruzione Introduzione 2.1.2 Pericolo componenti in tensione Il manuale di istruzione dato a corredo del bruciatore: Questo simbolo contraddistingue operazioni che, ➤ costituisce parte integrante ed essenziale del prodotto e non correttamente eseguite, comportano non va da esso separato;... -
Page 6: Garanzia E Responsabilità
Informazioni ed avvertenze generali Garanzia e responsabilità garantisce i suoi prodotti nuovi dalla data dell’installazio- ne secondo le normative vigenti e/o in accordo con il contratto di vendita. Verificare, all’atto della prima messa in funzione, che il bruciatore sia integro e completo. La mancata osservanza a quanto descritto in que- sto manuale, la negligenza operativa, una errata installazione e l’esecuzione di modifiche non au-... -
Page 7: Sicurezza E Prevenzione
Sicurezza e prevenzione Sicurezza e prevenzione Premessa Addestramento del personale I bruciatori sono stati progettati e costruiti in conformità L’utente è la persona, o l’ente o la società, che ha acquistato la alle norme e direttive vigenti, applicando le regole tecniche di si- macchina e che intende usarla per gli usi concepiti allo scopo. -
Page 8: Descrizione Tecnica Del Bruciatore
Descrizione tecnica del bruciatore Descrizione tecnica del bruciatore Dati tecnici MODELLO RL 70/M RL 100/M RL 130/M TIPO 669 T1 670 T1 671 T1 POTENZA (1) MAX. 474 - 1043 711 - 1482 948 - 1779 Mcal/h 408 - 897... -
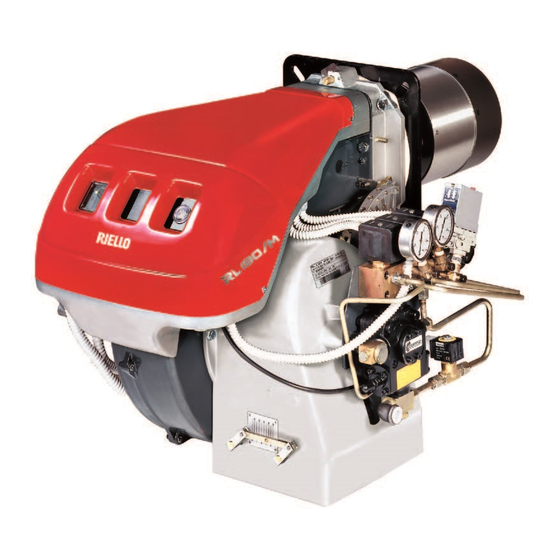
Page 9: Descrizione Bruciatore (Fig. 1)
I componenti da ordinare sono due: Modello Codice elettrica boccaglio mm ➤ il Regolatore di potenza da installare sul bruciatore; ➤ la Sonda da installare sul generatore di calore. 3477022 trifase RL 70/M trifase 3477023 3477222 trifase RL 100/M trifase 3477223 trifase... -
Page 10: Campi Di Lavoro (Fig. 3)
Tener presente che per ispezionare la testa di combustione il bru- ciatore deve essere aperto arretrandone la parte posteriore sulle guide. L’ingombro del bruciatore aperto è indicato dalla quota I. Fig. 2 D1217 RL 70/M 272 - 385 951 - 1086 RL 100/M 272 - 385 951 - 1086... -
Page 11: Installazione
(G) (vedere Campo di lavoro) La potenza del bruciatore deve rientrare nel cam- po di lavoro della caldaia; ATTENZIONE La manomissione, l’asportazione, la mancanza RIELLO S.p.A. 0036 I−37045 Legnago (VR) della targhetta del bruciatore o quant’altro non permettono la sicura identificazione del bruciatore Fig. -
Page 12: Piastra Caldaia (Fig. 5)
Piastra caldaia (Fig. 5) Forare la piastra di chiusura della camera di combustione come in (Fig. 5). La posizione dei fori filettati può essere tracciata utiliz- zando lo schermo termico a corredo del bruciatore. RL 70/M 275-325 M 12 RL 100/M... -
Page 13: Scelta Dell'ugello (Fig. 8)
Installazione Scelta dell’ugello (Fig. 8) Vedere diagramma (Fig. 25, pag. 20). UGELLI CONSIGLIATI: Qualora si desideri una portata intermedia tra i due valori riportati Bergonzo tipo A3, oppure A4 - angolo 45° nel diagramma (Fig. 25, pag. 20), scegliere l’ugello con portata superiore. -
Page 14: Regolazione Testa Di Combustione
Esempio: RL 70/M, portata massima gasolio = 50 kg/h Il diagramma (Fig. 13) indica che per una portata di 50 kg/h il bru- ciatore RL 70/M necessita di una regolazione della testa di com- Fig. 12 D462 bustione a 3 tacche circa, come illustrato in (Fig. 12). -
Page 15: Impianto Elettrico
➤ Non invertire il neutro con la fase nella linea di alimentazione elettrica. L’eventuale inversione comporterebbe un arresto in blocco per mancata accensione. ➤ I bruciatori RL 70/M-100/M-130/M sono stati omologati per funzionamento intermittente. Ciò significa che devono fermarsi "per Norma" almeno 1 volta ogni 24 ore per permettere all’apparecchiatura di effettuare un con- trollo della propria efficienza all’avviamento. -
Page 16: Impianto Elettrico (Eseguito In Fabbrica)
Impianto Elettrico (Eseguito In Fabbrica) RL 70/M - RL 100/M - RL 130/M Fig. 14 D2122 Bruciatori RL 70/M - RL 100/M - RL 130/M 6.1.1 Collegamenti elettrici (Fig. 15) ➤ I modelli RL 70-100-130/M lasciano la fabbrica previsti per alimentazione elettrica 400 V. - Page 17 Impianto elettrico Collegamento elettrico RL 70-100-130/M alimentazione trifase 230/400 V con neutro RL 70/M - RL 100/M - RL 130/M D2125 Fig. 16 Fusibili e sezione cavi schema (Fig. 16), vedi tabella. RL 70/M RL 100/M RL 130/M Sezione cavi non indicata: 1,5 mm...
- Page 18 400 V, la protezione è assicurata lo stesso. NOTA: I bruciatori RL 70/M - RL 100/M - RL 130/M lasciano la fabbri- ca previsti per alimentazione elettrica 400 V. Se l'alimenta- zione è 230 V, cambiare il collegamento del motore (da stella a triangolo) e la taratura del relè...
-
Page 19: Impianto Idraulico
Impianto idraulico Impianto idraulico Alimentazione combustibile Circuito ad anello Il circuito ad anello è costituito da un condotto che parte dalla ci- sterna e ritorna in essa nel quale una pompa ausiliaria fa scorrere il combustibile sotto pressione. Una derivazione dall’anello ali- menta il bruciatore. - Page 20 Impianto idraulico 7.1.1 Collegamenti idraulici (Fig. 20) 7.1.2 Servomotore (Fig. 21) Il servomotore regola contemporaneamente la serranda dell’aria, tramite la camma a profilo variabile, e il variatore di pressione. L’angolo di rotazione del servomotore è di 130° in 42 s. Non modificare la regolazione fatta in fabbrica alle 5 camme di cui è...
-
Page 21: Pompa (Fig. 22)
Impianto idraulico Pompa (Fig. 22) POMPA SUNTEC J7 C Fig. 22 D1226 Aspirazione G 1/2" 7.2.1 Innesco pompa Ritorno G 1/2" – Accertarsi, prima di mettere in funzione il bruciatore, che Attacco manometro G 1/8" il tubo di ritorno in cisterna non abbia occlusioni. Un Attacco vacuometro G 1/8"... -
Page 22: Accensione Bruciatore
Impianto idraulico Accensione bruciatore Chiudere i telecomandi e mettere l’interruttore 1) (Fig. 24) in po- Una volta effettuate le regolazioni descritte qui di seguito, l’ac- sizione "MAN". censione del bruciatore deve generare un rumore pari al funzio- namento. Se si avvertono una o più pulsazioni o un ritardo Ad accensione avvenuta, passare alla completa regolazione del d’accensione rispetto all’apertura della elettrovalvola del gasolio, bruciatore. - Page 23 Impianto idraulico Variatore di pressione Fig. 26 D2235 Manometro pressione ritorno ugello NOTA: Pressostato olio • Per una corretta taratura, l’eccentrico 6) deve lavorare su Anello di arresto pistone tutto il campo di escursione del servomotore (20° ÷ 130°): Dado e controdado taratura pistone ad ogni variazione del servomotore deve corrispondere Vite di regolazione eccentrico una variazione di pressione.
- Page 24 Impianto idraulico Regolazione aria 3 - Potenze intermedie Regolazione portata aria/olio Premere un poco il pulsante 2) (Fig. 24, pag. 20) “aumento po- tenza” in modo che il servomotore ruoti di circa 15°. Regolare le viti fino ad ottenere una combustione ottimale. Procedere allo stesso modo con le viti successive.
-
Page 25: Funzionamento Bruciatore
Impianto idraulico Funzionamento bruciatore 7.4.1 Avviamento bruciatore (Fig. 29) - (Fig. 30) ➤ 0 s: Chiusura telecomando TL, avvio motore. La pompa 3) aspira il combustibile dalla cisterna attraverso il condotto 1) ed il filtro 2) e lo spinge sotto pressione in mandata. - Page 26 Impianto idraulico 7.4.3 Mancata accensione Se il bruciatore non si accende si ha il blocco entro 5 s dall'aper- tura della valvola gasolio. 7.4.4 Spegnimento del bruciatore in funzionamento Se la fiamma si spegne accidentalmente in funzionamento, il bru- ciatore si blocca entro 1s. 7.4.5 Controlli finali ➤...
-
Page 27: Manutenzione
Manutenzione Manutenzione Note sulla sicurezza per la manutenzione Servomotore La manutenzione periodica è essenziale per il buon funziona- Svincolare la camma 2) (Fig. 27, pag. 22) dal servomotore, pre- mento, la sicurezza, il rendimento e la durata del bruciatore. mendo e spostando verso destra il pulsante 3) (Fig. 28, pag. 22), e controllare manualmente che la sua rotazione, avanti ed indie- Essa consente di ridurre i consumi, le emissioni inquinanti e di tro, sia scorrevole. - Page 28 Manutenzione Fotocellula (Fig. 32) Per aprire il bruciatore (Fig. 34) Pulire il vetro da eventuale polvere. Per estrarre la fotocellula Togliere tensione 1)(B) tirarla energicamente verso l'esterno; è inserita solo a pres- Allentare le viti 1) e togliere il cofano 2) sione.
- Page 29 Manutenzione SIMBOLO (1) INCONVENIENTE CAUSA PROBABILE RIMEDIO CONSIGLIATO Il bruciatore non si avvia - Un telecomando di limite o di sicurezza aperto ..Regolarlo o sostituirlo - Blocco apparecchiatura ......Sbloccare - Intervento pressostato olio di massima .
- Page 30 Manutenzione SIMBOLO (1) INCONVENIENTE CAUSA PROBABILE RIMEDIO CONSIGLIATO Fiamma fumosa - Bacharach scuro 56 - Poca aria ........Regolare testa e serranda ventilatore 57 - Ugello sporco o usurato.
- Page 31 Contents Declarations....................................2 Information and general instructions............................3 Information about the instruction manual ..............................3 Guarantee and responsibility ..................................4 Safety and prevention................................5 Introduction ........................................5 Personnel training ......................................5 Technical description of the burner ............................6 Technical data.......................................6 Electrical data........................................6 Burner description (Fig. 1).....................................7 Firing rates (Fig.
-
Page 32: Declarations
The quality is guaranteed by a quality and management system certified in accordance with UNI EN ISO 9001. Manufacturer’s Declaration RIELLO S.p.A. declares that the following products comply with the NOx emission limits specified by German standard “1. BImSchV release 26.01.2010”. -
Page 33: Information And General Instructions
Information and general instructions Information and general instructions Information about the instruction manual Introduction 2.1.2 Danger: live components The instruction manual supplied with the burner: This symbol indicates operations which, if not car- ➤ is an integral and essential part of the product and must not ried out correctly, lead to electric shocks with le- be separated from it;... -
Page 34: Guarantee And Responsibility
Information and general instructions Guarantee and responsibility guarantees its new products from the installation date, in accordance with the regulations in force and/or the sales con- tract. At the moment of the first start-up, check that the burner is integral and complete. Failure to observe the information given in this manual, operating negligence, incorrect installa- tion and the carrying out of non authorised modifi-... -
Page 35: Safety And Prevention
Safety and prevention Safety and prevention Introduction Personnel training burners have been designed and built in compliance The user is the person, body or company that has acquired the with current regulations and directives, applying the known tech- machine and intends to use it for the specific purpose. He is re- nical rules of safety and envisaging all the potential danger situ- sponsible for the machine and for the training of the people work- ations. -
Page 36: Technical Description Of The Burner
Technical description of the burner Technical description of the burner Technical data MODEL RL 70/M RL 100/M RL 130/M TYPE 669 T1 670 T1 671 T1 OUTPUT (1) MAX. 474 - 1043 711 - 1482 948 - 1779 Mcal/h 408 - 897... -
Page 37: Burner Description (Fig. 1)
Two components should be ordered: Model Code electrical blast tube mm ➤ the output regulator to install on the burner; ➤ the probe to install on the heat generator. 3477022 Three-phase RL 70/M Three-phase 3477023 3477222 Three-phase RL 100/M Three-phase 3477223 Three-phase... -
Page 38: Firing Rates (Fig. 3)
The dimensions of the open burner are indicated by position I. Fig. 2 D1217 RL 70/M 272 - 385 951 - 1086 RL 100/M 272 - 385... -
Page 39: Installation
The output of the burner must be within the boil- er's firing rate; WARNING A burner label that has been tampered with, re- RIELLO S.p.A. 0036 I−37045 Legnago (VR) moved or is missing, along with anything else that prevents the definite identification of the burner Fig. -
Page 40: Boiler Plate (Fig. 5)
Boiler plate (Fig. 5) Drill the combustion chamber locking plate as shown in (Fig. 5). The position of the threaded holes can be marked using the ther- mal screen supplied with the burner. RL 70/M 275-325 M 12 RL 100/M... -
Page 41: Choice Of Nozzle (Fig. 8)
Installation Choice of nozzle (Fig. 8) See diagram (page 20, Fig. 25). RECOMMENDED NOZZLES: In case an intermediate delivery between the two values indicat- Type A3 or A4 Bergonzo nozzles - 45° angle ed in the diagram (page 20, Fig. 25), is required, a nozzle with higher delivery must be chosen. -
Page 42: Combustion Head Setting
5) (Fig. 12). Example: RL 70/M, maximum light oil delivery = 50 kg/h Diagram (Fig. 13) indicates that for a delivery of 50 kg/h the RL 70/M Model requires the combustion head to be set to approx. -
Page 43: Electrical System
➤ The RL 70/M - RL 100/M - RL 130/M burners have been type- approved for intermittent operation. This means they should compulsorily be stopped at least once every 24 hours to enable the control box to perform checks of its own start-up efficiency. -
Page 44: Electrical System (Factory Set)
Electrical system (factory set) RL 70/M - RL 100/M - RL 130/M Fig. 14 D2122 Burners RL 70/M - RL 100/M - RL 130/M 6.1.1 Electrical connections (Fig. 15) ➤ Models RL 70-100-130/M leave the factory preset for 400 V power supply. - Page 45 Electrical system RL 70-100-130/M electrical connection three-phase 230/400 V power supply with neutral phase wire RL 70/M - RL 100/M - RL 130/M D2125 Fig. 16 Fuses and cables section layout, see table (Fig. 16). RL 70/M RL 100/M RL 130/M Cable section not indicated: 1.5 mm...
- Page 46 400 V, protection is still ensured in any case. NOTE: Burners RL 70/M - RL 100/M - RL 130/M leave the factory pre- set for 400 V power supply. If 230 V power supply is used, change the motor connection from star to delta and change the setting of the thermal cut-out as well.
-
Page 47: Hydraulic System
This circuit is extremely useful whenever the burner pump does not succeed in self-priming because the tank dis- tance and/or height difference are higher than the values listed in the table. L (m) RL 70/M RL 100/M - 130/M Ø (mm) Ø (mm) + 4.0 + 3.0... - Page 48 Hydraulic system 7.1.1 Hydraulic connections (Fig. 20) 7.1.2 Servomotor (Fig. 21) The servomotor provides simultaneous adjustment of the air gate valve, by means of the variable profile cam and the pressure reg- ulator. The servomotor rotates through 130° in 42 seconds. Do not alter the factory setting for the 5 cams;...
-
Page 49: Pump (Fig. 22)
Hydraulic system Pump (Fig. 22) PUMP SUNTEC J7 C Fig. 22 D1226 - Suction G 1/2" 7.2.1 Pump priming - Return G 1/2" – Before starting the burner, make sure that the tank return - Pressure gauge connection G 1/8" line is not clogged. -
Page 50: Burner Adjusting
Burner adjusting Burner adjusting Burner firing Burner calibration Close load controls and set switch 1) (Fig. 24) to "MAN". The optimum calibration of the burner requires an analysis of the flue gases at the boiler outlet. After burner firing a complete burner adjustment should be per- formed. - Page 51 Burner adjusting Pressure regulator Fig. 26 D2235 Pressure gauge for pressure on nozzle return NOTE: Oil pressure switch • The proper setting of the eccentric 6) is possible when its Ring for piston stop operation field follows the servomotor operation field Nut and lock-nut for piston setting (20°...
- Page 52 Burner adjusting Adjusting air delivery 3 - Intermediate output - Air/oil flow rate adjustment Press the switch 2) (Fig. 24, page 20) “output increase” a little so that the servomotor turns by about 15°. Adjust the screws until optimal combustion is obtained. Proceed in the same way with the other screws.
-
Page 53: Burner Operation
Burner adjusting Burner operation 8.3.1 Burner starting (Fig. 29) - (Fig. 30) ➤ 0 s : Control device TL closes, the motor starts. The pump 3) sucks the fuel from the tank through the piping 1) and the filter 2) and pumps it under pressure to delivery. The piston 4) rises and the fuel returns to the tank through the piping 5) - 7). - Page 54 Burner adjusting If the burner does not fire, it goes into lock-out within 5 s of the opening of the light oil valve. 8.3.4 Undesired shutdown during operation If the flame should go out for accidental reasons during operation, the burner will lock out in 1 s. 8.3.5 Final checks ➤...
-
Page 55: Maintenance
Maintenance Maintenance Notes on safety for the maintenance Servomotor The periodic maintenance is essential for the good operation, Disengage the cam 2) (Fig. 27, page 22) from the servomotor, by safety, yield and duration of the burner. pressing and moving button 3) (Fig. 28, page 22) towards the right, and turn it backwards and forwards by hand to make sure it It allows you to reduce consumption and polluting emissions and moves freely. - Page 56 Maintenance Photocell (Fig. 32) To open the burner (Fig. 34) Clean the glass cover from any dust that may have accumulated. Switch off the electrical power The photo-electric cell 1) (Fig. 32) is held in position by a pres- Loosen screws 1) and withdraw the cover 2) sure fit and can therefore be removed by pulling it outward force- Unscrew screws 3) fully.
- Page 57 Maintenance SYMBOL (1) FAULT PROBABLE CAUSE SUGGESTED REMEDY The burner does not start - A limit or safety control device is open ....Adjust or replace - Control box lock-out ......Reset - Maximum oil pressure switch intervenes .
- Page 58 Maintenance SYMBOL (1) FAULT PROBABLE CAUSE SUGGESTED REMEDY Smoke in flame - dark Bacharach 56 - Not enough air ....... . Adjust head and fan gate 57 - Nozzle worn or dirty.
- Page 60 RIELLO S.p.A. I-37045 Legnago (VR) Tel.: +39.0442.630111 http:// www.riello.it http:// www.riello.com Con riserva di modifiche - Subject to modifications...