Table of Contents
Advertisement
Available languages
Available languages
Quick Links
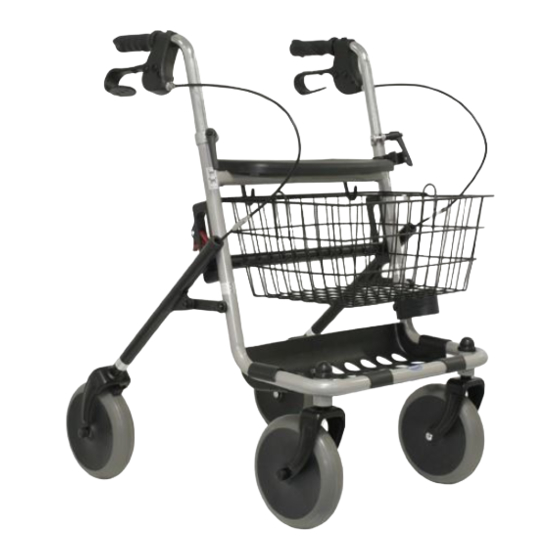
Rollator
Assembly, Installation and Operating Instructions
Model 65550
DEALER: These instructions MUST be given to the user of this product.
NOTE: Check ALL parts for shipping damage. If shipping damage is noted, DO NOT use. Contact carrier/dealer for further instruction.
• DO NOT use this product or any available optional equipment without first completely reading and understanding these
instructions and any additional instructional material such as owner's manuals, service manuals or instruction sheets supplied
with this product or optional equipment. If you are unable to understand the warnings, cautions or instructions, contact a
healthcare professional, dealer or technical personnel before attempting to use this equipment - otherwise, injury or damage
may occur.
• Each individual should ALWAYS consult with their physician or therapist to determine proper adjustment and usage.
• The Rollator is designed to provide support, increased stability and assistance to the end user while walking. The Rollator is
NOT designed to support the total weight of an individual and has a weight limitation of 285 lbs (130 kg).
• The Rollator can provide ambulatory assistance for an individual weighing up to 285 lbs (130 kg), including the weight of the
contents of the basket and tray. The seat can support an individual weighing up to 285 lbs (130 kg).
• DO NOT use the rollator as a wheelchair or transport device. The Rollator is NOT intended for propelling while seated.
• The brakes MUST be locked before using the seat. When using the rollator in a stationary standing position, the hand brakes
MUST be locked.
• DO NOT use the rollator on an escalator.
• A physical/occupational therapist should assist in the height adjustment for maximum support and correct brake activation.
• Care should be taken to ensure that all hand and height adjustments are secure, and that casters and moving objects are in good
working order before using this or any mobility aid.
• All casters MUST be in contact with the floor at all times during use. This will ensure the rollator is properly balanced.
• ALWAYS observe the weight limit on the labeling of your product. Check that all labels are present and legible. Replace if
necessary.
• The basket, tray and shelf have a weight limitation of 11 lbs (5 kg). Items placed in or on the basket, tray or shelf should NOT
protrude from the basket, tray or shelf.
• If push handles are exposed to extreme temperature (above 100°F or below 32°F), high humidity and/or becomes wet, prior to
use, ensure hand grips DO NOT twist on rollator handle - otherwise damage or injury may occur.
• After installation and before use, ensure that all attaching hardware is tightened securely.
• DO NOT hang anything from the frame of the rollator. Items should be placed in the basket or on the tray.
• Invacare products are specifically designed and manufactured for use in conjunction with Invacare accessories. Accessories
designed by other manufacturers have not been tested by Invacare and are not recommended for use with Invacare products.
Assembling the Rollator
NOTE: For this procedure, refer to FIGURE 1.
1.
Remove plastic caps from the side frame tubes.
2.
Unfold the rollator.
NOTE: Make sure that the red locking mechanism fully engages. An audible
"click" will be heard.
NOTE: The locking lever and washer are installed on the outside of the frame
tubes.
3.
From the inside of the frame, put a bolt through the locking lever
mounting holes.
4.
Put a washer onto the bolt.
5.
Thread the locking lever onto the bolt. DO NOT tighten the
locking lever.
6.
Repeat STEPS 3‐5 to install the opposite locking lever.
7.
On both sides of the rollator, insert and adjust the handle to the
appropriate height. Tighten the locking lever onto the bolt.
WARNING
The handles MUST NOT be angled outside the marked
position as this reduces the rollators lateral stability. Refer to
Detail "B".
Removing the Handles
1.
On each side of the rollator, loosen but DO NOT remove the
locking lever.
2.
Remove the handles from the frame tubes.
Adjusting Handle Height
1.
On both sides of the rollator, loosen, but DO NOT remove, the
locking levers.
2.
Adjust each handle to the appropriate height and tighten the
locking lever. Make sure both handles are adjusted to the same
height.
For more information regarding Invacare products, parts, and services, please visit www.invacare.com
Part No 1163185
SAVE THESE INSTRUCTIONS
WARNING
ACCESSORIES WARNING
DETAIL "A"
Locking Lever
Mounting Hole
Bolt
Locking
lever
FIGURE 1 Assembling the Rollator
1
DETAIL "B"
Incorrect
Correct
Handle
Frame Tube
Rollator
Advertisement
Table of Contents

Related Manuals for Invacare 65550


Summary of Contents for Invacare 65550
- Page 1 ACCESSORIES WARNING • Invacare products are specifically designed and manufactured for use in conjunction with Invacare accessories. Accessories designed by other manufacturers have not been tested by Invacare and are not recommended for use with Invacare products. Assembling the Rollator DETAIL “B”...
-
Page 2: Folding The Rollator
CAUTION Lay the rollator down on a flat stable surface. DO NOT lean the rollator against a wall or other vertical surface. Tab on Locking Mechanism Care and Maintenance Lift up to Verify brake operation. Contact your Invacare dealer if fold the brake adjustment is required. rollator If hand grips are loose, DO NOT use the rollator. Contact your Invacare dealer. Periodically inspect the casters tightness, wear and ... - Page 3 NOTES Part No 1163185 Rollator...
-
Page 4: Limited Warranty
This warranty gives you specific legal rights and you may also have other legal rights which vary from state to state. Invacare warrants the brakes to be free from defects in materials and workmanship for five years, and all other components for one year for the original purchaser (excluding tires and wheels). If within such warranty period any such product shall be proven to be defective, such product shall be repaired or replaced, at Invacare’s option. -
Page 5: Montage Du Déambulateur
• Les produits Invacare sont spécifiquement conçus et fabriqués pour une utilisation conjointe avec les accessoires Invacare. Les accessoires conçus par d'autres fabricants n'ont pas été testés par Invacare et ne sont pas recommandés pour utilisation avec les produits Invacare. -
Page 6: Entretien
Allonger le déambulateur sur une surface plane et Attention aux points de pincement stable. NE PAS appuyer le déambulateur contre un mur au moment de plier le déambulateur ou toute autre surface verticale. Entretien Vérifier la bonne marche des freins. Contacter votre distributeur Invacare si un réglage des freins est nécessaire. Si les capuchons de poignées glissent, NE PAS utiliser le déambulateur. Contacter votre distributeur Invacare. Inspecter régulièrement les rondelles pour détecter tout relâchement, usure ou endommagement. FIGURE 4 Plier le déambulateur Sʹassurer que cheveux, peluches ou autre débris ne bloquent pas ... -
Page 7: Garantie Limitée
Invacare garantit les freins contre les vices de fabrication et de main d'œuvre pendant cinq ans et tous les autres composants pendant un an à partir de l'achat initial (pneus et roues non compris). Si pendant cette période de garantie, ledit produit se révèle défectueux, il sera réparé... - Page 8 One Invacare Way 570 Matheson Blvd E Unit 8 the symbols ™ and ®. All trademarks are owned Elyria, Ohio USA Mississauga Ontario by or licensed to Invacare Corporation or its 44036-2125 L4Z 4G4 Canada subsidiaries unless otherwise noted. 800-333-6900 800-668-5324 ©2009 Invacare Corporation...