Advertisement
Available languages
Available languages
Quick Links
Rollator
Assembly, Installation and Operating Instructions
Model 65510
DEALER: These instructions MUST be given to the user of this product.
NOTE: Check ALL parts for shipping damage. If shipping damage is noted, DO NOT use. Contact carrier/dealer for further instruction.
• DO NOT use this product or any available optional equipment without first completely reading and understanding these
instructions and any additional instructional material such as owner's manuals, service manuals or instruction sheets supplied
with this product or optional equipment. If you are unable to understand the warnings, cautions or instructions, contact a
healthcare professional, dealer or technical personnel before attempting to use this equipment - otherwise, injury or damage
may occur.
• Each individual should ALWAYS consult with their physician or therapist to determine proper adjustment and usage.
• DO NOT use the rollator as a wheelchair or transport device.
• A physical/occupational therapist should assist in the height adjustment for maximum support and correct brake activation.
• Care should be taken to ensure that all hand and height adjustments are secure, and that casters and moving objects are in good
working order before using this or any mobility aid.
• All casters MUST be in contact with the floor at all times during use. This will ensure the rollator is properly balanced.
• When using the rollator in a stationary position, the hand brakes MUST be locked.
• ALWAYS observe the weight limit on the labeling of your product. Check that all labels are present and legible. Replace if
necessary.
• The rollator basket and tray have a weight limitation of 11 lbs (5 kg). The tote bag has a weight limitation of 10 lbs (5 kg). Items
placed in either the basket or the bag should NOT protrude from the basket or bag.
• If push handles are exposed to extreme temperature (above 100°F or below 32°F), high humidity and/or becomes wet, prior to
use, ensure hand grips DO NOT twist on rollator handle - otherwise damage or injury may occur.
• After installation and before use, ensure that all attaching hardware is tightened securely.
• DO NOT hang anything from the frame of the rollator. Items should be placed in the basket or the tote bag.
• Invacare products are specifically designed and manufactured for use in conjunction with Invacare accessories. Accessories
designed by other manufacturers have not been tested by Invacare and are not recommended for use with Invacare products.
Assembling the Rollator
NOTE: For this procedure, refer to FIGURE 1.
1.
Remove plastic caps from the side frame tubes.
2.
Unfold the rollator and engage the locking mechanism between
the front frame tubes. Refer to Detail "A".
NOTE: The locking lever and washer are installed on the outside of the frame
tubes.
3.
From the inside of the frame, put the bolt through the locking
lever mounting holes. Refer to Detail "B".
4.
Put a washer onto the bolt.
5.
Thread the locking lever onto the bolt. DO NOT tighten the
locking lever.
6.
Repeat STEPS 3‐5 to install the opposite locking lever.
7.
On both sides of the rollator, insert and adjust the handle to the
appropriate height. Tighten the locking lever onto the bolt.
WARNING
The handles MUST NOT be angled outside the marked
position as this reduces the rollators lateral stability. Refer to
Detail "C".
Adjusting Handle Height
1.
On both sides of the rollator, loosen, but DO NOT remove, the
locking levers.
2.
Adjust each handle to the appropriate height and tighten the
locking lever. Make sure both handles are adjusted to the same
height.
Removing the Handles
1.
On each side of the rollator, loosen but DO NOT remove the
locking lever.
2.
Remove the handles from the frame tubes.
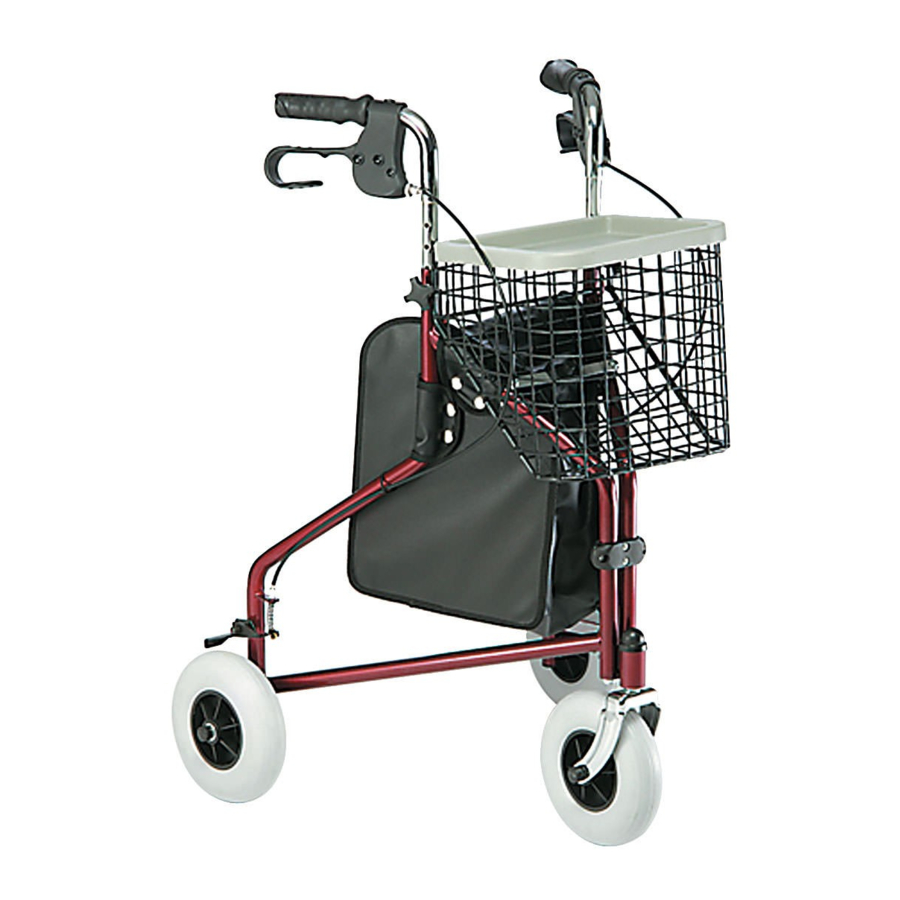
Installing the Bag, Basket and Tray
NOTE: For this procedure, refer to FIGURE 1, Detail "D".
NOTE: To remove the bag, basket and tray, reverse these procedures.
Bag
Hang the bag between the rollator frame tubes and secure with snap
button flaps.
Basket
Install the basket onto the hooks on the rollator frame.
Tray
Put the tray in place on top of the basket.
For more information regarding Invacare products, parts, and services, please visit www.invacare.com
Part No 1163186
SAVE THESE INSTRUCTIONS
WARNING
ACCESSORIES WARNING
DETAIL "B"
Locking Lever
Mounting Hole
Bolt
Locking
lever
DETAIL "C"
Bag
Incorrect
Correct
FIGURE 1 Assembling the Rollator
1
DETAIL "A"
Push down to engage locking
mechanism between frame tubes
Handle
DETAIL "D"
Tray
Basket
Rollator
Advertisement

Related Manuals for Invacare 65510


Summary of Contents for Invacare 65510
- Page 1 ACCESSORIES WARNING • Invacare products are specifically designed and manufactured for use in conjunction with Invacare accessories. Accessories designed by other manufacturers have not been tested by Invacare and are not recommended for use with Invacare products. Assembling the Rollator DETAIL “A”...
- Page 2 This warranty gives you specific legal rights and you may also have other legal rights which vary from state to state. Invacare warrants the brakes to be free from defects in materials and workmanship for five years, and all other components for one year for the original purchaser (excluding tires and wheels).
- Page 3 • Les produits Invacare sont spécifiquement conçus et fabriqués pour une utilisation conjointe avec les accessoires Invacare. Les accessoires conçus par d'autres fabricants n'ont pas été testés par Invacare et ne sont pas recommandés pour utilisation avec les produits Invacare.
- Page 4 La présente garantie confère certains droits : la législation du pays ou de la juridiction de l'acheteur initial/utilisateur final peut vous en accorder d'autres. Invacare garantit les freins contre les vices de fabrication et de main d'œuvre pendant cinq ans et tous les autres composants pendant un an à partir de l'achat initial (pneus et roues non compris).