Table of Contents
Advertisement
Available languages
Available languages
Quick Links
Advertisement
Chapters
Table of Contents

Related Manuals for Sony UPX-C21


Summary of Contents for Sony UPX-C21
- Page 1 3-204-293-12(1) Digital Printing System Operating Instructions page 2 Mode d’emploi page 58 Manual de instrucciones página 116 UPX-C21 © 2000 Sony Corporation UPX-C21GFE/3-204-293-12(1) Inst SS Ver.4.0...
- Page 2 This device requires shielded interface cables to comply with Record these number in the space provided below. FCC emission limits. Refer to these numbers whenever you call upon your Sony dealer regarding this product. for the DKC-C21X Digital Still Camera Model No.
-
Page 3: Table Of Contents
Table of Contents System Overview ............... 4 System Configuration ............. 4 Printouts that Can Be Made with This System ....... 5 Precautions ................ 7 Safety ..................7 Installation................8 Operation................. 9 Cleaning ..................9 Locations of Parts ............10 Camera ..................10 Station ................... 13 Printer ..................15 Preparations .............. -
Page 4: System Overview
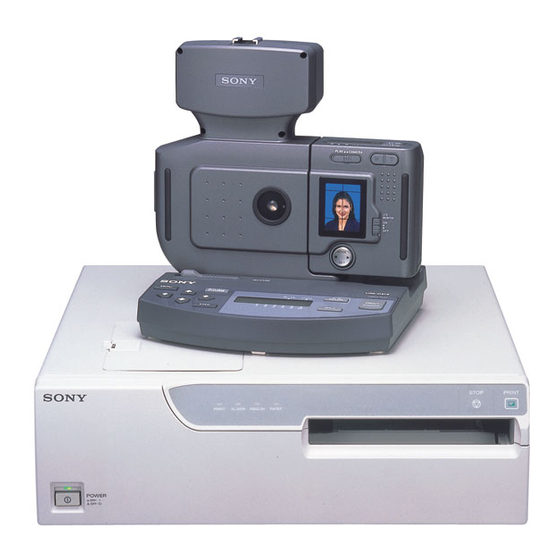
System Overview The Sony UPX-C21 digital printing system is designed to take pictures by the digital camera and to reproduce them on A6-sized paper in high resolution (310 dpi) and 256 shades of gray in black and white or in full color (16,700,000 colors). -
Page 5: Printouts That Can Be Made With This System
Printouts that Can Be Made with This System Printouts of split images With this system, the following types of printouts can be made: Model for the U.S.A. and Canada Single portrait Wallets U.S. passport Printout of Printout of Printout of four reduced images six reduced images* 16 reduced images... - Page 6 System Overview Model for the Europe Printout of Printout of Printout of a full-sized image two reduced images four reduced images Printout of Printout of Printout of six reduced images* nine reduced images 16 reduced images * Pr intout of six reduced images is possible only when the UPC-2040A or UPC-2045 Self-laminating color printing pack is used.
-
Page 7: Precautions
• If the printer malfunctions or if a foreign body falls into the cabinet, disconnect the power immediately and consult your Sony service facility or your Sony dealer. • Do not open the top cover of the printer during printing because of mechanical hazard. -
Page 8: Installation
Precautions Installation • Avoid placing the printer or camera in a location subject to: — mechanical vibration — high humidity — excessive dust — where it is exposed to rain — direct or excessive sunlight — extremely high or low temperatures —... -
Page 9: Operation
On transportation • Do not transport the printer with the supplied accessories. Doing so may cause malfunction. • Retain the original carton and packing materials in case you have to transport the unit in the future. Operation Test shooting Before shooting, you should always take a few test shots and review them to see that the camera is functioning normally. -
Page 10: Locations Of Parts
Locations of Parts For details, see the pages shown in parentheses. Camera Front F L A S A S E R E L E O O U V ID E 3 2 C R S -2 V IN D C 8 .4 6 RELEASE jack (minijack) (Refer to the 1 Release button (37) Operating Instructions (Advanced Operations).) - Page 11 Rear P L A Y C A M E R A L C D M O N IT O R O F F M O D S E T E: The built-in strobe does not light, but only the 1 Flash mode button (Refer to the Operating external strobe lights.
- Page 12 Locations of Parts 3 Operation display Protect mark When the POWER switch is set to ON, the operation (The current picture is protected.) mode or setting status appears. Resolution Hi-1 Picture number (Resolution of the (The number of the Flash mode current picture) current picture) Picture resolution mode...
-
Page 13: Station
qs Tripod screw hole (36) qf Viewfinder (39) Used to attach the camera to the tripod. A quick shoe You can see the subject through the viewfinder and can be also attached. can shoot a picture without using the LCD monitor. qd Standby lamp (37) The lamp is lit or flashing to indicate the following conditions when the PLAY/CAMERA switch is set to... - Page 14 Locations of Parts 4 PRINT button (49) Press to print the image selected on the camera. 5 SPLIT button (48) Select the type of printout: a full-sized image or a split reduced-image printout. 6 B/W COLOR button (48) Select B/W (black and white) or COL (color) for a printout.
-
Page 15: Printer
Printer Front panel 1 ! POWER switch (48) 9 Front panel Press to switch the unit on or off. Pull the top on the front door toward you to open it. Opening the front panel reveals the ink ribbon 2 Top cover cartridge, paper tray and paper cover. - Page 16 Locations of Parts Rear panel - AC IN 1 Station connector (26) Connect the interface cable of the station. 2 AC IN connector (25) Used to connect the printer to a wall outlet with the supplied power cord.
-
Page 17: Preparations
Preparations Preparation of Printer Here are described the following operations that must be made prior to starting printing. • Loading an ink ribbon cartridge, a component of an optional printing pack (see the below) • Loading paper and the paper cover (see page 20) Once the above operations have been completed, there should be no need to repeat them during routine printing. - Page 18 Preparations Remove the ink ribbon cartridge by pushing the ink ribbon cartridge itself. The ink ribbon cartridge pops out. When you use the printer first, this operation is not required. Note Never put your hand into the ink ribbon compartment. The thermal head becomes very hot.
- Page 19 Remove any slack from the ink ribbon. If the ribbon is left slack, it may be damaged when inserted. Wind the spool until the not-used point comes to the right-end. Insert the ink ribbon cartridge firmly until it stops. Close the front panel.
- Page 20 Preparations Notes When using ink ribbon cartridge • Once an ink ribbon cartridge has been completely used, replace it. Ink ribbon cartridges are not reusable. • Do not touch the ink ribbon cartridge or place it in a dusty location. Finger prints or dust on the ink ribbon will result in imperfect printing or malfunction of the head.
- Page 21 When you use the printer first, this operation is not required. Place the paper in the paper tray. Notes • The amount of paper that the paper tray holds depends on the paper in use. When adding paper to a partly full tray, be careful that the total number of sheets does not exceed the limit.
- Page 22 Preparations Slide the paper tray back into the printer until it clicks into place. Slide the paper cover into the printer. Paper cover Close the front panel. Notes When handling the paper Do not touch the printing surface. Dust or finger prints are likely to cause unsatisfactory printing or malfunction of the head.
- Page 23 Printing pack and paper tray Both paper and an ink ribbon cartridge are necessary for printing. Use the ink ribbon with the paper contained in the same package. About paper trays Two types of paper trays are provided for this system to house two different paper sizes.
- Page 24 Preparations B/W printing pack UPC-2020 Contains an ink ribbon cartridge and paper. B & W ink ribbon cartridge 1 roll A-6 (4 1/4 × 5 3/4 inches) size paper 200 sheets...
-
Page 25: Connections
Connections Connect the station and the printer. Notes • Turn off the power of each device before attempting to make any connections. • Grab the connector at the end of the connecting cable, and firmly insert it into the socket. Power connections Connect the station to wall outlet. - Page 26 Preparations Connect the printer to wall outlet. Connect the printer to wall outlet using the supplied AC power cord. Printer - AC IN AC power cord (supplied) to wall outlet AC power operation of the camera You can use the camera on AC power by using an optional AC-V615 AC power adaptor/charger.
- Page 27 Releasing the camera from the station Slide the CAMERA RELEASE lever to the left, and the camera pops up. POWER ON OFF PLAY CAMERA M,OMITOR MODE CAMERA RELEASE CAMERA RELERASE lever UPX-C21 POWER/BUSY BATTERY MENU CHARGE COLOR MULTI PICTURE EXEC...
- Page 28 Preparations Connection of the camera to the station with a cable You can connect the camera to the station with the supplied connecting cable. Connect the RS-232C connector on the camera and the CAMERA connector on the station. If the ferrite filters are not attached to the cable, attach the supplied filters to the plugs as illustrated below.
-
Page 29: Preparation Of The Camera
Preparation of the Camera Inserting batteries Two lithium-ion batteries are supplied, a large battery and a button battery. Insert both of them as described below. Open the battery compartment lid on the bottom of the camera by pushing the PUSH button and sliding the lid in the direction of the arrow. - Page 30 Preparations Install the button battery in its case. C R 2 0 P U S H C R 2 0 Reinsert the case. Insert the large lithium-ion battery. P U S H Close the lid. P U S H...
- Page 31 POWER ON OFF PLAY CAMERA M,OMITOR MODE CAMERA RELERASE UPX-C21 POWER/BUSY BATTERY MENU CHARGE COLOR MULTI PICTURE EXEC Attach the camera to the station.
- Page 32 Preparations Setting the clock, frame and power save The date and time, frame and power save mode are set on the SET UP display that appeasr on the LCD of the camera. Displaying the SET UP display P L A Y C A M E R A L C D...
- Page 33 Setting the time and date Check that the select mark points to CLOCK, then press SET of the mode button. The CLOCK SET display appears. C L OC K SE T D ISP OF F Y / M / D - - - - / - - / - - - - : - -...
- Page 34 Preparations Selecting the displayed guideline When the SET UP display is shown on the LCD, press B of the mode button so that the select mark points to FRAME, then press SET of the mode button. The FRAME ON/OFF display appears. F R A ME Press b or B of the mode button to select ON, then press SET of the mode button.
- Page 35 Setting power save mode In power save mode, the camera is automatically set to the status equal to power off after 3 minutes has passed with no operation. To restore power, set the POWER switch to OFF then ON again. If the PLAY/CAMERA switch is set to CAMERA, half-pressing the release button also restore power.
- Page 36 Preparations Attaching to a tripod You can attach the camera to a tripod using the tripod screw hole on the bottom of the camera. If a commercially available quick shoe is attached to the camera, you can easily attach and detach the camera. F LA S A S E R E LE...
-
Page 37: Operation
Operation Taking a Picture P L A Y C A M E R A L C D M O N IT O R O F F M O D S E T Standby lamp Set the POWER switch to ON. Set the PLAY/CAMERA switch to CAMERA. - Page 38 Operation Optimum distance between the subject and lens When you take a picture using a guideline displayed on the LCD, the optimum distance between the subject and lens differs according to the type of guideline and the zoom position. Assuming you take a picture of a face of 24 centimeters from the top of the head to the chin, the optimum distance and the face size that will appear on the printout are shown below.
- Page 39 FRAME 4 Wide: 1.3 m Telephoto: 1.65 m FRAME 22 mm inch) Using the viewfinder You can adjust the frame by looking through the viewfinder instead of monitoring the LCD, to save battery power. Set the LCD MONITOR switch to OFF, look through the viewfinder, and adjust the frame.
- Page 40 Operation Adjusting the angle of the grip The block with the LCD is rotated by 90 degrees to adjust the angle for easy monitoring of a picture on the LCD...
- Page 41 Manual operations This camera is designed to produce the best possible picture when used in AUTO mode (AUTO/MAN mode selection ise set to AUTO). However, manual operations as described below are also available for when you wish to use an external strobe, to shoot under special lighting conditions, etc. For details on manual operations, refer to the Operating Instructions (Advanced Operations).
-
Page 42: Viewing A Picture
Operation Viewing a Picture You can view pictures taken with the camera on the LCD. P L A Y C A M E R A L C D M O N IT O R O F F M O D S E T Set the POWER switch to ON. -
Page 43: Picture Erasure
Picture Erasure Pictures stored in the memory of the camera can be erased one by one or all at one time. Erasing pictures one by one P L A Y C A M E R A L C D M O N IT O R O F F M O D... - Page 44 Operation Press SET of the mode button. The ONE/ALL appears on the LCD, and the select mark points to ONE. Hi-1 ON E A LL Press SET of the mode button. ERASING appears on the LCD, and the picture selected in step 4 is erased.
- Page 45 Press SET of the mode button. ERASE ALL? appears on the LCD. Hi-1 E R AS E A LL? Press SET of the mode button. ERASING appears on the LCD, and all pictures that are not protected are erased. If all pictures are erased, the screen becomes blue. If some picture is protected, that picture and the ERASE mark will appear on the screen.
-
Page 46: Protecting A Picture
Operation Protecting a Picture To avoid erasing a picture accidentally, a picture protection function is available. P L A Y C A M E R A L C D M O N IT O R O F F M O D S E T 3,4,5 Set the POWER switch to ON. - Page 47 Press SET of the mode button. The protect mark appears at the top right on the LCD, and the picture is now protected from accidental erasure. Hi-1 PROT E C T Repeat steps 4 and 5 to protect the other pictures. To finish setting the protection Press MODE of the mode button.
-
Page 48: Printing
All indicators, PRINT, ALARM, RIBBON and PAPER are lit, then all of them go out. Now the printer is in standby status. The message “DIGITAL PRINTING SYSTEM UPX-C21” is displayed for about 8 seconds on the LCD of the station, then disappears. - Page 49 You can print up to nine sheets of a picture at a time. To print two or more sheets, set the number of sheets to be printed before pressing the PRINT button in step 7 above. CAMERA RELERASE UPX-C21 POWER/BUSY BATTERY MENU CHARGE...
- Page 50 Operation To laminate a printout If you are using a UPC-2045 self-laminating color-printing pack, you can laminate the printout. The lamination type can be selected from among glossy, mat or textured. Press the MENU button on the station. “LAMINATION:” appears on the LCD of the station. Press the b or B button to select the lamination type, GLOSSY, MATTE or TEXTURE.
- Page 51 Adjusting the printout quality The picture quality can be adjusted using the Menu functions of the station before printing. The Menu functions allow adjustment of the items below. If you print a color picture, you can check the adjusted results by printing a color guide.
-
Page 52: Specifications
Camera A , , Equivalent to ISO 100 General E: Equivalent to ISO 130 Power supply Supplied from a Sony NP- LCD monitor 1.8-inch cold polisilicone TFT F550 Lithium Battery or from color LCD viewfinder an optional AC power adaptor 110,000 pixel (8.4 V DC) - Page 53 Operating humidity 20% to 80% (no condensation Supplied accessories allowed) Storage and transport temperature Standard paper tray (1) –20°C to +60°C Postcard-size paper tray (1) (–4°F to +140°F) Paper cover (1) About 370 × 125 × 417 mm Dimensions (w/h/d) AC power cord for printer (1) ×...
-
Page 54: Troubleshooting
FLASH jack of the camera. • The battery is discharged. t Charge the battery or replace it with a new one. t The strobe may be out of life. Contact the Sony service facility. Liquid crystal display of the camera... - Page 55 Picture quality Symptom Possible causes/Action • Focus is off. The picture is out of t Check the distance between the lens and the focus. subject and place the subject at the range within which the focus is in. • The camera was moved when you pressed the release button.
- Page 56 Refer to the insert entitled “If the Paper Jams.” SENSOR TROUBLE Sensor trouble has occurred. t The printer must not be operated any further. Turn off the power immediately and contact your Sony service facility or your Sony dealer. END OF RIBBON The ink ribbon has been exhausted.
-
Page 57: Indicators On The Front Panel Of The Printer
Refer to the insert entitled “If the Paper Jams.” ALARM • The top cover of the printer opens. t Close the top cover. PRINT, ALARM, • Serviceman-call trouble occurs. PAPER and RIBBON t Turn off the power immediately and contact your Sony service facility or your Sony dealer. - Page 58 Français AVERTISSEMENT Afin d’éviter tout risque d’incendie ou d’électrocution, ne pas exposer cet appareil à la pluie ou à l’humidité. Afin d’écarter tout risque d’électrocution, garder le coffret fermé. Ne confier l’entretien de l’appareil qu’à un personnel qualifié. pour l’appareil photo numérique DKC-C21X ATTENTION Il y a danger d’explosion s’il y a remplacement incorrect de la batterie.
- Page 59 Table des matières Présentation du système ..........60 Configuration du système ............. 60 Tirages pouvant être effectués avec le système ....61 Précautions ..............63 Sécurité..................63 Installation................64 Fonctionnement..............65 Entretien ................65 Nomenclature ..............66 Appareil photo............... 66 Station ................... 69 Imprimante ................71 Préparatifs ................
-
Page 60: Présentation Du Système
Présentation du système Le système d’impression couleur numérique UPX-C21 Sony a été conçu pour reproduire les images prises par l’appareil photo numérique sur du papier de format A6 en mode haute définition (310 ppp) et avec 256 nuances de gris, en noir et blanc ou 16,7 millions de couleurs. -
Page 61: Tirages Pouvant Être Effectués Avec Le Système
Tirages pouvant être effectués avec le système Impression d’images multiples Avec ce système, les types de tirages suivants peuvent être effectués: Modèle pour les États-Unis et le Canada Portrait Format portefeuille Passeport U.S. Impression de six Impression de seize Impression de quatre images réduites* images réduites images réduites... - Page 62 Présentation du système Modèle pour l’Europe Impression de deux Impression de quatre Impression d’une images réduites images réduites image grand-format Impression de six Impression de neuf Impression de seize images réduites* images réduites images réduites * L’impression de six images réduites est possible seulement si vous utilisez le kit d’impression couleur autolaminant UPC-2040A ou UPC-2045 avec l’imprimante numérique.
-
Page 63: Précautions
• Si l’imprimante fonctionne incorrectement ou si un corps étranger pénètre à l’intérieur du châssis, débranchez immédiatement le cordon d’alimentation secteur et consultez un centre de service après-vente Sony ou votre revendeur Sony. • N’ouvrez pas le couvercle supérieur de l’imprimante pendant l’impression en raison des risques mécaniques. -
Page 64: Installation
Précautions Installation • N’installez pas l’imprimante ou l’appareil photo dans un endroit soumis à: — des vibrations mécaniques — une humidité importante — de la poussière excessive — l’action de la pluie — au rayonnement direct du soleil — des températures extrêmement basses ou élevées —... -
Page 65: Fonctionnement
Lieu d’installation Pour éviter toute surchauffe interne, veillez à assurer un espace dégagé suffisant autour de l’imprimante de façon à ce que de l’air puisse circuler par les ouïes de ventilation sur le côté gauche du châssis. A propos du transport •... -
Page 66: Nomenclature
Nomenclature Pour plus de détails, reportez-vous aux pages indiquées entre parenthèses. Appareil photo Avant F L A S A S E R E L E O O U V ID E 3 2 C R S -2 V IN D C 8 .4 1 Déclencheur (93) optionnel, vous pourrez visualiser une image de l’écran Appuyez sur le déclencheur pour enregistrer l’image... - Page 67 Arrière P L A Y C A M E R A L C D M O N IT O R O F F M O D S E T 1 Touche de mode de flash (Reportez-vous aux : Le flash intégré ne se déclenche pas. La vitesse Instructions de fonctionnement (Opérations d’obturation optimale est sélectionnée par avancées))
- Page 68 Nomenclature 3 Afficheur des opérations Repère de protection Quand le commutateur POWER est réglé sur ON, le (L’image actuelle est protégée) mode de fonctionnement ou le statut des paramètres Résolution (Résolution de apparaît. Numéro de l’image actuelle) Hi-1 l’image (Le numéro de Mode de flash l’image actuelle) Mode de résolution des images...
-
Page 69: Station
qa Contacts métalliques Clignote en rouge: Préparatifs d’enregistrement, Pour le raccordement à la station. Gardez-les toujours chargement du flash, stockage des données propres. S’ils sont sales, nettoyez-les avec un coton- (l’enregistrement est impossible). tige, etc. Allumé en rouge: Mémoire saturée Clignote en vert: Réglage manuel pour l’exposition, qs Vis de trépied (92) le diaphragme, la balance des blancs. - Page 70 Nomenclature 4 Touche PRINT (105) Appuyez sur cette touche pour imprimer l’image sélectionnée par l’appareil photo. 5 Commutateur SPLIT (105) Pour sélectionner le type de tirage: Une image grand format ou un tirage avec plusieurs images réduites. 6 Commutateur B/W COLOR (105) Sert à...
-
Page 71: Imprimante
Imprimante Panneau avant 9 Panneau avant Commutateur POWER (104) Appuyez sur ce commutateur pour mettre l’appareil Ouvrez le panneau avant en le tirant vers vous. sous ou hors tension. L’ouverture du panneau avant révèle la cartouche à ruban encreur, le bac d’alimentation et le réceptacle à 2 Couvercle supérieur papier. - Page 72 Nomenclature Panneau arrière - AC IN 1 Connecteur de la station (84) Branchez sur ce connecteur le câble d’imprimante de la station. 2 Prise -AC IN Sert au raccordement de l’imprimante à une prise murale au moyen du cordon d’alimentation fourni.
-
Page 73: Préparatifs
Préparatifs Préparatifs pour l’imprimante Cette section présente une description des opérations à exécuter avant de commencer un travail d’impression. • Installez une cartouche à ruban encreur, un des éléments d’un kit d’impression optionnel (voir plus loin) • Chargez du papier et mettez en place le réceptacle à papier (voir page 80) Une fois que les opérations ci-dessus ont été... - Page 74 Préparatifs Retirez la cartouche à ruban encreur en appuyant sur la cartouche elle- même. La cartouche à ruban encreur est éjectée. Cette opération n’est pas nécessaire la première fois que vous utilisez l’imprimante. Remarque N’introduisez jamais les doigts dans le compartiment du ruban encreur. La tête thermique atteint en effet une température très élevée et vous risquez de vous brûler si vous la touchez.
- Page 75 Tendez le ruban encreur. Si le ruban n’est pas correctement tendu, il risque d’être endommagé lors de son insertion. Rembobinez le ruban jusqu’à ce que la partie non utilisée arrive à l’extrémité droite. Introduisez fermement la cartouche à ruban encreur jusqu’à ce qu’elle s’encliquette.
- Page 76 Préparatifs Remarques Utilisation des cartouches à ruban encreur • Lorsqu’une cartouche à ruban encreur est complètement usée, remplacez- la. Les cartouches à ruban encreur ne sont pas réutilisables. • Ne touchez pas le ruban encreur proprement dit et ne placez pas la cartouche dans un endroit poussiéreux.
- Page 77 Quand vous utilisez l’imprimante pour la première fois, cette opération n’est pas nécessaire. Placez le papier d’impression dans le bac d’alimentation. Remarques • La quantité de papier que le bac d’alimentation peut contenir dépend du type de papier d’impression utilisé. Si vous ajoutez du papier dans un bac d’alimentation partiellement chargé, veillez à...
- Page 78 Préparatifs Réintroduisez le bac d’alimentation dans l’imprimante jusqu’à ce qu’il s’encliquette. Faites glisser le réceptacle à papier dans l’imprimante. Réceptacle à papier Refermez le panneau avant. Remarques Manipulation du papier d’impression Ne touchez pas la surface d’impression. De la poussière ou des traces de doigts risquent d’entraîner des résultats d’impression insatisfaisants ou un dysfonctionnement de la tête d’impression.
- Page 79 Kit d’impression et bac d’alimentation Pour réaliser des impressions, vous avez besoin de papier d’impression et d’une cartouche à ruban encreur. Utilisez le ruban encreur et le papier d’impression emballés dans le même paquet. A propos des bacs d’alimentation Deux types de bacs d’alimentation sont fournis avec ce système pour accueillir deux formats de papier différents.
- Page 80 Préparatifs Kit d’impression couleur avec pré-coupage auto-adhésif à 4 divisions UPC-20S04 Contient une cartouche à ruban encreur et du papier à étiquettes pour 4 images réduites. Cartouche à ruban encreur couleur 1 rouleau × 5 200 feuilles de papier format A6 (4 pouces) Kit d’impression en noir et blanc UPC-2020 Contient une cartouche à...
-
Page 81: Raccordements
Raccordements Raccordez la station à l’imprimante. Remarques • Mettez tous les appareils hors tension avant de procéder à quelque raccordement que ce soit. • Saisissez le connecteur à l’extrémité du câble de liaison et introduisez-le fermement dans la prise. Raccordement de l’alimentation Raccordement de la station à... - Page 82 Préparatifs Raccordement de l’imprimante à une prise murale Branchez l’imprimante sur une prise murale en utilisant le cordon d’alimentation secteur fourni. - AC IN Cordon d’alimentation secteur (fourni) vers une prise murale Fonctionnement sur courant secteur Vous pouvez utiliser l’appareil photo sur courant secteur avec un adaptateur d’alimentation secteur/chargeur AC-V615 optional.
- Page 83 Libération de l’appareil photo de la station Faites glisser le levier CAMERA RELEASE vers la gauche, et l’appareil photo sortira vers le haut. POWER ON OFF PLAY CAMERA M,OMITOR MODE Levier CAMERA CAMERA RELERASE RELEASE UPX-C21 POWER/BUSY BATTERY MENU CHARGE COLOR MULTI PICTURE EXEC...
- Page 84 Préparatifs Raccordement de l’appareil photo à la station avec un câble Vous pouvez raccorder l’appareil photo à la station avec le câble de liaison fourni. Raccordez la prise RS-232C de l’appareil photo à la prise CAMERA de la station. Si les filtres à ferrite ne sont pas en place sur le câble, mettez les filtres (fournis) en place sur les fiches comme indiqué...
-
Page 85: Préparation De L'appareil Photo
Préparation de l’appareil photo Insertion des batteries Une batterie rechargeable lithium ion et une pile bouton lithium ion sont fournies. Insérez-les de la façon décrite ci-dessous. Ouvrez le couvercle du logement de batterie au bas de l’appareil photo en appuyant sur le bouton PUSH et en faisant glisser le couvercle dans le sens de la flèche. - Page 86 Préparatifs Insérez la pile bouton dans son logement. C R 2 0 P U S H C R 2 0 Réinsérez le logement dans l’appareil photo. Insérez la batterie rechargeable lithium ion. P U S H Refermez le couvercle. P U S H...
- Page 87 POWER ON OFF PLAY CAMERA M,OMITOR MODE CAMERA RELERASE UPX-C21 POWER/BUSY BATTERY MENU CHARGE COLOR MULTI PICTURE EXEC Attachez l’appareil photo à la station.
- Page 88 Préparatifs Réglage de l’horloge, du cadrage et de l’économie d’énergie Vous pouvez régler l’heure et la date, le mode de cadrage et le mode d’économie d’énergie dans l’affichage SET UP qui apparaît sur l’écran LCD de l’appareil photo. Activation de l’affichage SET UP P L A Y C A M E R A...
- Page 89 Réglage de l’heure et de la date Assurez-vous que le repère de sélection indique CLOCK, puis appuyez sur SET de la touche de mode L’affichage CLOCK SET apparaît. C L O C K D ISP OF F Y / M / D - - - - / - - / - - - - : - -...
- Page 90 Préparatifs Sélection de l’affichage des repères de cadrage Quand l’affichage SET UP apparaît sur l’écran LCD, appuyez sur B de la touche de mode de telle façon que le repère de sélection indique FRAME, puis appuyez sur SET de la touche de mode. L’affichage FRAME ON/OFF apparaît.
- Page 91 Sélection du mode d’économie d’énergie En mode d’économie d’énergie, l’appareil photo passe automatiquement au statut de mise hors tension après 3 minutes d’inactivité. Pour remettre l’appareil photo sous tension, réglez le commutateur POWER sur OFF puis sur ON de nouveau. Si le commutateur PLAY/CAMERA est réglé sur CAMERA, une pression à...
- Page 92 Préparatifs Installation sur un trépied Installez l’appareil photo sur un trépied en utilisant le trou pour vis de trépied situé au bas de l’appareil photo. Si un sabot de fixation rapide (disponible dans le commerce) est mis en place sur l’appareil photo, vous pourrez facilement attacher/détacher l’appareil photo.
-
Page 93: Fonctionnement
Fonctionnement Prise de vues P L A Y C A M E R A L C D M O N IT O R O F F M O D S E T Témoin de veille Réglez le commutateur POWER sur ON. Réglez le commutateur PLAY/CAMERA sur CAMERA. - Page 94 Fonctionnement Distance optimale entre le sujet et l’objectif Quand vous prenez une photo en utilisant les repères de cadrage affichés sur l’écran LCD, la distance optimale entre le sujet et l’objectif dépend du type de repères et du réglage du zoom. Pour la prise de vue d’un visage de 24 centimètres du sommet de la tête au menton, la distance optimale et la taille du visage telle qu’elle apparaîtra sur le tirage sont indiqués ci- dessous.
- Page 95 FRAME 4 Grand angle: 1,3 m F R A M E Téléobjectif: 1,65 m 22 mm pouce) Utilisation du viseur Vous pouvez effectuer le cadrage en regardant dans le viseur au lieu d’utiliser l’écran LCD. Vous pouvez ainsi économiser l’énergie de la batterie rechargeable et de la pile.
- Page 96 Fonctionnement Réglage de l’angle de la poignée Le bloc comportant l’écran LCD peut pivoter sur 90 degrés pour le choix d’un angle permettant un visionnement facile d’une image sur l’écran LCD.
- Page 97 Fonctionnement manuel Cet appareil photo est conçu pour produire les meilleures images possibles quand il est utilisé en mode AUTO (utilisez la touche de sélection de mode pour sélectionner le mode AUTO) en utilisant le flash intégré avec réglage du mode de flash . Néanmoins, les opérations manuelles décrites ci- dessous sont aussi disponibles quand vous souhaitez utiliser un flash extérieur, pour la prise de vues dans des conditions d’éclairage spéciales, etc.
-
Page 98: Visionnement D'une Image
Fonctionnement Visionnement d’une Image Vous pouvez visionner les images enregistrées par cet appareil sur l’écran LCD. P L A Y C A M E R A L C D M O N IT O R O F F M O D S E T Réglez le commutateur POWER sur ON. -
Page 99: Effacement D'une Image
Effacement d’une Image Les images stockées dans la mémoire de l’appareil photo peuvent être effacées une par une ou toutes à la fois. Effacement des images une par une P L A Y C A M E R A L C D M O N IT O R O F F... - Page 100 Fonctionnement Appuyez sur SET de la touche de mode. L’indicateur ONE/ALL apparaît sur l’écran LCD, et le repère de sélection indique ONE. Hi-1 O N E A LL Appuyez sur SET de la touche de mode. ERASING apparaît sur l’écran LCD, et l’image sélectionnée à l’étape 4 est effacée.
- Page 101 Appuyez sur SET de la touche de mode. ERASE ALL? apparaît sur l’écran LCD. Hi-1 E R AS E A LL? Appuyez sur SET de la touche de mode. ERASING apparaît sur l’écran LCD, et les images non protégées sont effacées.
-
Page 102: Protection Des Images
Fonctionnement Protection des images Vous pouvez utilisez la fonction de protection d’image pour éviter l’effacement accidentel d’une image. P L A Y C A M E R A L C D M O N IT O R O F F M O D S E T 3,4,5... - Page 103 Appuyez sur SET de la touche de mode. L’indicateur de protection apparaît en haut à droite de l’écran LCD et l’image est protégée contre un effacement accidentel. Hi-1 PROTE C T Répétez les étapes 4 et 5 pour protéger d’autres images. Pour terminer le réglage de la protection Appuyez sur MODE de la touche de mode.
-
Page 104: Impression
Tous les indicateurs - PRINT, ALARM, RIBBON et PAPER - s’allument pendant quelques secondes et s’éteignent ensuite. L’imprimante se trouve à présent en mode de veille. Le message “DIGITAL PRINTING SYSTEM UPX-C21” est affiché pendant 8 secondes environ sur l’écran LCD de la station, puis disparaît. - Page 105 Vous pouvez imprimer jusqu’à neuf tirages d’une image à la fois. Pour imprimer deux feuilles ou plus, réglez le nombre de feuilles à imprimer avant d’appuyer sur la touche PRINT à l’étape 7 ci-dessus. CAMERA RELERASE UPX-C21 POWER/BUSY BATTERY MENU CHARGE...
- Page 106 Fonctionnement Appuyez sur la touche EXEC. Le nombre sélectionné est validé et le nombre sélectionné apparaît en bas et à gauche de l’écran LCD sous la forme “Q6”. Quand vous appuyez sur la touche PRINT, l’impression commence. Après l’impression du nombre de feuilles sélectionné, le réglage revient à 1. Pour laminer un tirage Si vous utilisez un kit d’impression couleur autolaminant UPC-2045, vous pourrez laminer le tirage.
- Page 107 Réglage de la qualité d’impression Vous pouvez ajuster la qualité d’impression à l’aide des fonctions du Menu de la station avant l’impression. Les fonctions du Menu vous permettent de régler les paramètres ci-dessous. Quand vous imprimez une image en couleur, vous pouvez vérifier les résultats modifiés en imprimant un guide des couleurs.
-
Page 108: Spécifications
Appareil photo : Exposition Généralités programmée avec priorité au Alimentation Fournie par une batterie lithium- diaphragme (valeur optimale) ion NP-F550 Sony ou par un : Exposition programmée adaptateur d’alimentation avec priorité au diaphragme secteur/chargeur en option (valeur fixée) Température de fonctionnement E: Vitesse d’obturation... - Page 109 Station Adaptateur d’alimentation secteur/ chargeur Alimentation 8,4 V CC (fournie par l’adaptateur secteur) Alimentation 100 - 240 V CA, 50/60 Hz 208 × 44 × 188 mm (l/h/p) Dimensions Consommation 23 W × 1 × 7 pouces) 34 VA (CA 100 V), Poids 560 g (1 li.
-
Page 110: Guide De Dépannage
Guide de dépannage Si un problème quelconque survient pendant l’utilisation de l’appareil photo, utilisez le tableau suivant comme guide de dépannage. Si le problème persiste, contactez votre revendeur Sony ou un centre de service après-vente agréé Sony. Pendant la prise de vues Symptômes... - Page 111 Qualité de l’image Symptômes Causes possibles/Mesures à prendre L’image n’est pas nette • Le sujet est en dehors de la zone de netteté. t Vérifiez la distance entre l’objectif et le sujet et disposez le sujet à l’intérieur de la zone de netteté. •...
- Page 112 Un dysfonctionnement du capteur s’est produit. t L’imprimante ne peut plus fonctionner. Mettez-la immédiatement hors tension et contactez votre revendeur ou centre de service après-vente Sony. END OF RIBBON Le ruban est épuisé t Remplacez la cartouche à ruban encreur par une neuve.
- Page 113 Message sur l’écran Causes possibles/Mesures à prendre LCD de la station LOW BATTERY La batterie est faible. PRESS [EXEC] t Rechargez la batterie (page 87), remplacez-la par une autre rechargée (page 85) ou utilisez l’appareil photo avec l’adaptateur d’alimentation secteur fourni (page 82).
-
Page 114: Indicateurs D'erreur Du Panneau Avant De L'imprimante
Le couvercle supérieur de l’imprimante est ouvert. t Refermez le couvercle supérieur. PRINT, ALARM, Une panne s’est produite nécessitant l’intervention PAPER and RIBBON d’un technicien. t Mettez immédiatement l’imprimante hors tension et consultez un centre de service après-vente Sony ou votre revendeur Sony. - Page 116 Español ADVERTENCIA Para prevenir el riesgo de incendios o de electrocución, no exponga la unidad a la lluvia ni a la humedad. Para evitar descargas eléctricas, no abra la unidad. En caso de avería, solicite el servicio de personal cualificado únicamente.
- Page 117 Índice Descripción general del sistema ......... 118 Configuración del sistema........... 118 Impresiones que podrán realizarse con este sistema ... 119 Precauciones ..............121 Seguridad ................121 Instalación ................122 Operación ................123 Limpieza................123 Ubicación de partes ............124 Cámara ................124 Estación ................127 Impresora ................129 Preparativos ..............
-
Page 118: Descripción General Del Sistema
Descripción general del sistema El sistema de impresión digital UPX-C21 Sony ha sido diseñado para reproducir fotografías tomadas mediante una cámara digital en papel de tamaño A6 con gran resolución (310 dpi) y 256 sombras de grises en blanco y negro, o a todo color (16.700.000 colores). -
Page 119: Impresiones Que Podrán Realizarse Con Este Sistema
Impresiones que podrán realizarse con este sistema Impresión de fotografías divididas Con este sistema podrán realizarse los tipos de impresiones siguientes: Modelo para EE.UU. y Canadá Impresión de una Impresión de dos Impresión de dos fotografías fotografía completa fotografías para cartera para pasaporte de EE.UU Impresión de quatro Impresión de seis... - Page 120 Descripción general del sistema Modelo para Europa Impresión de fotografía Impresión de dos Impresión de cuatro una completa fotografías reducidas fotografías reducidas Impresión de seis Impresión de nueve Impresión de dieciséis fotografías reducidas* fotografías reducidas fotografías reducidas * La impresión de seis imágenes reducidas solamente será posible cuando se utilice el paquete de impresión en color autolaminador UPC-2040A o UPC-2045 con la impresora digital.
-
Page 121: Precauciones
• Si la impresora funciona mal, o si han caído materias extrañas en su interior, desconecte inmediatamente su alimentación y consulte a un centro de reparaciones Sony o a su proveedor Sony. • No abra la cubierta superior de la impresora durante la impresión para evitar el riesgo de daños mecánicos. -
Page 122: Instalación
Precauciones Instalación • Evite colocar la impresora o la cámara en un lugar sometido a: — vibraciones mecánicas — gran humedad — polvo excesivo — la lluvia — luz solar excesiva o directa — temperaturas extremadamente altas o bajas — fuentes de magnetismo intenso —... -
Page 123: Operación
Operación Fotografiado de prueba Antes de fotografiar, tendrá que tomar algunas fotografías de prueba y comprobarlas para ver si la cámara funciona normalmente. Leyes sobre derechos de autor Usted podrá tomar fotografías para disfrutar personalmente con esta cámara digital. Sin embargo, es ilegal tomar fotografías de materiales protegidos por las leyes de autor sin permiso del propietario de los derechos de autor. -
Page 124: Ubicación De Partes
Ubicación de partes Con respecto a los detalles, consulte las páginas indicadas entre paréntesis. Cámara Parte frontal F L A S A S E R E L E O O U V ID E 3 2 C R S -2 V IN D C 8 .4 1 Botón disparador (151) - Page 125 Parte posteriorr P L A Y C A M E R A L C D M O N IT O R O F F M O D S E T 1 Botón de modio del flash (Consulte el Manual : El flash incorporado no se encenderá. La de instrucciones (Operaciones avanzadas).) velocidad de obturación óptima se seleccionará...
- Page 126 Ubicación de partes 3 Visualizador de operación Marca de protección Cuando ponga el interruptor POWER en ON, (La imagen actual está imagen aparecerá el modo de operación o el estado de ajuste. actual protegida.) Resolución Hi-1 Número de imagen (Resolución de la Modo de flash (Número de la imagen actual)
-
Page 127: Estación
qa Contactos metálicos Parpadeo en rojo: Preparación para la grabación, Para conexión a la estación. Manténgalos siempre carga del flash, y almacenamiento de datos (la limpios. Si se ensucian, límpielos con un palillo de grabación estará inhabilitada). algodón, etc. Iluminación en rojo: Memoria llena Parpadeo en verde: Ajuste manual de la exposición, qs Rosca para trípode (150) iris, y equilibrio del blanco... - Page 128 Ubicación de partes 4 Botón de impresión (PRINT) (163) Presiónelo para imprimir la imagen seleccionada en la cámara. 5 Botón de división (SPLIT) (162) Seleccione el tipo de impresión: impresión de imagen de tamaño completo o reducida dividida. 6 Botón de blanco y negro/color (B/W COLOR) (162) Seleccione B/W (blanco y negro) o COL (color) para impresión.
-
Page 129: Impresora
Impresora Panel frontal Interruptor de alimentación (POWER) (162) 9 Panel frontal Presiónelo para conectar o desconectar la alimentación Tire de la puerta frontal hacia usted para abrirla. de la unidad. Al abrir el panel se verá el cartucho de cinta entintadora, la bandeja de papel, y la cubierta del 2 Cubierta superior papel. - Page 130 Ubicación de partes Panel posterior - AC IN 1 Conector de interfaz en paralelo (140) Conéctele el cable de interfaz en paralelo de la estación. 2 Conector de entrada de CA (- AC IN) (139) Se utiliza para conectar la impresora a un tomacorriente de la red con el cable de alimentación suministrado.
-
Page 131: Preparativos
Preparativos Preparación de la impresora En esta sección se describen las operaciones siguientes, que habrá que realizar antes de iniciar la impresión. • Carga de un cartucho de cinta entintadora, componente de un paquete de impresión opcional (vea más abajo) •... - Page 132 Preparativos Quite el cartucho de cinta entintadora empujándolo. El cartucho de cinta entintadora saldrá hacia afuera. Cuando vaya a utilizar la impresora por primera vez, no necesitará realizar esta operación. Nota No introduzca nunca la mano dentro del compartimiento del cartucho de la cinta entintadora.
- Page 133 Tense la cinta entintadora. Si dejase la cinta floja, podría dañarse cuando la insertase. Bobine el carrete hasta que el punto no utilizado llegue al extremo derecho. Inserte firmemente el cartucho de cinta entintadora hasta que se pare. Cierre el panel frontal. (Continúa en la página siguiente)
- Page 134 Preparativos Notas Cuando utilice el cartucho de cinta entintadora • Después de haber utilizado completamente el cartucho de cinta entintadora, reemplácelo. Los cartuchos de cinta entintadora no son reusables. • No toque la cinta entintadora del cartucho ni coloque éste en un lugar polvoriento.
- Page 135 Cuando utilice la impresora por primera vez, no necesitará realizar esta operación. Coloque papel en la bandeja del papel. Notas • La cantidad de papel que puede contener la bandeja dependerá del papel que esté utilizando. Cuando añada papel a una bandeja parcialmente llena, tenga cuidad de que el número total de hojas no sobrepase el límite.
- Page 136 Preparativos Deslice la bandeja del papel hacia la impresora hasta que chasquee en su lugar. Deslice la cubierta del papel dentro de la impresora. Cubierta del papel Cierre el panel frontal. Notas Cuando maneje el papel No toque la superficie de impresión. El polvo o las huellas dactilares podría causar la impresión insatisfactoria o el mal funcionamiento del cabezal.
- Page 137 Paquete de impresión y bandeja del papel Para imprimir necesitará papel y un cartucho de cinta entintadora. Utilice la cinta entintadora con el papel contenido en el mismo paquete. Acerca de las bandejas del papel Para este sistema se suministran dos tipos de bandejas del papel para alojar papel de dos tamaños diferentes.
- Page 138 Preparativos Paquete de impresión en color autoadhesivo dividido en 4 partes UPC-20S04 Contiene un cartucho de cinta entintadora y papel para pegatinas de 4 imágenes reducidas. Cartucho de cinta entintadora en color: 1 rollo Papel de tamaño A-6: 200 hojas Paquete de impresión en blanco y negro UPC-2020 Contiene un cartucho de cinta entintadora y papel.
-
Page 139: Conexiones
Conexiones Conecte la estación y la impresora, y fije la cámara a la estación. Notas • Desconecte la alimentación de cada dispositivo antes de intentar realizar cualquier conexión. • Sujete el conector del extremo del cable conector, e insértelo firmemente en el conector hembra. - Page 140 Preparativos Para parar el suministro de alimentación a la estación Desconecte el adaptador de alimentación de CA del tomacorriente de la red. Conecte la impresora un tomacorriente de la red. Conecte la impresora a un tomacorriente de la red utilizando el cable de alimentación de CA suministrado.
- Page 141 Liberación de la cámara de la estación Deslice la palanca CAMERA RELEASE hacia la izquierda, y la cámara saldrá hacia arriba. POWER ON OFF PLAY CAMERA M,OMITOR MODE Palanca CAMERA RELEASE CAMERA RELERASE UPX-C21 POWER/BUSY BATTERY MENU CHARGE COLOR MULTI PICTURE EXEC...
- Page 142 Preparativos Conexión de la cámara a la estación con un cable Usted podrá conectar la cámara a la estación con el cable conector suministrado. Conecte el conector RS-232C de la cámara y el conector CAMERA de la estación utilizando el cable conector. En ambos casos, deberá...
-
Page 143: Preparación De La Cámara
Preparación de la cámara Inserción de la batería/pila Se suministra una batería de iones de litio, grande, y una pila de botón. Insértelas como se describe a continuación. Abra la tapa del compartimiento de la batería/pila de la parte inferior de la cámara empujando el botón PUSH y deslizándola en el sentido de la flecha. - Page 144 Preparativos Instale la pila de botón en la caja. C R 2 0 P U S H C R 2 0 Reinserte la caja. Inserte la batería grande de iones de litio. P U S H Cierre la tapa. P U S H...
- Page 145 POWER ON OFF PLAY CAMERA M,OMITOR MODE CAMERA RELERASE UPX-C21 POWER/BUSY BATTERY MENU CHARGE COLOR MULTI PICTURE EXEC Fije la cámara a la estación.
- Page 146 Preparativos Ajuste del reloj, el encuadre, y el modo de ahorro de energía La fecha y la hora, el encuadre, y el modo de ahorro de energía se ajustan con la visualización SET UP que aparece en el visualizador de cristal líquido de la cámara.
- Page 147 Ajuste de la hora y la fecha Compruebe si la marca de selección está señalando CLOCK, y después presione SET del botón de modo. Aparecerá la visualización de CLOCK SET. CL O CK S ET D ISP OFF Y / M / D - - - - / - - / - - - - : - -...
- Page 148 Preparativos Selección de la guía visualizada Cuando esté indicándose SET UP en el visualizador de cristal líquido, presione B del botón de modo de forma que la marca de selección señale FRAME, y después presione SET de dicho botón. Aparecerá la visualización de FRAME ON/OFF. F R A ME Presione b o B del botón de modo para elegir ON, y después presione SET de dicho botón.
- Page 149 Ajuste del modo de ahorro de energía En el modo de ahorro de energía, la cámara se ajustará automáticamente al estado existente 3 minutos después de no funcionar. Para reconectar la alimentación, ponga el interruptor POWER en OFF y después en ON. Si el selector PLAY/CAMERA está...
- Page 150 Preparativos Fijación a un trípode Fije la cámara al trípode utilizando el orificio roscado de la base de la empuñadura. Si la cámara tiene instalada una zapata rápida (adquirida en un establecimiento del ramo), podrá instalar/quitar fácilmente la cámara. F LA S A S E R E LE O O U...
-
Page 151: Operación
Operación Fotografía P L A Y C A M E R A L C D M O N IT O R O F F M O D S E T Lámpara indicadora de espera Ponga el interruptor POWER en ON. Ponga el selector PLAY/CAMERA en CAMERA. - Page 152 Operación Distancia óptima entre el motivo y el objetivo Cuando tome una fotografía utilizando la guía mostrada en el visualizador de cristal líquido, la óptima distancia entre el motivo y el objetivo diferirá de acuerdo con el tipo de guía y la posición del zoom. Suponiendo que tome una fotografía de una cara de 24 centímetros de la parte superior de la cabeza a la barbilla, la distancia óptima y el tamaño de la cara aparecerán en la impresión como se muestra a continuación.
- Page 153 FRAME 4 Gran angular: 1,3 m F R A M E Telefoto: 1,65 m 22 mm Utilización del visor Usted podrá ajustar el encuadre observando a través del visor en vez del visualizador de cristal líquido a fin de ahorrar energía de la batería. Ponga el interruptor LCD MONITOR en OFF, observe a través del visor, y encuadre.
- Page 154 Operación Ajuste del ángulo de la empuñadura El bloque con el visualizador de cristal líquido podrá girarse 90 para ajustar el ángulo a fin de ver claramente fotografías en el mismo.
- Page 155 Operaciones manuales Esta cámara ha sido diseñada para producir las mejores fotografías posibles cuando se utilice en el modo AUTO (para elegir el modo AUTO, utilice la selección de modo) usando el flash incorporado en el modo . Sin embargo, también podrán utilizarse las operaciones manuales descritas a continuación cuando desee usar un flash externo o fotografiar en condiciones de iluminación especiales, etc.
-
Page 156: Contemplación De Fotografías
Operación Contemplación de fotografías Usted podrá ver las fotografías tomadas en el visualizador de cristal líquido. P L A Y C A M E R A L C D M O N IT O R O F F M O D S E T Ponga el interruptor POWER en ON. -
Page 157: Borrado De Fotografías
Borrado de fotografías Las fotografías almacenadas en la memoria de la cámara podrán borrarse una tras otra o todas a la vez. Borrado de fotografías una tras otra P L A Y C A M E R A L C D M O N IT O R O F F... - Page 158 Operación Presione SET del botón de modo. En el visualizador de cristal líquido aparecerá la marca ONE/ALL, y la marca de selección apuntará hacia ONE. Hi-1 O N E A LL Presione SET del botón de modo. En el visualizador de cristal líquido aparecerá ERASING, y la fotografía seleccionada en el paso 4 se borrará.
- Page 159 Presione SET del botón de modo. En el visualizador de cristal líquido aparecerá ERASE ALL? Hi-1 E R AS E A LL? Presione SET del botón de modo. En el visualizador de cristal líquido aparecerá ERASING, y todas las fotografías que no estén protegidas se borrarán. Si borra todas las fotografías, el visualizador de cristal líquido se volverá...
-
Page 160: Protección De Una Fotografía
Operación Protección de una fotografía Para evitar el borrado accidental de una fotografía, existe una función de protección de fotografías. P L A Y C A M E R A L C D M O N IT O R O F F M O D S E T 3,4,5... - Page 161 Presione SET del botón de modo. En el visualizador de cristal líquido aparecerá la marca de protección, y la fotografía quedará protegida contra el borrado accidental. Hi-1 PROTE C T Para proteger otras fotografías, repita los pasos 4 y 5. Para finalizar el ajuste de protección Presione MODE del botón de modo.
-
Page 162: Impresión
PAPER, y después se apagarán. La impresora estará ahora en el estado de espera. En el visualizador de cristal líquido aparecerá el mensaje “DIGITAL PRINTING SYSTEM UPX-C21”, y después desaparecerá. Presione el botón B/W COLOR de la estación para seleccionar la impresión en blanco y negro (B/W) o en color (COL). - Page 163 Usted podrá imprimir hasta nueve hojas de una imagen al mismo tiempo. Para imprimir dos o más hojas, introduzca el número de hojas que desee imprimir antes de presionar el botón PRINT en el paso 7 anterior. CAMERA RELERASE UPX-C21 POWER/BUSY BATTERY MENU CHARGE...
- Page 164 Operación Presione el botón EXEC. Se establecerá el número seleccionado y el número seleccionado aparecerá en la parte inferior izquierda del visualizador de cristal líquido, por ejemplo “Q6”. Cuando presione el botón PRINT, se iniciará la impresión. Después de la impresión del número establecido de hojas, tal número volverá...
- Page 165 Ajuste de la calidad de impresión La calidad de las fotografías podrá ajustarse utilizando las funciones del menú de la estación antes de imprimir. Las funciones del menú permitirán ajustar los elementos siguientes. Si imprime una fotografía en color, podrá comprobar los resultados de los ajustes imprimiendo una guía de colores.
-
Page 166: Especificaciones
Alimentación Suministrada por una batería de prioridad del iris litio NP-F550 o desde el : Exposición programada adaptador/cargador de CA Sony con prioridad del iris suministrados E: Velocidad de Temperatura de operación obturación fija 5 a 35°C... - Page 167 Tensión de salida DC OUT: 8,4 V, 1,8 A en el Estación modo de operación Fuente de alimentación Temperatura de funcionamiento 8,4 V CC (suministrada por el 5 a 35°C adaptador de alimentación de Temperatura de almacenamiento –20 a +60°C 208 ×...
-
Page 168: Solución De Problemas
Si encuentra algún problema al utilizar su cámara, use la tabla siguiente como guía para tratar de solucionarlo. Si el problema continúa, póngase en contacto con su proveedor Sony o con un centro de reparaciones autorizado por Sony. Al fotografiar Síntoma... - Page 169 Calidad de las imágenes Síntoma Causas posibles/solución • El enfoque está desactivado. La imagen está t Compruebe la distancia entre el objectivo y el desenfocada. motivo y sitúe al motivo a una distancia dentro de la que se aplique el enfoque. •...
- Page 170 Se ha producido un problema en el sensor. t La impresora no puede utilizarse. Desconecte inmediatamente la alimentación y póngase en contacto con un centro de reparaciones Sony o con su proveedor Sony. END OF RIBBON La cinta entintadora se ha agotado.
-
Page 171: Indicadores Del Panel Frontal De La Impresora
• La cubierta superior de la impresora está abierta. t Ciérrela. PRINT, ALARM, • Problema que necesita la ayuda de un técnico. PAPER y RIBBON t Desconecte inmediatamente la alimentación y póngase en contacto con su proveedor Sony o con un centro de reparaciones autorizado por Sony. - Page 172 Printed in Japan...