Table of Contents
Advertisement
ALPINE ELECTRONICS MARKETING, INC.
1-1-8 Nishi Gotanda,
Shinagawa-ku,
Tokyo 141-0031, Japan
Phone 03-5496-8231
ALPINE ELECTRONICS OF AMERICA, INC.
19145 Gramercy Place, Torrance,
California 90501, U.S.A.
Phone 1-800-ALPINE-1 (1-800-257-4631)
ALPINE ELECTRONICS OF CANADA, INC.
7300 Warden Ave., Suite 203, Markham,
Ontario L3R 9Z6, Canada
Phone 1-800-ALPINE-1 (1-800-257-4631)
Yamagata Printing Co., Ltd.
2-6-34, Takashima, Nishi-ku,
Yokohama, Kanagawa, Japan
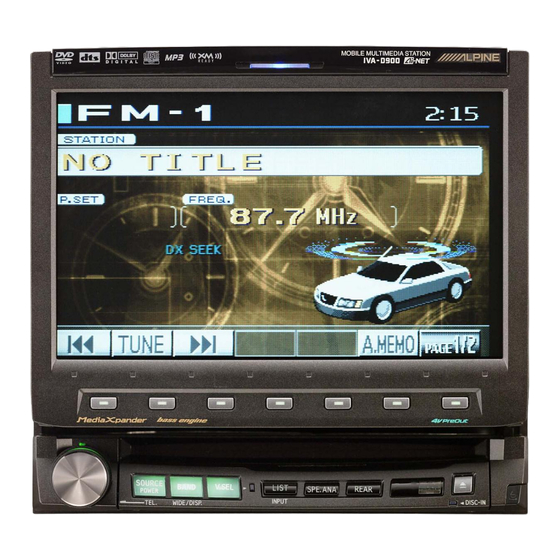
Mobile Multimedia Station
IVA-D900
DIGITAL VIDEO
• OWNER'S MANUAL
Please read before using this equipment.
• MODE D'EMPLOI
Veuillez lire avant d'utiliser cet appareil.
• MANUAL DE OPERACIÓN
Léalo antes de utilizar este equipo.
ALPINE ELECTRONICS OF AUSTRALIA PTY. LTD.
6-8 Fiveways Boulevarde Keysborough,
Victoria 3173, Australia
Phone 03-9769-0000
ALPINE ELECTRONICS GmbH
Kreuzerkamp 7,
40878 Ratingen, Germany
Phone 02102-4550
ALPINE ELECTRONICS OF U.K. LTD.
Alpine House
Fletchamstead Highway, Coventry CV4 9TW, U.K.
Phone 0870-33 33 763
R
ALPINE ELECTRONICS FRANCE S.A.R.L.
(RCS PONTOISE B 338 101 280)
98, Rue de la Belle Etoile, Z.I. Paris Nord Il,
B.P. 50016, 95945 Roissy Charles de Gaulle
Cedex, France
Phone 01-48638989
ALPINE ITALIA S.p.A.
Viale C. Colombo 8, 20090 Trezzano Sul
Naviglio (MI), Italy
Phone 02-484781
ALPINE ELECTRONICS DE ESPAÑA, S.A.
Portal de Gamarra 36, Pabellón, 32
01013 Vitoria (Alava)-APDO 133, Spain
Phone 945-283588
Designed by ALPINE Japan
Printed in Japan (Y)
68P50520Y71-O
EN
FR
ES
ES
IT
SE
Advertisement
Table of Contents

Related Manuals for Alpine D900 - XM Ready DVD/CD/MP3 Receiver


Summary of Contents for Alpine D900 - XM Ready DVD/CD/MP3 Receiver
- Page 1 Veuillez lire avant d'utiliser cet appareil. • MANUAL DE OPERACIÓN Léalo antes de utilizar este equipo. ALPINE ELECTRONICS MARKETING, INC. ALPINE ELECTRONICS FRANCE S.A.R.L. ALPINE ELECTRONICS OF AUSTRALIA PTY. LTD. 1-1-8 Nishi Gotanda, (RCS PONTOISE B 338 101 280) 6-8 Fiveways Boulevarde Keysborough, Shinagawa-ku, 98, Rue de la Belle Etoile, Z.I.
- Page 2 PLAY BACK and CD TEXT. The CHA-1214 Ai-NET model holds 12 discs, and the CHM-S630 M-Bus model is a super-compact 6-disc changer with a CD-R/RW PLAY BACK. Changeurs de CD Alpine : vous avez le choix! Plus de sélections musicales, plus de souplesse, plus de confort.
-
Page 3: Table Of Contents
ENGLISH Stopping Playback (PRE-STOP) ....16 Contents Stopping Playback .......... 16 Fast-forwarding/Fast-reversing ....... 17 Operating Instructions Finding the Beginnings of Chapters or Tracks ... 17 Playing Still Frames (Pausing) ....... 17 WARNING Frame-by-frame Playback ....... 17 Slow Motion Playback ........17 WARNING .......... - Page 4 Setup DISPLAY Setup Display Setup Operation ......... 35 DVD Setup Illumination Control ........35 DVD Setup Operation ........28 Adjusting Brightness ........35 Changing the language setting ......28 Adjusting Tint of Picture ......... 35 Setting of the Menu Language ......28 Adjusting Color of Picture ......
- Page 5 External Audio Processor (Optional) Installation and Connections Adjustment Procedure for Dolby Surround ..44 Setting the Speakers ........45 WARNING Set MX Mode of the External Audio Processor ..45 WARNING ..........67 X-OVER Adjustment ........46 CAUTION ..........67 Performing Time Correction Manually (TCR)/ Swithing the Phase ........
-
Page 6: Operating Instructions
Failure to do so may cause personal injury or damage to the DO NOT OPERATE ANY FUNCTION THAT TAKES YOUR product. Return it to your authorized Alpine dealer or the nearest Alpine Service Center for repairing. ATTENTION AWAY FROM SAFELY DRIVING YOUR VEHICLE. -
Page 7: Precautions
Maintenance • Excessive vibrations If you have problems, do not attempt to repair the unit yourself. Return it to your Alpine dealer or the nearest Alpine Service Correct Handling Station for servicing. Do not drop the disc while handling. Hold the disc so you will not leave fingerprints on the surface. -
Page 8: Discs Playable On This Unit
After a short warm-up period, it will return to 8 cm normal. Two-sided disc Alpine products equipped with the Ai-NET bus, connected to the Approx. IVA-D900, can be operated from the IVA-D900. Depending on 160 Minutes the products connected, the functions and displays will vary. For details, consult your Alpine dealer. - Page 9 If you use unspecified compact discs, correct performance cannot On handling Compact Discs (CD/CD-R/CD-RW) be guaranteed. • Do not touch the surface. You can play CD-Rs (CD-Recordable)/CD-RWs (CD- • Do not expose the disc to direct sunlight. ReWritable) which have been recorded only on audio devices. •...
-
Page 10: Getting Started
Getting Started Press SOURCE/POWER. The display shows the main menu screen. Turn the Rotary encoder and select "DVD PLAYER" from the main menu. OPEN/CLOSE TILT Action indicator • If an optional DVD player or DVD Changer is connected and MUTE FLAT/SLIDE its power is on, the display shows "... -
Page 11: Turning Power On Or Off
Align the groove on the front panel with the an optional steering wheel control interface may be projections on the main unit. available to connect to your Alpine radio. For details, contact your Alpine dealer. Push the right side of the front panel until it locks firmly into the main unit. -
Page 12: Selecting The Monitor Opening Angle
Selecting the Monitor Opening Angle Adjusting the Volume/Balance (Between Left and Right)/Fader (Between Front and Rear)/ The monitor opening angle can be set in 2 positions. Defeat Press and hold FLAT/SLIDE for at least 2 seconds while the monitor is being raised. Press the Rotary encoder repeatedly until the Each press changes the monitor angle back or forth. -
Page 13: Radio
Manual Storing of Station Presets Radio Tune in a desired radio station you wish to store in the preset memory by manual or automatic seek tuning. Press 7 (PAGE 1/2). Press and hold any one of the Function buttons 1 (P.SET1) through 6 (P.SET6) for at least 2 seconds. -
Page 14: Cd/Mp3
CD into the optional CD player starts playback automatically. - When an optional Alpine MD player is connected to the IVA-D900, you can control the player from the IVA-D900. (When the MDA-5051 is connected, MDs can be played... -
Page 15: Random Play)
M.I.X. (Random Play) About MP3 Press 5 (M.I.X.) in the play or pause mode. CAUTION Except for personal enjoyment, duplicating audio data (including The tracks (files) on the disc will be played back in a random MP3 data) or distributing, transferring, or copying it, whether for sequence. -
Page 16: Dvd/Video Cd
Rotary encoder V.SEL SOURCE/POWER Playing DVD/Video CD IVA-D900 has a built-in DVD player. When an optional Alpine DVD/ video CD/CD player (or DVD changer) is connected to the IVA- D900, you can control it from the IVA-D900. WARNING It is dangerous (and illegal in many states) for the... -
Page 17: To Display The Dvd Mode Screen
The display shows the Function Guide. brake once then engage it again. When an optional Alpine DVD player is connected: 3. While the parking brake is being engaged the second Insert a disc into the DVD/video CD/CD player, the player time, release the foot brake. -
Page 18: If A Menu Screen Appears
To check the disc working status during play If a menu screen appears 1 Press V.SEL when your vehicle stops. On DVDs and Video CDs with playback control (PBC), menu Each pressing switches the visual source. screens may appear automatically. If this happens, perform The menu screen of the DVD mode is displayed. -
Page 19: Fast-Forwarding/Fast-Reversing
Fast-forwarding/Fast-reversing Slow Motion Playback During playback, press and hold 1 ( g ) (fast- When 3 ( f ) is pressed and held in while in the reverse) or 3 ( f ) (fast-forward). pause mode, the 1/8th speed slow motion playback When pressed for more than 1 second, the disc is mode is set. -
Page 20: Searching By Title Number (Dvd Only)
• If the track number is a 2-digit number, playback starts Searching by Title Number (DVD only) automatically even if ENTER is not pressed in step 2. • If the chapter number is a 3-digit number, playback starts automatically even if ENTER is not pressed in step 2. Use this function to easily find positions on the DVD using the •... -
Page 21: Switching The Subtitles (Subtitle Language) (Dvd Only)
Switching the Subtitles (Subtitle Language) Displaying the Disc Status for DVD (DVD only) Use the procedure described below to display the status (title number, chapter number, etc.) of the currently playing DVD on the monitor With DVDs on which multiple subtitle languages are recorded, the screen. -
Page 22: Sound Setting
After pressing 2 (ON), press 3 (SETUP). Sound Setting MX list screen is displayed. Turn the Rotary encoder to select your desired MX mode. The screen shows the *Function Guide. *Displays the function assigned for each button. Press the Function button to switch the setting. MX CD (OFF, CD1 to 3) The large quantity of uncompressed CD data is processed to reproduce the sound with more clarity. -
Page 23: Setting The Bass Engine
• The settings of the bass level will be individually memorized for Setting the Bass Engine each source (FM, AM, XM, CD, etc.) until the setting is changed. Once you set Bass frequency and Bass Band Width for one of sources (FM, AM, XM, CD, etc.), this setting becomes effective for The following steps 1 to 7 are common operations to each all those sources. -
Page 24: About The Time Correction
Example 2. Listening Position: All Seats About the Time Correction Adjust the time correction level of each speaker to almost the The distance between the listener and the speakers in a car vary same level. widely due to the special conditions of the mobile environment. This Sit in the listening position (driver’s seat, etc.) and difference in the distances from the speakers to the listener creates a measure the distance (in meters) between your... -
Page 25: Time Correction
Example of Steps 2 and 3 Setting Time Correction 1 After entering corrections for the front (left and right) speakers in STEP 15, the time difference is 1.5 ms for Setting item: TIME CORRECTION both front-left and front-right speakers. Setting contents: TIME DN/UP/FRONT-LEFT/FRONT-RIGHT/ REAR-LEFT/REAR-RIGHT Before performing the following procedures, refer to “About the Time Correction”... -
Page 26: Other Useful Features
Other Useful Features Turn the Rotary encoder and select the desired character for the first position. To change between upper case, lower case, numeral and symbol, press 3 (A/1). Each press changes the bottom menu. When the character for the first position has been selected, press the Rotary encoder. -
Page 27: Setting Of Scrolling
Rear Enter Function Press the Rotary encoder. The selected title starts to play, and the screen returns to the Radio mode. The rear enter function independently routes different sources to the To display the folder list or the file list of MP3 disc front and the rear inside a car. -
Page 28: Blackout Mode On And Off
Switching Display Modes DEMO MUTE/DSP. OFF After carrying out the steps 1 to 3 of "To display the DVD mode Screen" explained on page 28, perform the operation described below. Press and hold WIDE/DISP for at least 2 seconds in the visual source. -
Page 29: Displaying The Spectrum Analyzer
Displaying the Spectrum Analyzer Switching the Visual Source Only (Simul Function) Depending on the external audio processor connected to the unit, this function may not work properly. You can watch the video portion of another source while listening to When one of the sources except for the video the current source. -
Page 30: Dvd Setup
Setup Turn the Rotary encoder to select your desired setting item. The screen shows the ∗ Function Guide. * Displays the function assigned for each button (the Function DVD Setup buttons). Setting items: MENU LANGUAGE ↔ AUDIO LANGUAGE ↔ SUB T. LANGUAGE ↔ COUNTRY CODE ↔ PARENTAL ↔ DIGITAL OUT MODE ↔... -
Page 31: Setting Of The Subtitle Language
1 Press 1 (P-WORD). Setting of the Subtitle Language Number input box is displayed. Setting item: SUB T. LANGUAGE 2 Press 0 to 9 on the supplied remote control to input the Setting contents: AUTO / ENGLISH / GERMAN / FRENCH / password. -
Page 32: Changing The Digital Output Setting
Changing the Digital Output Setting Use the following procedure to set the digital audio signal output from the IVA-D900. Setting item: DIGITAL OUT MODE Setting contents: AUTO / LPCM AUTO: The digital output is switched automatically according to the type of audio signals being played. Be sure to select “AUTO”... -
Page 33: Setting The Digital Output
Setting the Digital Output GENERAL Setup To connect an audio processor using the optical digital output, set to “ON” by the following procedure. Setting item: OPT.OUT Setting contents: OFF / ON • Afterwards, set ACC to OFF once, then turn it ON again. The setting of Digital Output is decided. -
Page 34: Setting Automatic Opening/Closing Of The Monitor
Sound (Beep) Guide Function Turn the Rotary encoder to select your desired setting item. Setting item: BEEP The screen shows the ∗ Function Guide. Setting content: OFF / ON * Displays the function assigned for each button (the Function Activate the Sound Guide mode. buttons). -
Page 35: System Setup Operation
To display the System mode screen: To watch a video source, your vehicle must be parked with With an Alpine navigation system connected to the IVA-D900, the the ignition key in the ACC or ON position. To do this, follow voice guidance of the navigation system will be mixed with the radio the procedure below. -
Page 36: Name External Equipment To Be Displayed
Guide of TV mode appears. • TEL icon on this setting is not related to TEL Link Operation • Only when an Alpine TV tuner is connected, can you operate the (pages 40 - 43). displayed function guide from this unit. -
Page 37: Display Setup Operation
AUTO: Adjust the brightness of the background illumination Display Setup Operation of the monitor automatically to the brightness of the car inside. To display the Display mode screen: Adjusting Brightness To watch a video source, your vehicle must be parked with the ignition key in the ACC or ON position. -
Page 38: Navigation System (Optional)
Controlling the Navigation System (Optional) Operating Auxiliary Devices (Optional) If an optional Alpine Navigation System is connected to the IVA- To operate your devices connected to the AUX terminals on the rear D900, some of its functions can be controlled from the IVA-D900. -
Page 39: Changer (Optional)
Changer (Optional) To activate your auxiliary devices: To watch a video source, your vehicle must be parked with the ignition key in the ACC or ON position. To do this, follow the procedure below. 1. Bring your vehicle to a complete stop at a safe location. -
Page 40: Multi-Changer Selection (Optional)
CD changer. Multi-Changer Selection (Optional) Rotary encoder BAND Alpine's Ai-NET system will support up to 6 CD Changers. When SOURCE/POWER LIST/INPUT operating two or more changers, the KCA-400C (Multi-Changer Switching device) must be used. If you use 1 Switching device, you can connect up to 4 CD Changers. -
Page 41: Tuning In To Categorized Programs
Tuning in to Categorized Programs Checking the XM Radio ID Number You can listen to programs categorized to the same group one after You need to provide XM with the unique XM Radio ID number for another. your XM Radio Receiver in order to subscribe to XM's programming. In XM mode, press 4 (CAT). -
Page 42: Displaying The Category/Channel Name Title List
Displaying the Category/Channel Name Title MobileHub™ Link List (Optional) In XM mode, press LIST/INPUT. The category title list is displayed. Turn the Rotary encoder to move the cursor to the desired category. Press the Rotary encoder. The lowest channel in the selected category is tuned. To display the channel name list 1 While the title List is displayed in step 2 above, press 6 (NEXT :). -
Page 43: Telephone Reception
• With a junction box connected outgoing, incoming, and sending Dial call history will also be recorded in the portable telephone. • While telephoning, Time Correction is set to normal (0.0ms) and Input the telephone number using the dial. DEFEAT is also set to ON. When the call has finished, the unit Press and hold the Rotary encoder for more than returns to the setting which you previously set. -
Page 44: Calling By The Address Book
Calling by the address book SMS (Short Message Service) Operation From your vehicle, call from the address book registered in the portable telephone. You can receive messages, show the contents of messages, and send standardized sentences. Press and hold the Rotary encoder for more than When a message is received, an icon is indicated on the display. -
Page 45: Sending A Standardized Sentence
Sending a standardized sentence You can select a standardized sentence when you send a mail. Press and hold the Rotary encoder for more than 2 seconds. The Speed Dial display appears. Press 7 (RETURN). The Telephone menu display appears. Pres the 6 (SMS WRITE). The Standardized sentences are displayed. -
Page 46: External Audio Processor (Optional)
Adjustment Procedure for Dolby Surround External Audio Processor Make the adjustments described below in order to reproduce Dolby (Optional) Digital and DTS sound with greater accuracy. Adjustment procedure When an external audio processor is connected to this unit, you can operate it from this unit. -
Page 47: Setting The Speakers
Set MX Mode of the External Audio Processor Before performing the operations below, set MX (Media Xpander ) mode of the external audio processor to “AUTO.” Check that defeat mode is off. Press SOURCE/POWER. The main menu is displayed. Press 4 (A.PROC). The A.PROC (Audio processor) list display appears. -
Page 48: X-Over Adjustment
Performing Time Correction Manually (TCR)/ Swithing the Phase Because of the particular conditions inside the vehicle, there can be major differences in the distances between the various speakers and the listening position. It is possible to calculate the optimum correction values and eliminate the time error at the listening position yourself using this function. -
Page 49: Graphic Equalizer Adjustments
• When the speaker is set to the “OFF” mode, the graphic equalizer Press SOURCE/POWER. for that speaker is ineffective. Refer to “Setting the Speakers” The main menu is displayed. (page 45). • Check the playable frequency ranges of the connected speakers Press 4 (A.PROC). -
Page 50: Bass Comp. Setting
Bass Focus The time difference between the front-rear/left-right speakers, can be adjusted a pair at a time. Audible time correction can be made from 0.05 ms to 20.00 ms in 401 steps (0 to 400). Check that the Defeat mode is off. Press SOURCE/POWER. -
Page 51: Setting Of Dolby 5.1Ch
• Subwoofer can be set to “ON” or “OFF” only. Mixing bass sound to the rear channel • It is not possible to set the front speakers to “OFF.” • If the front speakers are set to “SMALL,” the rear and center This function mixes the front channel audio signals to the audio speakers cannot be set to “LARGE.”... -
Page 52: Adjusting The Speaker Levels
Adjusting the DVD Level The volume (signal level) for Dolby Digital, Dolby PL II, DTS and PCM modes can be set. • Avoid stopping, pausing, switching the disc, cueing, fast- forwarding or switching the audio channel of this unit while making this adjustment. -
Page 53: Using The Prologic Ii Mode
• Avoid stopping, pausing, switching the disc, cueing, fast- Using the ProLogic II Mode forwarding or switching the audio channel of this unit while making this adjustment. The setting is canceled if the Decode mode Pro Logic processing can be conducted on the music signals recorded is switched. -
Page 54: Remote Control
1 AUDIO/NAV./EXT DVD Transmission Indicator Remote Control When the mode selector switch is switched, the transmission indicators for the various modes light for several seconds. 2 A.PROC Button Operating for the IVA-D900 Press the button to call the audio processor list. 3 , Button Set the mode selector switch to “AUDIO”... - Page 55 $ MENU/SETUP Button Button DVD/Video CD mode: Shows the menu display. Radio mode: SEEK (UP) Button By pressing it more than 2 seconds, Setup list display CD changer mode: appears. Press the button to advance to the beginning of the next track. Press and hold % Numeric Keypad to fast forward.
-
Page 56: Operating The Dvd Player/Dvd Changer (Sold Separately)
7 V.SEL Button Operating the DVD player/DVD changer Switches the screen of TV or DVD video. (sold separately) 8 LIGHT Button Lights the indicator. Set the mode selector switch to the “EXT DVD” side to operate a 9 VOLUME Button separately sold DVD player or DVD changer. -
Page 57: Operating The Navigation (Sold Separately)
Sets this switch to the “NAV.” side to operate a connected Alpine navigation system. Operating a separately sold TV monitor • To operate a separately sold Alpine TV monitor, press the mode change switch on the rear of the remote control unit. Operate while the transmission indicator is blinking. -
Page 58: Battery Replacement
Battery Replacement Notes on Using the Remote Control Applicable battery: Use two “AAA” sized dry batteries or equivalent. Point the remote control transmitter at the remote control sensor. Opening the battery cover. Push on the cover and slide it as indicated by the arrows then the cover will be removed. -
Page 59: Information
In addition, DVDs offer a variety of functions. Information • Multiple audio* (page 18) Movies can be recorded in up to eight languages. The desired language can be selected from the remote control unit. About DVDs • Subtitles function* (page 19) Movies can include subtitles in up to 32 languages. -
Page 60: Terminology
Dolby Pro Logic Terminology Dolby Pro Logic is the technology used to decode programs encoded in Dolby Surround. Pro logic decoding will provide Dolby Digital you with four channels of sound (front left/right, center and monaural rear surround) from a 2-channel (stereo) source. Dolby Digital is a digital audio compression technology * The separately sold digital audio processor (PXA-H510/PXA- developed by Dolby Laboratories that allows large quantities... -
Page 61: List Of Language Codes
List of Language Codes (For details, see page 29.) Abbreviation Code Language Abbreviation Code Language Abbreviation Code Language Afar 7369 Interlingue 8278 Kirundi 6565 6566 Abkhazian 7375 Inupiak 8279 Romanian 6570 Afrikaans 7378 Indonesian 8285 Russian 6577 Amharic 7383 Icelandic 8287 Kinyarwanda 6582... -
Page 62: List Of Country Codes
List of Country Codes (For details, see page 29.) Abbreviation Code Country Abbreviation Code Country Abbreviation Code Country 6568 Andorra 6877 Dominica 7573 Kiribati 6569 United Arab Emirates 6879 Dominican Republic 7577 Comoros 6570 Afghanistan 6890 Algeria 7578 Saint Kitts and Nevis Antigua and Barbuda 6967 Ecuador... - Page 63 Abbreviation Code Country Abbreviation Code Country Abbreviation Code Country 8069 Peru 8374 Svalbard and Jan Mayen 8487 Taiwan, Province of China 8070 French Polynesia 8375 Slovakia 8490 Tanzania, United Republic of 8071 Papua New Guinea 8376 Sierra Leone 8565 Ukraine 8072 Philippines 8377...
-
Page 64: In Case Of Difficulty
- Do not use a commercial available lens cleaner disc. Unclear picture display. Consult your nearest ALPINE dealer. • Fluorescent tube is exhausted. Disc playback sound skips without vibration. - Replace the fluorescent tube*. - Page 65 (page 9) and press c again. - Check if the disc is able to be played back. If the disc does not eject, consult your Alpine dealer. • Parental lock is set. - Cancel the parental lock or change the rating level.
- Page 66 Press c for at least 3 seconds. If the error indication still does not turn off after pressing c for a few times, consult your Alpine dealer. (Displayed in the rear monitor) DISC ERROR • Remote control operation is not possible.
- Page 67 - Wait until encryption code is being updated. Channels button and pull out the magazine. 0 and 1 should function normally. Check the indication. Insert the magazine again. If the magazine cannot be pulled out, consult your Alpine NO SIGNAL dealer. • Magazine ejection not possible.
-
Page 68: Specifications
GENERAL Specifications Power Requirement 14.4 V DC (11–16 V allowable) MONITOR SECTION Operating temperature +32°F to +113°F Screen Size 7.0" (0°C to + 45°C) 50 W × 4 LCD Type Transparent type TN LCD Maximum Power Output Operation System Low-Temperature p-si TFT active Output Voltage 2,000 mV/10k ohms matrix... -
Page 69: Installation And Connections
If so, please contact consult a physician immediately. your authorized ALPINE dealer for assistance. • Be sure to connect the speaker (–) leads to the speaker (–) DO NOT INSTALL IN LOCATIONS WHICH MIGHT HINDER terminal. -
Page 70: Installation
Reinforce the monitor unit with a metal mounting strap (not Installation supplied). Secure the ground lead of the unit to a clean metal spot using a screw (}) already attached to the vehicle's chassis. Installing the Monitor • For the screw marked }}, use an appropriate screw for the Installation Location chosen mounting location. - Page 71 Installing the Tuner Box Install the tuner on the floor with the supplied flange-head tapping screws (M4 x 14). Caution Do not block the unit’s fan or heat sink, thus preventing air circulation. If blocked, heat will Flange-head tapping screws (M4 x 14) (Included) accumulate inside the unit and may cause a fire.
- Page 72 Parking Brake Lead Connection If necessary, use a pinch connector to connect the foot brake lead, parking brake lead, etc. Vehicle Cable Pliers Pinch Connector Monitor Cable Stopper Foot Brake Lead / Parking Brake Lead Connection Foot brake lamp FOOT BRAKE Foot brake switch (Yellow/Black) Foot brake lead...
-
Page 73: Connections (Iva-D900 Wiring Diagram)
Connections (IVA-D900 Wiring Diagram) Antenna IVA-D900 <Monitor> BATTERY (Yellow) Battery (Black) REMOTE OUT AUX1 (White/Brown) REMOTE OUT AUX2 To remote input lead. (White/Brown) REMOTE OUT AUX3 IVA-D900 (White/Brown) Tuner BOX REMOTE IN AUX1 (White/Brown) To remote output lead. SUB W. REMOTE IN AUX2 PREOUT REAR... -
Page 74: System Switch
• If you add an optional noise suppressor, connect it as far away & Antenna Receptacle from the unit as possible. Your Alpine dealer carries various noise suppressors, contact them for further information. ( System Switch •... -
Page 75: System Example
System Example When connecting the Ai-NET compatible audio processor (Fiber digital compatible), Navigation system, DVD player and changer IVA-D900 Monitor NVE-N852A/NVE-N871A Fiber optic Navigation system cable (Sold Separately) *Fiber digital Input terminal (for head unit) IVA-D900 Tuner BOX Audio Processor (Ai-NET) (Fiber Digital compatible) (Sold Separately) SUB W. - Page 76 1 RGB Cable (Included with NVE-N852, not included with NVE-N871A) 2 Remote IN/OUT Terminal 3 RGB Input Terminal Connect this to the RGB output terminal of the Navigation System. 4 System Switch When connecting an equalizer or divider using Ai-NET feature, place this switch in the EQ/DIV position.
-
Page 77: Connecting External Equipmen
When Connecting External Equipment To Audio Input terminal IVA-D900 Rear monitor 1 Tuner BOX EQ/DIV (Sold Separately) To Video Input terminal NORM SUB W. PREOUT REAR FRONT POWER SUPPLY To Video Input terminal Ai-NET Rear monitor 2 REMOTE IN/OUT VIDEO (Sold Separately) AUX OUT NAVIGATION IN... -
Page 78: Limited Warranty
U.S.A. 1-800-ALPINE-1 (1-800-257-4631) objects. CANADA 1-800-ALPINE-1 (1-800-257-4631) Alpine Electronics of America, Inc., 19145 Gramercy Place, Torrance, California 90501, U.S.A. Alpine Electronics of Canada, Inc., Suite 203, 7300 Warden Ave. Markham, Ontario, L3R 9Z6, Canada...