Table of Contents
Advertisement
Mobile Multimedia Station
ALPINE ELECTRONICS MARKETING, INC.
1-1-8 Nishi Gotanda,
Shinagawa-ku,
Tokyo 141-0031, Japan
Phone 03-5496-8231
ALPINE ELECTRONICS OF AMERICA, INC.
19145 Gramercy Place, Torrance,
California 90501, U.S.A.
Phone 1-800-ALPINE-1 (1-800-257-4631)
ALPINE ELECTRONICS OF CANADA, INC.
777 Supertest Road, Toronto,
Ontario M3J 2M9, Canada
Phone 1-800-ALPINE-1 (1-800-257-4631)
Dalian Dongtai Colour Printing Technology Co., Ltd.
No. 24 Liaohexisan Road, Dalian Economic&Technical
Development Zone, China
IVA-W200
DIGITAL VIDEO
• OWNER'S MANUAL
Please read before using this equipment.
• MODE D'EMPLOI
Veuillez lire avant d'utiliser cet appareil.
• MANUAL DE OPERACIÓN
Léalo antes de utilizar este equipo.
ALPINE ELECTRONICS OF AUSTRALIA PTY. LTD.
161-165 Princes Highway, Hallam
Victoria 3803, Australia
Phone 03-8787-1200
ALPINE ELECTRONICS GmbH
Frankfurter Ring 117, 80807 München, Germany
Phone 089-32 42 640
ALPINE ELECTRONICS OF U.K. LTD.
Alpine House
Fletchamstead Highway, Coventry CV4 9TW, U.K.
Phone 0870-33 33 763
ALPINE ELECTRONICS FRANCE S.A.R.L.
(RCS PONTOISE B 338 101 280)
98, Rue de la Belle Etoile, Z.I. Paris Nord Il,
B.P. 50016, 95945 Roissy Charles de Gaulle
Cedex, France
Phone 01-48638989
R R
TM
ALPINE ITALIA S.p.A.
Viale C. Colombo 8, 20090 Trezzano
Sul Naviglio (MI), Italy
Phone 02-484781
ALPINE ELECTRONICS DE ESPAÑA, S.A.
Portal de Gamarra 36, Pabellón, 32
01013 Vitoria (Alava)-APDO 133, Spain
Phone 945-283588
ALPINE ELECTRONICS (BENELUX) GmbH
Leuvensesteenweg 510-B6,
1930 Zaventem, Belgium
Phone 02-725-13 15
Designed by ALPINE Japan
Printed in China (Y)
68-04123Z67-A
EN
FR
ES
Advertisement
Table of Contents

Related Manuals for Alpine IVA-W200


Summary of Contents for Alpine IVA-W200
- Page 1 Development Zone, China DIGITAL VIDEO Please read before using this equipment. Veuillez lire avant d’utiliser cet appareil. Léalo antes de utilizar este equipo. ALPINE ELECTRONICS OF AUSTRALIA PTY. LTD. 161-165 Princes Highway, Hallam Victoria 3803, Australia Phone 03-8787-1200 ALPINE ELECTRONICS GmbH Frankfurter Ring 117, 80807 München, Germany...
- Page 2 The CHA-1214 Ai-NET model holds 12 discs, and the CHM-S630 M-Bus model is a super-compact 6-disc changer with a CD-R/RW PLAY BACK. Changeurs de CD Alpine : vous avez le choix! Plus de sélections musicales, plus de souplesse, plus de confort.
-
Page 3: Table Of Contents
Contents Operating Instructions WARNING WARNING ... 4 CAUTION ... 4 PRECAUTIONS ... 5 Discs Playable on This Unit ... 6 Getting Started Accessory List ... 9 Location of Controls ... 9 Turning Power On or Off ... 9 Opening and Closing the Movable Monitor ... 10 Adjusting the Monitor Viewing Angle ... - Page 4 Rear Entertainment Function ... 25 Switching the function of the remote sensor ... 25 Switching Display Modes ... 26 Switching the Visual Source Only (Simultaneous Function) ... 26 Cancelling the Simultaneous Function ... 26 Blackout Mode On and Off ... 26 Setup DVD Setup DVD Setup Operation ...
- Page 5 Phase Switching ... 42 Graphic Equalizer Adjustments ... 42 Parametric Equalizer Adjustments ... 43 Setting Bass Sound Control ... 44 Setting Bass Compressor ... 44 Setting Bass Focus ... 44 Speaker Setup ... 44 Setting of Dolby Digital ... 45 Adjusting the acoustic image (BI-PHANTOM) ...
-
Page 6: Operating Instructions
HALT USE IMMEDIATELY IF A PROBLEM APPEARS. Failure to do so may cause personal injury or damage to the product. Return it to your authorized Alpine dealer or the nearest Alpine Service Center for repairing. KEEP FINGERS AWAY WHILE THE MOTORIZED FRONT PANEL OR MOVING MONITOR IS IN MOTION. -
Page 7: Precautions
Center Hole Center Hole Bumps Installation Location Make sure the IVA-W200 will not be installed in a location subjected to: • Direct sun and heat • High humidity and water • Excessive dust • Excessive vibrations Correct Handling Do not drop the disc while handling. -
Page 8: Discs Playable On This Unit
This will restrict operation of these functions to times when the vehicle is parked. This ensures the focus of the driver’s attention will be on the road and not on the IVA-W200. This has been done for the safety of the driver and passengers. - Page 9 Hybrid Audio CD and Data (MP3/WMA) CD-R/RW discs: The IVA-W200 can read either sector on the disc. Choose CD-DA to play the CD audio section or MP3/WMA to play the MP3/WMA section.*...
- Page 10 Using DVD-Rs/DVD-RWs/DVD+Rs/DVD+RWs • This unit is compatible with discs recorded in the DVD-Video and DVD-VR mode. • Note that discs not finalized (processed to enable to play on playback-only DVD players) cannot be played on this DVD player. • Some discs may not play back, depending on the recording device and disc format.
-
Page 11: Getting Started
Press and hold SOURCE/POWER for at least 2 seconds to turn off the unit. • The IVA-W200 draws minimal current even when its power switch is turned off. If the switched power (ignition) lead of the IVA-W200 is connected directly to the positive (+) post of the vehicle's battery, the battery may be discharged. -
Page 12: Opening And Closing The Movable Monitor
Opening and Closing the Movable Monitor Press The movable monitor will open. To close the movable monitor, press The movable monitor will close. • Do not apply shock to the movable monitor when it is open as it may result in malfunction of the unit. •... -
Page 13: Shortcut Screen
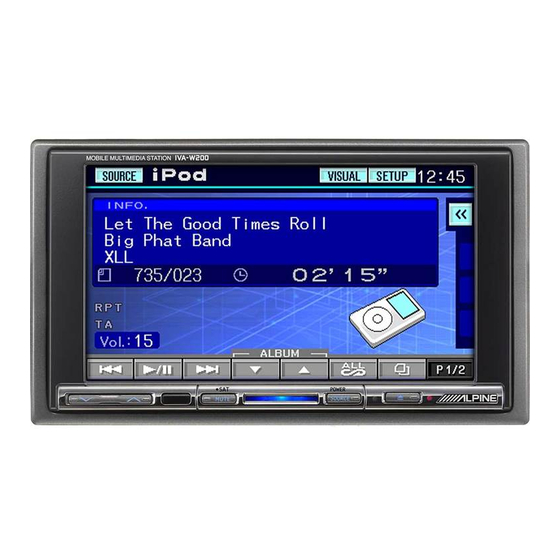
Touch [RADIO]. The screen changes to the Radio mode main display. Display example for FM Radio main screen Displays the source name, such as radio band, etc., that is selected Changes to VISUAL selection screen Changes to SETUP selection screen Displays time Displays shortcut menu screen (see pages 11) (Displayed when an image source or external audio... -
Page 14: Displaying The Numeric Keypad Input Screen
Displaying the Numeric Keypad Input Screen The numeric keypad input screen is displayed when the DVD mode is selected for searching a title or chapter. It can also be used for entering a country code or password for DVD setup, and for selecting a channel number in the SAT Radio mode. -
Page 15: Setting Analog Mode (Hd Radio Mode Only)
Touch [TUNE] to choose the tuning mode. Each touch changes the tuning mode display. Distance Local Manual • There are two modes you can select for auto tuning, DX and Local: - DX (Distance) mode (with DX SEEK indicator ON); Both strong and weak stations will be tuned in. -
Page 16: Cd/Mp3/Wma
The source selection screen is displayed. Touch [DVD PLAYER]. The display shows the DVD player mode screen. When a CD/MP3/WMA is inserted into the DISC SLOT of the IVA-W200, with the label side facing up, the unit starts to play the CD/MP3/WMA. Touch [ (file). -
Page 17: Repeat Play
Repeat Play Touch [ ] to play back repeatedly the track currently being played. The track (file) will be played repeatedly. Touch [ ] again and select OFF to deactivate Repeat play. CD: RPT RPT DISC* (off) MP3/WMA: 1 Touch [P1/2]* to change the function guide. - Page 18 Producing MP3/WMA discs MP3/WMA files are prepared, then written to a CD-R or CD-RW (DVD-R/DVD-RW) using CD-R writing software. A disc can hold up to 1024 files/256 folders (including Root Folders). Depending on the structure of the folders or files, it may take time to read a disc.
-
Page 19: Dvd/Video Cd
Video CD discs can be used. Playing a Disc IVA-W200 has a built-in DVD player. When an optional Alpine DVD/ video CD/CD player (or DVD changer) is connected to the IVA-W200, you can control it from the IVA-W200. (except some operations) -
Page 20: If A Menu Screen Appears
The display shows the DVD player mode screen. Insert a disc with the label side facing up. The unit starts to play the disc. When an optional Alpine DVD player is connected: Insert a disc into the DVD/video CD/CD player, the player starts playing. -
Page 21: Displaying The Top Menu Screen
Numeric Keypad Input Operations When PBC is turned OFF, the menu screen is not displayed. Turn it ON to display the screen. (See “Setting the Video CD Play Mode” on page 31.) 1 Touch [P1/2] in the video CD mode to change the function guide. -
Page 22: Fast-Forward/Fast-Reverse
Fast-forward/Fast-reverse DVD-Video, DVD-VR, Video-CD, DVD-Audio (VCAP mode)*: During playback, touch and hold [ reverse) or [ ] (fast-forward). When touched and held for more than 1 second, the disc is forwarded/reversed at double speed. When held for 5 more seconds or longer, the disc is forwarded/reversed at 8 times the normal speed. -
Page 23: Selecting Playlist (Skip)
Selecting Playlist (SKIP) Touch [P1/3] twice while playing a DVD-VR disc. The PLAYLIST function guide is displayed. Touch PLAYLIST* [ ] or [ ] to select a playlist. * To switch the function guide display PROGRAM [ to PLAYLIST [ ] or [ ], play back the playlist. -
Page 24: Searching By Title/Group/Program/Playlist Number
Searching by Title/Group/Program/ Playlist Number Use this function to easily find positions on the DVD using the DVD’s titles, groups, programs or playlists. Touch [P1/2]* while playback is stopped. The function guide appears. * Touch [P1/3] while playing a DVD-Audio or DVD-VR disc. Touch [10KEY]. -
Page 25: Switching The Subtitles (Subtitle Language)
Video CDs or DVD-VR disc with multiplex audio During playback, touch [P1/2] The function guide changes. Touch [P1/3] while playing a DVD-VR disc. Touch [AUDIO]* The left and right channels will be output as shown in the figure below, each time the button is touched. Touch [AUDIO] for at least 2 seconds to switch while playing a DVD-VR disc. -
Page 26: Other Useful Features
Other Useful Features Adjusting the Audio Touch [SETUP] on the main source screen. The SETUP selection screen is displayed. Touch [AUDIO MODE]. The AUDIO MODE screen appears. Display Example for Audio Adjustment Screen • Touching [CONTROL] will change to the main source screen. Adjusting the Fader Touch [F] or [R] to adjust the volume of the front and rear speakers. -
Page 27: Search Function
• The sensor of the touch panel rear monitor has priority over the sensor of the remote control, if the rear monitor (connected to the Alpine touch panel rear monitor via the Monitor control lead) is touched, regardless of the remote control sensor switch setting. Note, however, that the sensor of the remote control that has been set takes priority if it has been 5 seconds since last touching the panel. -
Page 28: Switching Display Modes
Switching Display Modes After carrying out the steps 1 to 3 of “To display the DVD mode Screen” explained on page 27, perform the operation described below. While your vehicle is parked, touch [WIDE] on the visual source screen. Each touch changes the display modes as follows: MODE 1 MODE 2 MODE 3... -
Page 29: Setup
Setup DVD Setup DVD Setup Operation To display the DVD mode screen: To watch a video source, your vehicle must be parked with the ignition key in the ACC or ON position. To do this, follow the procedure below. 1 Bring your vehicle to a complete stop at a safe location. -
Page 30: Setting Of The Menu Language
Touch [RETURN] to return to the previous screen. Touch [CONTROL] to return to the main source screen that was displayed before the setup operation was started. • Immediately after changing the settings of DVD mode (while the system is writing data automatically) do not turn the ignition key (engine key) to OFF. -
Page 31: Setting The Rating Level (Parental Lock)
(When [NO] is touched, playback will be at the parental level set in “Setting the Rating Level (Parental Lock).”) Changing the Digital Output Setting Use the following procedure to set the digital audio signal output from the IVA-W200. Setting item: DIGITAL OUT MODE Setting contents: AUTO / LPCM AUTO: The digital output is switched automatically according to the type of audio signals being played. - Page 32 Audio output/Optical digital audio output Disc Audio recording format Format LPCM 44.1/176.4kHz (CD-DA, DVD-V, DVD- 48/96/192kHz A, DVD-VR) PPCM 44.1/88.2/ (DVD-A) 176.4kHz 48/96/192kHz Dolby Digital 48kHz (-EX) (DVD-V, DVD- A, DVD-VR) DTS (-ES) 44.1kHz (CD-DA, DVD-V, DVD- 48/96kHz MPEG1Layer 44.1kHz (VCD, DVD-V, DVD-A, DVD- 48kHz...
-
Page 33: Setting The Downmix Mode
Use the procedure described below to modify the output screen according to the type of TV monitor (rear monitor) being used. This setting can also be applied for the IVA-W200. If the rear monitor is not connected, the screen setting is 16:9. -
Page 34: General Setup
GENERAL Setup General Setup Operation To display the General mode screen: To watch a video source, your vehicle must be parked with the ignition key in the ACC or ON position. To do this, follow the procedure below. 1 Bring your vehicle to a complete stop at a safe location. -
Page 35: Setting The Scroll
Setting the Scroll Scroll display is available if CD text, folder name, file name or tag information is entered. Setting item: AUTO SCROLL Setting content: OFF / ON Turns on the AUTO scroll mode. Scroll display is repeated as long as the mode is turned on. OFF: Turns off the AUTO scroll mode. -
Page 36: Setting The External Device Interrupt Mode
Select SOURCE to switch to the guide function of each mode. “EXTPLYR" is currently not available as a future system upgrade. • Only when an Alpine TV tuner is connected, you can operate the displayed function guide from this unit. -
Page 37: Setting Of The Rear Camera
Setting of the Rear Camera When the rear camera is connected, rear pictures are output on the screen. Setting item: CAMERA IN Setting contents: OFF / ON Even if the shift lever is not set to reverse (R), the rear pictures are output by selecting the CAMERA source. -
Page 38: Setting The Brightness Of The Backlighting
Setting the Brightness of the Backlighting Backlighting is provided by a fluorescent light built into the liquid crystal panel. The illumination control adjusts the brightness of the backlighting based on the car ambient lighting for easier viewing. Setting item: DIMMER Setting content: OFF / ON / AUTO OFF: Deactivate Auto Dimmer mode to keep the background... -
Page 39: Visual Eq
i-Personalize™ VISUAL EQ™ To display the i-Personalize mode screen: To watch a video source, your vehicle must be parked with the ignition key in the ACC or ON position. To do this, follow the procedure below. 1 Bring your vehicle to a complete stop at a safe location. -
Page 40: Adjusting Tint Of Picture
Downloading the BACKGROUND data You can download data (from Alpine’s website) to a CD-R/CD-RW (data is written in the root folder), and store the data to the IVA-W200. To start BACKGROUND download, access the URL below and follow the on-screen instructions. -
Page 41: External Audio Processor (Optional)
Pro Logic II, DTS and PCM modes.) Storing Settings in the Memory (page 46) (Storing all the settings and adjustments made on the IVA-W200 (not only the above settings/adjusts) in the memory) In case of combining the Automatic adjustments etc. -
Page 42: Setting The Speakers
Setting the Speakers Check that Defeat mode is off (page 24). Touch [SETUP] on the main source screen. The SETUP selection screen is displayed. Touch [i-Personalize]. The i-Personalize screen appears. Touch [ ] of A.PROCESSOR. The A.PROC list screen appears. Touch [ ] of SPEAKER SELECT. -
Page 43: Performing Time Correction Manually (Tcr)
Adjust the crossover to your preference. X-OVER (LPF) adjustment screen example Displays the speaker (channel) currently selected Displays the HP or LP selected Displays the cut-off frequency currently selected Displays the level of HPF or LPF currently selected Displays the slope range of HPF or LPF currently selected Variable range of selected cut-off frequency Displays the variable range of the cut-off frequency level... -
Page 44: Phase Switching
0.5m 2.25m The sound is uneven because Time correction eliminates the distance between the the difference between the listening position and the time required for the sound different speakers is different. from the different speakers to The difference in the distance reach the listening position. -
Page 45: Parametric Equalizer Adjustments
Adjust the G-EQ to your preference. G-EQ adjustment screen example Displays the speaker (channel) currently selected Displays the selected frequency Displays the frequency level currently selected Active bar: displays the variable range of the frequency level currently selected with an orange bar Setting variable range Adjusting the Frequency Touch [ ] or [ ] to adjust the frequency. -
Page 46: Setting Bass Sound Control
Adjusting the Frequency Touch [ ] or [ ], then adjust the frequency of the selected band. Adjusting the Level Touch [ ] or [ ], then adjust the level of the selected band. Selecting the Band The band (BAND1 through BAND5) changes each time [BAND] is touched. -
Page 47: Setting Of Dolby Digital
Select the speaker characteristic by touching [ ], [ ] or [ON], [OFF] of the desired speaker setting. OFF* When no speaker is connected. SMALL: When a speaker that cannot play low frequencies (80 Hz or less) is connected. LARGE* : When a speaker that can play low frequencies (80 Hz or less) is connected. -
Page 48: Adjusting The Speaker Levels (Output Level)
Adjusting the speaker levels (OUTPUT LEVEL) The test tones help to make the volume adjustments of the different speakers. When levels are equal, a strong sense of presence can be heard from the different speakers at the listening position. • Avoid stopping, pausing, switching the disc, cueing, fast-forwarding or switching the audio channel of this unit while making this adjustment. -
Page 49: Linear Pcm Setting
(Optional) Switching the Navigation Screen (Optional) If an optional Alpine Navigation System is connected to the IVA-W200, the Navigation screen can be displayed on this unit. Touch [SOURCE] on the main source screen. The source screen appears on the display. -
Page 50: Auxiliary Device (Optional)
Controlling CD Changer (Optional) An optional 6-disc or 12-disc CD Changer may be connected to the IVA-W200 if it is Ai-NET compatible. With a CD Changer connected to the Ai-NET input of the IVA-W200, the CD Changer will be controllable from the IVA-W200. -
Page 51: Multi-Changer Selection (Optional)
16). HDD Player Operation (Optional) Listening to Music of HDD This device is controllable from the unit when Alpine HDD player is connected. Touch [SOURCE] on the main source screen. The source selection screen appears. Touch [MM DRIVER]. The MM DRIVER mode main screen appears. -
Page 52: Sat Radio Receiver (Optional)
Radio Inc. * SIRIUS and its corresponding logos are trademarks of SIRIUS Satellite Radio Inc. • The SAT Receiver controls on the IVA-W200 are operative only when a SAT Receiver is connected. Touch [SOURCE] on the main source screen. The source selection screen is displayed. -
Page 53: Checking The Sat Radio Id Number
SIRIUS Radio: This number is a 12 digits number. It is printed on a label found on the SAT Receiver. It can also be displayed on the screen of the IVA-W200 in the following way. While receiving SAT Radio, touch [ [NO. -
Page 54: Selecting The Channel Directly
An iPod can be connected to the IVA-W200 by using the proprietary ALPINE FULL SPEED™ Connection Cable (KCE-422i). When the IVA-W200 is connected by using the cable, the controls on the iPod are not functional. About iPod usable with this unit The unit can be used with third generation and above iPod, iPod photo, iPod minis or iPod nano. -
Page 55: Searching For A Desired Song
Searching for a desired Song An iPod can contain hundreds of songs. By keeping these songs organized in playlists, the IVA-W200 can use these to ease song searches. Searching by Playlist Touch [ The search mode is activated, and the search list screen appears. -
Page 56: Direct Search Function
Direct Search Function The unit's direct search function can be used to search for an album, song, etc., more efficiently. In PLAYLIST/ARTIST/ALBUM/SONG mode, you can quickly target any song. Example of ALBUM search screen Returns to the previous screen Direct search bar Active point: The present selection position is displayed In search mode, touch anywhere on the direct search bar, or touch and drag the active point to the desired... -
Page 57: Remote Control
Remote Control Controls on Remote Control PWR button Turns the power ON and OFF. SRC Button Selects the audio source. DN Button Radio mode: Selects, in descending order, stations programmed into the radio’s presets. MP3/WMA mode: Folder Select (DN) Button selects the folder. Changer mode: DISC Select (DN) Button selects a disc in descending order. -
Page 58: When Using The Remote Control
MUTE Button Lowers the volume by 20 dB instantly. Press the button again to cancel. UP Button Radio mode: Selects, in ascending order, stations programmed into the radio’s presets. MP3/WMA mode: Folder Select (UP) Button to selects the folder. Changer mode: DISC Select (UP) Button selects a disc in ascending order. -
Page 59: Battery Replacement
Battery Replacement Battery type: CR2025 battery or equivalent. Opening the battery case Slide out the battery cover while firmly pressing in the direction of the arrow. Replacing the battery Put the battery in the case with the (+) indication upward as shown in the illustration. -
Page 60: Terminology
* The separately sold digital audio processor (PXA-H700, etc.) is required to enjoy full 5.1-channel surround sound. The IVA-W200 performs Dolby Digital decoding when it outputs analog audio signals, it just happens to be 2-channel audio not 5.1-channel. -
Page 61: List Of Language Codes
List of Language Codes (For details, see page 28.) Abbreviation Code Language 6565 Afar 6566 Abkhazian 6570 Afrikaans 6577 Amharic 6582 Arabic Assamese 6583 6589 Aymara 6590 Azerbaijani 6665 Bashkir 6669 Byelorussian 6671 Bulgarian 6672 Bihari Bislama 6673 6678 Bengali, Bangla 6679 Tibetan 6682... -
Page 62: List Of Country Codes
List of Country Codes (For details, see page 28.) Abbreviation Code Country Andorra 6568 6569 United Arab Emirates 6570 Afghanistan 6571 Antigua and Barbuda 6573 Anguilla Albania 6576 Armenia 6577 6578 Netherlands Antilles 6579 Angola 6581 Antarctica 6582 Argentina 6583 American Samoa 6584 Austria... - Page 63 Abbreviation Code Country 8069 Peru 8070 French Polynesia 8071 Papua New Guinea 8072 Philippines 8075 Pakistan 8076 Poland 8077 Saint Pierre and Miquelon 8078 Pitcairn 8082 Puerto Rico 8084 Portugal 8087 Palau 8089 Paraguay 8165 Qatar 8269 Reunion 8279 Romania 8285 Russian Federation 8287...
-
Page 64: In Case Of Difficulty
- Change the disc. • The pick-up lens is dirty. - Do not use a commercial available lens cleaner disc. Consult your nearest Alpine dealer. Disc playback sound skips without vibration. • Dirty or scratched disc. - Clean the disc; damaged disc should be replaced. - Page 65 If the error indication still does not turn off after trying for a few times, consult your Alpine dealer. • Disc was forcibly pulled out by hand during Auto Loading. - When the error indication remains after loading, try to load again.
- Page 66 - The indicator will disappear when the temperature returns to within operation range. • Malfunction in the CD Changer. - Consult your Alpine dealer. Press the magazine eject button and pull out the magazine. Check the indication. Insert the magazine again.
- Page 67 - Refer to the iPod’s documentation and charge the battery. • There are no songs in the iPod. - Download songs to the iPod and connect to the IVA-W200. • Communication error - Turn the ignition key off, and then set to ON again.
-
Page 68: Specifications
Specifications MONITOR SECTION Screen Size 6.5" LCD Type Transparent type TN LCD Operation System TFT active matrix Number of Picture Elements 280,800 pcs. (400 × 3 × 234) Effective Number of Picture Elements 99% or more Illumination System Cold cathode fluorescent tube FM TUNER SECTION Tuning Range 87.7 –... -
Page 69: Installation And Connections
(e.g. on-board computer). Do not tap into these leads to provide power for this unit. When connecting the IVA-W200 to the fuse box, make sure the fuse for the intended circuit of the IVA-W200 has the appropriate amperage. -
Page 70: Installation
Connect each input lead coming from an amplifier or equalizer to the corresponding output lead coming from the left rear of the IVA-W200. Connect all other leads of the IVA-W200 according to details described in the CONNECTlONS section. - Page 71 • The diagram and the fuse amperage shown above are in the case when IVA-W200 is used individually. • If the switched power (ignition) lead of the IVA-W200 is connected directly to the positive (+) post of the vehicle’s battery, the IVA-W200 draws some current (several hundred milliamperes) even when its switch is placed in the OFF position and the battery may be discharged.
-
Page 72: Connections
Connections Ai-NET EQ/DIV NORM • Set the system switch to “NORM” when only a changer is connected (when the Ai-NET compatible equalizer is not used). * The label is attached on the button of the unit. (Yellow) (White) (Red) (Yellow) (White) (Red) REMOTE OUT... - Page 73 Connect this lead to the remote control input lead. This lead outputs the controlling signals from the remote control. Remote Control Input Lead (White/Brown) Connect the external Alpine product to the remote control output lead. Reverse Lead (Orange/White) Use only when a back-up camera is connected. Connect to the plus side of the car's reverse lamp that lights when the transmission is shifted into reverse (R).
-
Page 74: System Example
System Example Connect the Ai-NET compatible audio processor (Fiber digital compatible), Navigation system, DVD player and changer. NVE-N852A/NVE-N871A/NVE-N872A Navigation system (Sold Separately) Ai-NET EQ/DIV NORM (Yellow) (White/Brown) (White/Brown) REMOTE OUT REMOTE IN • When the fiber optic compatible product is connected, it is necessary to set the mode of this unit. Refer to “Setting the Digital Output” (page 35) and set to ON. - Page 75 RGB Cable (Included with NVE-N852A/NVE-N872A, not included with NVE-N871A) Remote IN/OUT Connector RGB Input Terminal Connect this to the RGB output terminal of the Navigation System. System Switch When connecting an equalizer or divider using Ai-NET feature, place this switch in the EQ/DIV position. When no device is connected, leave the switch in the NORM position.
-
Page 76: Connecting External Equipmen
When Connecting External Equipment Ai-NET EQ/DIV NORM (White/Pink) * Connect this to the touch panel-compatible rear monitor. (White/Brown) (White/Brown) (Orange/White) System Switch When connecting an equalizer or divider using Ai-NET feature, place this switch in the EQ/DIV position. When no device is connected, leave the switch in the NORM position. -
Page 77: Limited Warranty
LIMITED WARRANTY...