
Related Manuals for HP Chromebook x360


Summary of Contents for HP Chromebook x360
- Page 1 Maintenance and Service Guide SUMMARY This guide provides information about spare parts, removal and replacement of parts, security, backing up, and more.
- Page 2 Chrome, Chrome OS, Chromebook, Google, and bound by the terms of the HP End User License Google Drive are trademarks of Google LLC. Agreement (EULA). If you do not accept these...
- Page 3 Safety warning notice Reduce the possibility of heat-related injuries or of overheating the computer by following the practices described. WARNING! To reduce the possibility of heat-related injuries or of overheating the computer, do not place the computer directly on your lap or obstruct the computer air vents. Use the computer only on a hard, flat surface.
- Page 4 Safety warning notice...
-
Page 5: Table Of Contents
Grounding the work area ........................18 Recommended materials and equipment ..................18 Cleaning your computer ............................19 Enabling HP Easy Clean (select products only) ................. 19 Removing dirt and debris from your computer ................19 Cleaning your computer with a disinfectant ..................20 Caring for wood veneer (select products only) ................. - Page 6 5 Removal and replacement procedures for authorized service provider parts ............ 23 Component replacement procedures ........................23 Preparation for disassembly ......................23 Bottom cover ............................. 23 Battery ............................... 24 WLAN module ............................ 26 Speakers ............................27 Touchpad ............................28 I/O board ............................29 Heat sink ............................
-
Page 7: Product Description
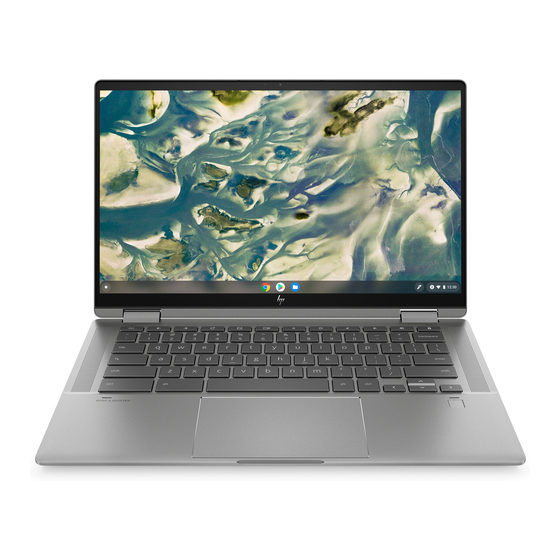
Product components and their descriptions Category Description Product Name HP Chromebook x360 14b Model numbers: 14b-cb0xxx, 14bt-cb000 (CTO) Processors Intel® processors Intel Pentium® Silver N6000 (1.10 GHz base frequency, up to 3.30 GHz, 4 MB L3 cache, 4 cores, 6 W) Intel Celeron®... - Page 8 Product components and their descriptions (continued) Category Description Media card reader Supports microSD™, SDHC™, SDXC™ up to UHS-104 Push-push insertion/removal HP Active Pen Ports Audio-out (headphone)/audio-in (microphone) combo jack (2) USB 3.2 Gen1 Type C, supporting: - Power delivery 3.0 - Type-C adapter - Data transfer - DisplayPort 1.4 out up to 4K output (4096 ×...
-
Page 9: Components
Components Your computer features top-rated components. This chapter provides details about your components, where they are located, and how they work. Right Use the illustration and table to identify the components on the right side of the computer. Table 2-1 Right-side components and their descriptions Component Description... -
Page 10: Left
Table 2-1 Right-side components and their descriptions (continued) Component Description NOTE: Use a standard USB Type-C charging cable or cable adapter (purchased separately) when charging a small external device. Audio-out (headphone)/Audio-in Connects optional powered stereo speakers, headphones, (microphone) combo jack earbuds, a headset, or a television audio cable. -
Page 11: Display
Table 2-2 Left-side components and their descriptions (continued) Component Description Amber: The AC adapter is connected and the battery is ● charging. Blinking amber: The battery has an error. ● Off: The battery is not charging. ● Power button When the computer is off, press the button briefly to ●... -
Page 12: Keyboard Area
Table 2-3 Display components and their descriptions (continued) Component Description NOTE: Camera functions vary depending on the camera hardware and software installed on your product. Camera light On (white): The camera is in use. On (amber): The camera is turned off by the switch. Off: The camera is turned off by the software. -
Page 13: Special Keys
Table 2-5 Speakers and their descriptions Component Description Speakers Produce sound. Special keys Use the illustration and table to locate the special keys. Table 2-6 Special keys and their descriptions Component Description Activates certain computer functions when pressed in combination with other keys, such as or shift. -
Page 14: Labels
Your service label will resemble one of the following examples. Refer to the illustration that most closely matches the service label on your computer. Table 2-7 Service label components Component HP product name Model number Warranty period Product ID Serial number... - Page 15 Table 2-8 Service label components (continued) Component Serial number Warranty period ● Regulatory labels—Provide regulatory information about the computer. Wireless certification labels—Provide information about optional wireless devices and the approval ● markings for the countries or regions in which the devices have been approved for use. Labels...
-
Page 16: Illustrated Parts Catalog
To identify the computer major components, use this illustration and table. NOTE: HP continually improves and changes product parts. For complete and current information about supported parts for your computer, go to http://partsurfer.hp.com, select your country or region, and then follow the on-screen instructions. NOTE: Details about your computer, including model, serial number, product key, and length of warranty, are on the service tag at the bottom of your computer. - Page 17 Table 3-1 Computer major component descriptions and part numbers Item Component Spare part number Display assembly NOTE: Display assemblies are spared only at the subcomponent level. Top cover with keyboard Natural silver, not backlit M47696-xx1 Natural silver, backlit M47697-xx1 Pale gold, not backlit M47698-xx1 Pale gold, backlit M47699-xx1...
-
Page 18: Display Assembly Subcomponents
Table 3-1 Computer major component descriptions and part numbers (continued) Item Component Spare part number Speaker Kit M47694-001 System board (includes integrated processor, system memory, and eMMC storage; includes replacement thermal material) Intel Pentium N6000 processor, 8 GB of system memory, 128 GB of eMMC storage (models with a M47684-001 backlit keyboard) Intel Pentium N6000 processor, 8 GB of system memory, 128 GB of eMMC storage (models without... - Page 19 Table 3-2 Display component descriptions and part numbers Item Component Spare part number Display panel (touch) FHD, UWVA M47690-001 HD, SVA M47691-001 Camera module (includes rubber) M47695-001 Wireless antennas M47668-001 Camera cable M47673-001 Display cable FHD displays M47674-001 HD displays M48173-001 Touch control board cable (not illustrated) M47675-001...
-
Page 20: Miscellaneous Parts
Miscellaneous part descriptions and part numbers Component Spare part number AC adapter, USB Type-C (45 W, nPFC, 1.8 m [5.9 ft]) L43407-001 WLAN module protective tape L92736-001 HP Active Pen L73384-001 Screw Kit M47693-001 Rubber feet M47692-001 Power cord (C5, 1.0 m [3.3 ft]) -
Page 21: Removal And Replacement Procedures Preliminary Requirements
Removal and replacement procedures preliminary requirements Use this information to properly prepare to disassemble and reassemble the computer. Tools required You need the following tools to complete the removal and replacement procedures: Tweezers ● Nonconductive, nonmarking pry tool ● Magnetic Phillips P1 screwdriver ●... -
Page 22: Electrostatic Discharge Information
IMPORTANT: Drives are fragile components. Handle them with care. To prevent damage to the computer, damage to a drive, or loss of information, observe these precautions: Before removing or inserting a hard drive, shut down the computer. If you are unsure whether the computer is off or in Hibernation, turn the computer on, and then shut it down through the operating system. -
Page 23: Preventing Electrostatic Damage To Equipment
Table 4-1 Static electricity occurrence based on activity and humidity (continued) Relative humidity Walking across vinyl floor 3,000 V 5,000 V 12,000 V Motions of bench worker 400 V 800 V 6,000 V Removing DIPs (dual in-line packages) from plastic tube 400 V 700 V 2,000 V... -
Page 24: Grounding The Work Area
Use conductive field service tools, such as cutters, screwdrivers, and vacuums. ● ● Avoid contact with pins, leads, or circuitry. Recommended materials and equipment HP recommends certain materials and equipment to prevent static electricity. Antistatic tape ● Antistatic smocks, aprons, or sleeve protectors ●... -
Page 25: Cleaning Your Computer
Keep liquids away from the product. Avoid getting moisture in any openings. If liquid makes its way inside your HP product, it can cause damage to the product. Do not spray liquids directly on the product. Do not use aerosol sprays, solvents, abrasives, or cleaners containing hydrogen peroxide or bleach that might damage the finish. -
Page 26: Cleaning Your Computer With A Disinfectant
Keep liquids away from the product. Avoid getting moisture in any openings. If liquid makes its way inside your HP product, it can cause damage to the product. Do not spray liquids directly on the product. Do not use aerosol sprays, solvents, abrasives, or cleaners containing hydrogen peroxide or bleach that might damage the finish. -
Page 27: Caring For Wood Veneer (Select Products Only)
When grounding is not possible, use an ionizer to dissipate electric charges. Accessing support information Use this information to find the HP support that you need. Table 4-3 Support information locations... - Page 28 Search collect Chrome device logs. Technical bulletins To locate technical bulletins: Go to www.hp.com. Place the cursor over Problem solving to display more options. Select Support & Troubleshooting. Type the serial number, product number, or product name to go to the product support page.
-
Page 29: Removal And Replacement Procedures For Authorized Service Provider Parts
NOTE: HP continually improves and changes product parts. For complete and current information about supported parts for your computer, go to http://partsurfer.hp.com, select your country or region, and then follow the on-screen instructions. You must remove, replace, or loosen as many as 50 screws when you service the parts described in this chapter. -
Page 30: Battery
Remove the two rubber feet from the bottom of the computer (1). Remove the six Phillips M2.0 × 8.0 screws (2). Remove the two screw covers (3). Remove the two Phillips M2.0 × 5.0 screws (4). Starting near the hinge, use a tool to work around and release the edges of the bottom cover from the computer (1). - Page 31 WARNING! To reduce potential safety issues, use only the user-replaceable battery provided with the computer, a replacement battery provided by HP, or a compatible battery purchased from HP. IMPORTANT: Removing a battery that is the sole power source for the computer can cause loss of information.
-
Page 32: Wlan Module
Remove the battery from the computer (5). To replace the battery, reverse the removal procedures. WLAN module To remove the WLAN module, use this procedure and illustration. Table 5-3 WLAN module descriptions and part numbers Description Spare part number Intel Wi-Fi 6 AX201-W 802.11ax (2 × 2) and Bluetooth 5 (non-vPro) L92724-005 Realtek RTL8822CE 802.11ac 2 ×... -
Page 33: Speakers
Remove the WLAN module from the connector (4). If the WLAN antenna is not connected to the terminal on the WLAN module, install a protective sleeve on the antenna connector, as shown in the following illustration. Reverse this procedure to install the WLAN module. Speakers To remove the speakers, use this procedure and illustration. -
Page 34: Touchpad
Before removing the speakers, follow these steps: Prepare the computer for disassembly (see Preparation for disassembly on page 23). Remove the bottom cover (see Bottom cover on page 23). Remove the battery (see Battery on page 24). Remove the speakers: Disconnect the speaker cable from the system board (1). -
Page 35: I/O Board
Remove the touchpad: Disconnect the cable from the ZIF connector on the touchpad (1). Remove the three Phillips broadhead M2.0 × 2.0 screws (2) that secure the touchpad to the computer. Lift the top of the touchpad up slightly (3), and then pull the touchpad into the computer to remove it (4). -
Page 36: Heat Sink
Remove the board from the computer (3). Reverse this procedure to install the I/O board. Heat sink To remove the heat sink, use these procedures and illustrations. Table 5-7 Heat sink descriptions and part numbers Description Spare part number Heat sink M47702-001 Before removing the heat sink, follow these steps: Prepare the computer for disassembly (see... -
Page 37: System Board
Thoroughly clean the thermal material from the surfaces of the heat sink and the system board components each time the heat sink is removed. Replacement thermal material is included with the heat sink and system board spare part kits. The following illustration shows the replacement thermal material locations. - Page 38 Table 5-8 System board descriptions and part numbers Description Spare part number Intel Pentium N6000 processor, 8 GB of system memory, 128 GB of eMMC storage (models with a backlit M47684-001 keyboard) Intel Pentium N6000 processor, 8 GB of system memory, 128 GB of eMMC storage (models without a M47682-001 backlit keyboard) Intel Pentium N6000 processor, 4 GB of system memory, 64 GB of eMMC storage (models without a...
- Page 39 Remove the five Phillips M2.0 × 2.5 screws that secure the system board to the computer. Lift the right side of the system board (1), and then release the I/O cables (2). Pull the board up and to the right to remove it (3). Reverse this procedure to install the system board.
-
Page 40: Display Assembly
Display assembly To remove and disassemble the display assembly, use these procedures and illustrations. Before removing the display panel, follow these steps: Prepare the computer for disassembly (see Preparation for disassembly on page 23). Remove the bottom cover (see Bottom cover on page 23). - Page 41 The display panel is secured to the display rear cover with tape that is installed under the left and right sides of the panel. To remove the panel, use a flat tool to separate the panel from the rear cover, enough to access the tape (1). Use tweezers to grasp the end of the tape. While turning the tweezers, wrap the tape around the tweezers (2) as you continue to pull the tape out from behind the display panel (3).
- Page 42 If you need to remove the camera module: Use a flat tool to lift up evenly across the camera module to remove it from the display rear cover (1). Disconnect the cable from the camera module (2). The camera module including rubber pieces is available as spare part number M47695-001. Chapter 5 Removal and replacement procedures for authorized service provider parts...
- Page 43 If you need to remove the camera cable, disconnect the cable from the camera module (1), peel the camera cable off the display rear cover (2), and the remove the cable (3). The cable is secured with adhesive. The camera cable is available as spare part number M47673-001. If you need to remove the hinges from the display: Remove the silver tape from the inside of each hinge (1).
-
Page 44: Keyboard With Top Cover
If you need to remove the wireless antennas, remove the cable from the right hinge (1), remove the antenna cables from the routing clips along the sides and top of the display rear cover (2), and then peel the antennas off the display rear cover (3). The antennas and cables are available as spare part number M47668-001. - Page 45 Table 5-9 Keyboard with top cover descriptions and part numbers (continued) Description Spare part number Natural silver, backlit M47697-xx1 Pale gold, not backlit M47698-xx1 Pale gold, backlit M47699-xx1 Spruce blue, not backlit M47700-001 Spruce blue, backlit M47701-001 Table 5-10 Spare part country codes For use in country or Spare part For use in country or...
-
Page 46: Backing Up, Resetting, And Recovering
Backing up, resetting, and recovering This chapter provides information about the standard procedures of backing up your personal data, resetting your computer to original factory conditions, and recovering your operating system with the Chromebook Recovery Utility. Backing up You can back up your data to an optional USB flash drive or SD memory card or through Google Drive™. For detailed information about creating a backup, go to http://www.support.google.com. -
Page 47: Installing The Chromebook Recovery Utility
NOTE: For more information about performing a system recovery on your computer, go to http://www.support.google.com. Before you begin the recovery process, you need the following prerequisites: A USB flash drive or SD memory card with a capacity of 4 GB or greater. All data is erased from this ●... -
Page 48: Setting Up Your Computer After A Reset Or Recovery
NOTE: If you need to cancel the recovery during the verification process, press and hold the power button until the computer turns off. Do not disrupt the system recovery process after the verification step is complete. NOTE: If an error message is displayed, you might need to run the Chrome Recovery Utility again or use a different USB flash drive or SD memory card. -
Page 49: Specifications
Specifications This chapter provides specifications for your computer. Computer specifications This section provides specifications for your computer. When traveling with your computer, the computer dimensions and weights, as well as input power ratings and operating specifications, provide helpful information. Table 7-1 Computer specifications Metric U.S. - Page 50 Table 7-2 Display specifications (continued) Metric U.S. Resolution 1920 × 1080 (FHD) 1368 × 766 (HD) Surface treatment Antiglare Brightness 250 nits Viewing angle UWVA (FHD) SVA (HD) Backlight WLED Display panel interface Chapter 7 Specifications...
-
Page 51: Power Cord Set Requirements
Power cord set requirements This chapter provides power cord requirements for countries and regions. The wide-range input feature of the computer permits it to operate from any line voltage from 100 V ac to 120 V ac, or from 220 V ac to 240 V ac. The three-conductor power cord set included with the computer meets the requirements for use in the country or region where the equipment is purchased. - Page 52 Table 8-1 Power cord requirements for specific countries and regions (continued) Country/region Accredited agency Applicable note number India Israel Italy Japan Netherlands KEMA New Zealand SANZ Norway NEMKO People's Republic of China Saudi Arabia SASO Singapore South Africa SABS South Korea Sweden SEMKO Switzerland...
-
Page 53: Recycling
Follow the local laws and regulations in your area for battery disposal. HP encourages customers to recycle used electronic hardware, HP original print cartridges, and rechargeable batteries. For more information about recycling programs, see the HP website at http://www.hp.com/recycle. -
Page 54: Index
21 memory card reader, identifying 3 removal 30 disinfecting 20 microphone (audio-in) jack, spare part numbers 30 HP Easy Clean 19 identifying 4 hinge removing dirt and debris 19 illustrated 12 components spare part number 12... - Page 55 ports system board product description 2 removal 31 spare part numbers 31 power button, identifying 5 system recovery power cord Chrome operating system 41 requirements for all countries Chromebook Recovery Utility 41 recovery media 41 requirements for specific countries and regions 45 touchpad set requirements 45 illustrated 12...