Epson TM-T88VI-DT2 User Manual
Hide thumbs
Also See for TM-T88VI-DT2:
- Technical reference manual (165 pages) ,
- Quick start manual (2 pages)
Table of Contents
Advertisement
Quick Links
User's Manual
Important Safety Information. . . . . . . . . . . . . . . . . . .page 2
Part Names and Functions. . . . . . . . . . . . . . . . . . . . . .page 5
Setup. . . . . . . . . . . . . . . . . . . . . . . . . . . . . . . . . . . . . . . . . .page 8
Basic Operations . . . . . . . . . . . . . . . . . . . . . . . . . . . . . page 20
Installing/Replacing the Roll Paper . . . . . . . . . . . page 23
Cleaning. . . . . . . . . . . . . . . . . . . . . . . . . . . . . . . . . . . . . page 25
Troubleshooting . . . . . . . . . . . . . . . . . . . . . . . . . . . . . page 26
Specifications . . . . . . . . . . . . . . . . . . . . . . . . . . . . . . . . page 28
Appendix . . . . . . . . . . . . . . . . . . . . . . . . . . . . . . . . . . . . page 29
M00112601EN
Advertisement
Table of Contents

Related Manuals for Epson TM-T88VI-DT2


Summary of Contents for Epson TM-T88VI-DT2
-
Page 1: Table Of Contents
User’s Manual Important Safety Information....page 2 Part Names and Functions..... .page 5 Setup. -
Page 2: Important Safety Information
English Important Safety Information This manual presents important information intended to ensure safe and effective use of this product. Read this manual carefully and store it in an accessible location. For information on development of a system with this product and setup, see also Technical Reference Guide. - Page 3 English ❏ Do not use this product where inflammable fumes of gasoline, benzine, thinner, or other inflammable liquids may be in the air. Doing so may cause an explosion or fire. ❏ Do not use aerosol sprayers containing flammable gas inside or around this product. Doing so may cause fire.
- Page 4 Do not touch the thermal head and the frame on its side because they can be very hot after printing. Caution about Warranty This product assumes that the customer uses the software provided by Epson. If the customer modifi es the software, any repairs for malfunctions that occur may be charged, even if they occur during the warranty period, and we may not be able to respond to product inquiries.
-
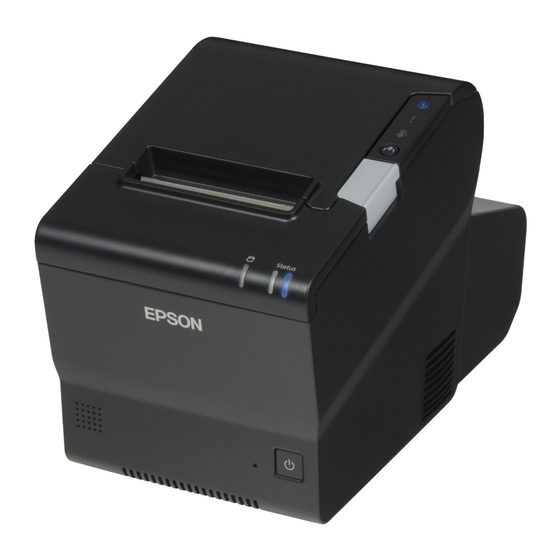
Page 5: Part Names And Functions
English Part Names and Functions Roll paper cover Printer LEDs Manual cutter Connector cover Cutter cover Feed button Controller LEDs Cover open button Printer reset button Power button Roll paper cover Open this cover to install/replace the roll paper. Manual cutter Use this cutter when you cut the roll paper manually. - Page 6 English Feed button Press this button to feed the roll paper. Connector cover Use the product with this cover attached to protect cables. (U “Attaching/Removing the Connector Cover” on page 11 Controller LEDs The storage access LED (➀) turns on during storage access. The status LEDs (➁...
- Page 7 English Interface All the ports and connectors are located on the back of the product Drawer kick Line-out port connector Serial port DC-in connector VGA port HDMI Port USB 3.0 port USB 3.0 ports (× 5) Ethernet port USB 2.0 port USB 2.0 Type C port Note: If the connector cover is attached, detach it to access the ports or connectors.
-
Page 8: Setup
English Setup Installing the Product Install the product horizontally on a firm, stable surface. Note: ❏ The security hook on the back of the product allows you to attach a commercially available antitheft wire. Security hook ❏ A tape for fixing the product (DF-10) is available as an option. (U “Securing the Product”... - Page 9 English Connecting the AC Adapter Follow the steps below to connect the AC adapter. WARNING: Be sure to use the specified AC adapter [AC Adapter, T1(Model: M284B)] only. CAUTION: Be sure to leave a space between the AC adapter and the main unit. 1.
- Page 10 English Connecting External Devices If you connect external devices, turn off the product and then connect each cable to the port/ connector on the back of the product. (U “Interface” on page 7 Note: When connecting the cables whose connectors do not lock themselves (USB cables and line-out cable, etc.), you can pass the cables through the wire saddle to prevent them from coming off.
- Page 11 English Attaching/Removing the Connector Cover Attaching the connector cover CAUTION: Be sure to hold both sides of the connector cover when attaching it, or it may become damaged. Follow the steps below to attach the connector cover to protect cables. Note: If you use the product with the optional customer display (Model: DM-D110), remove the U-shaped part from the connector cover.
- Page 12 English 2. Push the connector cover to click onto the main body. 3. Make sure the cables are not pinched. Note: You can also attach bottom cover to hide connectors.
- Page 13 English Removing the connector cover Push the connector cover down while pushing the lower part of the both sides of it inward to detach the hooks from the main body. Note: If the connector cover (bottom) is attached, first remove the connector cover (bottom).
- Page 14 English Attaching the Power Button Cover Attaching the power button cover that comes with the product onto the power button prevents accidental operation of the power button. Follow the steps below to attach the power button cover. Note: It is recommended to clean any dirt around the power button before you attach the cover. 1.
- Page 15 English Changing the Paper Width You can change the paper width from 80 mm to 58 mm by installing the roll paper guide. Follow the steps below to change the paper width. 1. Turn off the printer. 2. Open the roll paper cover. 3.
- Page 16 Base Screws 1. Attach the base on the TM-T88VI-DT2 with the three screws. (➀ in the illustration) 2. Pass the USB cable of the customer display through the base. (➁ in the illustration) 3. Align the dowel hole in the customer display and the dowel on the base to attach the customer display on the base.
- Page 17 The pole does not come out of the customer display once it is attached to it. Be sure of its orientation when attaching it to the customer display. 1. Attach the base on the TM-T88VI-DT2 with the three screws. (➀ in the illustration) 2.
- Page 18 English Changing the orientation of the display Hold the TM-T88VI-DT2 with your hand and move the display or arm to change the direction or angle. CAUTION: Do not rotate the display with excessive force. Doing so may break it. The mobile range of the display is as follows.
- Page 19 English Securing the Product Using the optional affixing tape (Model: DF-10) secures the product to the installation surface. Follow the steps below to use the affixing tape. 1. Turn over the product so that you can see its bottom. 2. With two pieces of the affixing tape combined, peel off the backing paper of a pair on one side, and paste it to one of the specified positions on the bottom of the product.
-
Page 20: Basic Operations
English Basic Operations Turning Power On/Off CAUTION: ❏ If you turn the product off, wait more than 10 seconds before you turn it on again. ❏ When the product is turned off or when it is in the standby mode, do not hold down the power button longer than 4 seconds. - Page 21 English Opening the Covers Opening the roll paper cover Press the cover open button to open the roll paper cover. Opening the cutter cover Slide the cutter cover toward front to open it.
- Page 22 English Controlling the Speaker Volume You can control the speaker volume through the product's operating system. Forced Termination CAUTION: When forced termination is executed, all unsaved data is lost and recovery of the operating system may be required. If you cannot turn the product off using applications or the operating system, you can execute forced termination as a last resort by pressing the power button for approximately 4 seconds.
-
Page 23: Installing/Replacing The Roll Paper
English Installing/Replacing the Roll Paper Follow the steps below to install/replace the roll paper. 1. Open the roll paper cover. (U “Opening the roll paper cover” on page 21 2. Remove the used roll paper core if there is one. 3. - Page 24 English 5. Tear off the paper.
-
Page 25: Cleaning
Never clean the product with alcohol, benzine, thinner, or other such solvents. Doing so may damage or break the parts made of plastic and rubber. Cleaning the Thermal Head To maintain print quality, Epson recommends cleaning the thermal head periodically (generally every 3 months) by following the steps below. CAUTION: ❏... -
Page 26: Troubleshooting
English Troubleshooting (Power) LED does not light Check whether the AC adapter is correctly connected. (U “Connecting the AC Adapter” on page 9 LED is on ❏ Check whether the roll paper cover is correctly closed. ❏ If the LED is on, check whether the roll paper is correctly installed and any roll paper remains. - Page 27 English The roll paper cover will not open When the autocutter blade is locked, the roll paper cover will not open. Follow the steps below to return the autocutter blade to the normal position. 1. Turn off the product (U “Turning Power On/Off”...
-
Page 28: Specifications
English Specifications Item Specification • Celeron model Intel® Celeron 3965U 2.20 GHz (2 MB SmartCache) • Core™ i3 model Intel® Core™ i3-7100U 2.40 GHz (3 MB SmartCache) • Core™ i5 model Intel® Core™ i5-7300U 2.60 GHz, 3.50 GHz during burst (3 MB SmartCache) Main memory 4 GB, DDR4-2133, SO-DIMM slot... -
Page 29: Appendix
Neither is any liability assumed for damages resulting from the use of the information contained herein. Neither Seiko Epson Corporation nor its affiliates shall be liable to the purchaser of this product or third parties for damages, losses, costs, or expenses incurred by purchaser or third parties as a result of: accident, misuse, or abuse of this product or unauthorized modifications, repairs, or alterations to this product, or (excluding the U.S.) failure to strictly comply with Seiko Epson... - Page 30 English Open Source Software License 1 ) This printer product includes open source software programs listed in Section 5) according to the license terms of each open source software program. 2 ) We provide the source code of the GPL Programs and LGPL Programs until five (5) years after the discontinuation of same model of this printer product.
- Page 31 English MICROSOFT SOFTWARE LICENSE TERMS WINDOWS 10 IOT ENTERPRISE & MOBILE (ALL EDITIONS) IF YOU LIVE IN (OR IF YOUR PRINCIPAL PLACE OF BUSINESS IS IN) THE UNITED STATES, PLEASE READ THE BINDING ARBITRATION CLAUSE AND CLASS ACTION WAIVER IN SECTION 9. IT AFFECTS HOW DISPUTES ARE RESOLVED.
- Page 32 English (vi) reverse engineer, decompile, or disassemble the software, or attempt to do so, except and only to the extent that the foregoing restriction is (a) permitted by applicable law; (b) permitted by licensing terms governing the use of open source components that may be included with the software; or (c) required to debug changes to any libraries licensed under the GNU Lesser General Public License which are included with and linked to by the software;...
- Page 33 English software. Every time you transfer the software to a new device, you must remove the software from the prior device. You may not transfer the software to share licenses between devices. 5. Authorized Software and Activation. You are authorized to use this software only if you are properly licensed and the software has been properly activated with a genuine product key or by other authorized method.
- Page 34 English award the same damages to you individually as a court could. The arbitrator may award declaratory or injunctive relief only to you individually to satisfy your individual claim. e. Arbitration fees and payments. (i) Disputes involving $75,000 USD or less. The manufacturer or installer (or Microsoft if your dispute is with Microsoft) will promptly reimburse your filing fees and pay the AAA’s and arbitrator’s fees and expenses.
- Page 35 English the fulfillment of which facilitate the due performance of this agreement, the breach of which would endanger the purpose of this agreement and the compliance with which a party may constantly trust in (so- called "cardinal obligations"). In other cases of slight negligence, the manufacturer or installer or Microsoft will not be liable for slight negligence.
- Page 36 English NO WARRANTY THE SOFTWARE ON YOUR DEVICE (INCLUDING THE APPS) IS LICENSED "AS IS." TO THE MAXIMUM EXTENT PERMITTED BY YOUR LOCAL LAWS, YOU BEAR THE ENTIRE RISK AS TO THE SOFTWARE'S QUALITY AND PERFORMANCE. SHOULD IT PROVE DEFECTIVE, YOU ASSUME THE ENTIRE COST OF ALL SERVICING OR REPAIR. NEITHER THE DEVICE MANUFACTURER NOR MICROSOFT GIVES ANY EXPRESS WARRANTIES, GUARANTEES, OR CONDITIONS FOR THE SOFTWARE.