Table of Contents
Advertisement
Advertisement
Table of Contents

Related Manuals for Roland V-Drums TD-50X


Summary of Contents for Roland V-Drums TD-50X
- Page 1 Reference Manual © 2021 Roland Corporation...
-
Page 2: Table Of Contents
Contents Getting Ready Customizing the Kits . . . . . . . . . . . . . . . . . . . . . . . . . . . . . . . . . . . . . . . . . - Page 3 Factory (Including Roland Cloud License Data) Defaults . . . . . . . . . . . . . . . . . . . . . . . . . . . . . . . . . . . . . . . . . . . . . . . .
-
Page 4: Getting Ready
Getting Ready An Overview of the TD-50X Drum Kits On the TD-50X, the sounds that play when you strike each pad are called “instruments. ” A set of instruments allocated to the respective pads is called a “drum kit. ” Drum kit 100 Drum kit 1 Pad settings... -
Page 5: Memories
Backup COPY Recorded data drum kit Trigger settings Trigger settings COPY (including kit backup data User samples Setup downloaded from Roland (presets) User samples Cloud) User sample LOAD SAVE Preset memory Temporary memory (saved temporarily) This is where the factory default settings are saved. - Page 6 Getting Ready About Performance Techniques As with an acoustic drum kit, the TD-50X supports a variety of playing techniques. NOTE 5 Use only wooden or plastic sticks. Using carbon or metal sticks may cause the sensors to malfunction. 5 Use nylon brushes. Using metal brushes may cause the sensors to malfunction or damage the pads. Pads Change the nuance of the rim shot With certain snare and tom sounds, slight changes in the way you play...
- Page 7 Getting Ready Edge shot This technique involves striking the edge of the top cymbal with the shoulder of Nuance changes depending on the the stick. When played as shown in the strike location illustration, the “rim-side” sound of the connected trigger input is triggered. Striking directly on the edge (i.e., exactly from the side) will not produce the correct Edge sensor...
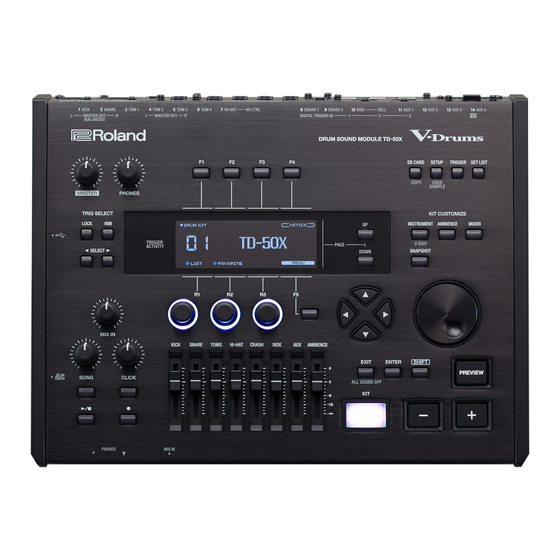
- Page 8 Getting Ready Panel Descriptions Top Panel PAGE [DOWN] [UP] buttons [MASTER] knob Press these buttons when the PAGE [UP] [DOWN] buttons are lit to switch between screen pages. Adjusts the volume from the MASTER OUT jacks. TRIGGER ACTIVITY indicator [PHONES] knob These indicators light when a trigger signal (the signal outputted Adjusts the volume of headphones connected to the PHONES jack.
- Page 9 Getting Ready [ s ] button Plays/stops the song or recorded data. [SD CARD] button [ t ] button Use this for operations related to the SD card, such as saving or loading data. Also, you can copy settings such as drum kit and Press this to record your playing.
- Page 10 Getting Ready Side Panel/Front Panel * To prevent malfunction and equipment failure, always turn down the volume, and turn off all the units before making any connections. Computer SD card Audio player Headphones USB COMPUTER port * Never turn off the power or remove the SD cards while the screen indicates “Processing...
- Page 11 Getting Ready Rear Panel (Connecting Your Equipment) MIDI devices Footswitch Mixer Electronic instruments Mixer or amplified speakers (external sound module, etc.) (sampling pads, etc.) Pads and other Pads and other triggerable instruments triggerable instruments (connected digitally) MIX IN (STEREO) jack [ L ] switch Connect this to an electronic instrument such as a sampling pads.
-
Page 12: Turning The Power On/Off
Getting Ready Turning the Power On/Off MEMO When connecting a digitally-connected pad, a settings screen may appear for the pad. For details, refer to “Settings for pads that * Once everything is properly connected (p. 11), be sure to support digital connection” (p. 12). follow the procedure below to turn on their power. -
Page 13: Making The Power Automatically Turn Off After A Time (Auto Off)
Getting Ready Making the Power Automatically Turn Off Making Hi-Hat Settings After a Time (AUTO OFF) When using the VH-14D digital V-hi-hat or the VH-13, VH-11 or VH-10 V-hi-hats, adjust the offset on the TD-50X. The power to this unit will be turned off automatically after This is necessary in order to correctly detect open/close operations a predetermined amount of time has passed since it was and pedal movement. - Page 14 Getting Ready Loosen the clutch screw of the VH-11, so that the hi-hat MEMO naturally rests atop the motion sensor unit. You can also press the [TRIGGER] button while holding down the [KIT] button on the TD-50X to adjust the offset. Press the [TRIGGER] button.
- Page 15 Getting Ready Basic Operations Adjusting the overall volume Switching between tabs Switching between pages ([MASTER] knob or [PHONES] knob) (PAGE [UP] [DOWN] buttons) and setting functions ([F1]–[F5] buttons, [R1]–[R3] knobs) Use the [MASTER] knob to adjust the Use the PAGE [UP] [DOWN] buttons to switch volume output from the MASTER OUT between screen pages.
-
Page 16: Performing
Performing Drum Kits and Instruments Selecting a Drum Kit On the TD-50X, the sounds that play when you strike each pad are Press the [KIT] button. called “instruments. ” A set of sounds (instruments) allocated to the respective pads is called a “drum kit. ” The DRUM KIT screen appears. -
Page 17: Using A Cross-Stick Technique
Performing Using the Click Using a Cross-Stick Technique Using a pad that is connected to a TRIGGER IN jack Turning the click on/off Each time you press the [F4] (XSTICK) button, you’ll switch between sounding and not sounding the cross-stick sound (p. 6) from the snare pad. -
Page 18: Performing Along With A Song
Performing Editing the sound settings Performing Along with a Song On the CLICK screen (SOUND tab), use the knobs to Playing Along with a Song on an Audio Player change the settings. Connect an audio player (your smartphone or other device) to the MIX Knob Value Explanation... -
Page 19: Repeatedly Playing A Specified Region (A-B Repeat)
Performing MEMO Repeatedly Playing a Specified Region 5 You can repeatedly play back an entire song or just one part. (A-B Repeat) 5 You can make the click sound in time with the song by outputting You can make a certain part of a song repeat. an audio file on the SD card as a click track (p. -
Page 20: Changing The Settings For Each Song
Performing View the information for a song Changing the Settings for Each Song You can set the volume, method of playback and playback speed for Select a song on the SONG screen (p. 18). each song. Press the PAGE [DOWN] button. Select a song on the SONG screen (p. -
Page 21: Playing Back A Audio File As A Click (Click Track)
Performing Rhythm Training Playing Back a Audio File as a Click (Click Track) (Coach Mode) You can use an audio file (WAV) separate from the song for the click, This unit features practice modes, collectively called “Coach Mode. ” and play it back as the click (click track). These modes help you to practice as effectively as possible. -
Page 22: Developing Internal Timing Sense (Quiet Count)
Performing TIME CHECK settings Developing Internal Timing Sense (QUIET COUNT) In the TIME CHECK screen, you can press the [F2] (SETUP) button to This lets you practice keeping the tempo with your body. change the pads that are evaluated and the number of measures that For the first few measures, the click is heard at the specified volume, are scored. -
Page 23: Warm Ups
Performing QUIET COUNT settings WARM UPS In the QUIET COUNT screen, press the [F2] (SETUP) button to access In this mode you’ll successively practice steps 1–3, be graded on your the settings screen. performance at each step, and then receive a final evaluation. You can choose one of three courses (5/10/15 minutes), ranging from easy to difficult. -
Page 24: Registering/Recalling Your Favorite Drum Kits (Favorite)
Performing Overall evaluation Registering/Recalling Your Favorite Drum This grades your performance at each step, and displays the overall Kits (FAVORITE) evaluation. To resume practicing, press the [F5] (RETRY) button. You can register your favorite drum kits as “favorites, ” and recall them instantly. -
Page 25: Recording
Recording Playback Recording a Performance Press the [ s ] button. You can easily record your own performance and play it back. * When recording to an SD card, make sure that the SD card is The recorded performance plays back. inserted (p. -
Page 26: Deleting Your Recorded Data
Recording Deleting Your Recorded Data Exporting the Recorded Data to an SD Card (SONG EXPORT) Here’s how to delete recorded data. You can export the data you’ve recorded and stored on this unit or on In the SONG screen (p. 18), press the [F3] (REC DATA) an SD card as an audio file (WAV) or SMF to the SD card. -
Page 27: Connecting And Recording To Your Computer
Recording Press the [F5] (EXECUTE) button. A confirmation message appears. If you decide to cancel, select “CANCEL” and press the [ENTER] button. Select “OK,” and press the [ENTER] button. The export begins. Exported data is saved in the “EXPORT” folder (p. 53). NOTE Never do any of the following things while data is being exported. -
Page 28: Customizing The Kits
Customizing the Kits Selecting the Instruments Saving your settings Since the TD-50X automatically saves the values that you edit, Press the [INSTRUMENT] button. you don’t need to do anything in particular to save your settings. Press the PAGE [UP] button several times to display the Settings are also saved when you turn off the power. -
Page 29: Selecting The Pad To Set
Customizing the Kits Selecting the Pad to Set Listening Only to the Currently-Selected Instrument (LAYER PREVIEW) Selecting by striking the pad With the TD-50X, you can create layered sounds by stacking an instrument (main instrument) with a sub-instrument. The currently- To edit the settings for a pad, strike that pad to select it. -
Page 30: Adjusting The Attack And Release (Transient)
Customizing the Kits Adjusting the Attack and Release Layering Instruments (TRANSIENT) (SUB INSTRUMENT) You can adjust parameters such as the attack and release (the You can layer the main instrument with a sub-instrument so that they transients) for each instrument. are heard together. -
Page 31: Listening Only To The Currently-Selected
Customizing the Kits Listening Only to the Currently-Selected This basically works the XFADE same as FADE2, but the Instrument Volume (LAYER PREVIEW) main instrument (A) sounds quieter when you strike the You can temporarily listen to only the currently-selected layer (or sub- pad stronger than the Fade Playing instrument in this case). -
Page 32: Recreating The Reverberations Of A Performance Location (Ambience)
Customizing the Kits Recreating the Reverberations of a Editing the Mixer (MIXER) Performance Location (AMBIENCE) With the mixer function, you can set the volume for each pad and add various effects to the sounds. This feature recreates the sound of the overhead mic that captures &... -
Page 33: Applying Effects
Customizing the Kits PAD COMP screen (pad compressor) Parameter Value Explanation Maximum volume of each pad This lets you decrease the volume of the strongest hits while preserving their nuances. Use this to keep the volume Pad Maximum down while still maintaining -5–0 Volume (*1) the nuances of the strongest... -
Page 34: Adjusting The Overall Sound Of The Drum Kit (Master Comp/Master Eq)
Customizing the Kits Turning the master compressor/master EQ on/off Adjusting the Overall Sound of the Drum Kit (MASTER COMP/MASTER EQ) Press the [MIXER] button. This shows you how to configure the stereo compressor/limiter (master comp) that is applied at the final stage of the master output, as well as Press the PAGE [UP] [DOWN] buttons to display the the four-band parametric equalizer (master EQ). -
Page 35: Comparing With Or Reverting To The Unedited Drum Kit (Snapshot)
Customizing the Kits Press the [F4] (RESTORE) button. Comparing with or Reverting to the A confirmation message appears. Unedited Drum Kit (SNAPSHOT) You can temporarily save the currently-edited drum kit, and compare it with the current settings or revert back to it (Snapshot). Save temporarily Immediately (STOCK) -
Page 36: Editing A Drum Kit (Menu)
Customizing the Kits Editing a Drum Kit Setting the Illumination Colors for the [KIT] (MENU) Button and Knobs This shows how to set the drum kit volume, the illumination colors for the controllers and so on. For each drum kit, you can change the illumination color of the [KIT] &... -
Page 37: Playing With Brushes
Customizing the Kits Playing with Brushes Setting a Tempo for Each Drum Kit You can specify whether you’re performing with sticks or with brushes. When you select a drum kit, the tempo you specify here is automatically applied. In the DRUM KIT screen (p. 16), press the [F5] (MENU) In the DRUM KIT screen (p. -
Page 38: Controlling The Changes In The Sound
Customizing the Kits Muting the sound of a specific pad when you strike Controlling the Changes in the Sound a pad (MUTE GROUP) You can use a pedal to change the pitch, or to adjust the tone based on the pad position. When you set a mute group and strike a pad in that group, the other pads in the same mute group are muted (silenced). -
Page 39: Making Midi Transmit/Receive Settings For Each Pad
Customizing the Kits Making MIDI Transmit/Receive Settings for Importing and Playing Audio Each Pad Files (USER SAMPLE) You can specify the MIDI data that is transmitted or received when you Audio files that you created on your computer can be imported from strike a pad. -
Page 40: Bulk Import Of Audio Files Within A Folder (Import All)
Customizing the Kits Use the cursor buttons to select an audio file, and press * If there is already one or more user samples within the import destination range, the message “User Sample Exists! Not Enough the [F5] (SELECT) button. Space to Import All”... -
Page 41: Listing The User Samples
Customizing the Kits Listing the User Samples Specifying the Sounded Region of a User Sample Here’s how to view a list of all user samples that have been imported. You can audition the sound, specify looping, and edit the name. You can specify the region of a user sample that is actually sounded. -
Page 42: Renaming A User Sample
Customizing the Kits Renaming a User Sample Button/Explanation [F2] (OPTIMIZE) button Here’s how to rename a user sample. Optimizing the user sample area (OPTIMIZE) From the user sample list, select the user sample that If you repeatedly import and delete user samples, the user sample you want to edit. -
Page 43: Using The Utilities
5 This might not work correctly for some models of computer. Refer Specifying the USB driver to the Roland website for details on the operating systems that are supported. Here’s how to switch between the TD-50X’s dedicated USB driver and 5 A USB cable is not included. -
Page 44: Configuring The Output For Usb Audio
Using the Utilities Configuring the Output for USB Audio Specifying the Input for USB Audio You can set the output destination of the USB audio that is output Here’s how to specify the USB audio input that is input to the USB from the USB COMPUTER port. -
Page 45: Configuring The Routing For Usb Audio (Audio Routing)
Using the Utilities Configuring the Routing for USB Copying Settings (COPY) Audio (Audio Routing) With the TD-50X, you can copy the respective settings within memory or to an SD card. You can also swap the copy source and destination This shows you how to configure the routing for the USB audio input/ settings. - Page 46 Using the Utilities Example 1: Copying a drum kit A confirmation message appears. (KIT) In the SETUP MENU 1 screen, press the [F1] (KIT) button. The COPY KIT screen appears. If you decide to cancel, select “CANCEL” and press the [ENTER] button.
-
Page 47: Recalling Drum Kits Successively
Using the Utilities SD CARD Recalling Drum Kits Successively (SET LIST) Include or don’t include user samples You can specify an order in which drum kits are recalled in 32 steps Copy- Instrument set to copy (step 1 through step 32). Such an order is called a “set list, ” and you can Copy-source bank number source create 32 set lists. -
Page 48: Using Set Lists
Using the Utilities Swapping or renaming set lists Using Set Lists Press the [F5] (SETUP) button. Selecting the set lists The setup screen appears. Press the [SET LIST] button to make it light. The set list turns on. Button Explanation [F1] (MOVE LIST H ) button Changes the order of the set list at the cursor... -
Page 49: Settings
Settings can make fine adjustments as appropriate according to how you Trigger Settings attach the pad and how you use it. For details, refer to “Data List” (PDF). Here’s how to make trigger settings so that the signals from the pads can be accurately processed by the TD-50X. -
Page 50: Adjusting The Sensitivity Of Individual Pads
Settings Adjusting the Sensitivity of Individual Pads Parameter Value Explanation Adjusts the sensitivity of all Because the following settings are automatically set to the appropriate pads as a whole for the entire values for each pad when you specify the trigger type (p. 49), there drum kit. -
Page 51: Making Detailed Settings For Digitally-Connected Pads
Settings Press a button from [F1] (THRESHOLD) to [F4] MEMO (POSITION) to select the item you want to edit. To return to the default values, press the [F5] (DEFAULT) button. Trigger parameters (with the exception of certain parameters such Button Explanation as crosstalk cancellation) are set to the default value. -
Page 52: Eliminate Crosstalk Between Pads (Crosstalk Cancellation)
Settings Example) Crash 1 is triggered when you strike the Eliminate Crosstalk Between Pads Tom 1 pad (Crosstalk Cancellation) If two pads are attached to the same stand, the vibration from one struck pad may cause the other pad to sound without your intention. Press the [TRIGGER] button. -
Page 53: Backing Up Data
Kit folder Drum kit backup data is saved here. Kit backup data (files with a “.tdz” extension) that were downloaded from Roland Cloud for import should be saved here. SONG folder Recorded song data is saved here. Backing Up to an SD Card Here’s how to save all settings that are stored in the TD-50X (up to 99... -
Page 54: Loading Backup Data From An Sd Card
Settings * If you back up user samples as well, it may take several minutes A confirmation message appears. to save the data depending on the size of the user samples. If you don’t back up user samples, and you then delete user samples or renumber them, the kit won’t be reproduced correctly even if you load the backup. -
Page 55: Loading Kit Backup Data From An Sd Card (1 Kit Load)
The kit backup data is saved on the SD card. * The license data for the kit backup data is saved to this unit the first time you load the kit backup data downloaded from Roland Cloud. Loading Kit Backup Data from an SD Card A confirmation message appears if the license data has not been saved to this unit. -
Page 56: Using A Connected Computer To Manage The Sd Card
Settings Make deletion settings. Press the PAGE [DOWN] button to display page 3 (SD CARD UTILITY). Parameter Explanation Press the [F2] (INFO) button. Bank Number The SD CARD INFO screen appears. Selects the backup number that you want to (when using delete. -
Page 57: Making Overall Settings For The Td-50X
Settings Making Overall Settings for the TD-50X Audio Output Assignments (OUTPUT) (SETUP) Here’s how to assign the audio outputs from the MASTER OUT jacks, DIRECT OUT jacks, and PHONES jacks. The settings below are common to the entire TD-50X, such as specifying the output destination of the TD-50X and configuring the MEMO footswitch assignments. - Page 58 Settings Output destination setting examples Here are some examples of output destination settings. MEMO The MASTER OUT jacks (XLR type) and DIRECT OUT jacks (1/4-inch [F3] (MONITOR) button TRS phone type) are balanced outputs. The MASTER OUT jacks (1/4- inch TRS phone type) are unbalanced outputs (p. 11). This lets you check the output volumes for each jack.
- Page 59 Settings Example 3: Performing while listening to a click/ Button Explanation guide track Specifies whether the low-frequency region is With these settings, all sound is output to the PHONES jacks for cut from the output. [F2] (LO CUT) monitoring. button The frequency setting is the same for each By outputting CLICK (the click and song click track output) and USB output.
-
Page 60: Other Settings (Option)
Settings Assigning Functions to Footswitches or Pads Parameter Explanation (CONTROL) With the “DIRECT” setting Footswitches (BOSS FS-5U, FS-6; sold separately) or pads that are 5 The master compressor and master EQ connected to the TD-50X can be assigned to control functions such as effects are not applied to the output from switching drum kits or switching set lists. -
Page 61: Midi Settings (Midi)
Settings Assigning functions to pads Button Explanation You can freely configure how the drum kits You can assign a function to a pad that’s connected to TRIGGER IN jacks [F4] (PROG CHG) correspond with the program change messages 13/AUX3 and 14/AUX4, or to a pad that supports digital connection button that are transmitted and received. -
Page 62: Restoring The Factory Settings
This restores the settings stored in the TD-50X to their factory default values. This is called a “factory reset. ” When you upgrade from a TD-50 to the TD-50X or load kit backup data from Roland Cloud into this unit, the Roland Cloud license data is NOTE saved on the TD-50X. -
Page 63: Appendix
Appendix List of Displayed Messages Error Message List Message Meaning Action Insert an SD card correctly. Format SD Card Error! Failed to format the SD card. Unlock the SD card. Incorrect File! The backup data or the kit backup data is damaged. Do not use this data. -
Page 64: Other Messages
Appendix Message Meaning Action If you see this message but can’t figure out why, check the The USB cable was disconnected (or USB communication USB Offline! USB cable to make sure it is connected properly, and that was interrupted for some reason). there isn’t a short in the cable. -
Page 65: Troubleshooting
Appendix Troubleshooting Problem Items to check Action Page Problems with sound Are the cables correctly connected to each pad and Check the connections. p. 11 pedal? Could the Instrument be “OFF”? Assign an Instrument. p. 28 p. 32 Is the instrument’s volume set too low? Adjust the volume of the instrument. - Page 66 Appendix Problem Items to check Action Page Problems with USB Is the USB cable connected correctly? Check the connections. p. 11 In order to transmit and receive audio as USB audio, the Install the USB driver on your computer. p. 43 USB driver must be installed.
-
Page 67: Main Specifications
Kick: KD series, KT series Footswitch: BOSS FS-5U, FS-6 Hi-Hat: VH series Personal Drum Monitor: PM series * This document explains the specifications of the product at the time that the document was issued. For the latest information, refer to the Roland website.