Table of Contents
Advertisement
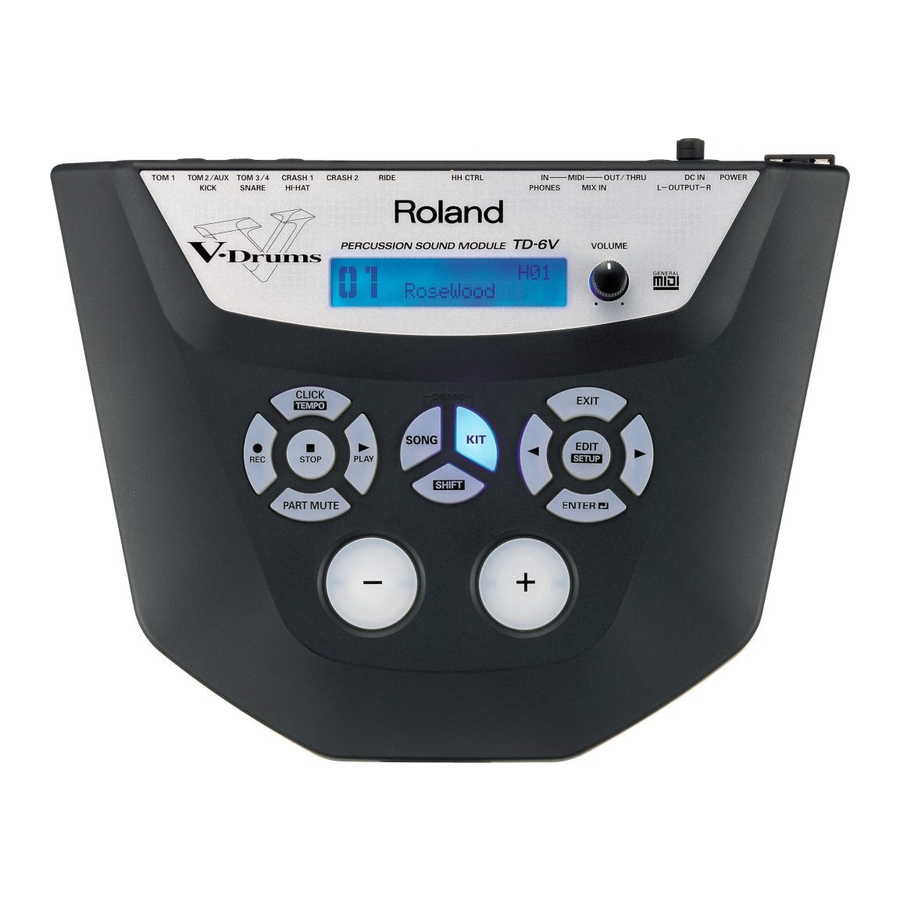
Owner's Manual
Thank you, and congratulations on your choice of the Roland Percussion Sound
Module TD-6V.
Before using this unit, carefully read the sections entitled: "USING THE UNIT
SAFELY" (p. 2–3) and "IMPORTANT NOTES" (p. 4–5). These sections provide
important information concerning the proper operation of the unit. Additionally,
in order to feel assured that you have gained a good grasp of every feature
provided by your new unit, Owner's manual should be read in its entirety. The
manual should be saved and kept on hand as a convenient reference.
*
All product names mentioned in this document are trademarks or registered
trademarks of their respective owners.
202
Copyright © 2003 ROLAND CORPORATION
All rights reserved. No part of this publication may be reproduced in any
form without the written permission of ROLAND CORPORATION.
Advertisement
Table of Contents

Related Manuals for Roland TD-6V


Summary of Contents for Roland TD-6V
- Page 1 Owner’s Manual Thank you, and congratulations on your choice of the Roland Percussion Sound Module TD-6V. Before using this unit, carefully read the sections entitled: “USING THE UNIT SAFELY” (p. 2–3) and “IMPORTANT NOTES” (p. 4–5). These sections provide important information concerning the proper operation of the unit. Additionally, in order to feel assured that you have gained a good grasp of every feature provided by your new unit, Owner’s manual should be read in its entirety.
- Page 2 Roland. • When using the unit with a rack or stand recom- mended by Roland, the rack or stand must be carefully placed so it is level and sure to remain stable. If not using a rack or stand, you still need to...
- Page 3 • The unit and the AC adaptor should be located so their location or position does not interfere with their proper ventilation. 101c • This unit for use only with Roland stand (or cart). Use with other stands (or carts) is capable of resulting in instability causing possible injury. 102d •...
-
Page 4: Important Notes
However, in certain cases (such as when circuitry related to memory itself is out of order), we regret that it may not be possible to restore the data, and Roland assumes no liability concerning such loss of data. - Page 5 (including padding) that it came in, if possible. Otherwise, you will need to use equivalent packaging materials. • Use a cable from Roland to make the connection. If using some other make of connection cable, please note the following precautions.
-
Page 6: Table Of Contents
Front Panel ... 16 Rear Panel ... 18 Making the Settings...19 Mounting the TD-6V to the Stand ... 19 Connecting the Pads and the Pedals ... 20 Connecting Two Pads to Trigger Inputs 5/6 (TOM2/AUX) and 7/8 (TOM3/4)... 21 Connecting Headphones, Audio Equipment, Amps, and Other Gear ... 22 Turning On/Off the Power...23... - Page 7 Using the Pads to Play Songs...50 Playing with a CD, Tape, or MD (Using MIX IN Jack) ...51 Using the TD-6V As a General MIDI Sound Module ...52 Advanced Use ... 53 Chapter 1 Creating Your Own Drum Kit ... (Kit Edit)...54 About Drum Kits and the Drum Kit Screen ...
- Page 8 Detecting Trigger Signal Attenuation and Cancelling Incorrect Triggering ... (Retrigger Cancel) ... 74 Double Triggering Prevention ... (Mask Time) ... 74 Setting Rim Sensitivity on the PD-80R, PD-85, PD-105, PD-120, and PD-125... (Rim Sens)... 75 Using the TD-6V with Acoustic Triggers... 75...
- Page 9 Chapter 3 Global Settings for the TD-6V ... (SETUP/UTILITY, Making the Global Settings ... (UTILITY) ... 76 Display Contrast Adjustment ... (LCD Contrast) ... 76 Percussion Part Volume Control ... (Percussion Part Level)... 76 Backing Instruments Volume Control ... (Backing Level) ... 77 Muting Parts of a Song ...
- Page 10 Saving Data to an External MIDI Device ... (BULK DUMP)... 103 Returning Saved Data to the TD-6V ... 104 Data Compatibility Between the TD-6 and the TD-6V ... 104 Chapter 8 Features Using MIDI and Setting Examples ...105 About Transmitting/Receiving Program Changes ... 105 Triggering an External Sound Device by Playing the TD-6V...
- Page 11 Pad Does Not Sound As Intended ... 113 Song Does Not Sound As Intended ... 114 Sound is distorted... 114 Problems Operating the TD-6V ... 115 Display Is Too Light Or Too Dark ... 115 Messages and Error Messages ...116 System and Battery Error Messages...
-
Page 12: Features
You also get 100 internal songs that you can use to record your own drum performances (User songs). ■ 262 Backing Instruments The TD-6V’s abundance of backing instruments allow you to record in a variety of musical genres. Rich Expression ■ Compatible with mesh head V-PADs... - Page 13 Cymbals (CY-6, CY-8, CY-12H, CY-12R/C, CY-14C, CY-15R) Kick Trigger Units (KD-7, KD-8, KD-80, KD-85, KD-120) Hi-Hat Control Pedals (FD-7, FD-8 ) ■ Use the TD-6V As a MIDI Sound Module With an External Sequencer (p. 106) ■ Support for General MIDI (p. 52, p. 99) The TD-6V has a GM mode that can play back GM scores.
-
Page 14: How To Use This Manual
Preset songs. Advanced Use (p. 53) The TD-6V allows you use the drum kits you like to create new drum kits and to create songs from recordings of what you play. This section provides detailed explanations of all of the TD- 6V’s functions. -
Page 15: Setup Guide
Setup Guide... -
Page 16: Panel Descriptions
The screen displays information, indicating the drum kit name, song name, and settings etc. VOLUME Knob Adjusts the volume of the TD-6V (p. 24). Even when headphones are connected, sound will still be output from the various output jacks. Sequencer Section •... -
Page 17: Shift Button
Displays the tempo settings [CLICK (TEMPO)] screen (p. 43, p. 47) [SHIFT] + For making overall settings for [EDIT (SETUP)] the TD-6V (Setup; p. 69, p. 76, p. 92) [SHIFT] + [SONG] Displays the volume settings screen for the backing instruments (melodic and other instruments) (p. -
Page 18: Rear Panel
Use these connectors when using a MIDI sequencer, MIDI keyboard, or other MIDI device to play sounds with the TD-6V, when using the TD-6V and pads to play sounds from an external MIDI sound generator, or when saving the TD- 6V’s settings to, or loading settings from a MIDI... -
Page 19: Making The Settings
Using the screws attached to the bottom panel, attach the holder so the unit is oriented as shown in the diagram. Use the 8 mm screws (M5 x 8) provided with the TD-6V. Use of other screws may result in damage to the unit. -
Page 20: Connecting The Pads And The Pedals
Using the provided cables, connect the pads, cymbal pads, hi-hat control pedal, and kick trigger unit. Carefully refer to the numbers shown in the illustration and connect to the appropriate TRIGGER INPUT jacks on the TD-6V's rear panel. Setting Example fig.P-011.e... -
Page 21: Connecting Two Pads To Trigger Inputs 5/6 (Tom2/Aux) And 7/8 (Tom3/4)
With the optional cable (PCS-31) or standard insert cable, two pads may be connected to the trigger inputs 5/6 (TOM2/AUX) and 7/8 (TOM3/4). For instructions on making these settings, refer to p. 69. fig.P-012.e TD-6V Rear Panel PD-8 Making the Settings When using an optional PCS-31 or standard "insert"... -
Page 22: Connecting Headphones, Audio Equipment, Amps, And Other Gear
AC adaptor jack, anchor the power cord using the cord hook, as shown in the illustration. Using the TD-6V’s MIX IN Jack, allows you to play along with a CD or other such sound input (p. 51). -
Page 23: Turning On/Off The Power
Turning On/Off the Power Once the connections have been completed (p. 22), turn on power to your various devices in the order specified. By turning on devices in the wrong order, you risk causing malfunction and/or damage to speakers and other devices. fig.P-001 Turn the [VOLUME] knob completely to the left to lower the volume to the minimum level. -
Page 24: Turning Off The Power
When Using an Amp or Audio System • Is the amp or audio system volume setting correct? • Are the TD-6V and the amp or audio system connected correctly? • Is there a problem with any connector cable? • Have the input select settings of your audio system or amp been... -
Page 25: Restoring The Factory Settings (Factory Reset)
Restoring the Factory Settings (Factory Reset) This restores the pad and instrument settings, song data, and other information stored in the TD-6V to the original factory settings. fig.P-003 While holding down [SHIFT], press [EDIT (SETUP)]. [EDIT (SETUP)] lights. fig.P-004ai Press [ ] to select “FactoryReset.”... - Page 26 Only the settings for the currently selected drum kit are restored to the factory settings. ALL DRUM KITS: The settings for all of the TD-6V’s internal drum kits are restored to factory settings. ALL SONGS: All of the TD-6V’s internal song data is restored to the factory settings.
-
Page 27: Listening To The Demo Songs
Listening to the Demo Songs The TD-6V features five demo songs demonstrating the TD-6V’s sounds and expressive capabilities. The drums played on the demo songs were played in real time into a sequencer. fig.P-029 While holding down [KIT], press [SONG]. - Page 28 Listening to the Demo Songs Press [+] or [-], or press [ 1. How Now Copyright © 2003, Roland Corporation Drum kit being used: #11 “PopKit X” 2. TC R&B Copyright © 2001, Roland Corporation Drum kit being used: #80 “AcuStick”...
-
Page 29: Selecting The Pad Type
Selecting the Pad Type Make the settings for the type of pads to be used (trigger type) to ensure that the TD-6V accurately receives what is being played on the pads. Set each trigger input as described below. Settings optimized for the TD-6K are provided in factory settings on the TD-6V. - Page 30 Selecting the Pad Type Strike the pad you wish to set. The setting screen for the struck pad appears. Select the most suitable trigger type from the following chart for the pad you are using. Trigger Type Pad PD-8 PD-8 PD-6 PD Type PD-7...
-
Page 31: Adjusting The Sensitivity Of The Pad
Adjusting the Sensitivity of the Pad You may wish to adjust the sensitivity of the pads to accommodate your personal taste and style of performing. Adjusting the TD-6V’s sensitivity allows you to change the correlation between your playing velocity (strength) and the response and volume of the sound. - Page 32 Adjusting the Sensitivity of the Pad Press [ ] to select “Sensitivity.” fig.P-020_50 Strike the pad you wish to set. The setting screen for the struck pad appears. Press [+] or [-] to adjust the sensitivity of the pads. Here you can make a setting of 1–16. Higher settings result in higher sensitivity, so that the pad will produce a loud volume even when struck softly.
-
Page 33: About The Pads
Trigger Inputs and the Pads You Can Use Although you can use previous model pads, kick trigger units, and other such devices with the TD-6V, there may be incompatibilities between pads and trigger inputs, which may prevent you from being able to perform on some pads. -
Page 34: Combinations Of Pad And Trigger Type
About the Pads ■ Combinations of Pad and Trigger Type To enjoy full use of all the functionality offered by the TD-6V and your pads, be sure to review the following chart and select the pads best suited for your aims. -
Page 35: Recommended Parameters For The Pads
(SETUP/TRIG BASIC/Xtalk Cancel; p. 73). • Use the “RT-7K,” “RT-5S,” or “RT-3T”setting when you use acoustic drums to sound the TD-6V. For details refer to “Using the TD-6V with Acoustic Triggers” (p. 75). Trigger Type... -
Page 36: Playing The Pads
About the Pads Playing the Pads ■ Pad Head Shots and Rim Shots When you perform a head shot, the head instrument is played; rim shots produce the sound of the rim instrument. To play a rim shot, you must strike both the head and the rim of the pad simultaneously. -
Page 37: Cymbal Bow Shots/Edge Shots/Bell Shots
■ Cymbal Bow Shots/Edge Shots/Bell Shots When you perform a bow shot, the head instrument is played; edge shots and bell shots produce the sound of the rim instrument. CY-6, CY-12H, CY-14C: Capable of bow shots and edge shots. CY-12R/C, CY-15R: In addition to bow shots, either edge shots or bell shots can be played. -
Page 38: Cymbal Choke
About the Pads ■ Cymbal Choke By striking a pad and then squeezing the rim portion of the pad, you can mute the note while the note is still sounding. This performance technique is known as choking. fig.P-027.e Hi-Hat Control Pedal By connecting a hi-hat control pedal (FD-8), you can obtain consecutive control of the hi-hat’s opening and closing. -
Page 39: Quick Start
Quick Start... -
Page 40: Choosing A Drum Kit
Choosing a Drum Kit The TD-6V comes with 99 preset drum kits. Now’s probably a good time for you to try out the drum kits by selecting and playing them. fig.Q-001 Press [KIT]. [KIT] lights, and the “DRUM KIT” screen appears. -
Page 41: Playing While Listening To The Metronome/Click
Playing While Listening to the Metronome/Click Switching the Click On and Off Try using metronome (click). You can switch the click sound on and off by pressing [CLICK]. [CLICK] lights when set to play the sound. fig.Q-003.e Click is played Click is not played fig.Q-004a Press [CLICK]. -
Page 42: Adjusting The Click Volume (Level)
Playing While Listening to the Metronome/Click Adjusting the Click Volume (Level) fig.Q-004 Confirm that [EDIT] is not lit. If [EDIT] lights, you can press [KIT] or [SONG] to turn it off. fig.Q-005 Press [CLICK]. [CLICK] lights, and the click sound begins to play. fig.Q-006 Press [EDIT]. -
Page 43: Adjusting The Click Tempo
Adjusting the Click Tempo fig.Q-008 Press [CLICK]. [CLICK] lights, and the click sound begins to play. fig.Q-006 While holding down [SHIFT], press [CLICK (TEMPO)]. The Tempo screen appears. fig.Q-009_50 Press [+] or [-] to select the tempo. When you finish making settings, press [EXIT] to end the procedure. The “Tempo”... -
Page 44: Playing Along With Songs
Playing Along with Songs Choosing a Song and Playing Back The TD-6V features a sequencer that can record and play back accompaniment tracks and drum performances. This sequencer comes loaded with 170 Preset (internal) songs. fig.Q-010 ■ Choosing a Song Press [SONG]. -
Page 45: Playing Back A Song
■ Playing Back a Song Press the [PLAY ] button, and the song will begin playing. [PLAY ] lights. fig.Q-012 To stop playback of the song, press [STOP The [PLAY ] light goes out. fig.Q-013 When playback of a song is stopped, you can do the following. •... -
Page 46: Adjusting The Song Volume
Playing Along with Songs Adjusting the Song Volume You can adjust the song volume to correct the drum kit volume balance. Song volume consists of the two following adjustments. Backing Volume: Adjusts the volume of melodic instruments etc. other than percussion. Percussion Part Volume: Adjusts the volume of the drums and percussion sounds. -
Page 47: Temporarily Changing The Tempo Of A Song
Press [+] or [-] to select the volume. When you finish making settings, press [SONG] to end the procedure. Temporarily Changing the Tempo of a Song You can temporarily change the tempo of a song while playback is in progress. The song returns to its preset tempo when a different song is selected. -
Page 48: Muting The Pre-Programmed Drums In Songs
Playing Along with Songs Muting the Pre-programmed Drums in Songs You can mute just the drums recorded in a song. So you can play along. Try this using Song #8, “FUNK ROK.” fig.Q-019 4, 5 Press [SONG]. [SONG] lights, and the SONG screen appears. fig.Q-020ai Press [+] or [-] to select Song #8. - Page 49 Press the [PLAY ] button, and the song will begin playing. [PLAY ] lights. fig.Q-022 Press [PART MUTE]. [PART MUTE] lights, and the drum sound are muted. fig.Q-023 To hear the drums, press [PART MUTE] once more. The [PART MUTE] light goes out. fig.Q-023a Playing Along with Songs At the factory settings,...
-
Page 50: Using The Pads To Play Songs
Using the Pads to Play Songs The pads can also be set so that they start the performance of songs when struck (Pad Pattern function). This function is available only with electronic drums. The Pad Pattern function is already selected in Drum Kit #8, “1ManBand+.” Use this kit to try out this function. -
Page 51: Playing With A Cd, Tape, Or Md (Using Mix In Jack)
Playing with a CD, Tape, or MD (Using MIX IN Jack) Using the TD-6V’s MIX IN jack allows you to play along with a CD or other external audio sources. Make the connections as shown in the following figure. fig.Q-027.e Headphones, audio equipment, amp, etc. -
Page 52: Using The Td-6V As A General Midi Sound Module
Using the TD-6V As a General MIDI Sound Module The TD-6V features GM mode, allowing it to play back GM scores (music data for GM sound generators) from an External Sequencer. The TD-6V has a function that lets you mute only the drum sounds in GM mode, making this a very useful feature. -
Page 53: Advanced Use
Advanced Use... -
Page 54: Chapter 1 Creating Your Own Drum Kit
Chapter 1 Creating Your Own Drum Kit Parameters That Can Be Set Here fig.01-001.e INST (Instrument Settings) (p. 60) Inst Level Pitch Decay AMBIENCE (Ambience Settings) Ambience Switch Ambience Send Level Studio Type Wall Type Room Size Ambience Level EQUALIZER (Equalizer Settings) Master Equalizer Switch... -
Page 55: About The Drum Kit Screen
You can make settings preventing the display from switching to the instrument’s settings screen even when the pad is struck. When the TD-6V is set so that the screen does not switch, the trigger input number appears in brackets ([ ]). For more detailed information, refer to “Locking the Setting... -
Page 56: Choosing On The Td-6V
Helpful Edit Functions Listening to an INST (Instrument) assigned to a Pad (Preview) Even when no pad is connected to the TD-6V, you can select trigger input numbers and make settings while checking out instrument sounds. The preview velocity is set in “Preview Velo (Preview Velocity)”... -
Page 57: Locking The Setting Screen While Editing One Instrument
Chapter 1 Creating Your Own Drum Kit (Kit Edit) Choosing an Instrument About the Instruments The TD-6V features 1,024 different instruments which are categorized into 13 separate groups, such as KICK, SNARE, and TOM. You can individually adjust the Level, Pan, Pitch, and Decay settings for instruments set to the pads. -
Page 58: Choosing An Instrument
Chapter 1 Creating Your Own Drum Kit (Kit Edit) Choosing an Instrument (Inst) Select the instrument you want to sound when the pad is struck. To see which instruments can be selected here, refer to “Drum Instrument List” (p. 120). No sound is played if the pads are struck when the instrument is set to “1024 OFF.”... -
Page 59: Adjusting The Volume Of The Pad
Adjusting the Volume of the Pad (Level) Adjusts the volume of the instrument. Raising the value will increase the volume. With a setting of “0,” no sound is produced. Make the adjustment here when correcting the volume balance between instruments. The pedal hi-hat volume is set in “Pedal HH Vol (Pedal Hi- Hat Volume)”... -
Page 60: Ambience Settings
AmbSendLevel (Ambience Send Level):0–127 Choose “Location” Where the Drums are Played (Studio Type) The TD-6V includes nine different internal Studio Types you can select for the drum “location.” Before you make detailed settings, use this setting to select the basic type of acoustic Value environment in which you will be playing. -
Page 61: Changing The Wall Surface Material
Changing the Wall Surface Material (Wall Type) Select the surface material of the walls in the room in which the drums are played. fig.01-027_50 WallType (Wall Type): WOOD, PLASTER, GLASS WOOD: Simulates the sound of a wood-walled room producing a warm sound. -
Page 62: Equalizer Settings
Chapter 1 Creating Your Own Drum Kit (Kit Edit) Equalizer Settings (EQUALIZER) A two-band equalizer (for high and low frequency ranges) is used to adjust the sound of each drum kit. An equalizer lets you boost or cut specified frequency ranges to adjust the tone. -
Page 63: Playing A Song By Hitting A Pad
Value by playing back with the song’s velocity changed (KIT/ CONTROL/Pad Ptn Velo; p. 63). • The TD-6V features auxiliary functions for songs set to One Shot Playback and Tap Playback. For more details, refer to “Quick Play” (SONG/COMMON/Quick Play; p. 86), “Reset Time”... -
Page 64: Pitch Control With The Hi-Hat Control Pedal On/Off For Each Pad
TD-6V receives the note number specified here, the instrument assigned to the pad is played. On the TD-6V, the drum kit part and percussion part can both be set to Channel 10 at the same time. When two parts are set to channel 10, you should also set... -
Page 65: Midi Gate Time For Each Pad
98). When Setting Multiple Pads to the Same Note Number When using an external MIDI device to play TD-6V drum kits, if overlapping note numbers are received, the instrument assigned to the pad connected to the lowest-numbered trigger input is sounded. -
Page 66: Overall Drum Kit Settings
Chapter 1 Creating Your Own Drum Kit (Kit Edit) Overall Drum Kit Settings (COMMON) Make the settings for each drum kit. 1. Confirm that [CLICK] is not lit. If this lights, press [CLICK] to extinguish it. 2. Press [KIT], then [EDIT]. [KIT] and [EDIT] light. -
Page 67: Naming The Drum Kit
Naming the Drum Kit (Kit Name) Each kit can be given a name of up to 8 characters. Press [ ] or [ ] to move the cursor (under bar) to the character you want to change, then press [+] or [-] to select the character. -
Page 68: Restoring The Factory Settings For The Edited Drum Kit
Chapter 1 Creating Your Own Drum Kit (Kit Edit) Restoring the Factory Settings for the Edited Drum Kit You can restore reconfigured drum kits to their original factory conditions. Drum Kit Copy Function Follow the procedure described on p. 67 to select a drum kit marked with “... -
Page 69: Chapter 2 Making The Pad And Trigger Settings
Indicator (Maximum) Selecting the Pad Type (Trigger Type) To ensure that the TD-6V accurately receives signals sent from the pads, be sure to specify the trigger type (the type of pads being used). Set each trigger input as described below. - Page 70 RT-3T Rim Edge • Use the “RT-7K,” “RT-5S,” or “RT-3T”setting when you use acoustic drums to sound the TD-6V. For details refer to “Using the TD-6V with Acoustic Triggers” (p. 75). There may be no improvement of conditions when non- Roland pads are used, even after changing the trigger parameter settings.
-
Page 71: Setting The Pad Sensitivity And Making Other Settings
4. Disconnect the connecting cable, then connect two pads to TRIGGER INPUT 5/6 and 7/8 using the optional cable (PCS-31). When connecting the pads, refer to the instructions in “Connecting Two Pads to Trigger Inputs 5/6 (TOM2/ AUX) and 7/8 (TOM3/4)” (p. 21). 5. -
Page 72: Setting The Minimum Levels For The Pads
Chapter 2 Making the Pad and Trigger Settings (SETUP/TRIG) fig.02-006_50 Sensitivity: 1–16 Setting the Minimum Levels for the Pads (Threshold) This setting allows a trigger signal to be received only when the pad is struck harder than a specified force. This can be used to prevent a pad from sounding in response to extraneous vibrations from another pad.In the following example, B will sound but A and C will not sound. -
Page 73: Eliminate Crosstalk Between Pads
SPLINE: Extreme changes are made in response to the force used to strike the pad. fig.02-013.e Volume Striking Force SPLINE LOUD1, LOUD2: Changes made in response to the striking force are minor, maintaining a volume level at which it is easy to play. When using drum triggers, these settings help maintain stable levels. -
Page 74: Adjusting The Trigger Signal Detection Time
Chapter 2 Making the Pad and Trigger Settings (SETUP/TRIG) Adjusting the Trigger Signal Detection Time (Scan Time) Since the rise time of the trigger signal waveform may differ slightly depending on the characteristics of each pad or acoustic drum trigger (drum pickup), you may notice that identical hits (velocity) may produce sound at different volumes. -
Page 75: Setting Rim Sensitivity On The Pd-80R
Set this to as low a value as you can. 10. Set the “TrigCurve (Trigger Curve).” (SETUP/TRIG BASIC/TrigCurve; p. 72) If changes in playing dynamics do not produce a natural change in the volume of the TD-6V instrument, adjust this parameter. -
Page 76: Chapter 3 Global Settings For The Td-6V
[SONG] to end the procedure. Display Contrast Adjustment (LCD Contrast) The display contrast is strongly influenced by the location of the TD-6V and the lighting of the room it’s in. Adjust this parameter when needed. A larger value results in a brighter screen. fig.03-004_50 LCD Contrast: 1–16... -
Page 77: Backing Instruments Volume Control
Hold down [SHIFT] and press [PART MUTE] to jump to this screen. • This setting remains in effect even when songs are switched and when the TD-6V is played using data from an external MIDI device. • All percussion instruments in the Preset songs (except for Preset song #1 “DRUMS”) are recorded to the percussion... -
Page 78: Preview Volume Control
TD-6V to the original factory settings. All data and settings stored in the TD-6V are lost in carrying out this operation. Use the “Bulk Dump” operation to save crucial data and settings to an external MIDI device (SETUP/ BULK DUMP/Bulk Dump;... -
Page 79: Chapter 4 Setting The Metronome
Chapter 4 Setting the Metronome Parameters That Can Be Set Here fig.04-001.e CLICK (Click Settings) (p. 80) Click Level Time Signature Interval Inst Play Count In Rec Count In Switching the Click On/Off (Click) You can switch the click sound on and off by pressing [CLICK]. [CLICK] lights while the click sound is set to be played. -
Page 80: Setting The Time Signature
Chapter 4 Setting the Metronome (Click Edit) Setting the Time Signature (Time Signature) Specify the time signature of the click sound.When the numerator is set to “0,” no accent is added to the first beat. The metronome click sound then plays at a fixed volume. It is not possible to change the time signature of the metronome clicks while a song is playing back. -
Page 81: Chapter 5 Editing Songs
About Songs and the Song Screen About Songs The TD-6V’s sequencer organizes music into six parts. The Drum Kit part is used to record/play back what is played on the pads. Additionally, Part 1, Part 2, Part 3, and Part 4 are the four backing instrument parts (backing parts), and there is another Percussion part. -
Page 82: About The Song Screen
Chapter 5 Editing Songs (SONG Edit) fig.05-001.e Song #250 Song #1 Overall Settings Tempo, Play Type, Song Lock, Song Name Part Settings Drum Kit Part (p. 56) Percussion Part Backing Part Part1 Part2 Part3 Part4 Part Settings Inst, Level, Pan*, Ambience Send Level, Bend Range* *: This setting cannot be made for percussion part... -
Page 83: Choosing A Song
Choosing a Song Part settings are switched when a song is selected. To see which songs can be selected here, refer to “Preset Song List” (p. 128). Choosing from a Category (Song Category) Select songs by searching the category names. 1. -
Page 84: Adjusting The Song Volume
Chapter 5 Editing Songs (SONG Edit) Even when “9 Perc Only” or “10 Special” is selected for the percussion set, the buttons still light up according to the note numbers. • The correspondence between the lighted buttons and note numbers is predetermined and cannot be changed. •... -
Page 85: Overall Song Settings
Overall Song Settings (COMMON) Make the settings for each song. • If you want to save any changes made to Preset song settings, first copy the song to a User Song before making the changes (SONG/COPY; p. 89). Changes made to a Preset song are only temporary, so when you select a different song, the song reverts to its predetermined part settings. -
Page 86: Playing Back The Song From The First Note/Event
[STOP ]. Since you can also lock unused User Songs, then in situations such as when using the TD-6V as a sound module, it’s a good idea to lock songs when you want to save their settings. ] appears in the Song screen when a User Song is locked. -
Page 87: Naming A Song
Naming a Song (Song Name) You can use up to eight characters when naming a User song. Press [ ] or [ ] to move the cursor (under bar) to the character you want to change, then press [+] or [-] to select the character. -
Page 88: Choosing Percussion Set And Instruments
Select a percussion set for the percussion part and instruments for Parts 1–4. Percussion Part The TD-6V features ten Preset percussion sets that are ready to use. You cannot change the content of the Preset percussion sets. To see which percussion sets can be selected here, refer to the “Preset Percussion Set List”... -
Page 89: Adjusting The Stereo Position
Adjusting the Stereo Position (Pan) Adjusts the pan (the perceived location of the sound between the left and right speakers). The effect set here applies only when connected in stereo. Percussion parts do not feature the Pan setting. fig.05-027_50 Pan: L15–Center–R15 Sound is positioned at the extreme left. -
Page 90: Deleting A Song
Chapter 5 Editing Songs (SONG Edit) 7. Press [+] or [-] to select copy destination song. You can select a song that has not yet been used by holding down [SHIFT] and pressing [STOP User songs are indicated by “ fig.05-031ai.e Copy destination song 8. -
Page 91: Erasing Performance Data In A Song
Erasing Performance Data in a Song (ERASE) This erases the User song. Only the performance data is erased, and the beat, measure length, parts, and the song’s other settings are left intact. You can also erase specific parts. 1. Confirm that [CLICK] is not lit. If this lights, press [CLICK] to extinguish it. -
Page 92: Chapter 6 Recording A Song
The performance of the hi-hat control pedal is also recorded. • Sequencer cannot be used in GM mode (p. 99). • The amount that can be recorded to the TD-6V is limited. Please keep in mind that even though there are 100 user songs, the amount of memory available will be determined by how much data is recorded into each song. -
Page 93: How To Record
How To Record (RECORDING STANDBY) 1. Prepare for recording using the procedure described in “Preparations for Recording” (p. 92). 2. Press [SONG] ➝ [REC [PLAY ] flashes, while [SONG], [REC [CLICK] light up. • If a Preset song is selected when you press [REC then a new User song is selected automatically. -
Page 94: Quantize During Recording
Chapter 6 Recording a Song (Realtime Recording) Quantize During Recording (Quantize) “Quantize” is a function that corrects mistakes or discrepancies in the timing of the performance being recorded. Timing problems almost always occur when recording performances using pads, a MIDI keyboard, or other instruments. -
Page 95: Chapter 7 Making The Midi Settings
While using only pads with the TD-6V, there is no need to have any detailed knowledge of MIDI. For those who wish to use MIDI keyboards to record patterns on the TD-6V, use it as... -
Page 96: How The Internal Sequencer Operates
Sound Module B Receive Channel: 2 When used as a sound module, the TD-6V can receive on up to six of the sixteen MIDI channels (16 channels in GM mode). Sound modules like the TD-6V which can receive multiple MIDI channels simultaneously to play different sounds on each channel are called “multi-timbral sound modules.”... -
Page 97: Automatically Switching Instrument Settings Screens
TD-6V’s internal sound generator. Striking the pads does not cause sound to be produced by the internal sound generator. The pads and internal sequencer are connected to the TD-6V’s internal sound generator. Sounds are produced by the internal sound generator when the pads are struck. -
Page 98: Synchronizing With An External Midi Device
The TD-6V’s sequencer operates in accord with external tempo data. REMOTE: Playback begins, pauses, and stops in accord with data from the external device, but the TD-6V’s tempo setting is used for the playback tempo. Setting Priority for Playing Drums and Percussion (Channel 10 Priority) This setting is necessary when both drum kit part and percussion part are simultaneously assigned to Channel 10. -
Page 99: Hi-Hat Control Pedal Data Reduction
GM score data (music files for General MIDI sound module). For more on the GM system, refer to p. 13. To ensure proper playback of GM scores, set the TD-6V to GM mode. Setting this to “ON” initializes the TD-6V’s internal sound... -
Page 100: Preventing The Td-6V From Switching To Gm (General Midi) Mode
Preventing the TD-6V from Switching to GM (General MIDI) Mode (Rx GM ON) This setting prevents the TD-6V from switching to GM mode, even when a “GM System ON message” is received from an external MIDI device. fig.07-016_50 RX GM ON: OFF, ON OFF: Even when a “GM System ON message”... -
Page 101: Set The Device Id
When saving data using Bulk Dump (p. 103), save using “17” as the TD-6V Device ID. When re-transmitting this data back to the TD-6V, it won’t receive if the Device ID is set to something other than “17.” Even if you happen to have another TD-6V connected, data will not be received if the Device ID is set to something other than “17.”... -
Page 102: Midi Channel Settings For A Part
MIDI device. MIDI Channel Settings for a Part (MIDI PART) For each part, you can specify the channel on which the TD-6V will receive and transmit MIDI messages. At a setting of “1” through “16,” MIDI messages will be transmitted and received on that channel. -
Page 103: Saving Data To An External Midi Device
MIDI sequencer. use the external sequencer as you would when recording musical data, and perform the following steps on the TD-6V as shown in the following diagram. Bulk Dump is one kind of System Exclusive message. Be sure to use an external MIDI sequencer that is capable of recording System Exclusive messages. -
Page 104: Returning Saved Data To The Td-6V
This returns settings that have been saved to a sequencer or other external MIDI device back to the TD-6V. At this time, the TD-6V’s data is overwritten. Save any data you need to an external MIDI device before carrying out this operation. -
Page 105: Chapter 8 Features Using Midi And Setting Examples
Triggering an External Sound Device by Playing the TD-6V This sets the TD-6V so that the external MIDI sound module is sounded when the pads are struck. With this setting, both the TD-6V and the external sound module can play simultaneously. -
Page 106: Combining With An External Midi Sequencer
MIDI IN This makes the settings that allow performances of the pads to be recorded by an external MIDI sequencer. 1. Use a MIDI cable to connect the TD-6V and MIDI sequencer MIDI connectors as shown in the following figure. -
Page 107: Using The Td-6V As A Sound Module
TD-6V is played. Using the TD-6V As a Sound Module Here, the TD-6V is used as a sound module. You can connect an external MIDI sequencer and play back songs or connect a MIDI-compatible keyboard or pads for performance. - Page 108 MEMO...
-
Page 109: Appendices
Appendices... -
Page 110: Troubleshooting
Troubleshooting This section outlines points to check if you experience problems, and what to do about them. No Sound No Sound Has the [VOLUME] been lowered? ➝ Rotate the [VOLUME] knob to be sure. Is Local control set to “OFF?” (SETUP/MIDI COMMON/LocalControl;... - Page 111 Precautions When Turning On the Power When the TD-6V is turned on, it carries out a check of the pads. If you strike a pad or press the pedal anytime during this process, the pads cannot be checked properly, resulting in incorrect functioning of the pads.
-
Page 112: No Sound/Low Volume From Device Connected To The Mix In Jack
Is the volume level for each part set to “0?” (SONG/PART/Level; p. 88) ➝ Press [+] or [-] to make the setting. TD-6V Not Playing Even During Performance of External Sequencer or Keyboard Is the part’s MIDI channel correct? Or is the channel set to “OFF?”... -
Page 113: Drum Kit Does Not Sound As Intended
(SETUP/TRIG BASIC/Sensitivity; p. 71) ➝ Press [+] or [-] to make the setting. For fullest expression in performance, we recommend the exclusive use of Roland pads. Is the KD-80, KD-85, KD-120, PD-80, PD-80R, PD-85, PD-100, PD-105, PD-120, PD-125 or RP-2 head tightened uniformly? ➝... -
Page 114: Song Does Not Sound As Intended
Troubleshooting Wrong Sound Plays Is there a mistake in the head and rim selection? (p. 55) ➝ With some parameters, you can make separate settings for the head and rim. At this time, confirm the trigger type appearing in the upper right of the screen, then make the settings. -
Page 115: Problems Operating The Td-6V
Is GM Mode set to “ON?” (SETUP/MIDI COMMON/GM Mode; p. 99) ➝ Press [-] to set this to “OFF.” The sequencer does not function when the TD-6V is in GM mode. Cannot Record or Edit User Song Is Song Lock set to “ON?”... -
Page 116: Messages And Error Messages
2. Press [ENTER ] once again. Factory Reset is executed, enabling you to use the TD-6V temporarily. Carrying out a Factory Reset deletes all of the current TD-6V’s data and settings, and returns them to the original factory settings. Backup Battery Low! fig.e-004_50... -
Page 117: Messages And Error Messages Related To Midi
Confirm that the external MIDI device is properly connected (p. 105). If this does not resolve the problem, reduce the amount of MIDI messages being transmitted to the TD-6V. Data Transmitting... Please, Wait. fig.e-017_50 ] in the song screen Bulk data is being transmitted in response to an external request for transmission. -
Page 118: Drum Kit List
Drum Kit List Drum Kit Name Remark Featured Kits RoseWood BeeBop X x-stick Yo Yo RokCncrt LtnPerc+ Pad Pattern (SNR_H,CR1_R) Orch Set TblaTun+ Pad Pattern (RD_H,RD_R) 1ManBnd+ Pad Pattern (KIK,CR1_R,CR2_R) Scary Guitars+ Pad Pattern (HH_H) Acoustic Drum Kits I PopKit x-stick Brushes Groove... - Page 119 Drum Kit Name Remark Jazz Kits BrshSwel Jazz Sizzle JazzOne Electronic Kits II HipHop R&B1 R&B2 Dance808 Funk Kits JazzFunk PowrFusn Pocket Ambience Kits Dome JzThet X x-stick TileRoom GigaHall Cave Dry&Wet Drum Kit Number (Program Number) No.: Pad Pattern: The pad pattern function (p.
-
Page 120: Drum Instrument List
Drum Instrument List Name Remark KICK DblHeadK Sharp Acous Meat R8 Low K R8 Dry K WdBeatrK Open VintageK 26"DeepK ThickHdK Round Medium K BigRoomK BigLow K Studio1K Studio2K Studio3K Studio4K Studio5K Studio6K Studio7K Studio8K Buzz 1 K Buzz 2 K Buzz 3 K Buzz 4 K Buzz 5 K... - Page 121 Std2 1 S Std2 2 S Room 1 S Room 2 S Power1 S Power2 S Gate Jazz 2 S Jazz 3 S Funk Funk Picolo5S Pco5 Picolo6S Pco6 Medium5S Med5 Medium6S Med6 Medium7S Med7 Medium8S Med8 Fat3 Fat3 Fat4 Fat4 DynamicS Dynmc RS...
- Page 122 Drum Instrument List Name Remark Elec Elec Elec Elec Elec Elec TR808 T1 TR808 T2 TR808 T3 TR808 T4 TR808 T5 TR808 T6 HI-HAT Pure PureEgHH BrightHH BritEgHH Jazz JazzEgHH RIDE Thin ThinEgHH Heavy HH HevyEgHH Light HH LigtEgHH Dark DarkEgHH 12"...
- Page 123 KungFoo Pistol Gun Shot Glass Hammer Bucket Barrel TrashCan Af Stomp Bounce CuicaHit Monster AirDrive Car Door Car Cell CarEngin Car Horn MELODIC Helicptr Thunder Bomb Sticks Click Tamb FX Tek Clik Beep Hi Beep Low MetroBel MetroClk Snaps Clap NoizClap Tek Noiz Mtl Slap...
-
Page 124: Preset Percussion Set List
Preset Percussion Set List 1. Stndard 1 2. Stndard 2 PC100 PC101 Voices Note No. ← Bs Slide ← GtScrach ← Gt Slide ← CutGtDwn ← CutGtUp ← WahGtDw1 ← WahGtUp1 ← WahGtDw2 ← WahGtUp2 ← Hi-Q ← Mtl Slap ←... -
Page 125: Preset Percussion Set List
7. Jazz 8. Brush PC106 PC107 Note No. ← Bs Slide ← GtScrach ← Gt Slide ← CutGtDwn ← CutGtUp ← WahGtDw1 ← WahGtUp1 ← WahGtDw2 ← WahGtUp2 ← Hi-Q ← Mtl Slap ← Scrach 3 ← Scrach 2 ← Sticks ←... -
Page 126: Backing Instrument List
Backing Instrument List CC0 Name Voices PIANO Piano 1 Piano 1w Piano 1d Piano 2 Piano 2w Piano 3 Piano 3w Honky-tonk Honky-tonk w E. PIANO E.Piano 1 Detuned EP 1 60’s E.Piano FM+SA EP Hard Rhodes E.Piano 2 Bright FM EP CLAVI Harpsichord Coupled Hps. - Page 127 • To switch instruments from the external MIDI device, send “0” on the CC32# (Control Change Bank Select) from the external MIDI device to the TD-6V. • The value of the CC32# (Control Change Bank Select) that the TD-6V transmits is always “0.”...
-
Page 128: Preset Song List
Preset Song List Song Name Time Sig Length DRUMS DRUMS ROCK US ROCK ACO ROCK 8BT'ROK1 8BT'ROK2 SHFL ROK FUNK ROK SLOW ROK URBAN UPBEAT TRIPLETS 16BT'ROK CYBER HARDROCK FNKYHR BOOGIE HARD POP METAL EARLYMTL THRASH BALLAD 6/8BLD POPBLD ROCK BLD PIANOBLD 16BT'BLD R&B... - Page 129 Song Name Time Sig Length LATIN LATIN1 LATIN2 LATIN3 MAMBO MERENGUE SALSA1 SALSA2 SALSA3 SONGO TJANO BRAZIL BOSSA SAMBA1 SAMBA2 BASICPTN 8BEAT1 8BEAT2 8BEAT3 SHUFFL1 SHUFFL2 SLOW1 SLOW2 R&B1 R&B2 BLUES POP X DIXIE FUNK1 FUNK2 16BEAT1 16BEAT2 HIPHOP2 AMBIENT1 AMBIENT2 TRANCE RAVE...
-
Page 130: Parameter List
Parameter List Drum Kit Parameters Parameter Drum Kit (p. 55) KIT/INST Parameter Inst (p. 58) Inst Group (p. 57) Level (p. 59) Pan (p. 59) Pitch (p. 59) Decay (p. 59) KIT/AMBIENCE Parameter Ambience Sw (p. 60) AmbSendLevel (p. 60) Studio (p. - Page 131 KIT/COPY Parameter Src (p. 67) Copy Source Dst (p. 67) Copy Destination KIT/EXCHANGE Parameter Src (p. 68) Exchange Source Dst (p. 68) Exchange Destination Song Parameters SONG Parameter Song (p. 83) Song Song Category (p. 83) Song Category This setting cannot be made in GM mode. SONG/COMMON Parameter Tempo (p.
-
Page 132: Setup Parameters
Parameter List SONG/COPY Parameter Src (p. 89) Dst (p. 89) This setting cannot be made in GM mode. SONG/DELETE Parameter Song (p. 90) This setting cannot be made in GM mode. SONG/ERASE Parameter Song (p. 91) Part (p. 91) This setting cannot be made in GM mode. Setup Parameters SETUP/UTILITY Parameter... - Page 133 SETUP/MIDI COMMON Parameter Note Chase (p. 97) Note Chase Local Control (p. 97) Local Control Sync Mode (p. 98) Sync Mode CH10Priorty (p. 98) Channel 10 Priority PdlDataThin (p. 99) Pedal Data Thin GM Mode (p. 99) GM Mode Rx GM ON (p. 100) Rx GM On Soft Thru (p.
-
Page 134: Song Recording
Parameter List Click Parameters CLICK Parameter Click Level (p. 79) Time Sig (p. 80) Interval (p. 80) Inst (p. 80) Pan (p. 80) PlyCountIn (p. 80) RecCountIn (p. 80) This setting cannot be made in GM mode. Song Recording Recording Standby Parameter Time Sig (p. -
Page 135: Midi Implementation Chart
MIDI Implementation Chart PERCUSSION SOUND MODULE MIDI Implementation Chart Model TD-6V Function... Basic Default 1–16, OFF Channel Changed 1–16, OFF Default Mode 3 Mode Messages Altered ************** Note 0–127 Number : True Voice 0–127 Note On O 9nH, v = 1–127... - Page 136 PERCUSSION SOUND MODULE Model TD-6V Function... Basic Default Channel Changed Default Mode Messages Altered Note Number : True Voice Note On Velocity Note Off After Key's Touch Channel's Pitch Bend 0, 32 Control Change 100, 101 Program : True Number...
- Page 137 PERCUSSION SOUND MODULE MIDI Implementation Chart Model TD-6V Function... Basic Default Channel Changed Default Mode Messages Altered ************** Note Number : True Voice ************** Note On Velocity Note Off After Key's Touch Channel's Pitch Bend 0, 32 Control Change 100, 101...
-
Page 138: Td-6V Block Diagram
TD-6V Block Diagram... -
Page 139: Specifications
Specifications TD-6V: Percussion Sound Module (Conforms to General MIDI System) Maximum Polyphony 64 Voices Instruments Drum Instruments: 1,024 Backing Instruments: Drum Kits Effect Types Ambience 2-Band Master Equalizer Sequencer Preset Songs: User Songs: Parts: Play Functions: One shot, Loop, Tap Tempo: 20–260... -
Page 140: Index
Index AC Adaptor Jack ... 18 Acoustic Drum Trigger ... 75 Advanced Trigger Parameter ... 73 Amb Level (Ambience Level) ... 61 AMBIENCE ... 60 Ambience Sw (Ambience Switch) ... 60 AmbSendLevel (Ambience Send Level) Drum Instrument ... 60 Part1–Part4 ... 89 Percussion Part ... - Page 141 INC/+, DEC/- Button ... 17 Indicator ... 32, 69 INST ... 58 Inst Group ... 57 Instrument Click ... 80 Drum Kit ... 58 Part1–Part4 ... 88 Instruments Drum Kit ... 57 Internal Sequencer ... 96 Interval ... 80 AMBIENCE ... 60 COMMON ...
- Page 142 Index Pitch Ctrl (Pitch Control Assign) ... 64 PLAY Button ... 16 Play Type ... 85 Playback ... 83 PlyCountIn (Play Count In) ... 80 Power Turning Off ... 24 Turning On ... 23 POWER Switch ... 18 Preset Percussion Set List ... 124 Preset Song ...
- Page 143 User Song ... 81 UTILITY ... 76 Variation Tone ... 88 Volume Backing Part ... 46, 77 Click ... 42 Drum Instrument ... 59 Part1–Part4 ... 88 Percussion Part ... 46, 76 Preview ... 78 Song ... 46 VOLUME Knob ... 16 WallType (Wall Type) ...
- Page 144 MEMO...
- Page 145 MEMO...
- Page 146 MEMO...
- Page 147 Apparatus containing Lithium batteries ADVARSEL! Lithiumbatteri - Eksplosionsfare ved fejlagtig håndtering. Udskiftning må kun ske med batteri af samme fabrikat og type. Levér det brugte batteri tilbage til leverandøren. ADVARSEL Eksplosjonsfare ved feilaktig skifte av batteri. Benytt samme batteritype eller en tilsvarende type anbefalt av apparatfabrikanten.
- Page 148 03458934 5RCC...