
Related Manuals for Fisher & Paykel WB24 Series


Summary of Contents for Fisher & Paykel WB24 Series
- Page 1 COMPANION PRODUCTS Warming Drawer WB24 Coff ee Maker EB24 Steam Oven OS24N models INSTALLATION GUIDE US CA 591496B 07.18...
- Page 2 CONTENTS Warming drawer Coffee maker Steam oven Safety and warnings Safety and warnings Safety and warnings Parts supplied Parts supplied Prior to installation Prior to installation Prior to installation After installation Product dimensions After installation Product dimensions 5A Cabinetry dimensions – underbench Product dimensions 5A Cabinetry dimensions (ie installed with F&P single oven)
- Page 3 WARMING DRAWER WB24 models...
- Page 5 PARTS SUPPLIED Screws (4) Anti-tip bracket (1) Oven support brackets (2) PRIOR TO INSTALLATION The cavity is square and level, and of the required dimensions. ● The installation will comply with all clearance requirements and applicable standards and regulations. ● The power switch will be easily accessible to the customer when the warming drawer is installed.
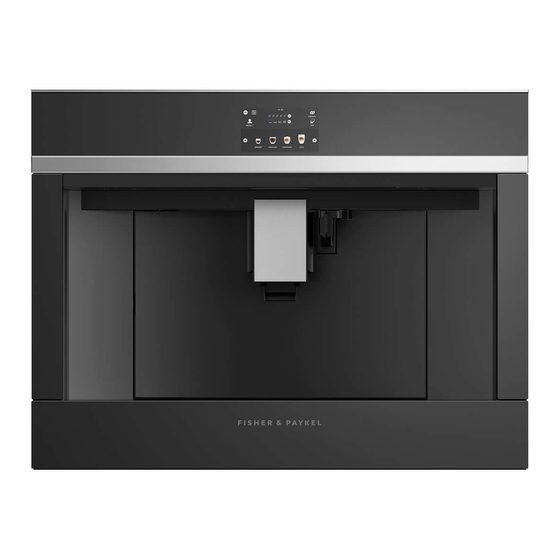
- Page 14 COFFEE MAKER EB24 models...
- Page 17 PRODUCT DIMENSIONS SIDE EB24 MODELS PRODUCT DIMENSIONS inches (mm) Overall height of product 18” (458) Overall width of product 23 1/2” (596) Overall depth of product ( 18 7/8” (480) excluding dials) Height of chassis 17 1/2” (445) Width of chassis 22 1/16”...
- Page 22 FINAL CHECKLIST TO BE COMPLETED BY THE INSTALLER Make sure the coffee maker is level and securely fitted to the cabinetry. Check the lower trim is undamaged. Check there is adequate clearance. This is to ensure correct air circulation. ...
- Page 23 STEAM OVEN OS24N models...
- Page 30 FINAL CHECKLIST TO BE COMPLETED BY THE INSTALLER Make sure the oven is level and securely fitted to the cabinetry. Check the lower trim is undamaged. Open the oven door slowly until it is fully open and check there is adequate clearance between the bottom of the door and the lower trim. This is to ensure correct air circulation.
- Page 34 PRODUITS COMPAGNONS Modèles Tiroir chauff ant WB24 Machine à café EB24 Four à vapeur OS24N GUIDE D’INSTALLATION 591496B 07.18...
- Page 35 CONTENTS Tiroir chauffant Machine à café Four à vapeur Sécurité et avertissements Sécurité et avertissements Sécurité et avertissements Pièces fournies Pièces fournies Avant l’installation Avant l’installation Avant l’installation Après l’installation Dimensions du produit Après l’installation Dimensions du Produit 5A Dimensions de l’armoire – underbench Dimensions du produit 5A Dimensions de l’armoire (ie installé...
- Page 36 TIROIR CHAUFFANT Modèles WB24...
- Page 38 PIÈCES FOURNIES Des vis (4) Support anti-basculement (1) Supports de support de four (2) AVANT L’INSTALLATION La cavité est carrée et de niveau, et des dimensions requises. ● L’installation sera conforme à toutes les exigences de dégagement et aux normes et règlements applicables. ●...
- Page 48 MACHINE À CAFÉ Modèles EB24...
- Page 51 DIMENSIONS DU PRODUIT LE CÔTÉ HAUT MODÈLES EB24 DIMENSIONS DU PRODUIT Pouces (mm) Hauteur totale du produit 18” (458) Largeur totale du produit 23 1/2” (596) Profondeur totale du produ 18 7/8” (480) it (à l’exclusion des cadrans) Hauteur du châssis 17 1/2”...
- Page 55 LISTE DE CONTRÔLE FINALE A REMPLIR PAR L’INSTALLATEUR Assurez-vous que la cafetière est de niveau et solidement fixée aux armoires. Vérifiez que la garniture inférieure n’est pas endommagée. Vérifiez qu’il y a un dégagement suffisant. Ceci afin d’assurer une circulation d’air correcte. ...
- Page 56 FOUR À VAPEUR Modèles OS24N...
- Page 63 LISTE DE CONTRÔLE FINALE A REMPLIR PAR L’INSTALLATEUR Assurez-vous que le four est de niveau et solidement fixé aux armoires. Vérifiez que la garniture inférieure n’est pas endommagée. Ouvrez lentement la porte du four jusqu’à ce qu’elle soit complètement ouverte et vérifiez qu’il y a un espace suffisant entre le bas de la porte et la garniture inférieure. Ceci afin d’assurer une circulation d’air correcte.