Advertisement
Available languages
Available languages
Quick Links
Advertisement

Related Manuals for Kenwood KWL90


Summary of Contents for Kenwood KWL90
- Page 1 TYPE KWL90 instructions...
- Page 2 English 2 - 16 ´ ¸ ∂ ٣١ - ١٧...
- Page 4 To Use Your Stand Mixer – Manual Mode Using Preset Programmes Egg White Whis… Sponge Cake Dough Kneading...
- Page 5 To Use The Weighing Function Unit Unit Zero Zero To Assemble The Creaming Beater To Fit And Use Your Splashguard Tool Adjustment...
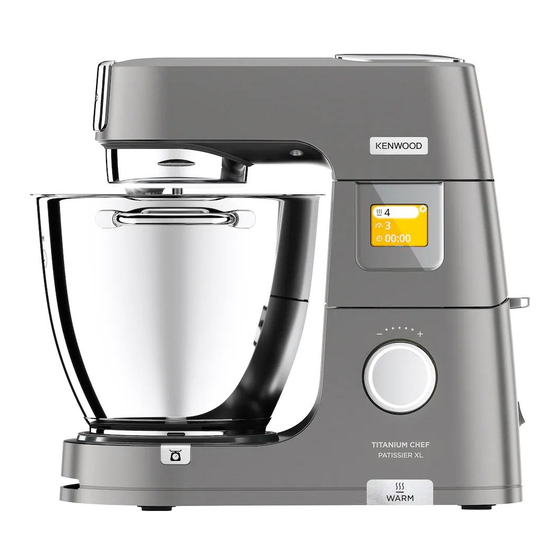
- Page 6 Know Your Kenwood Stand Mixer Congratulations on buying a Kenwood. With such a wide range of attachments available, it is more than just a mixer. It is a state-of-the-art Stand Mixer. We hope you will enjoy it. Robust. Reliable. Versatile. Kenwood.
- Page 7 Children should be supervised to ensure that they do not play with the appliance. Never operate the appliance in warming mode with the bowl empty. Never use the splashguard with the 5L bowl. Splashguard only suitable for use with the 7L bowl. Do not fit a bowl tool to the Stand Mixer when the 5L bowl is stacked in the 7L bowl.
- Page 8 Only use the appliance for its intended domestic use. Kenwood will not accept any liability if the appliance is subject to improper use, or failure to comply with these instructions. This appliance is not intended to be operated by means of an external timer or separate remote- control system.
- Page 9 Note: Spanner shown is for illustration Place the required tool into the purposes only and is not supplied in socket. Then push up and turn the pack. tool to lock into position. Lower the mixer head by pushing the head release lever down and lower Optional Attachments There are a range of optional the mixer head until it locks.
- Page 10 Use the two side handles to remove Zero the scale. and carry the bowl. Use oven gloves Weigh the ingredients. when handling the hot bowl and hot To change between units tap the unit tools. button on the weighing screen. To Use The Weighing Note: Always place the appliance on a dry, flat, stable surface prior to weighing.
- Page 11 Warming Hints and Tips Warming Levels Recommended Usage Softening Prove Swiss Meringues Chocolate Melting Sabayon Pulse - Select for short bursts of maximum speed. Press and hold control dial in to operate pulse setting. Continuous Stir – The mixer will operate at a constant slow speed.
- Page 12 Preset Usage Chart (Max) Preset Recommended Default Settings Recipe (adjustable) Tool Ideas / Uses Dough Proving 2.58kg 1 hrs Proving yeasted Total (20 mins – 1 hr) doughs Weight Chocolate Chocolate 300g 10 mins Melting Mousse (cut (3 mins – 1 hr) into pieces) Swiss...
-
Page 13: Recommended Usage Chart
Recommended Usage Chart This is for guidance only and will vary depending on the exact recipe and ingredients being processed. K-beater For making cakes, biscuits, pastry, icing, fillings, eclairs and mashed potato. Hints and Tips • To avoid splashing of ingredients gradually increase the speed. •... - Page 14 Recommended Usage Chart This is for guidance only and will vary depending on the exact recipe and ingredients being processed. Whisk For eggs, cream and soufflés. Important • To avoid splashing of ingredients gradually increase the speed. • Do not use the whisk for heavy mixtures (all in one cakes and creaming fat &...
- Page 15 Recommended Usage Chart This is for guidance only and will vary depending on the exact recipe and ingredients being processed. Dough Tool For yeasted dough mixes Hints and Tips Important • Never exceed the maximum capacities and speeds stated – you may overload the machine.
- Page 16 To Assemble The Creaming To Fit And Use Your Beater Splashguard Refer to Illustrations – Refer to Illustrations – Note: The splashguard is suitable for use Fitting The Wiper Blade The wiper blade is supplied already with the 7L bowl only. fitted and should always be removed before cleaning.
-
Page 17: Care And Cleaning
However, if you wish to adjust the tool Power Unit And Outlet Covers use a suitable sized spanner: Wipe with a damp cloth, then dry. TYPE KWL90 = 19mm Never use abrasives or immerse in Then follow the instructions below: water. -
Page 18: Service And Customer Care
(in or out of guarantee) call Kenwood customer care on 023 9239 2333. Have your model number (e.g. TYPE KWL90) and date code (5 digit code e.g. 20T04) ready. They are on the underside of the power unit. -
Page 19: Troubleshooting Guide
(unless by Guarantee UK only If your Stand Mixer goes wrong within KENWOOD); one year from the date you bought it is not second hand; it, we will repair it (or replace it if it has not been used commercially;... - Page 20 Troubleshooting Guide - Continued Problem Cause Solution Appliance not Control dial not pressed. Press the control dial to start. operating. Timer not counting During the heating stage Normal operation. down on display of a preset, the timer will screen. not count down until the correct temperature is reached.
- Page 21 دليل استكشاف المشكالت وحلها الحل السبب المحتمل المشكلة قللي الكميات أو أعيدي ترتيب الطعام داخل حمل غير متساوي في حركة أو اهتزاز شديد أثناء .السلطانية وأعيدي تشغيل الجهاز السلطانية يتسبب في .التشغيل .اهتزازات كبيرة راجعي البرنامج الخاص بوصفة التحضير تم تجاوز السعة القصوى وجدول...
- Page 22 دليل استكشاف المشكالت وحلها الحل السبب المحتمل المشكلة اضبطي طول األداة باستخدام مفتاح ربط لتعديل ارتفاع األداة غير صحيح خفاقة البيض أو مضرب .»االرتفاع - راجعي قسم «ضبط األداة .وتحتاج لضبط ارتفاعها العجين يقرع قاع الوعاء أو ال يصل إلى المكونات الموجودة .في...
- Page 23 .الضمان والمستهلك في البلد التي تم شراء المنتج منها عن العمل ا ٔ و في حالة وجود ا ٔ ي عيوب، فيرجى ا ٕ رساله ا ٔ و ا ٕ حضاره ا ٕ لى مركز خدمة معتمد منKenwood في حالة تعطل منتج...
- Page 24 ففي هذه الحالة استخدمي مفتاح ربط بحجم يحذر استخدام المواد الكاشطة أو الغمر في .مناسب .الماء = ٩١ ممTYPE KWL90 السلطانيات :ثم اتبعي التعليمات التالية غسيل يدوي ثم التجفيف جيدا ً أو غسيل في .افصلي الجهاز عن مصدر التيار الكهربي...
- Page 25 تركيب واستخدام مانع الرذاذ لتجميع مضرب الخلطات الكريمية ارجعي إلى الرسوم التوضيحية من ارجعي إلى الرسوم التوضيحية من إلى إلى تركيب اخلفاقة املرنة ملحوظة: واقي الرذاذ غير مناسب لالستخدام إال مع .السلطانية سعة ٧ لترات تزود اخلفاقة املرنة مركبة بالفعل وجيب فكها .دامئًا...
- Page 26 جدول توصيات االستخدام األزمنة المعروضة هي أزمنة إرشادية فقط وتختلف حسب الوصفة والمكونات المستخدمة أداة العجن لخلطات العجين المخمرة تمليحات ونصاحئ هام .يحذر تجاوز السعات القصوى المحددة – فقد تتسببي في حمل زائد على الجهاز • في حالة سماع صوت الجهاز مثق ال ً ، فأوقفي التشغيل وأزيلي نصف العجين ثم •...
- Page 27 جدول توصيات االستخدام األزمنة المعروضة هي أزمنة إرشادية فقط وتختلف حسب الوصفة والمكونات المستخدمة الخفاقة .للبيض والكرمية والسوفليه هام . ً لتجنب تطاير رذاذ عن المكونات، ارفعي السرعة تدريجيا • ال تستخدمي خفاقة البيض مع الخلطات السميكة (مثل تحضير الكيك بوضع كل •...
- Page 28 جدول توصيات االستخدام األزمنة المعروضة هي أزمنة إرشادية فقط وتختلف حسب الوصفة والمكونات المستخدمة K المضرب لصنع الكعك والبسكويت واملعجنات واآليس كرمي واحلشوات واإللكري والبطاطا .املهروسة تمليحات ونصاحئ . ً لتجنب تطاير رذاذ عن المكونات، ارفعي السرعة تدريجيا • لدمج المكونات بالكامل، أوقفي عملية الخلط واكشطي جوانب السلطانية باستخدام •...
- Page 29 مخطط استخدام اإلعدادات المسبقة )(الحد األقصى اإلعدادات االفتراضية األداة الموصى اإلعداد ٧ لترات أفكار )(قابلة للتعديل بها المسبق لترات /الوصفات االستخدام ٨٥.٢ كجم تخمير العجين تخمير 1 ساعة اإلجمالي المخمر العجين )(٠٢ دقيقة – ١ ساعة الوزن اإليقاف ٢ ٣٥ – (٥٢ درجة مئوية )درجة...
- Page 30 تلميحات ونصائح الطهي االستخدام الموصى به مستويات التسخين التليين ١ ٢ تخمير ٣ ٤ المارينج السويسري ٥ إذابة الشوكوالتة ٧ ٨ السابايوني ٩ التشغيل النبضي- حددي فترات قصيرة من السرعة .القصوى اضغط مع االستمرار على قرص التحكم لتشغيل إعداد .التشغيل النبضي .التقليب...
- Page 31 تفسير رموز شاشة العرض .اضغطي على هذا الرمز لفتح قائمة اإلعدادات .)s( ) والثوانيm( ) والدقائقh( تعرض الوقت المحدد بالساعات .يظهر فرتة التقليب احملددة ٤(، سزييد اجلرس تدرجي ي ً ا وسيمت ٢) إذا مت حتديد الرسعة املتقطعة . ً التقليب يف اجلهاز عندما يكون ممتلئ .يعرض...
- Page 32 استخدام البرامج سابقة اإلعداد الستخدام جهاز المطبخ المتكامل ارجعي إلى الرسوم التوضيحية من ارجعي إلى الرسوم التوضيحية من إلى إلى ١ اسحبي لليمين للوصول إلى قائمة البرامج .تأكدي من نظافة منطقة طبق التسخين .سابقة اإلعداد ومستشعر درجة الحرارة، والسطح الخارجي ٢...
- Page 33 تحديد غطاء المنصهر الكهربي الصحيح حسب اللون ويمكن الحصول على بديل من مركز صيانة متخصص معتمد لدى .) (يرجى مراجعة قسم الخدمةKenwood إذا تم قطع مقبس غير قابل إلعادة تركيب األسالك الجديدة به، فيجب تدميره على الفور. قد ينشأ خطر حدوث صدمة...
- Page 34 في حالة تزويد المقبس الخاص بالجهاز بواسطة منصهر كهربي، فإن قدرة المنصهر الكهربي تكون ٠١ أمبير. في حالة .تلف المنصهر الكهربي، يجب استبداله بآخر مماثل له بنفس المواصفات في حالة الحاجة إلى استبدال المقبس أو السلك الكهربي، فيجب استبدالهما وتركيبهما من قبل مركز صيانة متخصص .Kenwood معتمد لدى .تحذير: يجب توصيل هذا الجهاز بطرف أرضي ١٨...
- Page 35 « ∞ ∑ ` ¡ ≠ § U « ∞ d U ‹ ∞ ∑ … « d « ¡ q Æ Æ ∂ Kenwood استكشاف جهاز المطبخ المتكامل من . من خالل العديد من الملحقات المتوفرة، فإن اقتنائك للجهاز ال يشكل فقطKenwood تهانينا على اقتناء منتج .شراء الخالط. فهو جهاز مطبخ متكامل عبقري وفريد من نوعه. نتمنى أن ينال إعجابك وتستمتعين باستخدامه .Kenwood متين. يمكنك االعتماد عليه. متنوع. منتج السالمة اقرئي التعليمات التالية واحتفظي بها في المتناول لالستخدامات المستقبلية .المرجعية .أزيلي مكونات التغليف وأية ملصقات ألسباب متعلقة بالسالمة ولتجنب حدوث أية مخاطر، في حالة تلف السلك أو مركز خدمة الكهربي أو القابس، يجب استبداله بواسطة Kenwood معتمد من قبل...
- Page 36 Kenwood Ltd New Lane Havant Hampshire PO9 2NH kenwoodworld.com © Copyright 2020 Kenwood Limited. All rights reserved 5720001923/1...