Table of Contents
Advertisement
Quick Links
ACX2200 Universal Access Routers
Quick Start
April 2016
Part Number: 530-062854
Revision 01
Contents
Copyright © 2016, Juniper Networks, Inc.
This document describes how to install the Juniper Networks
Router.
ACX2200 Quick Start Description . . . . . . . . . . . . . . . . . . . . . . . . . . . . . . . . . . . . . . . 3
Step 1: Prepare the Site for Installation . . . . . . . . . . . . . . . . . . . . . . . . . . . . . . . . . . . 5
Step 2: Install the Router . . . . . . . . . . . . . . . . . . . . . . . . . . . . . . . . . . . . . . . . . . . . . . 7
Tools Required to Install the Router in a Rack . . . . . . . . . . . . . . . . . . . . . . . . . . 7
Install the Mounting Brackets . . . . . . . . . . . . . . . . . . . . . . . . . . . . . . . . . . . . . . . 7
Install the ACX2200 Router in the Rack . . . . . . . . . . . . . . . . . . . . . . . . . . . . . . . 8
Step 3: Ground the ACX2200 Router . . . . . . . . . . . . . . . . . . . . . . . . . . . . . . . . . . . . 9
Tools Required to Ground the ACX Router . . . . . . . . . . . . . . . . . . . . . . . . . . . . . 9
Connect the Grounding Cable . . . . . . . . . . . . . . . . . . . . . . . . . . . . . . . . . . . . . . 9
Step 4: Connect External Devices and Cables . . . . . . . . . . . . . . . . . . . . . . . . . . . . . 11
Tools Required to Connect External Devices and Cables . . . . . . . . . . . . . . . . . 11
Management . . . . . . . . . . . . . . . . . . . . . . . . . . . . . . . . . . . . . . . . . . . . . . . . 11
Device . . . . . . . . . . . . . . . . . . . . . . . . . . . . . . . . . . . . . . . . . . . . . . . . . . . . . . 11
Connect Network Interface Cables to the ACX2200 Router . . . . . . . . . . . . . . . 11
Step 5: Connect Power to the ACX2200 Router . . . . . . . . . . . . . . . . . . . . . . . . . . . 13
Connect AC Power to an AC-Powered ACX2200 Series Router . . . . . . . . . . . 13
Connect DC Power to a DC-Powered ACX2200 Router . . . . . . . . . . . . . . . . . . 13
Step 6: Perform Initial Software Configuration . . . . . . . . . . . . . . . . . . . . . . . . . . . . 17
Enter Configuration Mode . . . . . . . . . . . . . . . . . . . . . . . . . . . . . . . . . . . . . . . . . 17
Configure User Accounts and Passwords . . . . . . . . . . . . . . . . . . . . . . . . . . . . . 17
Configure System Attributes . . . . . . . . . . . . . . . . . . . . . . . . . . . . . . . . . . . . . . . 18
Commit the Configuration . . . . . . . . . . . . . . . . . . . . . . . . . . . . . . . . . . . . . . . . . 18
Safety Warnings . . . . . . . . . . . . . . . . . . . . . . . . . . . . . . . . . . . . . . . . . . . . . . . . . . . . 20
Compliance Statements for NEBS . . . . . . . . . . . . . . . . . . . . . . . . . . . . . . . . . . . . . . 21
®
ACX2200 Universal Access
1
Advertisement
Table of Contents

Related Manuals for Juniper ACX2200


Summary of Contents for Juniper ACX2200
-
Page 1: Table Of Contents
Install the Mounting Brackets ........7 Install the ACX2200 Router in the Rack ....... 8 Step 3: Ground the ACX2200 Router . - Page 2 ACX2200 Universal Access Routers Quick Start Compliance Statements for EMC Requirements for the ACX2200 Router ..21 Canada ............21 European Community .
-
Page 3: Acx2200 Quick Start Description
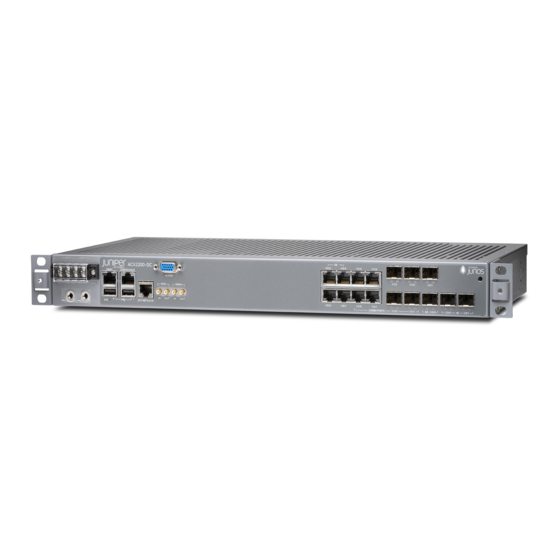
MSO mobile backhaul service cell site deployment, and service provider or operator cell site deployment. The ACX2200 routers have high-density Ethernet interfaces and high-capacity switching throughput. - Page 4 ACX2200 Universal Access Routers Quick Start Figure 1: Front Panel of the DC-powered ACX2200 Router ACX2200 0/0/2 0/0/3 0/1/2 0/1/3 MGMT CONSOLE/AUX ALARM 0/1/2 0/1/3 0/2/1 1PPS 10MHz EXT REF CLK IN 0/0/0 0/0/1 0/1/0 0/1/1 COMBO PORTS 0/1/0 0/1/1...
-
Page 5: Step 1: Prepare The Site For Installation
Install the router only in restricted areas, such as dedicated equipment rooms and equipment closets, in accordance with Articles 110-16, 110-17, and 110-18 of the National Electrical Code, ANSI/NFPA 70. Copyright © 2016, Juniper Networks, Inc. - Page 6 ACX2200 Universal Access Routers Quick Start Figure 3: ACX Series Routers Rack Clearance and Chassis Dimensions 2.16" (5.5 cm) .75" (2 cm) clearance required clearance required 3" (7.6 cm) for the cables for free airflow 9.4" (24 cm) 19.2" 17.5"...
-
Page 7: Step 2: Install The Router
Insert the four screws at the top and bottom of the bracket and tighten each partially. Tighten the four screws completely. Repeat the procedure for the other bracket. Figure 4: Installing the Mounting Brackets to the Front of the ACX2200 Router Figure 5: Installing the Mounting Brackets to the Rear of the ACX2200 Router Copyright ©... -
Page 8: Install The Acx2200 Router In The Rack
ACX2200 Universal Access Routers Quick Start Install the ACX2200 Router in the Rack The router can be installed horizontally in a rack or cabinet. NOTE: For additional installation options, contact JTAC. One person must be available to lift the router while another secures the router to the rack. -
Page 9: Step 3: Ground The Acx2200 Router
Step 3: Ground the ACX2200 Router Step 3: Ground the ACX2200 Router You must ground DC-powered routers before connecting DC power. Tools Required to Ground the ACX Router on page 9 Connect the Grounding Cable on page 9 Tools Required to Ground the ACX Router... - Page 10 ACX2200 Universal Access Routers Quick Start Figure 7: Grounding Points on the DC-powered ACX Router 1— Grounding lug 2— SAE 10-32 screw and washer Copyright © 2016, Juniper Networks, Inc.
-
Page 11: Step 4: Connect External Devices And Cables
Tools Required to Connect External Devices and Cables on page 11 Connect the ACX2200 Router to a Network for Out-of-Band Management on page 11 Connect the ACX2200 Router to a Management Console or Auxiliary Device on page 11 Connect Network Interface Cables to the ACX2200 Router on page 11... - Page 12 ACX2200 Universal Access Routers Quick Start WARNING: Do not look directly into a fiber-optic transceiver or into the ends of fiber-optic cables. Fiber-optic transceivers and fiber-optic cable connected to a transceiver emit laser light that can damage your eyes. CAUTION: Do not leave a fiber-optic transceiver uncovered except when inserting or removing cable.
-
Page 13: Step 5: Connect Power To The Acx2200 Router
WARNING: You must ground the router before connecting the power cables. Connect AC Power to an AC-Powered ACX2200 Series Router on page 13 Connect DC Power to a DC-Powered ACX2200 Router on page 13 Connect AC Power to an AC-Powered ACX2200 Series Router... - Page 14 The DC power supply has four terminals on the front panel, covered by a clear plastic cover. WARNING: You must ground the router before connecting the DC power cables. Table 1: ACX2200 DC Power System Input Voltage Nominal Voltage Specification Operating range: +18 to +30 VDC –48 Operating range: –39 to –56 VDC...
- Page 15 Connect DC Power to a DC-Powered ACX2200 Router Secure each power cable lug to the terminal with the flat washers and screw (see Figure 9 on page 16). Apply between 8 lb-in. (0.9 Nm) and 9 lb-in. (1.02 Nm) of torque to each screw.
- Page 16 ACX2200 Universal Access Routers Quick Start Figure 9: Connecting DC Power to the Router Copyright © 2016, Juniper Networks, Inc.
-
Page 17: Step 6: Perform Initial Software Configuration
Create a management console user account. [edit] root# set system login user user-name authentication plain-text-password New Password: password Retype new password: password Set the user account class to super-user [edit] root@# set system login user user-name class super-user Copyright © 2016, Juniper Networks, Inc. -
Page 18: Configure System Attributes
ACX2200 Universal Access Routers Quick Start Configure System Attributes Configure the name of the router. If the name includes spaces, enclose the name in quotation marks (“ ”). [edit] root@# set system host-name host-name Configure the router’s domain name. [edit] root@# set system domain-name domain-name Configure the IP address and prefix length for the router’s Ethernet interface. - Page 19 (Optional) Configure additional properties by adding the necessary configuration statements. Then commit the changes to activate them on the router. [edit] root@host# commit When you have finished configuring the router, exit configuration mode. [edit] root@host# exit root@host> Copyright © 2016, Juniper Networks, Inc.
-
Page 20: Safety Warnings
Failure to use an ESD strap could result in damage to the router. Only trained and qualified personnel should install or replace the router. Perform only the procedures described in this quick start or the ACX2200 Universal Access Routers Hardware Guide. Other services should be performed by authorized service personnel only. -
Page 21: Compliance Statements For Nebs
Code (NEC) applies. The battery return connection is to be treated as an isolated DC return (that is, DC-I), as defined in GR-1089-CORE. Compliance Statements for EMC Requirements for the ACX2200 Router Canada on page 21 European Community on page 22 Canada This Class A digital apparatus complies with Canadian ICES-003. -
Page 22: European Community
ACX2200 Universal Access Routers Quick Start Cet appareil numérique de la classe A est conforme à la norme NMB-003 du Canada. European Community This is a Class A product. In a domestic environment, this product might cause radio interference in which case the user might be required to take adequate measures. -
Page 23: Junos Os Documentation And Release Notes
7 days a week, 365 days a year. Self-Help Online Tools and Resources For quick and easy problem resolution, Juniper Networks has designed an online self-service portal called the Customer Support Center (CSC) that provides you with the following features: Find CSC offerings: http://www.juniper.net/customers/support/... -
Page 24: Opening A Case With Jtac
Juniper Networks, Junos, Steel-Belted Radius, NetScreen, and ScreenOS are registered trademarks of Juniper Networks, Inc. in the United States and other countries. The Juniper Networks Logo, the Junos logo, and JunosE are trademarks of Juniper Networks, Inc. All other trademarks, service marks, registered trademarks, or registered service marks are the property of their respective owners.