
Related Manuals for Neilsen CT2213


Summary of Contents for Neilsen CT2213
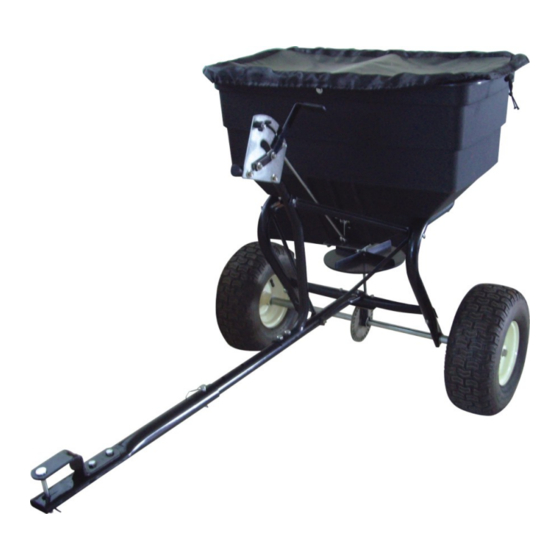
- Page 1 250LB TOW BEHIND SPREADER CT2213 ASSEMBLY AND OPERATING INSTRUCTION SAVE THESE INSTRUCTIONS FOR FUTURE REFERENCE...
-
Page 2: Ec Declaration Of Conformity
In case of alteration of the machine, not agreed upon by us, this declaration will lose its validity. Product description: TWO-BEHIND SPREADER Model: CT2213 Applicable EC Directives: EC Machinery Directive 2006/42/EC 20 Station Road, Rowley Regis, West Midlands, B65 0JU.U.K. - Page 3 1. SAFETY RULES READ THE DIRECTIONS BEFORE ASSEMBLY Read the towing vehicle owners manual and towing vehicle safety rules. Know how to operate your tractor before using the tow-behind spreader. Read the chemical label instructions and cautions for handling and applying the chemicals purchased for spreading.
-
Page 4: Assembly Instruction
ASSEMBLY INSTRUCTION STEP 1: Attach the first Flat Washer Ø20, Bushing, the second Flat Washer Ø20,the third Flat Washer Ø20 onto the end of wheel axle of Mounting Tube in turn. Then insert the Cotter Pin Ø4x40 into the small hole on the wheel axle and bend to fix it. - Page 5 STEP 2: Assembly the another wheel to the other side of Wheel Axle, operation same as step 1. Rotating the wheel so that the hole on the inside of wheel align with the hole on the end of axle, then insert the Drive Pin Ø6x45 and lock it.
- Page 6 STEP 4: Attach two Braces (each at one side) to the middle of Hitch Tongue by using Hex Bolt M6x45 and Nylon Lock Nut M6, don't screw them up temporarily. STEP 5: Attach the Gauge & Lever Ass’y to the middle of Hitch Tongue using 2pcs Hex Bolts M8x45 and Nylon Lock Nuts M8.
- Page 7 STEP 6: 1. Attach two Braces (each at one side) to the middle of Support Rod by using Hex Bolt M6x45 and Nylon Lock Nut M6, don't screw them up temporarily. 2. Connect another end of two Braces at each side of Hitch Tongue with the hole in horizontal direction at the round part of Mounting Tube by using Hex Bolt M6x35 and Nylon Lock Nut M6.
- Page 8 STEP 8: Install one Flat Washer Ø8 at one end of Adjust Connection Rod and then insert into the hole of Rod Base, connect them by using a Nylon Lock Nut M8. STEP 9: Attach the support rod into the hole on the Hopper by using Hex Bolts M6x20, Big Flat Washers Ø6 and Nylon Lock Nuts M6.
- Page 9 STEP 11: Connect Hitch Bracket to Hitch Tongue, the hole on the Hitch Bracket align at the hole on the Hitch Tongue, using the Drive Pin Ø9x60. The Length of Hitch Tongue can be adjustable. Your Spreader is now fully assembled and ready for use.
-
Page 10: Parts Drawing
PARTS DRAWING... -
Page 11: Parts List
PARTS LIST Ref# Description Ref# Description Flat Washer Ø20 Hex Bolt M6x35 Pneumatic Tire Adjustable Connection Rod Wheel Spacer Hex Bolt M6x20 Bushing Gauge Plate Wheel Axle Big Flat Washer Ø6 Drive Gear Nylon Washer Shaft Support Cap Handle Grip Small Gear Adjustable Handle Shaft... - Page 12 CANNON TOOLS LTD 20 Station road, Rowley Regis, West Midlands,B65 0JU.U.K. Made in China...