Yamaha Portatone PSR-5700 Owner's Manual
Yamaha portatone owner's manual psr-5700
Hide thumbs
Also See for Portatone PSR-5700:
- Advanced features (79 pages) ,
- Mode d'emploi (78 pages) ,
- Authorized product manual (140 pages)

Related Manuals for Yamaha Portatone PSR-5700


Summary of Contents for Yamaha Portatone PSR-5700
- Page 1 OWNER’S MANUAL Getting Started BEDIENUNGSANLEITUNG Kurzanleitung MODE D’EMPLOI Pour commencer MANUAL DE INSTRUCCIONES Para empezar...
-
Page 2: Special Message Section
SPECIFICATIONS SUBJECT TO CHANGE: The informa- tion contained in this manual is believed to be correct at the time of printing. However, Yamaha reserves the right to change or modify any of the specifications without notice or obligation to update existing units. -
Page 3: Table Of Contents
You are the proud owner of an extraordinary electronic keyboard. The Yamaha PSR-5700 PortaTone combines the most advanced AWM tone generation technology with state-of-the-art digital electronics and features to give you stunning sound quality with maximum musical en- joyment. The Interactive Accompaniment and Super Style Play features, in particular, are bril- liant examples of how advanced technology can significantly expand your musical horizons. -
Page 4: About The Psr-5700 Manuals
About the PSR-5700 Manuals The PSR-5700 comes with two manuals: “Getting Started” (this manual), and the “Advanced Features” manual. I The “Getting Started” Manual This, as its name suggests, is the manual you should start with. The “Getting Started” manual will teach you everything you need to basically play and enjoy the PSR- 5700, concentrating on the keys and controls that you’ll... -
Page 5: Taking Care Of Your Portatone
Taking Care of Your PortaTone Your PortaTone will give you years of playing pleasure if you follow the simple rules given below: I Location I Power Supply I Turn Power OFF When Making Connections I Handling and Transport I Cleaning Do not expose the instrument to the following conditions to avoid defor- mation, discoloration, or more serious damage. -
Page 6: Data Backup
G The PSR-5700 contains no user serviceable parts. Opening it or tamper- ing with it in anyway can lead to irreparable damage and possibly elec- tric shock. -
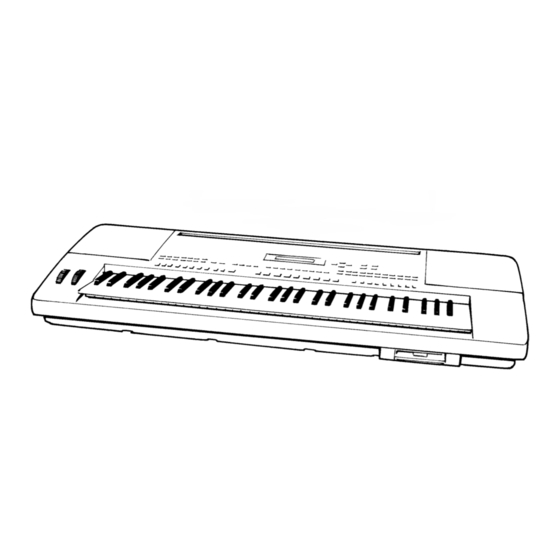
Page 7: Nomenclature
Nomenclature PITCH BEND/ MODULATION/ GLISSANDO EFFECT DOWN HEADPHONES 1 POWER Button ... [page 10] 2 DEMO Button ...[page 10] 3 VOICE SELECT Buttons ... [page 13, 17] BANK NUMBER VOICE REGISTRATION MEMORY 4 BEAT Display ... [page 21] 5 LED Display ... [page 20] 6 TEMPO [-] and [+] Buttons ... - Page 8 SYNTH BASS 2 90 SPACE PIANO MINI LEAD 91 STRINGS & HARPSCD SQUARE LEAD 92 BELL STRINGS BIG LEAD 93 CLARINET & SAX SYNTH PAD 94 BIG BRASS CRYSTAL 95 SYNTH REED WARM PAD 96 ATMOS PAD POLY SYNTH 97 EVOLUTION SWEEP PAD 98 DRUM KIT ATMOS...
-
Page 9: Connections & Music Stand
When a plug is inserted into the L/L+R jack only, the monaural input signal is fed to both the left and right channels of the PSR-5700 stereo sound sys- tem. Please note that the PSR-5700 MASTER VOLUME control does not affect the level of the signal delivered to external equipment. -
Page 10: Sustain Jack
More details on MIDI are provided on page 50 of the Advanced Features manual. The Music Stand The PSR-5700 is supplied with a music stand that can be attached to the instrument by inserting it into the slot at the rear of the control panel. -
Page 11: The Demonstration
The Demonstration To give you an idea of the PSR-5700’s sophisticated capabilities, it is programmed with four demonstration sequences which play automatically. Switch ON POWER *** YAMAHA PORTATONE *** Set Initial Volume Levels VOLUME MASTER RHYTHM BASS CHORD CHORD Press the [DEMO] Button... -
Page 12: Playing The Psr-5700
CHORD CHORD Before playing your PSR-5700 for the first time, it might be a good idea to re- initialize it to the original factory settings just in case these have been changed at some point before you receive the instrument. To do this, press the [FUNCTION] button a few times until “F6”... - Page 13 The split point for the PSR-5700 is initially set at F # 2 when the unit is shipped. This means that when the “ORCH. 2 v 1” mode is selected, the ORCH. 2 voice will be played by all keys to the left of and including F # 2, while the ORCH.
- Page 14 Voice numbers 90 through 97 are actually combinations of two voices, so the total number of simultaneous notes that can be played when these voices are selected is less than when any of the other voices are selected. DETAIL Playing the PSR-5700...
-
Page 15: Keyboard Percussion
Playing the PSR-5700 >98:Drum Kit 00:Eurobeat 99:Pop.Drum 98: DRUM KIT Instrument Applause Triangle Close Whistle Low Triangle Open Whistle Hi Kick 1 Kick 2 Kick 3 Kick 4 Tom 1 Bass Rim Shot 1 Tom 1 Low Tom 1 Mid... -
Page 16: Transposition, Tuning, And Octave Change
The TRANSPOSITION, TUNING, and OCTAVE CHANGE functions described below let you control the pitch of the PSR-5700 in a number of ways. This function allows the overall pitch of the PSR-5700 to be transposed up or down in semitone increments, and fine-tuned in 0.5 Hertz increments. -
Page 17: Octave Change
Transposition, Tuning, and Octave Change This function allows the ORCH. 1 and ORCH. 2 voices to be independently trans- posed up or down by one octave. Press the [OCTAVE CHANGE] Button OCTAVE CHANGE Orc2=Normal Orc1=Normal – – Set the Octave Change As Required OCTAVE CHANGE Orc2=Normal... -
Page 18: Voice Registration
If you have particular combinations of voices you like to use in the dual or split orchestration modes, the PSR-5700 lets you store up to 10 different combinations in its Voice Registration memory so that they can be recalled by pressing a single button. Voice registration also memorizes the volume settings of the voices;... -
Page 19: Using The Accompaniment Section
Using the Accompaniment Section The PSR-5700 has 36 different accompaniment “styles” that can be used to provide fully-orchestrated or rhythm-only accompaniment. The PSR-5700’s sophisticated Auto Bass Chord accompaniment system can provide automated bass and chord backing that is perfectly matched to the selected accompaniment style. - Page 20 ORCH. 1 voice is played on the upper section of the keyboard. You can select any of the PSR-5700’s normal voices (00 through 89) to play on the lower section of the keyboard — of course, it’s normal to choose a bass voices for the left hand.
-
Page 21: Select A Style
>00:Piano 1 31:Shuffle 21:Strings1 – Set the Tempo – TEMPO A list of the 36 accompaniment styles is printed on the PSR-5700 for easy reference. BANK 2 BANK 3 20 SYNTH BOOGIE 30 JAZZ BALLAD 21 SOUL ROCK 31 SHUFFLE... - Page 22 Several LEDs will flash simultaneously on the first beat of odd-numbered meas- ures in all time signatures. A Yamaha FC5 footswitch plugged into the rear panel FOOT SW. jack can also be used to start the accompaniment if the appropriate function is assigned to...
- Page 23 CHORUS SOLO As soon as you play any chord that the PSR-5700 can “recognize” on the left-hand section of the keyboard in the FINGERED CHORD mode (see fingering chart on page 178) or an abbreviated chord in the SINGLE FIN- GER mode, the PSR-5700 will automatically begin to play the chord along with the selected rhythm and an appropriate bass line.
-
Page 24: Accompaniment Volume
FILL IN buttons, the fill-in will repeat until the button is released. A Yamaha FC5 footswitch plugged into the rear panel FOOT SW. jack can also be used to activate fill-ins if the appropriate function is assigned to the... -
Page 25: Interactive Accompaniment
Press the [INTERACTIVE ACCOMPANIMENT] button so that its indi- cator lights to activate the Interactive Accompaniment mode. In this mode the PSR-5700 uses advanced technology to monitor the way you are playing on the keyboard and automatically varies the rhythm or ABC accompani- ment accordingly. -
Page 26: Using The Disk Style On The Supplied Data Disk
Using the Disk Style on the Supplied Data Disk The Disk Style The data disk supplied with the PSR-5700 contains 1 disk style that can be used in addition to the 36 70’S DISCO internal styles. Use the following procedure to assign the desired disk style to the [DISK] style button on the PSR-5700 panel. -
Page 27: Super Style Play
Super Style Play The PSR-5700’s 36 internal styles and the external disk style each have 4 different preset “panel setups” that can be instantly selected via the SUPER STYLE PLAY buttons — [VERSE A], [VERSE B], [CHORUS A], and [CHORUS B] — to create different musical tex- tures. - Page 28 Memorize the Super Style Play Settings If You Like SUPER STYLE PLAY VERSE CHORUS MEMORY RECALL Store Edited P.Regist -> SSP02_1 Turn Super Style Play Off SUPER STYLE PLAY AUTO VERSE CHORUS SS CHORD VERSE CHORUS Your Super Style Play settings can be memorized by pressing the VERSE [A] or [B] or CHORUS [A] or [B] button while holding the Panel Registra- tion [MEMORY] button.
-
Page 29: Using The Pads
• ORCHESTRA 1 VOLUME • SUSTAIN ON/OFF • PITCH BEND • GLIDE ON/OFF • OCTAVE CHANGE The data listed above is also recorded if it is received via the PSR-5700 MIDI interface (Advanced Features manual, page 246). DETAIL MULTI PLAYING PHRASE... -
Page 30: Recording Phrases
Although the note data played by the phrase pads can not be recorded by the PSR-5700 sequencer (Advanced Features manual, page 3), the phrase pad events (i.e. the fact that a pad has been pressed) can be recorded. Phrase pad... -
Page 31: Recording Chords
Using the Pads The CHORD Pads (pads 5 … 8) Each CHORD pad can record up to approximately 80 chords played on the left-hand section of the keyboard when the AUTO BASS CHORD feature is engaged. The recorded chords can then be played back at any time —... -
Page 32: Multi Pad Repeat Playback
“Change to FC or SF mode!” will appear on the display, since chord playback will not function in the Manual Bass mode.. Chord pad playback can be recorded by the PSR-5700 sequencer. HINT Chord pad data can be saved to and loaded from disk (Advanced Features manual, page 46), but can not be memorized by the Panel Registration feature (page 38). -
Page 33: The Perc Mode
Using the Pads MULTI REPEAT To engage the PERC mode, press the [MODE SELECT] button a few times until the PERC indi- PERC. BREAK cator lights. TEMPO SYNCHRO MODE SELECT The 8 pads are initially programmed with the following drum and percussion instruments which can be played via the pads when the PERC mode is selected: 1. -
Page 34: Playing The Percussion Pads
The PERC pad sounds are not affected by the PSR-5700 PITCH BEND wheel or EFFECT settings. DETAIL If you press the button immediately to the right of the pad [MODE SE- LECT] button so that the indicator above it lights while the PERC mode is engaged, the PERC BREAK function is engaged —... -
Page 35: The Tempo Mode
[Tap Start] pad can be used to set any desired tempo (within the PSR-5700’s 40 to 280 beats per minute range) by simply tapping on the pad at the required tempo. Tap 4 times for an accompaniment with a 4/4 time signature, 3 times for 3/4, and 5 times for 5/4. -
Page 36: The Tempo Synchro Function
G faster faster G a tempo a tempo G slower slower G rit. (Ritardando) rit. The TEMPO SYNCHRO Function MULTI REPEAT PERC. BREAK TEMPO SYNCHRO MODE SELECT Tap the [faster] pad to increase the tempo by a fixed amount, whether the accompaniment is playing or not. -
Page 37: Expression & Effects
Expression & Effects I Sustain VOIC ORCH. LEFT HARMONY SUSTAIN ORCH. HOLD I Harmony VOIC ORCH. LEFT HARMONY SUSTAIN ORCH. HOLD G Harmony Type Selection Press the [HARMONY TYPE] Button HARMONY TYPE No. 1 Type=Basic :Duet – – Select a Harmony Type The Harmony Types are: 1. - Page 38 I Pitch Bend/Glissando Wheel PITCH BEND/ MODULATION/ GLISSANDO EFFECT DOWN I Modulation/Effect Wheel PITCH BEND/ MODULATION/ GLISSANDO EFFECT DOWN I Reverb REVERB EFFECT I Effects REVERB EFFECT LEFT HOLD will not function during Multi Pad playback or Sequencer ACCOMP. track playback even if the LEFT HOLD indicator is lit. DETAIL The PITCH BEND/GLISSANDO wheel to the left of the keyboard lets you bend the pitch of notes or “glissando”...
-
Page 39: Panel Registration
Panel Registration The PSR-5700 Panel Registration feature can be used to memorize 16 complete con- trol-panel setups (2 banks, 8 setups each) that you can recall whenever needed. INITIAL PANEL REGIST A1 ROMANTIC PIANO G Registering the Panel Settings Set Up the Controls as... - Page 40 G Recall the Registered Panel Settings PANEL REGISTRATION MEMORY RECALL G Recall the Previous Panel Settings MEMORY RECALL Simply select the appropriate bank using the [A/B] button and press the desired PANEL REGISTRATION button at any time to recall the memo- rized settings.
-
Page 41: Playing Doc (Disk Orchestra Collection) Disks
The disk should click into place and the DISK IN USE lamp will light briefly while the PSR-5700 reads and identifies the disk. - Page 42 EFFECT By turning off the left- or right-hand melody part, or both, you can prac- tice playing those parts on the PSR-5700 keyboard. Sheet music is provided with the Disk Orchestra Collection disks. Use the [-] and [+] buttons under “Mode=L+R” on the display to select the desired mode: •...
-
Page 43: Troubleshooting
You are using single-finger type fingering in the fingered mode, or vice-versa. The PSR-5700 is constantly check- ing for the presence of a disk. Solution No solution necessary. Set the volume controls and expres- sion pedal to a reasonable listening level. -
Page 44: Index
Index This index covers both the PSR-5700 “Getting Started” and “Advanced Features” manuals, so the page numbers include coded prefixes to indicate in which manual the information can be found: GS = Getting Started AF = Advanced Features A tempo ... GS-35 ABC ... - Page 45 Index Fader select ... AF-20 Faster ... GS-35 Fill-ins ... GS-23 Fingered chords ... GS-18 Fingering chart ... GS-178 Floppy disks ... GS-5, 25 Foot switch select ... AF-37 Footswitch jack ... GS-8 Format disk ... AF-47 From disk ... AF-45 From disk button ...
- Page 46 Percussion instrument cancel ... AF-16 Percussion map ... AF-255 Phrase pads ... GS-28 Pitch bend ... GS-37 Pitch bend range ... AF-28 Pitch bend select ... AF-39 Power supply ... GS-4 Punch recording ... AF-8 Quantize ... AF-10, 21 Recall initial data ... AF-50 Record track selection ...
-
Page 47: Fingering Chart
Fingering Chart/Akkordliste/Tablature/Gráfica de digitación • Notes in parentheses ( ) can be omitted. • Chord types marked with an asterisk (*) can be played in any inversion (i.e. the root does not have to be the lowest note in the chord). •... -
Page 48: Suspended Fourth [Sus4]
• Les notes entre parenthèses ( ) peuvent être omises. • Les accords marqués d’un astérisque (*) peuvent être joués dans n’importe qu’elle inversion (il n’est pas nécessaire que la note fondamentale de l’accord soit la note la plus basse). •... -
Page 49: Minor Major Seventh [Mm7]
Fingering Chart/Akkordliste/Tablature/Gráfica de digitación Minor major seventh* Moll mit großer Septime* Septième majeure mineure* Séptima mayor menor* C mM (D mM ) D mM (E mM ) F mM (G mM ) G mM (A mM ) A mM (B mM ) Seventh* Seventh flatted fifth Dur-Septakkord*... - Page 50 Fingering Chart/Akkordliste/Tablature/Gráfica de digitación Seventh suspended fourth* Added ninth* Septakkord mit Dur-Akkord mit vorgehaltener Quarte* hinzugefügter None* Quarte suspendue septième* Neuvième ajoutée* Séptima cuarta suspendida* Novena añadida* C sus Cadd C add sus ) (D add ) D sus Dadd D add sus ) (E add )
- Page 51 Fingering Chart/Akkordliste/Tablature/Gráfica de digitación Major seventh ninth* Minor seventh ninth* Dur-Akkord mit großer Septime und hinzugefügter Moll-Septakkord mit None* hinzugefügter None* Neuvième septième majeure* Neuvième septième mineure* Mayor de séptima novena* Manor de séptima novena* (D m (D M (E m (E M (G m (G M...
- Page 52 Fingering Chart/Akkordliste/Tablature/Gráfica de digitación Major seventh flatted fifth* Dur-Akkord mit großer Septime und verminderter Quinte* Quinte bémol septième majeure* Mayor de séptima quinta bemol* Caug C aug (D M (D aug) Daug D aug (E M (E aug) Eaug Faug F aug (G M (G aug)
-
Page 53: Important Safety Instructions
Some of these items are designed to be dealer assembled or installed. Please make sure that benches are stable and any optional fixtures (where applicable) are well secured BEFORE using. Benches supplied by Yamaha are designed for seating only. No other uses are recommended. - Page 54 This product, when installed as indicated in the instructions contained in this manual, meets FCC requirements. Modifi- cations not expressly approved by Yamaha may void your authority, granted by the FCC, to use the product. 2. IMPORTANT : When connecting this product to accessories and/or another product use only high quality shielded cables.
- Page 55 JUSQU’AU FOND. • This applies only to products distributed by Yamaha Canada Music Ltd. • Dies bezieht sich nur auf die von der Yamaha Canada Music Ltd. vertriebenen Produkte. • Ceci ne s’applique qu’aux produits distribués par Yamaha Canada Music Ltd.