Table of Contents
Advertisement
Quick Links
Advertisement
Table of Contents

Related Manuals for Yamaha PortaTone PSR-510


Summary of Contents for Yamaha PortaTone PSR-510
-
Page 2: Special Message Section
• This applies only to products distributed by Yamaha Europa GmbH. You should note this serial number in the space provided below and • Dies bezieht sich nur auf die von der Yamaha Europa GmbH vertriebenen Produkte. retain this manual as a permanent record of your purchase to aid identifi- cation in the event of theft. -
Page 3: Table Of Contents
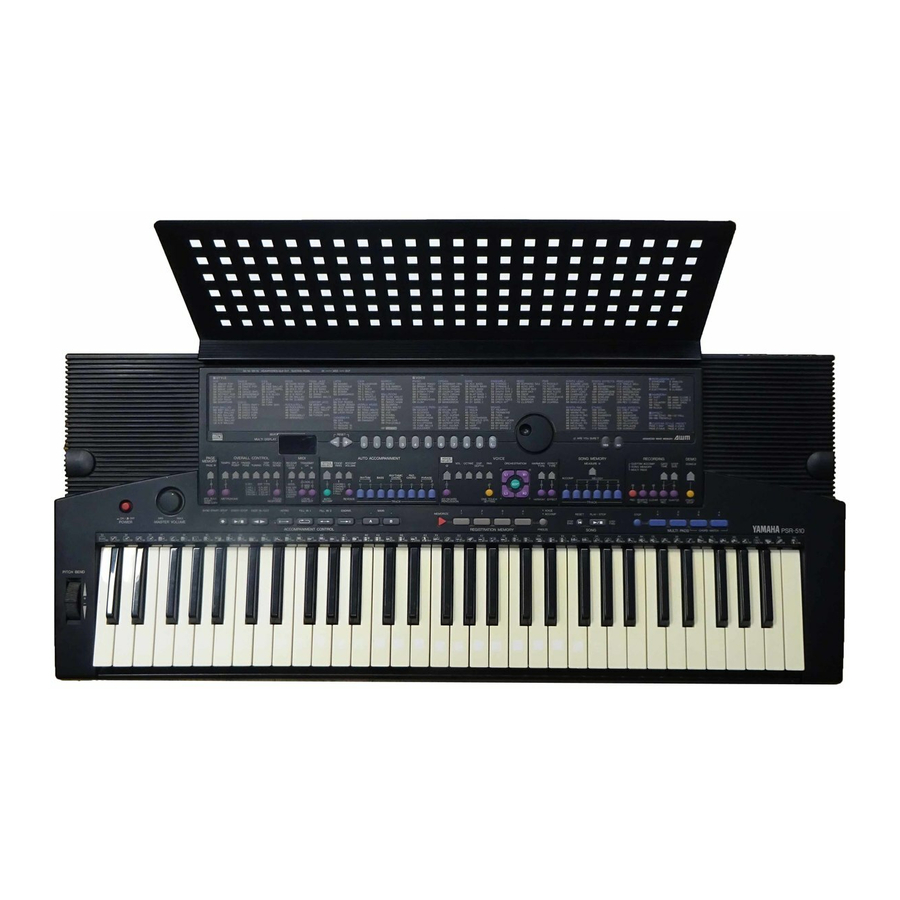
Congratulations! You are the proud owner of a Yamaha PSR-510. Your PSR-510 is a high- quality musical instrument that incorporates advanced Yamaha digital tech- nology and many versatile features. In order to obtain maximum performance and enjoyment from your PSR-510, we urge you to read this Owner’s Manual thoroughly while trying out the various features described. -
Page 6: Taking Care Of Your Portatone
MIDI cables. YAMAHA is not responsible for damage caused by improper handling or operation. | | | | | | | | | | | | | | | | | | | | | | | | | | | | | | | | | | | | | | | | | | | | | | | | | | | | | | | | | | | | | | | | | | | | | | | | | | | | | | | | | | | | | | | | | | | | | | | | | | | | | | | | | | | | | | | | | | | | | | | | | | | | | | | | | | | | | | | | | | | | |... -
Page 7: Preparation
AC adaptor) during any PSR-510 record operation! Doing so can result in a loss of data. Using An Optional AC Power Adaptor ....................Plug the DC output cable from an optional Yamaha PA-3, PA-4, PA-5, PA- DC 10-12V IN PA-3,... -
Page 8: Using Headphones Or An External Sound System
Stereo sound system The Sustain Pedal An optional Yamaha FC4 or FC5 footswitch can be plugged into the SUSTAIN PEDAL rear-panel SUSTAIN PEDAL jack. The sustain pedal functions as a damper pedal, controlling sustain. Press the pedal to sustain notes after the keys are released. -
Page 9: Listen To The Demo
Listen to the Demo! Once you’ve set up your PSR-510, try listening to the pre-programmed demonstration songs — they’ll give you a good idea of what the PSR-510 can do! DEMO SONG # POWER MASTER VOLUME START/ STOP Turn the Power ON & Set the Volume ....................Before playing the demo turn the power ON by pressing the POWER switch (the panel indicators and MULTI DISPLAY will light), and turn the MASTER VOLUME control up (clockwise) about a quarter-turn from its... -
Page 10: Basic Editing Procedure
Basic Editing Procedure The PSR-510 features a flexible-but-consistent interface that lets you edit just about all of its parameters using the same basic procedure. Once familiar with the system, you’ll be able to edit any parameter quickly and easily. Here’s the basic procedure: BEAT RESET MULTI DISPLAY... - Page 11 2-2: The [+] and [−] Buttons The [+] and [−] buttons immediately to the right of the MULTI DIS- PLAY can be used to increment (increase by one) or decrement (decrease by one) the currently selected parameter. Press the [+] button briefly to in- RESET crement the parameter value, or the [−] button to decrement.
-
Page 12: Selecting & Playing The Voices
Selecting & Playing the Voices The PSR-510 has 128 stunning voices plus 8 different drum and percussion kits that you can select and play in a number of ways. VOICE VOICE SELECT OCTAVE DSP ORCHESTRATION HARMONY EFFECT DEPTH TYPE TYPE EDIT KEYBOARD ONE TOUCH... - Page 13 Dual Mode Split & Dual Modes In the dual mode both the [R1] and [R2] part There are five possible combinations of the split voices are selected so they can be played simultane- and dual modes, as shown below. The part for the ously across the entire keyboard.
-
Page 14: Voice Assignment
Selecting & Playing the Voices Voice Assignment You can assign any of the PSR-510’s 128 voices to each of the ORCHESTRATION parts, whether the part is currently ON or OFF. Press the [VOICE SELECT] Button ....................... You don’t need to do this if the [VOICE SELECT] indicator is already VOICE SELECT lit. -
Page 15: Volume
Volume You can individually set the volume of each orchestration part to set up the ideal balance between parts. Select the Part You Want to Edit ......................Use the ORCHESTRATION [EDIT] button to select the part you want to edit. Press the [VOL] Button .......................... -
Page 16: Dsp Depth
Selecting & Playing the Voices DSP Depth The PSR-510 features a built-in digital signal processor (DSP) that can be used to apply a range of reverb and delay effects to the PSR-510 voices. The [DSP TYPE] button in the OVERALL CONTROL section (page 21) determines the type of effect to be applied, while the VOICE section [DSP DEPTH] button lets you individually set the amount of effect applied to each orchestration part. -
Page 17: Auto Harmony
Auto Harmony Auto Harmony is used with the PSR-510’s Auto Accompaniment feature except for Full fingering mode (see page 23). It automatically adds appropriate harmony notes to a single-note melody line you play on the key- board. You can choose from 10 different types of harmony that can be assigned to the right-hand orchestration parts. -
Page 18: Effects
Selecting & Playing the Voices Effects The PSR-510 has a range of 12 delay-based effects — in addition to the DSP effects (pages 14 and 21) — that can be selected and applied to the right-hand orchestration parts (the left-hand orchestration parts are not af- fected). -
Page 19: Keyboard Percussion
Keyboard Percussion The PSR-510 has 8 different drum and percussion “kits” that can be played on the keyboard when the Key- board Percussion function is turned ON. The types of drum and percussion instruments played by the various keys when Keyboard Percussion function is selected are marked by symbols above the keys. Turn Keyboard Percussion ON ...................... -
Page 20: Pitch Bend
Release the PITCH BEND wheel when you’ve set the required pitch bend range. Sustain If you have plugged an optional Yamaha FC4 or FC5 footswitch into the SUSTAIN PEDAL PSR-510’s rear-panel SUSTAIN PEDAL jack, the footswitch can be used as a damper pedal, controlling sustain. Press the pedal to sustain notes after the keys are released. -
Page 21: Overall Control
Overall Control The OVERALL CONTROL section includes a range of parameters that, as their title suggests, apply to the overall sound of the PSR-510. OVERALL CONTROL TEMPO SPLIT TRANS- TOUCH POINT POSE TUNING TYPE SENSE 0 OFF DSP TYPE ........1 HALL 1 5 PLATE 1 2 HALL 2... -
Page 22: Transpose
Overall Control Transpose The PSR-510 [TRANSPOSE] button makes it possible to shift the pitch of the PSR-510 up or down in semi- tone intervals up to a maximum of 12 semitones (one octave). Transposing the pitch of the PSR-510 keyboard makes it easier to play in difficult key signatures, and you can easily match the pitch of the keyboard to the range of a singer or other instrumentalist. -
Page 23: Dsp Type
DSP Type The [DSP TYPE] button selects one of eight digital effects that you can use for extra depth and expressive power. This button determines the type of effect to be used, while the [DSP DEPTH] button in the VOICE sec- tion allow the depth of the effect to be individually set for each orchestration part. -
Page 24: Touch Sensitivity
Overall Control Touch Sensitivity This function varies the touch sensitivity of the keyboard. Use this capability to adjust the PSR-510’s touch sensitivity for the best results with your own particular playing style. Press the [TOUCH SENSE] Button ....................... Press the OVERALL CONTROL section [TOUCH SENSE] button. The TOUCH SENSE current sensitivity setting will appear on the MULTI DISPLAY. -
Page 25: Auto Accompaniment
Auto Accompaniment The PSR-510 has 103 accompaniment styles that can be used to provide fully-orchestrated Auto Accompaniment. When the Auto Accompaniment function is turned ON, the PSR-510 creates fully-orchestrated rhythm, bass, and chord accompaniment based on chords you play with the left hand in the Auto Accompaniment section of the keyboard (i.e. -
Page 26: Setting The Auto Accompaniment Split Point
Auto Accompaniment Setting the Auto Accompaniment Split Point To set the Auto Accompaniment split point, first turn Auto Accompani- SPLIT STYLE POINT SELECT ment ON — press the [AUTO ACCOMP] button so that its indicator lights — then proceed with steps 2 and 3 as described in “Split Point Change” on page 19. - Page 27 Mode 1: Chord 1 The Chord 1 mode is ideal if you already know how to play chords on a keyboard, since it allows you to supply your own chords for the Auto Ac- companiment feature. The PSR-510 will accept the following chord types: Example for “C”...
- Page 28 Auto Accompaniment Mode 2: Chord 2 This is essentially the same as the Chord 1 mode, above, except that the lowest note played in the Auto Accompaniment section of the keyboard will be played by the bass part rather than the chord root. C on E C on G SINGLE mode fingering makes it simple to produce beautifully orches-...
-
Page 29: Tempo Control
Mode 5: Full In this mode chords played anywhere on the keyboard are detected and used for Auto Accompaniment. Otherwise the keyboard functions normally, and the entire range is available for playing. Chord recognition is the same as in the Chord 1 mode. Please note that in this mode all notes you play on the keyboard at any one time will be interpreted as the Auto Accompani- ment chord. -
Page 30: Accompaniment Control
Auto Accompaniment Accompaniment Control The PSR-510 provides a range of accompaniment “sections” — introduction, fill-ins, variations on the main pattern, ending — that you can select to control the “flow” of the accompaniment to achieve the desired musical results. Accompaniment start/stop and sections are controlled by the ACCOMPANIMENT CONTROL buttons. Straight Start ............................ - Page 31 Starting the Accompaniment with an Introduction ................Any of the PSR-510 accompaniment patterns can be started with an appro- INTRO priate introduction by pressing the [INTRO] button and then the [START/ STOP] button. Once the [INTRO] button is pressed, the [INTRO] indicator will be lit continuously and the MAIN [A] or [B] indicator will flash to indicate which INTRO MAIN...
- Page 32 Auto Accompaniment Stopping the Accompaniment ....................... An accompaniment in progress can be stopped immediately by pressing SYNC-START/STOP START/STOP ENDING the [START/STOP] button or the [SYNC-START/STOP] button. In the latter case the synchro start mode will be engaged when the accompaniment stops.
-
Page 33: Accompaniment Volume
Accompaniment Volume While the VOICE control section [VOL] button can be used to set the volume levels of the orchestration parts, the [ACCOMP VOLUME] button can be used to adjust the volume of the selected accompaniment in relation to the voices. Press the [ACCOMP VOLUME] Button .................... -
Page 34: Re-Voicing The Tracks
Auto Accompaniment BASS: The BASS track always plays a bass line, but the voice will change to fit the selected style … acoustic bass, synth bass, tuba, etc. RHYTHMIC CHORD 1 & 2: Both these tracks provide the rhythmic chordal accompaniment required by each style. - Page 35 Make the Required Voice Settings ......................Use the [+] and [–] buttons, the number buttons, the data dial, or the VOICE [VOICE SELECT] button itself to select a new voice for the selected SELECT OCTAVE DSP DEPTH track. You can also use the [VOL], [OCTAVE], [DSP DEPTH], and [PAN] buttons to change the corresponding parameters for the selected voice.
-
Page 36: One Touch Setting
One Touch Setting Each PSR-510 accompaniment style has a suitable preset voice and other settings that can be instantly recalled by pressing the [ONE TOUCH SETTING] button in the VOICE control section. This makes it simple to recall the optimum settings for each style in one quick operation. To use the One Touch Setting function: select a style, press the [ONE TOUCH SETTING] button so that its indicator lights, then play. -
Page 37: Registration Memory
Registration Memory The PSR-510 REGISTRATION MEMORY can be used to store four complete sets of VOICE and AUTO ACCOMPANIMENT settings that can be recalled anytime at the touch of a button. The REGISTRATION MEMORY stores the following parameters: VOICE AUTO ACCOMPANIMENT 1. - Page 38 Registration Memory Recalling the Settings ..........................The settings stored to a REGISTRATION MEMORY button can be recalled at any time simply by pressing the appropriate button. The indicator of the selected button will light continu- ously when initially recalled, but will flash as soon as any change is made to the panel settings.
-
Page 39: Record Functions
Record Functions The PSR-510 RECORDING section controls three recording functions: The SONG MEMORY: Record complete songs including an accompaniment track and up to five melody tracks. Each PAGE MEMORY holds a different song. MULTI PADS: Record short chord, melody, or rhythm sequences that can be played back anytime by simply pressing a button. -
Page 40: Realtime Accompaniment Track Recording
Record Functions Realtime Accompaniment Track Recording The SONG MEMORY ACCOMP track records the following operations and data: • Chord changes. • Auto accompaniment TRACK button operations. • Intro, Main, Fill in, & Ending sections. • Tempo. • Accompaniment volume. • Style number. •... - Page 41 Record ..............................Recording will begin as soon as you play a chord on the Auto Accompani- ment section of the keyboard. If you’ve selected a MELODY track to record with the ACCOMP track, a right-hand note will also start the recording proc- ess.
-
Page 42: Realtime Melody Track Recording
Record Functions Realtime Melody Track Recording The SONG MEMORY MELODY tracks record the following operations and data: • Key on/off • Volume. • Effect on/off & effect type. (i.e. notes played on the keyboard). • Pan. • Sustain (footswitch) on/off. •... -
Page 43: Accompaniment And Melody Playback
Accompaniment And Melody Playback Select a PAGE MEMORY ........................If necessary, press the [PAGE #] button to select the PAGE MEMORY PAGE MEMORY number containing the song you want to play back. When a new PAGE PAGE # MEMORY number is selected the ARE YOU SURE? indicator will flash and the “Are you sure?”... -
Page 44: The [Reset] Button
Record Functions The [RESET] Button Press the SONG [RESET] button to go directly to the first measure of RESET PLAY/STOP the song and turn ON all tracks that contain data. Measure number “001” STEP STEP will appear on the MULTI DISPLAY. The [RESET] button also functions during playback or realtime recording. -
Page 45: The Multi Pads
The Multi Pads The PSR-510 MULTI PADS can be used to record short rhythmic or melodic sequences, percussion fill-ins, or single percussion sounds that can be played at any time simply by pressing the appropriate pad. Pads [1] and [2] play back exactly as recorded, while pads [3] and [4] are “CHORD MATCH”... -
Page 46: Playback
Record Functions Engage the MULTI PAD Record Ready Mode ..................Press one of the MULTI PAD buttons — [1] through [4] — while holding the [REC] button. The [REC] button indicator and the selected MULTI PAD indictor will flash to indicate that the record ready mode is engaged, and the metronome will begin to sound at the currently selected tempo if the OVER- ALL CONTROL section [METRONOME] button indicator is lit. -
Page 47: Custom Accompaniment
Custom Accompaniment Style number “00” in each PAGE MEMORY is a “custom accompaniment” that you can record yourself and use with the PSR-510’s Auto Accompaniment feature. Custom accompaniments can be created only using the tracks which have the preset accompaniment style data. The CUSTOM ACCOMPANIMENT records the following operations and data: •... - Page 48 Record Functions Select a Style & Section ......................... Select an accompaniment style that will serve as an appropriate founda- tion for the type of accompaniment you want to record. Also use the AC- COMPANIMENT CONTROL buttons to select the particular section you want to record: INTRO, MAIN A, MAIN B, FILL 1 (for MAIN A or B), FILL 2 (for MAIN A or B), ENDING.
-
Page 49: Using A Custom Accompaniment
Record ..............................Recording will begin as soon as you press the ACCOMPANIMENT CON- SYNC-START/STOP START/STOP FADE IN/OUT TROL section [START/STOP] button or play a chord or note on the keyboard. The preset accompaniment style data in the track being recorded will be en- tirely erased (except the data you have entered). -
Page 50: Step Recording
Record Functions Step Recording In addition to the realtime-recording procedures described above, the PSR-510 has a “step recording” mode in which notes can be entered one at a time with precise timing and length. • Only chord sequences can be step-recorded to Song Memory Accomp track. The RE- NOTES WRITE SETTING function (page 52) can be used after step recording to change other parameters as required. - Page 51 Specify the Required Gate Time ......................“Gate Time” refers to the actual length of the note to be entered in rela- GATE STEP tion to the note’s step size — i.e. whether the note is staccato, legato, etc. TIME SIZE Gate times are specified as percentages of the total note length, as shown in the list below.
- Page 52 Record Functions The following chart shows the step size and gate time settings required Example to enter a variety of notes: MULTI DISPLAY (Beat/Clock) MULTI DISPLAY (Step Size) MULTI DISPLAY (Gate Time) Note Hold Hold Hold PLAY/STOP PLAY/STOP PLAY/STOP PLAY/STOP STEP STEP STEP...
-
Page 53: Editing Functions
Editing Functions The following functions make it possible to “edit” recorded data to polish and refine your sound. • When using any of the editing functions on a custom style, be sure to NOTES select style number 00 before engaging the editing function. Quantization It is possible to “quantize”... -
Page 54: Clearing Tracks
Record Functions Clearing Tracks The [CLEAR] button can be used to completely erase the following data: • All data after the current measure in the specified SONG MEMORY track. • All data from the specified CUSTOM ACCOMPANIMENT track. • All data from the specified MULTI PAD. For a SONG MEMORY Track, Set the Start Measure ................ - Page 55 Select the Track or Pad to be Altered ....................Press the track or pad button corresponding to the track or pad you want to alter while holding the RECORDING section [REWRITE SETTING] button (for a Custom Accompaniment, first select the section you want to REWRITE edit).
-
Page 56: Page Memory
Page Memory In addition to the REGISTRATION MEMORY described on page 35, the PSR-510 has a PAGE MEMORY that stores panel control and parameter settings plus the contents of the SONG MEMORY, CUSTOM ACCOM- PANIMENT, and MULTI PADS. There are four PAGE MEMORY locations, each holding a complete set of parameters and recorded data. -
Page 57: Midi
MIDI MIDI, the Musical Instrument Digital Interface, is a world-standard communication interface that allows MIDI-compatible musical instruments and equipment to share musical information and control one another. This makes it possible to create “systems” of MIDI instruments and equip- ment that offer far greater versatility and control than is available with isolated instruments. PAGE MIDI MEMORY... -
Page 58: Midi Bulk Dump
MIDI MIDI Bulk Dump MIDI bulk dump operations allow large amounts of MIDI data to be transmitted from one device to another. The entire contents of the currently selected PSR-510 PAGE MEMORY (CUSTOM ACCOMP, MULTI PADS, SONG MEMORY, REGISTRATION MEMORY) can be dumped to a second PSR-510 or to a bulk storage de- vice such as a MIDI data recorder or MIDI computer. -
Page 59: Page Copy
Bulk Dump Reception ..........................The PSR-510 will automatically receive bulk dump data from another PSR-510 or MIDI data storage de- vice as long as the MIDI OUT terminal of the external device is properly connected to the MIDI IN connector of the PSR-510, and PSR-510 MIDI reception is enabled. -
Page 60: Midi Reception Modes
MIDI MIDI Reception Modes The [RECEIVE CH/CL/COM] button is used to specify the reception mode for each of the 16 MIDI channels, the internal or external clock mode, and MIDI start/stop command reception mode. Channel Reception Modes The PSR-510 allows any of five reception modes to be individually assigned to MIDI channels 1 through 16. The five modes are: Mode “0”... -
Page 61: Clock Mode
Clock Mode Reception of an external MIDI clock signal can be enabled or disabled as required. When disabled, all of the PSR-510’s time-based functions (Auto Accompaniment, SONG MEMORY, etc.) are controlled by its own inter- nal clock, the speed of which is set by the PSR-510 [TEMPO] button. When MIDI clock reception is enabled, however, all timing is controlled by an external MIDI clock signal received via the PSR-510 MIDI IN terminal (the PSR-510 [TEMPO] setting has no effect). -
Page 62: Midi Transmission
MIDI MIDI Transmission The PSR-510 allows independent MIDI transmit channels to be assigned to the L and R ORCHESTRATION voices. It is also possible to independently turn local control and MIDI output on or off for the L and R voices. MIDI Transmit Channels The L and R ORCHESTRATION voices can be independently set to transmit on any of the 16 MIDI channels as follows:... -
Page 63: Appendix
Appendix Voice & Polyphony List The PSR-510 can play up to 28 individual notes at the same time (i.e. it has a maximum “polyphony” of 28). This number includes all voices used: dual, split, auto accompaniment, song memory, and multi pads. If the maximum polyphony of the PSR-510 is exceeded, the excess notes will be truncated (they will not sound). -
Page 64: Style List
Appendix Style List Name Panel Name Rhythm Comments 16-Beat Pop 16BEAT POP 16-Beat Contemporary 16-beat pop. 8-Beat Pop 8BEAT POP 8-Beat Bright piano/guitar-based ’70s pop. 8-Beat Light 8BEAT LIGHT 8-Beat Eight-beat easy-listening style with arpeggiated piano part. FolkRock FOLKROCK 16-Beat Guitar-based folk-rock. - Page 65 Name Panel Name Rhythm Comments Rock & Roll Rock & Roll ROCK&ROLL 12-Beat Old-time ’60s Rock&Roll. Boogie Woogie BOOGIE 12-Beat Late ’50s piano-based rock ‘n’ roll, with boogie woogie bass. Brass in PHRASE 1 &2, piano bass in PAD. Twist TWIST 8-Beat Straight-eight boogie, with a ”Twist.”...
- Page 66 Appendix Style List Name Panel Name Rhythm Comments World Music Polka POLKA 8-Beat Traditional Polka style with acoustic instruments. Try altering the arrangement by bringing the accordion and the horn parts in and out. Traditional Waltz TRAD WALTZ Three-Four European waltz with guitar, accordion, clarinet, bass, drums and a string pad. Use CHORD 1 &...
-
Page 67: Reset Procedures & Page Memory Default Settings
Reset Procedures & Page Memory Default Settings All PSR-510 page memory settings are retained in memory even when the power switch is turned OFF as long as the PSR-510 is powered by batteries or an AC adapter. You can, however, restore the factory default set- tings for all four page memories or a single specified page memory by following the procedures outlined below. - Page 68 Appendix Page Memory Default Settings ORCHESTRATION VOICE AUTO OVERALL CONTROL MULTI CUSTOM ACCOMPANIMENT PADS ACCOMP On/Off VOICE OCTAVE HARMONY EFFECT STYLE VOL TEMPO SPLIT POINT P.B. TOUCH 1/2/3/4 style00 DEPTH On/Off TYPE On/Off TYPE Split mode Accomp. Range On/Off SENSE REGIST1 L1 PERCUSS.
-
Page 69: Troubleshooting
Troubleshooting Something not working as it should? In many cases what appears to be a malfunction can be traced to a sim- ple error that can be remedied immediately. Before assuming that your PSR-510 is faulty, please check the fol- lowing points. -
Page 70: Index
Index + and – buttons ........9 Introduction (Intro) ......29 Re-voice ..........32 Reception modes, MIDI ....58 Record functions ......37-52 AC power adaptor ....... 5 Registration memory ......35 Accompaniment control ....28 Keyboard percussion ......17 Reset button ........ -
Page 71: Percussion Kit List
Percussion Kit List / Verzeichnis der Schlagzeug- und Percussion-Set * “<——” indicates the content is the same as that of Standard Kit. * “<——” zeigt an, daß der Inhalt identisch mit dem Standardset ist. * Only 1 note can be played at a time when Keyboard Percussion is engaged. * Bei aktivierter Keyboard Percussion-Funktion kann zu einem Zeitpunkt jeweils nur eine Note gespielt werden. - Page 72 ts / Liste des kits de percussion / Lista de juegos de percusión * “<——” indique que le contenu est le même que celui du kit standard. * “<——” indica que el contenido es el mismo que el del juego estándar. * Une seule note peut être jouée à...
-
Page 73: Midi Implementation Chart
MIDI Implementation Chart / Implementierungstabelle / Table [Portable Keyboard] Date: 1993. 6. 15 MIDI Implementation Chart Model: PSR-510 Version: 1.00 Function Transmitted Recognized Remarks Basic Default 1~16 CH 1~16 CH (*1) Channel Changed 1~16 CH 1~16 CH (*1) Default Mode 3 (*1) Mode Messages... - Page 74 d’implémentation / Gráfico de implememtación *1. The following modes can be set individually for each channel via *9. GM melody voices 0 through 127 become panel voices 1 through the panel control: 128. Mode 00: Reception OFF. Rhythm voices 0, 8, 16, 24, 25, 32, 40, and 48 become panel Mode 01: Direct tone generator control.
- Page 75 GM System Level 1 The existing MIDI protocol allows performance and Le protocole MIDI existant permet le transfert des other data to be transferred between different instruments, données d’exécution et autres entre plusieurs instruments, even if they are from different manufacturers. This means, même s’ils ne sont pas de la même marque.
-
Page 76: Specifications
Specifications / Technische Daten / Spécifications / Especificaciones Keyboards: SONG MEMORY: 61 standard-size keys (C1~C6) with touch response. MEASURE # TRACK: ACCOMP, MELODY 1~5 VOICE: AWM128 voices: 01~128 SONG: Polyphony: 28 RESET (STEP BWD), PLAY/STOP (STEP FWD) KEYBOARD PERCUSSION: 1~8 VOL: 00~24 RECORDING: OCTAVE: -2~2... - Page 77 M.D.G., EMI Division © 1993 Yamaha Corporation...