Olympus DS-4000 Installation And User Manual
Digital voice recorder for enterprise express voicesystem
Hide thumbs
Also See for DS-4000:
- Instructions manual (60 pages) ,
- Online instructions manual (88 pages)

Related Manuals for Olympus DS-4000


Summary of Contents for Olympus DS-4000
- Page 1 Administrator and Provider Installation and User Guide Olympus DS-4000 Digital Voice Recorder ® for Enterprise Express VoiceSystem ® Versions 6.5, 7.0, and 7.5...
- Page 2 Nuance Communications, Inc. or its affiliates in the United States and/or other countries. Olympus ® is a registered trademark of Olympus Optical Co., Ltd, and/or Olympus. All other trademarks referenced herein are trademarks or registered trademarks of their respective owners. Patents The Enterprise Express ®...
-
Page 3: Table Of Contents
Configuring Users for the DS-4000 ........50... - Page 4 DS-4000 Recorder ........
-
Page 5: Chapter 1: Olympus Digital Recorder - Model Ds-4000
Chapter Overview This chapter provides: • an overview of the DS-4000 recorder • the main features of the DS-4000 recorder • an illustration showing the buttons and controls on the DS-4000 recorder • an illustration showing the elements of the LCD display screen on the DS-4000 recorder •... -
Page 6: Introduction And Overview
Enterprise Express VoiceSystem. The recorder is connected to a PC with a mini-USB cable and uses the Olympus Uploader application provided by Nuance to efficiently upload your dictations to an Enterprise Express Voice server. -
Page 7: Main Features Of The Olympus Ds-4000 Recorder
• Configure your recorder with the settings and options recommended by Nuance and set your own personal preferences. Refer to “Setting Up the DS-4000 Recorder ” on page 7 in this chapter. • Install the Olympus DSS Player Pro software and any available ®... - Page 8 ® Olympus DS-4000 Digital Recorder Installation and User Guide Some of the additional features of the DS-4000 recorder are: • User IDs – one per unit. • Worktypes – up to 10 per recorder. When recording, users can scroll through the worktypes using a button on the front of the recorder.
-
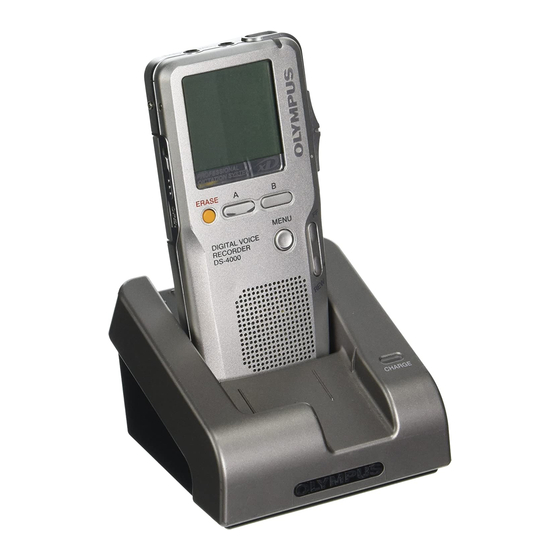
Page 9: Olympus Ds-4000 Recorder - Illustrations
® Chapter 1: Olympus Digital Recorder — Model DS-4000 Olympus DS-4000 Recorder — Illustrations These two illustrations identify the parts of the DS-4000 recorder and the functions on the LCD display screen. -
Page 10: Memory Card
Recorder supports cards with memory capacity of 16 MB to 512 MB. The DS-4000 shipped from Nuance comes with a 32 MB card. There are two recording modes that can be configured on the DS-4000: • SP (Standard Play) records in DSS 12 kHz 13.7 kbps •... -
Page 11: Connecting Your Ds-4000 Recorder To Your Pc
PC workstation. Connect the other end of the USB cable to the cradle. When you are ready to upload voice files from the DS-4000 recorder to the EXVoice server, place the recorder in the cradle. Files on the recorder are uploaded automatically through the Dictaphone EXV Olympus Uploader application. - Page 12 ® Olympus DS-4000 Digital Recorder Installation and User Guide When the batteries are charged, open the card cover and insert the memory card into the slot on the left side of the recorder. To remove a card, turn off the recorder, open the storage compartment, and push in to eject the card.
-
Page 13: Chapter 2: Installing The Olympus Dss Player Pro Software
Chapter 2 ® Installing the Olympus DSS Player Pro Software Chapter Overview This chapter covers: • installing the DSS Player Pro software • installing the latest program patch and firmware updates • disabling the Directrec Configuration Tool • configuring the Device Detector program... -
Page 14: Installing The Olympus Dss Player Pro Software
Pro Software The Olympus DSS Player Pro software, available on the Olympus DSS Player Pro software CD provided with your DS-4000 recorder, must be installed on each provider’s PC workstation. You will not actually use the Player Pro software. However, it must be installed on the PC so the Dictaphone EXV Olympus Uploader application can recognize the DS-4000 recorder. - Page 15 ® Chapter 2: Installing the Olympus DSS Player Pro Software ® Select Install English (US) Version. The InstallShield Wizard starts and the Welcome window appears. Click Next. Read the License Agreement and click Yes. The Customer Information window appears. 5. In the Customer Information window, enter your User Name,...
- Page 16 Olympus DS-4000 Digital Recorder Installation and User Guide find the 20-digit Serial Number of the DS-4000 recorder on a green or blue card in the DS-4000 box. It is labeled License ID Number. After entering the Serial Number, click Next Note: Neither Nuance nor Olympus track software licenses shipped to customers.
- Page 17 ® Chapter 2: Installing the Olympus DSS Player Pro Software Click Yes to confirm the creation of the new folder. In the Select Program Folder window, click Next to accept the default Program Folders location.
- Page 18 ® Olympus DS-4000 Digital Recorder Installation and User Guide 10. If the Selection of recorder window appears, select DS-4000 and click Next. 11. In the Start Copying Files window, click Next to accept the folders shown.
- Page 19 PDF version of the Olympus Digital Voice Recorder DS-4000 Instructions manual, check the box labeled Install “Adobe Acrobat Reader” and click Next.
-
Page 20: Upgrading The Dss Player Pro Software
Upgrading the DSS Player Pro Software After completing the installation of the DSS Player Pro software from the CD, go to the Olympus Web site to check for upgrades to this software. Locate, download, and install the latest program patch for Release 4.x from the Olympus Web site. - Page 21 Type support DS-4000 and click Go. c. On the resulting page, scroll down and locate the heading and link for DS-4000 > Software Downloads and click the DS-4000 > Software Downloads link. d. On the next page, click Microsoft Windows and continue at Step 2 on page 19.
- Page 22 ® Olympus DS-4000 Digital Recorder Installation and User Guide b. Click Professional Dictation. c. Click DS-4000. d. Click Microsoft Windows and continue at Step 2 below.
- Page 23 ® Chapter 2: Installing the Olympus DSS Player Pro Software On the Software Downloads page for the DS-4000 Digital Voice Recorder, scroll down to the bottom and click the link for the DSS Player Pro Release 4 Update Version 4.10.3.
-
Page 24: Installing The Dss Player Pro Update
® Olympus DS-4000 Digital Recorder Installation and User Guide When the download is finished, click Close in the File Download dialog box. Close Internet Explorer by clicking the Close button in the top, right corner. Installing the DSS Player Pro Update Open Windows Explorer and navigate to the TEMP folder, or to the folder where you saved the downloaded file. - Page 25 ® Chapter 2: Installing the Olympus DSS Player Pro Software Read the License Agreement and click Yes. A progress bar is shown while the DSS Player Pro software update is installed. When the update is complete and the Wizard Complete window displays, click Finish to complete the installation of the software update.
-
Page 26: Configuring The Olympus Software
Olympus DS-4000 Digital Recorder Installation and User Guide Configuring the Olympus Software When you install the Olympus DSS Player Pro software, three separate pieces of software are installed on your PC, each of which serves a different function. • Olympus DSS Player Pro software •... -
Page 27: Olympus Device Detector 3
3 must be present in the Startup menu so it starts automatically each time you start your PC. The Device Detector 3 icon in the Notification Area indicates the program is running in the background to sense when the DS-4000 recorder is connected and facilitates communication between the recorder and the Dictaphone EXV Olympus Uploader application. - Page 28 ® Olympus DS-4000 Digital Recorder Installation and User Guide • If the icon is not in the Notification Area, meaning the Device Detector program is not running, continue with Step 2 to start this program. • If the icon is in the Notification Area, meaning the Device Detector program is running, continue with Step 4.
- Page 29 ® Chapter 2: Installing the Olympus DSS Player Pro Software Be sure that the DSSPlayerPro Dictation Module check box is not checked. If it is checked, click this box to clear the check mark. Click OK to close the Setting dialog box.
- Page 30 ® Olympus DS-4000 Digital Recorder Installation and User Guide c. Select Copy from the shortcut menu. d. Navigate back to C:\Documents and Settings\All Users\Start Menu\Programs\Startup. e. Right-click anywhere in the right panel to open the shortcut menu. f. Select Paste Shortcut from the shortcut menu to put the Device Detector 3 shortcut in the Startup folder.
-
Page 31: Chapter 3: Installing The Dictaphone Exv Olympus Uploader Application
Chapter 3 Installing the Dictaphone EXV Olympus Uploader Application Chapter Overview This chapter covers: • installing the Dictaphone EXV Olympus Uploader application for use with the DS-4000 recorder • testing the connection between the DS-4000 and the EXVoice server... -
Page 32: Installing The Olympus Uploader
Installing the Olympus Uploader The Dictaphone EXV Olympus Uploader application provides a simple way for users of the Olympus DS-4000 recorder to upload dictations to your PC and to the EXVoice server. Your Nuance Service Representative can provide the installation file for the Olympus Uploader application to you. - Page 33 Chapter 3: Installing the Dictaphone EXV Olympus Uploader Application In the right panel, double-click the Enterprise Express Voice Olympus Uploader.exe file to start the installation. The Dictaphone EXV Olympus Uploader - InstallShield Wizard starts. Click Next.
- Page 34 ® Olympus DS-4000 Digital Recorder Installation and User Guide In the Customer Information dialog box, enter the Customer Name and Company. Click Next. In the Destination Folder window, click Next. to accept the default location where the software is to be installed.
- Page 35 Chapter 3: Installing the Dictaphone EXV Olympus Uploader Application Click Next to continue. Click Install to start the installation. A progress bar is shown while the Olympus Uploader application is installed.
-
Page 36: Installing The Olympus Uploader With Exvoice 6.5
Olympus Uploader application as indicated here. Note: If your facility is using EXVoice Version 7.0, refer to “Installing the Olympus Uploader with EXVoice 7.x” beginning on page 28 for the installation procedures. To install the Olympus Uploader application at each workstation using EXVoice 6.5:... - Page 37 Chapter 3: Installing the Dictaphone EXV Olympus Uploader Application In the right panel, double-click the Enterprise Express Voice Olympus Uploader.exe file to start the installation. The Enterprise Express Voice Olympus Uploader - InstallShield Wizard starts. Click Next. In the Customer Information dialog box, enter the Customer Name...
- Page 38 ® Olympus DS-4000 Digital Recorder Installation and User Guide In the Destination Folder window, click Next. to accept the default location where the software is to be installed. Click Install to start the installation.
- Page 39 Chapter 3: Installing the Dictaphone EXV Olympus Uploader Application A progress bar is shown while the Olympus Uploader application is installed. When the InstallShield Wizard is complete, click Finish to complete the installation.
-
Page 40: Testing The Connection Between The Ds-4000 Recorder And Exvoice
EXVoice Right-click the Olympus Uploader icon in the Notification Area and click Open to start the Olympus Uploader application. Note: If the Olympus Uploader icon is not in the Notification Area, select Start > All Programs > Dictaphone >... - Page 41 You are connected Connect the DS-4000 to the PC with the USB cable. The Found New Hardware dialog appears. Please wait while the device is configured. When the Olympus Uploader starts, you need to configure the provider.
- Page 42 ® Olympus DS-4000 Digital Recorder Installation and User Guide...
-
Page 43: Chapter 4: Configuring Exvoice For Using The Ds-4000 Recorder
• creating ID field matching for the users/ providers • configuring the master profile • configuring users/providers • assigning and reassigning an Olympus recorder to a user/provider • adding the input type to Job Lister • uploading a test dictation... -
Page 44: Before You Begin
Note: Instructions are included in this document for editing an existing Master Profile and configuring the Olympus settings. If you prefer, you can create a Master Profile specifically for Olympus users and assign users to that Master Profile or you can customize individual user’s Master Profiles. -
Page 45: Assigning Privileges
Assigning Provider Privileges If you have an existing administrative group for providers, you can edit that group and add the required privilege (which is Olympus Uploader: Execute) or you can create an administrative group just for Olympus providers. Assigning Administrator Privileges... - Page 46 Olympus DS-4000 Digital Recorder Installation and User Guide In the Available Privileges drop-down list, click the down-arrow and select Olympus Uploader to add privileges for administrators and providers using the DS-4000 recorder. For providers: In the Available Privileges listing, double-click Execute to move it to the Selected Privileges list.
-
Page 47: Creating Id Field Matching
Chapter 4: Configuring EXVoice for Using the DS-4000 Recorder Creating ID Field Matching ID Field matching must be used when configuring users for the Olympus DS- 4000 recorder. For providers to use the Olympus DS-4000, you must follow these procedures to set up ID Field matching for each of the worktypes each provider will use when dictating with the DS-4000 recorder. - Page 48 In the Field Text field, type a short description of the worktype up to a maximum of 16 characters; for example, H&P for History and Physical. Note: Up to 10 worktypes can be assigned to the Olympus DS- 4000. The maximum length of the worktype name is 16 characters,.
-
Page 49: Configuring The Master Profile For Using The Olympus Ds-4000 Recorder
Instructions are included in this document for modifying an existing Master Profile for an Olympus user. If you prefer to customize a provider’s master profile or create a new master profile, refer to the instructions in your EXVoice System Administrator Courseware Guide, L-2957-00x. - Page 50 Modifying master profile dialog box opens. Select the Portables tab. In the Portable type group box, select Olympus DS-4000. In the Worktypes group box, select the check box next to each worktype the provider can dictate with using this recorder. Up to ten...
- Page 51 “Reference Number”…, select None. Under DSS (portable) file conversions, select the conversion method for audio files recorded on the Olympus recorder. With any of the first three options in effect, conversion takes place on the PC workstation.
-
Page 52: Configuring The Master Profile In Exvoice 6.5
Select the Lucid/PJL/OlUp tab. In the Require id field edits when jobs are created with group box, be sure that the Olympus check box is not checked. Note: The Require ID field edits when jobs are created with option is only used for Personal Job Lister systems. - Page 53 Chapter 4: Configuring EXVoice for Using the DS-4000 Recorder 5. From the drop-down list under When importing jobs from portables that are aware of “Work Types”…, select Field 1, or the ID field that stores worktypes. From the drop-down list under When importing jobs from portables that are aware of “Reference Number”…, select None.
-
Page 54: Configuring Users For The Ds-4000
Configuring Users for the DS-4000 Before you begin this section, please note the following items: • The user settings for providers who are dictating with the Olympus DS- 4000 must have an EXVoice Client settings login configured and must be assigned to an administrative group that has the Olympus Uploader: Execute privilege granted. - Page 55 Chapter 4: Configuring EXVoice for Using the DS-4000 Recorder Uncheck Account Disabled Enter the Login and password Select the correct Admin group Click when finished.
-
Page 56: Assigning Or Reassigning A Recorder To A User
Recorder to a User Each Olympus DS-4000 recorder has to be assigned to the user/provider who is using it so the recorder and the provider are both recognized by the Olympus Uploader application and the EXVoice system. To assign a new recorder, or to reassign a previously used recorder to a user/ provider, you need access to a workstation that has the Dictaphone EXV Olympus Uploader application installed and configured. -
Page 57: Assigning A Recorder (Exvoice 6.5)
Chapter 4: Configuring EXVoice for Using the DS-4000 Recorder Reassigning a Recorder in EXVoice 7.x At times, you may need to assign an Olympus recorder to a different provider. This can be done by a system administrator at any workstation on which the Olympus Uploader has been installed and configured. - Page 58 Users privilege, and then select the dictation user from a list when the Assign Olympus DS-4000 dialog box opens. Click OK to continue to the Assign Olympus DS-4000 dialog box. Complete the Assign Olympus DS-4000 dialog box settings: • Users group box – When logged in as an administrative user, find and check the check box beside the name of the provider to whom you are assigning this recorder.
- Page 59 Reassigning a Recorder in EXVoice 6.5 At times, you may need to assign an Olympus recorder to a different provider. This can be done by a system administrator at any workstation on which the Olympus Uploader has been installed and configured.
-
Page 60: Adding The Input Type Column To Job Lister Reports
® Olympus DS-4000 Digital Recorder Installation and User Guide To reassign an Olympus DS-4000 recorder to a provider when your facility is using EXVoice Version 6.5: With the recorder turned on, insert the recorder in the cradle. The Dictaphone/Dictaphone DS-3000/DS-4000 Upload Utility opens automatically. -
Page 61: Uploading A Test Dictation
EXVoice server. To perform this procedure, the recorder should be configured according to the information in “Setting Up the DS-4000 Recorder ” beginning on page 7, and the cradle must be connected to the workstation with the USB cable. - Page 62 Upload error message Successful transfer If the Dictaphone DS-3000/DS-4000 Upload Utility does not initiate the upload process, select File > Get Files to see the list of the uploaded files. Note: If the upload utility does not open when you place the recorder in the docking station, the application might have been closed.
- Page 63 Chapter 4: Configuring EXVoice for Using the DS-4000 Recorder The Information column in the log displays data that can aid in troubleshooting the error. Upload error message Successful transfer • Data in the log can be sorted in ascending or descending order by clicking any of the column headings.
- Page 64 ® Olympus DS-4000 Digital Recorder Installation and User Guide...
-
Page 65: Chapter 5: Dictating With The Olympus Ds-4000 Digital Recorder
DS-4000 Digital Recorder Chapter Overview This chapter provides an overview of the basic functions of your Olympus DS-4000 recorder: • Dictating a new report; see page 62. • Setting the priority level for a new dictation; see page 62. • Setting the priority level for an existing dictation;... -
Page 66: Dictating With The Olympus Ds-4000 Digital Recorder
® Olympus DS-4000 Digital Recorder Installation and User Guide Dictating with the Olympus DS- 4000 Digital Recorder Dictating with the DS-4000 To dictate a new report: Turn on your Olympus DS-4000 by sliding the power switch on the back of... -
Page 67: Playing Back A Dictation
Move the slide switch to when finished. STOP Deleting Files from the DS-4000 Recorder To delete a single file from the recorder: Press to scroll through existing dictations and select the dictation you want to delete. -
Page 68: Uploading Files
EXVoice. You must not disconnect the recorder until the upload is complete; otherwise, the same files are transferred again. When the upload is complete, the Olympus Uploader provides a list of the files that were uploaded. Upload error message... - Page 69 ® Chapter 5: Dictating with the Olympus DS-4000 Digital Recorder Check the icons on the left side of the file list: • A green icon indicates successful file transfer. These files have been removed from the recorder. • A red icon indicates the transfer failed.
- Page 70 ® Olympus DS-4000 Digital Recorder Installation and User Guide...
-
Page 71: Chapter 6: Licensing Administration For The Olympus Ds-4000 Recorder
Chapter 6 Licensing Administration ® for the Olympus DS-4000 Recorder Chapter Overview This chapter covers: • administering the Olympus license IDs... -
Page 72: Administering Olympus Dss Player Pro License Ids
• Methods to view or change a license ID for the Olympus software on a specific computer include: • View the ID by starting the DSS Player Pro application and click Help/ About Dictation Module. -
Page 73: Chapter 7: Troubleshooting The Ds-4000 Recorder
Chapter 7 Troubleshooting the DS- 4000 Recorder Chapter Overview This chapter covers: • preliminary troubleshooting steps to take to resolve problems with the Olympus Uploader application and the Olympus DS-4000 recorder. -
Page 74: Troubleshooting
Dictaphone EXV Clients > Dictaphone DS-4000 Uploader. Files fail to upload If you get a failed icon (red icon) and error messages in the Olympus Uploader log window: • Check the error messages in the Information column for clues. If you are unable to diagnose and correct the problem using the error message, you can upload the log file to the VoiceNet >... - Page 75 The following table shows a list of error messages that can be passed to the Olympus Uploader from the EXVoice system. Note that the %s and %d in the list below represent a variable that is assigned specific data related to the error message.
- Page 76 Olympus DS-4000 Digital Recorder Installation and User Guide Troubleshooting the Olympus Recorder The table below lists some of the common problems you might encounter with the Olympus DS-4000 recorder, along with suggestions for correcting these issues. Symptom Action Nothing appears on the screen •...
- Page 77 Reader and it might have been installed without your being aware of it. There is a known conflict with Adobe Photo Manager in that this program can recognize the DS-4000 recorder before the Olympus Device Detector does. Symptoms include the intermittent disappearance of the Device Detector from the Notification Area.
- Page 78 ® Olympus DS-4000 Digital Recorder Installation and User Guide...
-
Page 79: Index
20 software upgrade 16 recording mode, setting the 8 SP Mode 4 validation of input data ID field matching for 43 variable control voice activator, setting the 8 Web site, Olympus software download 16 xD-Picture card memory card 6... - Page 80 ® Olympus DS-4000 Digital Recorder Installation and User Guide...