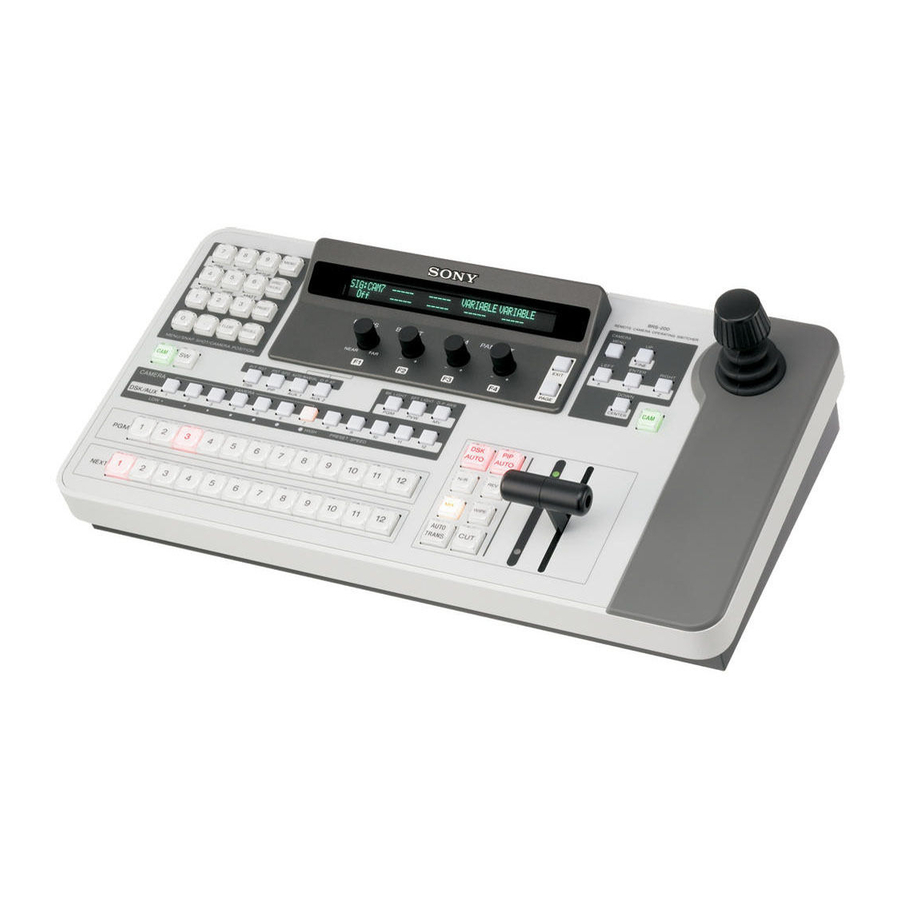
Sony BRS-200 Quick Reference Manual
Remote camera operating switcher
Hide thumbs
Also See for BRS-200:
- Operating instructions manual (159 pages) ,
- Operational manual (91 pages)

Related Manuals for Sony BRS-200


Summary of Contents for Sony BRS-200
- Page 1 4-145-708-11 (1) Remote Camera Operating Switcher Quick Reference Guide BRS-200 © 2009 Sony Corporation...
-
Page 2: About This Manual
For system configurations using other equipment and detailed operations of the switcher, refer to the Operating Instructions prepared separately. System Configuration z BRS-200 Remote Camera Operating Switcher (Processor Unit and Control Panel): 1 set z Sony BRC-series VISCA cameras (with the HD-SDI output card attached):... -
Page 3: System Connection
System Connection Note Be sure to turn off all the equipment before connection. Monitor equipped with Monitor equipped BRC-series cameras HD-SDI input with DVI input with the HD-SDI output card attached – – – – – – DVI IN – –... -
Page 4: Basic Setups
Basic Setups This section explains the basic setups required for viewing images shot by the cameras on the monitor with multi-viewer display, provided that the factory-preset settings are not changed. Note If you have changed the factory-preset settings, use “FACT SET” on menu page 955 to reset the settings to default. -
Page 5: Menu Operation
Display panel SYSTEM FORMAT FRAME ASPECT APPLY Numeric buttons and SYS MODE 59.94 16:9 Exec . (dot) button MENU button Control Panel BRS-200 MENU REMOTE CAMERA OPERATING SWITCHER SYSTEM FORMAT FRAME ASPECT APPLY SETUP CAMERA MENU SYS MODE 59.94 16:9... -
Page 6: Setting The System Format
Setting the System Format Set the video signal format and the aspect ratio to be supported by the switcher. Display menu page 951 by pressing buttons MENU t 9 t . (dot) t 5 t 1 in order. SYSTEM FORMAT FRAME ASPECT APPLY... - Page 7 When you press the SW mode button, the message “Save setup data? [PAGE] (yes) or [EXIT] (no)” may appear on the display panel. Press the PAGE button. The changed setting will be saved, and the switcher will enter the SW (switcher) mode.
- Page 8 If the images from the two cameras are displayed on the monitor, the setup is successful and completed. CAM1 CAM2 Image from the camera Image from the camera connected to the SDI IN 1 connected to the SDI IN 2 connector connector Sony Corporation Printed in Japan...