
Related Manuals for Fisher & Paykel RS2484WR


Summary of Contents for Fisher & Paykel RS2484WR
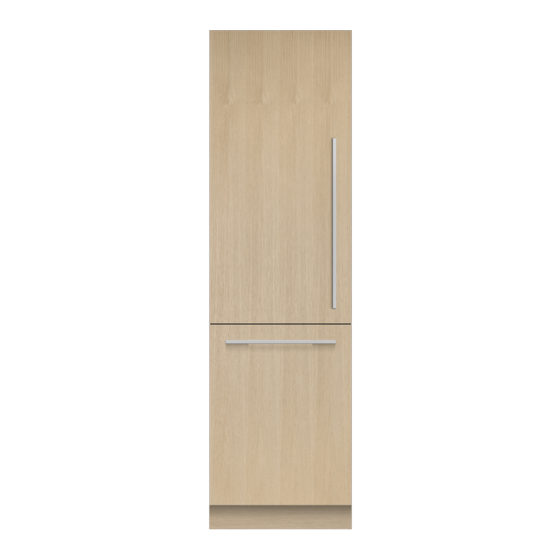
- Page 1 INTEGRATED COLUMN REFRIGERATOR FREEZER RS2484WR, RS2484WL, RS3084WR & RS3084WL models INSTALLATION GUIDE US CA 863026B 03.20...
-
Page 3: Table Of Contents
CONTENTS Safety and warnings Dual install options Cavity dimensions — RS24 + RS24 dual install Integrated columns — refrigerator–freezer Check your appliance Cavity dimensions — RS24 + RS30 dual install Cavity dimensions — RS30 + RS30 dual install Moving your appliance Before installation Toe kick panel dimensions —... -
Page 4: Safety And Warnings
SAFETY AND WARNINGS WARNING! WARNING! To avoid hazard, follow these instructions carefully before installing or using this appliance. Electric Shock Hazard Please make this information available to the person installing the appliance. Assume all electrical parts are live. Read and follow the safety and warnings Disconnect power supply before servicing and installation. -
Page 5: Integrated Columns - Refrigerator-Freezer
Open the appliance door to remove the alignment brackets from both sides of the appliance, and then re-tighten the screws. Installing the door panel RS2484WR RS3084WR Stainless steel panel Protect the finish of the Fisher & Paykel Stainless Steel door panels from any scratch or damage. -
Page 6: Check Your Appliance
CHECK YOUR APPLIANCE Ensure you follow the unpacking steps printed on the packaging box of your appliance. Check that your appliance is the correct model as per your order. Check that the components and install kits are complete. Remove external box (trims kit) Remove installation kit, miscellaneous from the back of the appliance. -
Page 7: Moving Your Appliance
MOVING YOUR APPLIANCE Follow the steps below to move your appliance to the install location. Be careful when tilting the appliance forward/backward. Tape the door shut to prevent opening while moving the appliance. Hand truck 1 Remove the brackets from the 2 Tilt the appliance slightly non-hinge side of the pallet. -
Page 8: Before Installation
BEFORE INSTALLATION Check the cabinetry Check the dimensions of the cabinetry: height, width, depth, floor level, finished alcove returns. Refer to 'Cavity Dimensions' for the correct measurements. Check the power supply and water connections Ensure that there is a separate power socket for each appliance. Avoid sharing the power point with other appliances to prevent accidental switching off of the appliance. -
Page 9: Supplied Parts
SUPPLIED PARTS DOOR PANEL ATTACHMENT KIT INSTALL FASTENERS KIT Side bracket Bracket slider Side spacer bracket Depth alignment gauge Barbed plug 8Gx16 Countersunk screw For Custom door panels: M5x12 Cross-head screw (32) ANTI-TIP BRACKET ASSEMBLY MISCELLANEOUS PARTS Supplied in separate bags Anti-tip bracket Masonry plug 10-12x35mm crosshead screw... - Page 10 SUPPLIED PARTS TRIMS INSTALL KIT (EXTERNAL BOX) WATER FILTER KIT Top door panel side extrusion Cabinet side trim Collet locking clip Water filter Bottom drawer panel side Bottom drawer top trim extrusion (2) 1/4” (6.35mm) Adaptor 7/16" (11mm) UNS Stainless steel braided hose MISCELLANEOUS ITEM PACK SUPPLIED TOOLS INTEGRATED COLUMN...
-
Page 11: Required Parts
REQUIRED PARTS TOE KICK PANEL INSTALL JOINER KIT TOE KICK PANEL Not supplied and can be purchased separately through an authorised Fisher & Paykel dealer. Used for dual or multiple installation of appliances. Can be purchased separately through an Visit fisherpaykel.com for more information. authorised Fisher &... -
Page 12: Door Panel Set
DOOR PANEL SET DOOR AND DRAWER HANDLE KITS Not supplied and must be purchased separately through an authorised Fisher & Paykel dealer. Visit fisherpaykel.com for more information. Select among the handle kit options below: Stainless steel door panel set HANDLE KIT RS24 RS30 Not supplied and must be purchased... -
Page 13: Hinge Change Kit
HINGE CHANGE KIT Not supplied and must be purchased separately. Available online at fisherpaykel.com. MODEL LEFT HINGE TO RIGHT HINGE KIT MODEL RIGHT HINGE TO LEFT HINGE KIT RS24 CA 848184P RS24 CA 848183P RS30 CA 848184P RS30 CA 848183P Top hinge pocket RH K05 bottom adaptor bracket RH Top hinge pocket LH... -
Page 14: Product Dimensions - Rs24 Model
PRODUCT DIMENSIONS — RS24 MODEL PRODUCT DIMENSIONS A Overall height of product 2134 B Overall width of product 23 3/4 C Overall depth of product (excluding front door panel) PRODUCT WEIGHT Weight (with packaging) Weight (without packaging) PROFILE VIEW FRONT VIEW... -
Page 15: Cavity Dimensions - Rs24 Model
CAVITY DIMENSIONS — RS24 MODEL FRAMELESS CABINETRY FRAMED CABINETRY Aligns appliance flush with the cabinetry. Aligns appliance flush with the frame of cabinetry. DIMENSIONS A Overall height of cavity 2134 B Overall width of cavity C Minimum overall depth of cavity* D Minimum cabinetry gap clearance from edge of door panels 1/8”... -
Page 16: Door Panel Dimensions - Rs24 Model
DOOR PANEL DIMENSIONS — RS24 MODEL STAINLESS STEEL PANEL CUSTOM PANEL DIMENSIONS DIMENSIONS A Height of top door panel A Height of top door panel 49 3/8 1254 49 3/8 1254 B Height of bottom drawer panel B Height of bottom drawer panel 30 3/8 30 3/8 C Width of door/drawer panel... -
Page 17: Custom Door Panel Install Dimensions - Rs24 Model
CUSTOM DOOR PANEL INSTALL DIMENSIONS — RS24 MODEL Dimensions apply for the preparation and installation of Custom door panels. For Dwg and Dxf files of the below panel preparation download the folder on thekitchentools.fisherpaykel.com. The thickness of the custom door panel can vary provided that the screws do not penetrate beyond the full depth of the door panel. Measurements of screw hole locations can vary depending on the height of toe kick 50 –... -
Page 18: Door Clearance - Rs24 Model
DOOR CLEARANCE — RS24 MODEL 115° DOOR OPENING 90° DOOR OPENING Insert hinge limiting pin Before pushing the appliance into the cabinetry, insert the supplied hinge limiting pin into the borehole of the top hinge. The hinge limiting pin limits the door swing to 90°. -
Page 19: Drawer Clearance - Rs24 Model
DRAWER CLEARANCE — RS24 MODEL DIMENSIONS A Maximum drawer extension when open (excluding handle) 15 3/4 B Maximum drawer extension when open (including handle) 18 1/8... -
Page 20: Toe Kick Dimensions - Rs24 Model
TOE KICK DIMENSIONS — RS24 MODEL STAINLESS STEEL TOE KICK PANEL CUSTOM PANEL TOE KICK PANEL Can be purchased separately through an authorised Fisher & Paykel dealer. Visit fisherpaykel. For Custom door panel installation, a custom toe kick 2” – 6” (50 – 152mm) can be com for more information. -
Page 21: Toe Kick Install Options
TOE KICK INSTALL OPTIONS For custom toe kick with 6" Standard toe kick height is (152mm) height. 4" (102mm) with Stainless steel door panel. For custom toe kick Min 2 7/8" (73mm) – max with 2" (50mm) height 4" ( 102mm) toe kick depth (extra lower grille attached). -
Page 22: Product Dimensions - Rs30 Model
PRODUCT DIMENSIONS — RS30 MODEL PRODUCT DIMENSIONS A Overall height of product 2134 B Overall width of product 29 3/4 C Overall depth of product (excluding front door panel) PRODUCT WEIGHT Weight (with packaging) Weight (without packaging) FRONT VIEW PROFILE VIEW... -
Page 23: Cavity Dimensions - Rs30 Model
CAVITY DIMENSIONS — RS30 MODEL FRAMELESS CABINETRY FRAMED CABINETRY Aligns appliance flush with the cabinetry. Aligns appliance flush with the frame of cabinetry. DIMENSIONS 1 Overall height of cavity 2134 2 Overall width of cavity 3 Minimum overall depth of cavity* 4 Minimum cabinetry gap clearance from edge of door panels 1/8”... -
Page 24: Door Panel Dimensions - Rs30 Model
DOOR PANEL DIMENSIONS — RS30 MODEL STAINLESS STEEL PANEL CUSTOM PANEL DIMENSIONS DIMENSIONS A Height of top door panel 49 3/8 1254 A Height of top door panel 49 3/8 1254 B Height of drawer door panel 30 3/8 B Height of drawer door panel 30 3/8 C Width of door panel 29 3/4... -
Page 25: Custom Door Panel Install Dimensions - Rs30 Model
CUSTOM DOOR PANEL INSTALL DIMENSIONS — RS30 MODEL Dimensions apply for the preparation and installation of Custom door panels. For Dwg and Dxf files of the below panel preparation download the folder on thekitchentools.fisherpaykel.com. The thickness of the custom door panel can vary provided that the screws do not penetrate beyond the full depth of the door panel. Measurements of screw hole locations can vary depending on the height of toe kick 50 –... -
Page 26: Door Clearance - Rs30 Model
DOOR CLEARANCE — RS30 MODEL 115° DOOR OPENING 90° DOOR OPENING Insert hinge limiting pin Before pushing the appliance into the cabinetry, insert the supplied hinge limiting pin into the borehole of the top hinge. The hinge limiting pin limits the door swing to 90°. -
Page 27: Drawer Clearance - Rs30 Model
DRAWER CLEARANCE — RS30 MODEL DIMENSIONS A Maximum drawer extension when open (excluding handle) 15 3/4 B Maximum drawer extension when open (including handle) 18 1/8... -
Page 28: Toe Kick Dimensions - Rs30 Model
TOE KICK DIMENSIONS — RS30 MODEL STAINLESS STEEL TOE KICK PANEL CUSTOM PANEL TOE KICK PANEL Can be purchased separately through an authorised Fisher & Paykel dealer. Visit fisherpaykel. For Custom door panel installation, a custom toe kick 2” – 6” (50 – 152mm) can be com for more information. -
Page 29: Dual Install Options
DUAL INSTALL OPTIONS The following are options for dual/multiple installation with reference to the door opening range and partition (optional) between two appliance combinations. Beware of clashing (circled) when opening the doors. Use a hinge limiting pin to restrict door opening rotation to 90°. Refer to ‘Door Clearance’ for more information. If installing a partition between two appliances, it must have enough clearance to ensure the doors/handles do not interfere with one another when opening or closing. -
Page 30: Cavity Dimensions - Rs24 + Rs24 Dual Install
CAVITY DIMENSIONS — RS24 + RS24 DUAL INSTALL FRAMELESS CABINETRY FRAMED CABINETRY Aligns appliance flush with the cabinetry. Aligns appliance flush with the frame of cabinetry. DIMENSIONS A Overall height of cavity 2134 B Overall width of cavity 1219 C Minimum overall depth of cavity* D Minimum cabinetry gap clearance from edge of door panels 1/8”... -
Page 31: Cavity Dimensions - Rs24 + Rs30 Dual Install
CAVITY DIMENSIONS — RS24 + RS30 DUAL INSTALL FRAMELESS CABINETRY FRAMED CABINETRY Aligns appliance flush with the cabinetry. Aligns appliance flush with the frame of cabinetry. DIMENSIONS A Overall height of cavity 2134 B Overall width of cavity 1372 C Minimum overall depth of cavity* D Minimum cabinetry gap clearance from edge of door panels 1/8”... -
Page 32: Cavity Dimensions - Rs30 + Rs30 Dual Install
CAVITY DIMENSIONS — RS30 + RS30 DUAL INSTALL FRAMELESS CABINETRY FRAMED CABINETRY Aligns appliance flush with the cabinetry. Aligns appliance flush with the frame of cabinetry. DIMENSIONS A Overall height of cavity 2134 B Overall width of cavity 1524 C Minimum overall depth of cavity* D Minimum cabinetry gap clearance from edge of door panels 1/8”... -
Page 33: Toe Kick Panel Dimensions - Dual Install
TOE KICK PANEL DIMENSIONS — DUAL INSTALL STAINLESS STEEL PANEL CUSTOM PANEL toe kick panel toe kick panel door panels door panels TOE KICK PANEL (CA 25396) RS24 + RS24 MODELS RS24 + RS24 MODELS DIMENSIONS DIMENSIONS A Width of toe kick A Width of toe kick 47 7/8 1216... -
Page 34: Power Supply Dimensions
POWER SUPPLY DIMENSIONS SINGLE INSTALLATION DUAL INSTALLATION Electrical connection must be within this space if located behind the appliance and ELECTRICAL AND PLUMBING CONNECTIONS must not protrude from the back wall. 1 Recommended location for connections in adjacent area or unit 2 Alternative location for connections at rear of cavity ELECTRICAL DIMENSIONS A Overall height of supply area... -
Page 35: Electrical Specification
ELECTRICAL SPECIFICATION PLUMBING SPECIFICATION Power cord Power cord Water hose Water hose Supply 115 VAC, 60 Hz Supply 1/2” (12.7mm) BSP Stainless steel braided hose with adaptor Service 10 amp circuit Pressure psi (kPa) min 150psi (22) / max 827psi (120kPa) @ 68°F Socket 3-prong grounding-type (20°C) -
Page 36: Install Anti-Tip Bracket
INSTALL ANTI-TIP BRACKET Anti-tip bracket assembly kit overhead cabinetry back wall Anti-tip bracket stud Locating the attachment position of anti-tip bracket 1 Measure the height (A) of the attachment location from the floor to the alcove return at the back wall, and mark a horizontal line (B). - Page 37 INSTALL ANTI-TIP BRACKET Anti-tip bracket assembly kit For plaster board wall Roll the appliance slowly into Fix the anti-tip bracket to the the cabinetry until the anti-tip wall with #10x40mm cross head Anti-tip bracket bracket overlaps the back edge min 7 1/16" (180mm) screws, and screw tightly with a of the appliance.
-
Page 38: Connect Water And Power Supply
CONNECT WATER AND POWER SUPPLY Water fittings kit Collet locking clip Connecting to water supply 1 Roll the appliance to the front of the cabinetry close enough to Rear side allow access at the back for power and water connection. 2 Insert the adaptor end of the braided 7/16"... - Page 39 CONNECT WATER AND POWER SUPPLY Water fittings kit 5 Insert the tube end of the adaptor fully into the PLV (C) at the bottom front of the appliance. Collet locking clip 7/16" (11mm) BSP Stainless steel braided hose with adaptor 6 Secure the connection with a locking clip between the PLV and hose end of adaptor (D).
-
Page 40: Position And Alignment In Cabinetry
POSITION AND ALIGNMENT IN CABINETRY Install fasteners kit Attaching the barbed plugs Barbed plugs 1 Before rolling into the cavity, insert a barbed plug into a large hole at the top left side (A) of the appliance. The plugs protect the inside surface of cabinetry from being damaged by screws when pushing in the appliance. - Page 41 POSITION AND ALIGNMENT IN CABINETRY Install fasteners kit Attaching the depth alignment gauges Cabinet depth 1 Loosen the right and left screws at the top and bottom alignment gauge sides of the door. (A) 2 Locate the alignment gauges at correct orientation to the right and left screws.
- Page 42 POSITION AND ALIGNMENT IN CABINETRY Positioning into the cabinetry min 7 1/16" (180mm) 1 Roll the appliance slowly into the cabinetry until the anti-tip bracket overlaps the back edge of the appliance. Bracket Ensure the bracket overlaps the appliance by a minimum 7 1/16"...
- Page 43 POSITION AND ALIGNMENT IN CABINETRY Tools Aligning with the depth gauges 1 Mark the step of the depth gauges (A, B) on both sides of the door based on the thickness of door panel. Example illustrations showing 1" (25.4mm) door panel Cross-head screwdriver thickness marked on the gauges.
- Page 44 POSITION AND ALIGNMENT IN CABINETRY Tools Cross-head screwdriver Adjusting the alignment in the cabinetry Clockwise turn of the front and rear adjustment screws (A) raise the height of the appliance. Front foot Rear foot Powered driver Counter-clockwise turn of the adjustment screws lower adjustment adjustment (optional)
-
Page 45: Secure Appliance To Cabinetry
SECURE APPLIANCE TO CABINETRY Install fasteners kit 8Gx16 Countersunk screw (6) Securing the top brackets Fix the top brackets to the ceiling surface of the cabinetry with 8Gx16 countersunk screws. (A) Tools Cross-head screwdriver Powered driver (optional) Securing the side brackets Fix the side brackets (2x) to the lower right and left sides of the cabinetry with 8Gx16 countersunk screws. -
Page 46: Remove Hanging Brackets
REMOVE HANGING BRACKETS Tools 1 Remove the M8 nut (A) and M8 washer (B) from the M8 screw at the top of the refrigerator door using the Powered driver supplied hex key and spanner. Repeat for the top of the drawer door. M8 hex key top hanging bracket 2 Remove the top and bottom hanging brackets (D, E) and... -
Page 47: Install Door And Drawer Panels
INSTALL DOOR AND DRAWER PANELS Door handle kit STAINLESS STEEL PANELS CUSTOM PANELS Remove the protective film around the handle attachment area of the stainless steel panel before installing the handle. M5x25 Hex screw (4x) Tools Attaching refrigerator door handle Attaching refrigerator door handle 1 Secure the door handle to the handle 1 Refer to 'Custom door panel... - Page 48 INSTALL DOOR AND DRAWER PANELS Door panel STAINLESS STEEL PANELS CUSTOM PANELS attachment kit custom door panel hanging bracket Attaching top hanging bracket Side bracket Attaching top hanging 1 Secure the top hanging bracket bracket (A) to the screw 1 Mark a line across holes of the refrigerator the center of the door panel with 8Gx16...
- Page 49 INSTALL DOOR AND DRAWER PANELS Tools Hanging the refrigerator door panel 1 Hold the door panel at an angle towards the top of the refrigerator door (A). Powered driver (with 2.5mm drill bit) 2 Lower the screw holes of the hanging bracket Cross-head screwdriver onto the adjustment screws at the top of the refrigerator door.
- Page 50 INSTALL DOOR AND DRAWER PANELS Tools Ensure the side brackets are loosely screwed when adjusting the height of the door panel. Do not adjust the door panel height when the side brackets are screwed tight. This can generate friction which causes the hanging brackets to bend.
-
Page 51: Install Locking Bracket
INSTALL LOCKING BRACKET INSTALL ADJUSTMENT BRACKETS Tools Cross-head screwdriver Cutter M4 hex key 1 Loosen the screw at the bottom 1 Loosen the cap screws (C) of the of the refrigerator door, and slide adjustment brackets (D) on both 13mm spanner the locking bracket (A) out until it sides of the plinth with a hex key. -
Page 52: Install Toe Kick Panel
INSTALL TOE KICK PANEL Miscellaneous components Attaching the mounting plate Air toe kick seal 1 Re-attach the toe kick mounting plate (A) to the plinth using same screws that were set aside previously. 2 If toe kick depth is less than 3 5/8" (92mm), attach an air toe kick seal (B) to the mounting plate. -
Page 53: Install Toe Kick Grilles
INSTALL TOE KICK GRILLES INSTALL TOP TRIM Tools Installing the top grille Reinstalling the top trim 1 Reattach the top grille (A) 1 Slide one end of the top trim Cutter using the same screws set (A) into the hinge pocket aside previously. -
Page 54: Install Water Filter
INSTALL WATER FILTER Supplied tools Inserting the water filter Removing and replacing the filter 1 Remove the packaging from 1 To remove the water filter, the water filter. turn the filter removal tool Water filter 2 Align the filter head with the counterclockwise and pull slot of the filter removal tool out the filter. -
Page 55: Install Air Flow Divider
INSTALL AIR FLOW DIVIDER Miscellaneous The air flow divider blocks the air flow from bypassing the front of the bottom grille. components Flow divider cap 1 Remove the adhesive layer (A) off the air flow divider. Tools 2 Reinstall the air flow divider (B) to the bottom of the freezer drawer with screw. -
Page 56: Install Cabinet Side Trims
INSTALL CABINET SIDE TRIMS Install parts Dual adhesive strips are pre-attached at four locations along the side trim. 1 Peel off the liners from the 3 Hold the same angle and Cabinet side trim dual adhesive strips (A). slide the side trim bottom end behind the lower hinge down to the bottom drawer side. -
Page 57: Install Door And Drawer Side Trims
INSTALL DOOR AND DRAWER SIDE TRIMS Trims install kit Install door top extrusion Install drawer top and side trims Top door panel side 1 Align the top extrusion (A) 1 Remove the adhesive extrusion (2) to the top of the door, and backing of adhesive strips front of door match the notch (B) with the... -
Page 58: Dual Installation
DUAL INSTALLATION Install fasteners kit Attach central spacer to cabinetry 1 Measure the widths from the left (A) and right (B) cabinetry Cabinet depth alignment sides towards the centre to determine the spacer location. gauges (4) Refer to "Cavity dimensions' page for correct width of the Top joiner appliance. - Page 59 DUAL INSTALLATION Install fasteners kit Attaching the depth alignment gauges 1 Loosen the screws (A) at the cabinetry sides of the door and drawer of each appliance. 2 Locate the alignment gauges (B) at correct orientation to Cabinet depth alignment the right and left side screws.
- Page 60 DUAL INSTALLATION Tools Aligning the first appliance into the cabinetry min 7 1/16" (180mm) 1 Roll the first appliance (A) slowly into one side of the cabinetry until the anti-tip bracket (B) overlaps the back edge of the appliance. Cross-head screwdriver Ensure the bracket overlaps the appliance by a minimum 7 1/16"...
- Page 61 DUAL INSTALLATION Install fasteners Adjusting the height of first appliance in cabinetry 8Gx16 Countersunk screw (6) 1 Turn the front and rear adjustment screws clockwise Rear foot Front foot to raise height of the appliance adjustment adjustment screw and counter-clockwise to screw Securing first appliance in Foot...
- Page 62 DUAL INSTALLATION Tools Aligning the second appliance into the cabinetry min 180mm 1 Push the second appliance (A) to roll slowly into the other side of the cabinetry side by side with the first appliance. Cross-head screwdriver Ensure the bracket (B) overlaps the appliance by a minimum 180mm for a secure hold.
- Page 63 DUAL INSTALLATION Top joiner fastener kit M5x20 Cap screw (1) Securing the top brackets 1 Secure the top caps of both appliances to the central spacer with M5x20 cap screw (A) and washer (B). M5x16x1 Plain washer 2 Secure the top brackets to the ceiling surface of the cabinetry with 8Gx16 countersunk screws.
-
Page 64: Change The Door Hinges (Optional)
CHANGE THE DOOR HINGES (OPTIONAL) You have the option to switch the door hinge side of your appliance from right hand hinge to left hand hinge or vice versa. A hinge change kit is required for this Tools installation, and must be purchased separately. T2 star-head screwdriver ‘0’... - Page 65 CHANGE THE DOOR HINGES (OPTIONAL) Tools Removing the top door hinge T2 star-head screwdriver 1 Rotate the top hinge (A) outwards and remove the top hinge pocket cover (B) using the flat head screwdriver in the slot of the cover. 2 Unscrew M6x16 countersunk screws (C) to remove top hinge, and set aside to use later.
- Page 66 CHANGE THE DOOR HINGES (OPTIONAL) Tools Moving the sensor housing T20 star-head screwdriver Flat-head screwdriver 5 Reinstall the sensor 4 Move the sensor 1 Unclip the hall sensor housing using #8x16 housing to align the from the housing. screws (2x) into the opposite hall sensor clip with the centre pre-drilled holes in...
- Page 67 CHANGE THE DOOR HINGES (OPTIONAL) Hinge change assembly Reinstalling the top hinge 1 Reinstall the hinge top bracket and bracket spacer with M5x12 countersunk screws (A) on the new hinge Hinge (right or left) top side at the other side of the appliance. pocket (1) 2 Install the new hinge pocket and alcove top bracket on the new hinge side using two (2x) M6x16...
- Page 68 CHANGE THE DOOR HINGES (OPTIONAL) Hinge change assembly K05 top adaptor bracket R/L (1) use new top adaptor bracket Changing the top door bracket 1 Unscrew the M5x10 screws (4x) to remove the top adapter bracket from the top of the door (A). K05 bottom adaptor 2 Install the new top adapter bracket into the bracket R/L (1)
- Page 69 CHANGE THE DOOR HINGES (OPTIONAL) Tools T2 star-head screwdriver Reinstalling the door 1 Secure the door to the top and middle hinges of the appliance using M6x10 hex screws (4x). (A) Flat-head screwdriver Hex key 2 Activate the hinge spring by turning the star T20 screws to the I position.
-
Page 70: Final Checklist
FINAL CHECKLIST TO BE COMPLETED BY THE INSTALLER All models Check all parts are installed. Ensure the appliance is level. Ensure the appliance is securely fastened to the cabinetry with the supplied anti-tip bracket and fittings. Ensure the door can open and close freely with no resistance from surrounding cabinetry. - Page 72 FISHERPAYKEL.COM © Fisher & Paykel Appliances 2020. All rights reserved. The appliance specifications in this document apply to the specific appliances and models described at the date of issue. Under our policy of continuous appliance improvement, these specifications may change at any time.
- Page 73 COLONNE ENCASTRABLE RÉFRIGÉRATEUR CONGÉLATEUR Modèles RS2484WR, RS2484WL, RS3084WR et RS3084WL GUIDE D’INSTALLATION US CA 863026B 03.20...
- Page 75 TABLE DES MATIÈRES Consignes de sécurité et mises en garde Options d’installation double Colonnes encastrables — réfrigérateur–congélateur Dimensions de la cavité — installation double RS24 + RS24 Vérification de votre appareil Dimensions de la cavité — installation double RS24 + RS30 Déplacement de votre appareil Dimensions de la cavité...
-
Page 76: Consignes De Sécurité Et Mises En Garde
CONSIGNES DE SÉCURITÉ ET MISES EN GARDE MISE EN GARDE! MISE EN GARDE! Pour réduire les risques de danger, suivez attentivement ces instructions avant d’installer ou Risque de choc électrique utiliser cet appareil. Veuillez remettre ces informations à la personne qui installera l’appareil. Lisez et observez les consignes de sécurité... -
Page 77: Colonnes Encastrables - Réfrigérateur-Congélateur
Assurez-vous de retirer les supports d’alignement de profondeur avant de fixer l’appareil dans les armoires. Ouvrez la porte de l’appareil pour retirer les supports d’alignement des deux côtés de RS2484WR RS3084WR l’appareil, puis resserrez les vis. Installation du panneau de porte Panneau en acier inoxydable Protégez le fini des panneaux de portes en acier inoxydable de Fisher & Paykel pour éviter... -
Page 78: Vérification De Votre Appareil
VÉRIFICATION DE VOTRE APPAREIL Assurez-vous de suivre les étapes de déballage imprimées sur la boîte d’emballage de votre appareil. Vérifiez que le modèle de l’appareil est bien celui que vous avez commandé. Vérifiez que toutes les pièces sont présentes et tous les ensembles d’installation sont complets. -
Page 79: Déplacement De Votre Appareil
DÉPLACEMENT DE VOTRE APPAREIL Suivez les étapes ci-dessous pour déplacer votre appareil jusqu’à l’emplacement d’installation. Soyez prudent lorsque vous inclinez l’appareil vers l’avant/arrière. Appliquez du ruban adhésif pour maintenir les portes fermées et empêcher leur ouverture pendant le déplacement de l’appareil. Chariot manuel 1 Retirez les supports sur 2 Inclinez légèrement l’appareil... -
Page 80: Avant L'installation
AVANT L’INSTALLATION Vérifiez les armoires Vérifiez les dimensions des armoires : hauteur, largeur, profondeur, niveau du plancher, finitions de l’alcôve. Reportez-vous à ‘Dimensions de la cavité’ pour les mesures adéquates. Vérifiez les raccordements d’alimentation électrique et d’alimentation en eau Assurez-vous de brancher chaque appareil à une prise électrique distincte. Pour prévenir les interruptions d’alimentation accidentelles de l’appareil, évitez de partager le point d’alimentation avec d’autres appareils. -
Page 81: Pièces Fournies
PIÈCES FOURNIES ENSEMBLE DE FIXATION DE PANNEAU DE PORTE ENSEMBLE DE FIXATIONS D’INSTALLATION Pièce d’espacement de support Jauge d’alignement de Support latéral Pièce d’insertion pour support Embout cannelé Vis à tête fraisée 8Gx16 latéral profondeur Pour les panneaux de portes sur mesure : Vis cruciforme M5x12 (32) ASSEMBLAGE DE SUPPORT ANTIBASCULEMENT... - Page 82 EMBALLAGE D’ARTICLES DIVERS OUTILS FOURNIS INTEGRATED COLUMN COLONNE ENCASTRABLE WINE CABINET RÉFRIGÉRATEUR CONGÉLATEUR RS2484VL2K1, RS2484VR2K1, RS6121VL2K1, RS6121VR2K1 models Modèles RS2484WR, RS2484WL, RS3084WR et RS3084WL USER GUIDE GUIDE D’INSTALLATION US CA NZ AU GB IE SG HK US CA 863023A 09.19 863026A 03.20 Clé...
-
Page 83: Pièces Requises
PIÈCES REQUISES PANNEAU DE PLINTHE ENSEMBLE DE LIAISON POUR INSTALLATION PANNEAU DE PLINTHE Non fourni; peut être acheté séparément auprès d’un détaillant Fisher & Paykel autorisé. Visitez Utilisé pour l’installation double ou multiple avec plusieurs appareils. Peut être acheté le site fisherpaykel.com pour plus d’informations. séparément auprès d’un détaillant Fisher & Paykel autorisé. -
Page 84: Ensemble De Panneau De Porte
ENSEMBLE DE PANNEAU DE PORTE ENSEMBLES DE POIGNÉE DE PORTE ET TIROIR Non fourni; doit être acheté séparément auprès d’un détaillant Fisher & Paykel autorisé. Visitez le site fisherpaykel.com pour plus d’informations. Sélectionnez parmi les options d’ensemble de poignée ci-dessous : Ensemble de panneau de porte en acier inoxydable ENSEMBLE DE POIGNÉE RS24... -
Page 85: Ensemble De Changement De Côté Des Charnières
ENSEMBLE DE CHANGEMENT DE CÔTÉ DES CHARNIÈRES Non fourni; vendu séparément. Disponible en ligne sur le site fisherpaykel.com. MODÈLE ENSEMBLE POUR CHARNIÈRE GAUCHE À MODÈLE ENSEMBLE POUR CHARNIÈRE DROITE À CHARNIÈRE DROITE CHARNIÈRE GAUCHE RS24 CA 848184P RS24 CA 848183P RS30 CA 848184P RS30... -
Page 86: Dimensions Du Produit - Modèle Rs24
DIMENSIONS DU PRODUIT — MODÈLE RS24 DIMENSIONS DU PRODUIT A Hauteur hors tout du produit 2 134 B Largeur hors tout du produit 23 3/4 C Profondeur hors tout du produit (excluant le panneau de porte avant) POIDS DU PRODUIT Poids (avec l’emballage) Poids (sans l’emballage) VUE DE PROFIL VUE DE FACE... -
Page 87: Dimensions De La Cavité - Modèle Rs24
DIMENSIONS DE LA CAVITÉ — MODÈLE RS24 ARMOIRES SANS MONTANT ARMOIRES AVEC MONTANT Alignement de l’appareil au même niveau que les Alignement de l’appareil au même niveau que le montant des armoires. armoires. DIMENSIONS A Hauteur hors tout de la cavité 2 134 B Largeur hors tout de la cavité... -
Page 88: Dimensions De Panneau De Porte - Modèle Rs24
DIMENSIONS DE PANNEAU DE PORTE — MODÈLE RS24 PANNEAU EN ACIER INOXYDABLE PANNEAU SUR MESURE DIMENSIONS DIMENSIONS A Hauteur du panneau de porte supérieur A Hauteur du panneau de porte supérieur 49 3/8 1 254 49 3/8 1 254 B Hauteur du panneau de tiroir inférieur B Hauteur du panneau de tiroir inférieur 30 3/8 30 3/8... -
Page 89: Dimensions D'installation De Panneau De Porte Sur Mesure - Modèle Rs24
DIMENSIONS D’INSTALLATION DE PANNEAU DE PORTE SUR MESURE — MODÈLE RS24 Les dimensions sont indiquées pour la préparation et l’installation des panneaux de portes sur mesure. Pour les fichiers Dwg et Dxf de la préparation de panneau ci-dessous, téléchargez le dossier sur thekitchentools.fisherpaykel.com. -
Page 90: Dégagement De La Porte - Modèle Rs24
DÉGAGEMENT DE LA PORTE — MODÈLE RS24 OUVERTURE DE LA PORTE À 115° OUVERTURE DE LA PORTE À 90° Insertion de la tige de limitation de charnière Avant de pousser l’appareil dans les armoires, insérez la tige de limitation de charnière fournie dans le trou de la charnière supérieure. -
Page 91: Dégagement Du Tiroir - Modèle Rs24
DÉGAGEMENT DU TIROIR — MODÈLE RS24 DIMENSIONS A Extension maximale du tiroir lors de l’ouverture (excluant la 15 3/4 poignée) B Extension maximale du tiroir lors de l’ouverture (incluant la 18 1/8 poignée) -
Page 92: Dimensions De La Plinthe - Modèle Rs24
DIMENSIONS DE LA PLINTHE — MODÈLE RS24 PANNEAU DE PLINTHE EN ACIER INOXYDABLE PANNEAU DE PLINTHE SUR MESURE Peut être acheté séparément auprès d’un détaillant Fisher & Paykel autorisé. Visitez le site Pour l’installation d’un panneau de porte sur mesure, une plinthe sur mesure de 2 à 6 po (50 fisherpaykel.com pour plus d’informations. -
Page 93: Options D'installation De La Plinthe
OPTIONS D’INSTALLATION DE LA PLINTHE Pour une plinthe sur mesure La hauteur de la plinthe d’une hauteur de 6 po standard est de 4 po (102 mm) avec le panneau de porte en (152 mm). acier inoxydable. Pour une plinthe sur mesure Profondeur de plinthe de min. d’une hauteur de 2 po (50 mm) 2 7/8 po (73 mm) à... -
Page 94: Dimensions Du Produit - Modèle Rs30
DIMENSIONS DU PRODUIT — MODÈLE RS30 DIMENSIONS DU PRODUIT A Hauteur hors tout du produit 2 134 B Largeur hors tout du produit 29 3/4 C Profondeur hors tout du produit (excluant le panneau de porte avant) POIDS DU PRODUIT Poids (avec l’emballage) Poids (sans l’emballage) VUE DE FACE VUE DE PROFIL... -
Page 95: Dimensions De La Cavité - Modèle Rs30
DIMENSIONS DE LA CAVITÉ — MODÈLE RS30 ARMOIRES SANS MONTANT ARMOIRES AVEC MONTANT Alignement de l’appareil au même niveau que les Alignement de l’appareil au même niveau que le montant des armoires. armoires. DIMENSIONS 1 Hauteur hors tout de la cavité 2 134 2 Largeur hors tout de la cavité... -
Page 96: Dimensions De Panneau De Porte - Modèle Rs30
DIMENSIONS DE PANNEAU DE PORTE — MODÈLE RS30 PANNEAU EN ACIER INOXYDABLE PANNEAU SUR MESURE DIMENSIONS DIMENSIONS A Hauteur du panneau de porte supérieur 49 3/8 1 254 A Hauteur du panneau de porte supérieur 49 3/8 1 254 B Hauteur du panneau de porte de tiroir 30 3/8 B Hauteur du panneau de porte de tiroir 30 3/8... -
Page 97: Dimensions D'installation De Panneau De Porte Sur Mesure - Modèle Rs30
DIMENSIONS D’INSTALLATION DE PANNEAU DE PORTE SUR MESURE — MODÈLE RS30 Les dimensions sont indiquées pour la préparation et l’installation des panneaux de portes sur mesure. Pour les fichiers Dwg et Dxf de la préparation de panneau ci-dessous, téléchargez le dossier sur thekitchentools.fisherpaykel.com. -
Page 98: Dégagement De La Porte - Modèle Rs30
DÉGAGEMENT DE LA PORTE — MODÈLE RS30 OUVERTURE DE LA PORTE À 115° OUVERTURE DE LA PORTE À 90° Insertion de la tige de limitation de charnière Avant de pousser l’appareil dans les armoires, insérez la tige de limitation de charnière fournie dans le trou de la charnière supérieure. -
Page 99: Dégagement Du Tiroir - Modèle Rs30
DÉGAGEMENT DU TIROIR — MODÈLE RS30 DIMENSIONS A Extension maximale du tiroir lors de l’ouverture (excluant la 15 3/4 poignée) B Extension maximale du tiroir lors de l’ouverture (incluant la 18 1/8 poignée) -
Page 100: Dimensions De La Plinthe - Modèle Rs30
DIMENSIONS DE LA PLINTHE — MODÈLE RS30 PANNEAU DE PLINTHE EN ACIER INOXYDABLE PANNEAU DE PLINTHE SUR MESURE Peut être acheté séparément auprès d’un détaillant Fisher & Paykel autorisé. Visitez le site Pour l’installation d’un panneau de porte sur mesure, une plinthe sur mesure de 2 à 6 po (50 fisherpaykel.com pour plus d’informations. -
Page 101: Options D'installation Double
OPTIONS D’INSTALLATION DOUBLE Les options suivantes sont présentées pour une installation double/multiple, avec les portées d’ouverture de porte et les dimensions de cloison (optionnelle) requises entre deux appareils combinés. Évitez tout contact (encerclé) lors de l’ouverture des portes. Utilisez une tige de limitation de charnière pour limiter la rotation d’ouverture de la porte à 90°. Reportez-vous à ‘Dégagement de la porte’... -
Page 102: Dimensions De La Cavité - Installation Double Rs24 + Rs24
DIMENSIONS DE LA CAVITÉ — INSTALLATION DOUBLE RS24 + RS24 ARMOIRES SANS MONTANT ARMOIRES AVEC MONTANT Alignement de l’appareil au même niveau que les Alignement de l’appareil au même niveau que le montant des armoires. armoires. DIMENSIONS A Hauteur hors tout de la cavité 2 134 B Largeur hors tout de la cavité... -
Page 103: Dimensions De La Cavité - Installation Double Rs24 + Rs30
DIMENSIONS DE LA CAVITÉ — INSTALLATION DOUBLE RS24 + RS30 ARMOIRES SANS MONTANT ARMOIRES AVEC MONTANT Alignement de l’appareil au même niveau que les Alignement de l’appareil au même niveau que le montant des armoires. armoires. DIMENSIONS A Hauteur hors tout de la cavité 2 134 B Largeur hors tout de la cavité... -
Page 104: Dimensions De La Cavité - Installation Double Rs30 + Rs30
DIMENSIONS DE LA CAVITÉ — INSTALLATION DOUBLE RS30 + RS30 ARMOIRES SANS MONTANT ARMOIRES AVEC MONTANT Alignement de l’appareil au même niveau que les Alignement de l’appareil au même niveau que le montant des armoires. armoires. DIMENSIONS A Hauteur hors tout de la cavité 2 134 B Largeur hors tout de la cavité... -
Page 105: Dimensions De Panneau De Plinthe - Installation Double
DIMENSIONS DE PANNEAU DE PLINTHE — INSTALLATION DOUBLE PANNEAU EN ACIER INOXYDABLE PANNEAU SUR MESURE panneau de plinthe panneau de plinthe panneaux de portes panneaux de portes MODÈLES RS24 + RS24 PANNEAU DE PLINTHE (CA 25396) MODÈLES RS24 + RS24 DIMENSIONS DIMENSIONS A Largeur de la plinthe... -
Page 106: Dimensions Pour L'alimentation Électrique
DIMENSIONS POUR L’ALIMENTATION ÉLECTRIQUE INSTALLATION SIMPLE INSTALLATION DOUBLE S’il est situé derrière l’appareil, le raccordement de l’alimentation électrique doit se trouver dans cet espace et ne pas RACCORDEMENTS D’ALIMENTATION ÉLECTRIQUE ET DE PLOMBERIE dépasser du mur arrière. 1 Emplacement recommandé pour les raccordements dans une zone adjacente ou derrière l’appareil 2 Autre emplacement possible pour les raccordements à... -
Page 107: Spécifications Électriques
SPÉCIFICATIONS ÉLECTRIQUES SPÉCIFICATIONS DE PLOMBERIE Cordon Cordon d’alimentation d’alimentation Tuyau d’alimentation Tuyau d’alimentation en eau en eau Alimentation 115 V CA, 60 Hz Alimentation Tuyau tressé en acier inoxydable BSP de 1/2 po (12,7 mm) avec adaptateur Circuit 10 ampères Pression psi (kPa) min. 150 psi (22) / max. 827 psi (120 kPa) @ 68 °F Prise 3 broches avec mise à... -
Page 108: Installation Du Support Antibasculement
INSTALLATION DU SUPPORT ANTIBASCULEMENT Ensemble d’assemblage de support armoires antibasculement suspendues mur arrière montant Localisation de la position de fixation du support antibasculement Support antibasculement 1 Mesurez la hauteur (A) de l’emplacement de fixation sur le mur arrière, correspondant à la distance entre le plancher et la finition de l’alcôve, puis marquez une ligne horizontale (B). - Page 109 INSTALLATION DU SUPPORT ANTIBASCULEMENT Ensemble d’assemblage de support antibasculement Pour un mur en plaque de plâtre Déplacez lentement l’appareil Fixez le support antibasculement dans les armoires jusqu’à ce au mur à l’aide de vis cruciformes que le support antibasculement min. 7 1/16 po (180 mm) n° 10x40 mm, puis vissez chevauche le rebord arrière de fermement avec un tournevis.
-
Page 110: Raccordement De L'alimentation En Eau Et De L'alimentation Électrique
RACCORDEMENT DE L’ALIMENTATION EN EAU ET DE L’ALIMENTATION ÉLECTRIQUE Ensemble de raccords d’alimentation en eau Clip de blocage de collet Arrière Raccordement à l’alimentation en eau Tuyau tressé en acier 1 Déplacez l’appareil vers l’avant des armoires, à une distance permettant inoxydable BSP de d’accéder à... - Page 111 RACCORDEMENT DE L’ALIMENTATION EN EAU ET DE L’ALIMENTATION ÉLECTRIQUE Ensemble de raccords d’alimentation en eau 5 Insérez entièrement l’extrémité de tuyau de l’adaptateur dans le dispositif PLV (C) dans la Clip de blocage de collet partie avant inférieure de l’appareil. Tuyau tressé...
-
Page 112: Positionnement Et Alignement Dans Les Armoires
POSITIONNEMENT ET ALIGNEMENT DANS LES ARMOIRES Ensemble de fixations d’installation Fixation des embouts cannelés Embouts cannelés 1 Avant de déplacer l’appareil dans la cavité, insérez un embout cannelé dans un grand trou sur le côté supérieur gauche (A) de l’appareil. Les embouts protègent la surface intérieure des armoires des dommages pouvant être Embout cannelé... - Page 113 POSITIONNEMENT ET ALIGNEMENT DANS LES ARMOIRES Ensemble de fixations d’installation Fixation des jauges d’alignement de profondeur Jauge d’alignement 1 Desserrez les vis sur les côtés gauche et droit dans le haut de profondeur et le bas de la porte. (A) 2 Placez les jauges d’alignement dans le bon sens sur les vis des côtés gauche et droit.
- Page 114 POSITIONNEMENT ET ALIGNEMENT DANS LES ARMOIRES Positionnement dans les armoires min. 7 1/16 po (180 mm) 1 Déplacez lentement l’appareil dans les armoires jusqu’à ce que le support antibasculement chevauche le rebord arrière de l’appareil. Support Vérifiez que le support chevauche l’appareil d’un minimum de 7 1/16 po (180 mm) pour assurer un maintien stable.
- Page 115 POSITIONNEMENT ET ALIGNEMENT DANS LES ARMOIRES Outils Alignement avec les jauges de profondeur 1 Sur chaque côté de la porte, marquez le repère des jauges de profondeur (A, B) qui correspond à l’épaisseur du panneau de porte. Dans les illustrations de cet exemple, l’épaisseur de panneau de Tournevis cruciforme porte de 1 po (25,4 mm) est marquée sur les jauges.
- Page 116 POSITIONNEMENT ET ALIGNEMENT DANS LES ARMOIRES Outils Tournevis cruciforme Ajustement de l’alignement dans les armoires Tourner les vis d’ajustement avant et arrière (A) dans d’ajustement le sens des aiguilles d’une montre augmente la hauteur de la patte Vis d’ajustement Visseuse électrique de l’appareil.
-
Page 117: Fixation De L'appareil Aux Armoires
FIXATION DE L’APPAREIL AUX ARMOIRES Ensemble de fixations d’installation Vis à tête fraisée 8Gx16 Fixation des supports supérieurs Fixez le support supérieur à la surface du plafond des armoires à l’aide de vis à tête fraisée 8Gx16. (A) Outils Tournevis cruciforme Visseuse électrique (optionnelle) Fixation des supports latéraux... -
Page 118: Retrait Des Supports D'accrochage
RETRAIT DES SUPPORTS D’ACCROCHAGE Outils 1 Retirez l’écrou M8 (A) et la rondelle M8 (B) de la vis M8 dans le haut de la porte du réfrigérateur en utilisant la clé Visseuse électrique hexagonale et la clé fournies. Répétez dans le haut de la porte de tiroir. Clé... -
Page 119: Installation Des Panneaux De Porte Et Tiroir
INSTALLATION DES PANNEAUX DE PORTE ET TIROIR Ensemble de poignée PANNEAUX EN ACIER INOXYDABLE PANNEAUX SUR MESURE de porte Avant d’installer la poignée, retirez la pellicule protectrice autour de la zone de fixation de la poignée du panneau en acier inoxydable. Vis hexagonale M5x25 (4x) Outils... - Page 120 INSTALLATION DES PANNEAUX DE PORTE ET TIROIR Ensemble de fixation PANNEAUX EN ACIER INOXYDABLE PANNEAUX SUR MESURE de panneau de porte panneau de porte sur mesure support d’accrochage Fixation du support d’accrochage supérieur Support latéral Fixation du support 1 Fixez le support d’accrochage supérieur d’accrochage supérieur 1 Marquez une ligne au...
- Page 121 INSTALLATION DES PANNEAUX DE PORTE ET TIROIR Outils Suspension du panneau de porte du réfrigérateur 1 Maintenez le panneau de porte avec un angle, vers le haut de la porte du réfrigérateur (A). Visseuse électrique (avec mèche de 2,5 mm) 2 Abaissez les trous de vis du support d’accrochage Tournevis cruciforme sur les vis d’ajustement dans le haut de la porte du réfrigérateur.
- Page 122 INSTALLATION DES PANNEAUX DE PORTE ET TIROIR Outils Assurez-vous que les supports latéraux soient partiellement vissés lors de l’ajustement de la hauteur du panneau de porte. N’ajustez pas la hauteur du panneau de porte lorsque les supports latéraux sont solidement vissés. Cela risque de produire un frottement causant la déformation des supports d’accrochage.
-
Page 123: Installation Du Support De Blocage
INSTALLATION DU SUPPORT DE BLOCAGE INSTALLATION DES SUPPORTS D’AJUSTEMENT Outils Tournevis cruciforme Couteau à lame rétractable Clé hexagonale M4 1 Desserrez la vis dans le bas de la porte 1 Desserrez les vis d’assemblage du réfrigérateur, puis glissez le support (C) des supports d’ajustement Clé... -
Page 124: Installation Du Panneau De Plinthe
INSTALLATION DU PANNEAU DE PLINTHE Pièces diverses Installation de la plaque de fixation Joint d’étanchéité à l’air 1 Réinstallez la plaque de fixation (A) sur la plinthe de l’appareil à de la plinthe l’aide des mêmes vis précédemment mises de côté. 2 Si la profondeur de la plinthe est inférieure à... -
Page 125: Installation Des Grilles De Plinthe
INSTALLATION DES GRILLES DE PLINTHE INSTALLATION DE LA GARNITURE SUPÉRIEURE Outils Installation de la grille Réinstallation de la garniture Couteau à lame supérieure supérieure rétractable 1 Refixez la grille supérieure 1 Glissez une extrémité de la (A) à l’aide des mêmes vis garniture supérieure (A) dans la précédemment mises de côté. -
Page 126: Installation Du Filtre À Eau
INSTALLATION DU FILTRE À EAU Outils fournis Insertion du filtre à eau Retrait et réinstallation du filtre 1 Retirez l’emballage 1 Pour retirer le filtre à eau, du filtre à eau. tournez l’outil de retrait de filtre Filtre à eau 2 Alignez la tête de filtre avec dans le sens inverse des aiguilles la fente de l’outil de retrait de... -
Page 127: Installation Du Diviseur De Débit D'air
INSTALLATION DU DIVISEUR DE DÉBIT D’AIR Pièces diverses Le diviseur de débit d’air empêche la dérivation du débit d’air devant la grille inférieure. Capuchon de diviseur de 1 Retirez le revêtement de la couche adhésive (A) du débit diviseur de débit d’air. Outils 2 Réinstallez le diviseur de débit d’air (B) dans le bas du tiroir de congélateur avec la vis. -
Page 128: Installation Des Garnitures Latérales De Bâti
INSTALLATION DES GARNITURES LATÉRALES DE BÂTI Pièces à installer Les bandes adhésives double face sont préfixées à quatre emplacements le long de la garniture latérale. 3 Maintenez la garniture latérale dans le même angle et glissez l’extrémité inférieure derrière la charnière inférieure, vers 1 Enlevez le revêtement des le bas jusqu’au côté... -
Page 129: Installation Des Garnitures Latérales De Porte Et Tiroir
INSTALLATION DES GARNITURES LATÉRALES DE PORTE ET TIROIR Ensemble d’installation de garnitures Installation du profilé supérieur Installation des garnitures Profilé latéral du panneau de porte supérieure et latérales de tiroir de porte supérieur (2) 1 Alignez le profilé supérieur 1 Enlevez l’endos adhésif des devant de la porte (A) sur le haut de la porte, bandes adhésives préfixées... -
Page 130: Installation Double
INSTALLATION DOUBLE Ensemble de fixations Fixez la pièce d’espacement centrale aux armoires d’installation 1 Mesurez les largeurs des côtés gauche (A) et droit (B) vers Jauges d’alignement de le centre de l’alcôve pour déterminer l’emplacement de la profondeur (4) pièce d’espacement. Ensemble de support Reportez-vous à... - Page 131 INSTALLATION DOUBLE Ensemble de fixations d’installation Fixation des jauges d’alignement de profondeur 1 Desserrez les vis (A) sur les côtés des armoires de la porte et du tiroir de chaque appareil. 2 Placez les jauges d’alignement (B) dans le bon sens sur les Jauges d’alignement de vis latérales à...
- Page 132 INSTALLATION DOUBLE Outils Alignement du premier appareil dans les armoires min. 7 1/16 po (180 mm) 1 Déplacez lentement le premier appareil (A) sur le côté souhaité dans les armoires jusqu’à ce que le support antibasculement (B) chevauche le rebord arrière Tournevis cruciforme de l’appareil.
- Page 133 INSTALLATION DOUBLE Ensemble de fixations d’installation Ajustement de la hauteur du premier appareil dans les armoires Vis à tête fraisée 1 Tournez les vis d’ajustement 8Gx16 (6) avant et arrière dans le sens des aiguilles d’une montre d’ajustement d’ajustement de la patte pour augmenter la hauteur de la patte arrière...
- Page 134 INSTALLATION DOUBLE Outils Alignement du deuxième appareil dans les armoires min. 180 mm 1 Poussez le deuxième appareil (A) pour le déplacer lentement sur l’autre côté dans les armoires, à côté du premier appareil. Tournevis cruciforme Assurez-vous que le support (B) chevauche l’appareil d’un minimum de 180 mm pour assurer un maintien stable.
- Page 135 INSTALLATION DOUBLE Ensemble de fixation de liaison supérieure Vis d’assemblage M5x20 (1) Fixation des supports supérieurs 1 Fixez les capuchons supérieurs des deux appareils à la pièce d’espacement centrale à l’aide de la vis Rondelle plate M5x16x1 d’assemblage M5x20 (A) et la rondelle (B). 2 Fixez les supports supérieurs à...
-
Page 136: Changement De Côté Des Charnières De Porte (Étape Optionnelle)
CHANGEMENT DE CÔTÉ DES CHARNIÈRES DE PORTE (ÉTAPE OPTIONNELLE) Vous avez la possibilité optionnelle de changer le côté des charnières de porte de votre appareil, du côté droit au côté gauche ou vice versa. Un ensemble de Outils changement de côté des charnières est requis pour cette installation; cet ensemble est vendu séparément. Tournevis à... - Page 137 CHANGEMENT DE CÔTÉ DES CHARNIÈRES DE PORTE (ÉTAPE OPTIONNELLE) Outils Retrait de la charnière de porte supérieure Tournevis à pointe T2 étoilée 1 Faites pivoter la charnière supérieure (A) vers l’extérieur et retirez le couvercle de cavité de la charnière supérieure (B) en insérant un tournevis à...
- Page 138 CHANGEMENT DE CÔTÉ DES CHARNIÈRES DE PORTE (ÉTAPE OPTIONNELLE) Outils Déplacement du compartiment de capteur Tournevis à pointe T20 étoilée Tournevis à pointe plate 5 Réinstallez le compartiment 4 Déplacez le compartiment 1 Dégrafez le capteur de capteur en utilisant des de capteur afin d’aligner le Hall du compartiment.
- Page 139 CHANGEMENT DE CÔTÉ DES CHARNIÈRES DE PORTE (ÉTAPE OPTIONNELLE) Assemblage de changement de côté des charnières Réinstallation de la charnière supérieure 1 Réinstallez le support de la charnière supérieure et la pièce d’espacement avec les vis à tête fraisée M5x12 (A) sur le nouveau côté...
- Page 140 CHANGEMENT DE CÔTÉ DES CHARNIÈRES DE PORTE (ÉTAPE OPTIONNELLE) Assemblage de changement de côté des charnières Support adaptateur utilisez le nouveau support supérieur K05 D/G (1) adaptateur supérieur Changement de support de porte supérieur 1 Dévissez les vis M5x10 (4x) pour retirer le support adaptateur supérieur du haut de la porte (A).
- Page 141 CHANGEMENT DE CÔTÉ DES CHARNIÈRES DE PORTE (ÉTAPE OPTIONNELLE) Outils Tournevis à pointe T2 étoilée Réinstallation de la porte 1 Fixez la porte aux charnières supérieure et centrale de l’appareil en utilisant des vis hexagonales M6x10 (4x). (A) Tournevis à pointe plate Clé...
-
Page 142: Liste De Vérification Finale
LISTE DE VÉRIFICATION FINALE À ÊTRE REMPLIE PAR L’INSTALLATEUR Tous les modèles Vérifiez que toutes les pièces sont installées. Assurez-vous que l’appareil est de niveau. Assurez-vous que l’appareil est fixé solidement aux armoires à l’aide du support antibasculement et des raccords fournis. Assurez-vous que la porte peut s’ouvrir et se fermer facilement, sans aucune résistance causée par les armoires à... - Page 144 FISHERPAYKEL.COM © Fisher & Paykel Appliances 2020. Tous droits réservés. Les caractéristiques de l’appareil présentées dans ce document s’appliquent aux modèles et appareils spécifiques qui y sont décrits à la date de publication. Dans le cadre de notre politique d’amélioration en permanence de nos appareils, ces caractéristiques peuvent être modifiées à...