AudioCodes Mediant Series Quick Setup Manual
Broadcloud hosted uc solution using crp
Hide thumbs
Also See for Mediant Series:
- Configuration note (46 pages) ,
- Quick setup manual (48 pages)

Related Manuals for AudioCodes Mediant Series


Summary of Contents for AudioCodes Mediant Series
- Page 1 Quick Setup Guide AudioCodes Mediant™ Series BroadCloud Hosted UC Solution using AudioCodes Mediant™ CRP Version 7.2...
-
Page 3: Table Of Contents
Contents Table of Contents Introduction ......................5 Making BroadCloud Preparations ................5 Component Information .................... 5 1.2.1 AudioCodes CRP Version ..................5 1.2.2 BroadCloud Hosted UC Version ................5 1.2.3 Solution Topology ...................... 6 Installing the Hardware ..................7 Mediant 500L ......................7 2.1.1... - Page 4 Information contained in this document is believed to be accurate and reliable at the time of printing. However, due to ongoing product improvements and revisions, AudioCodes cannot guarantee accuracy of printed material after the Date Published, nor can it accept responsibility for errors or omissions.
-
Page 5: Introduction
AudioCodes Mediant 1. Introduction Introduction This guide shows how to set up AudioCodes' Cloud Resilience Package (referred to as CRP in this document) for interworking between BroadCloud's Hosted UC and IP-Phones and/or ATA devices environment. Making BroadCloud Preparations Before reading and using this Quick Setup Guide, read the BroadCloud Hosted Survivability Service Definition guide available from the BroadCloud knowledgebase (info.broadcloudpbx.com). -
Page 6: Solution Topology
BroadCloud Hosted UC 1.2.3 Solution Topology Interoperability between AudioCodes CRP and BroadCloud Hosted UC Service with the IP- Phones and/or ATA devices was achieved using the following topology setup: Enterprise IP-Phones and/or ATA devices AudioCodes Mediant CRP device, connecting the enterprise’s IP-Phones and/or ATA devices to the BroadCloud Hosted UC service over IP ... -
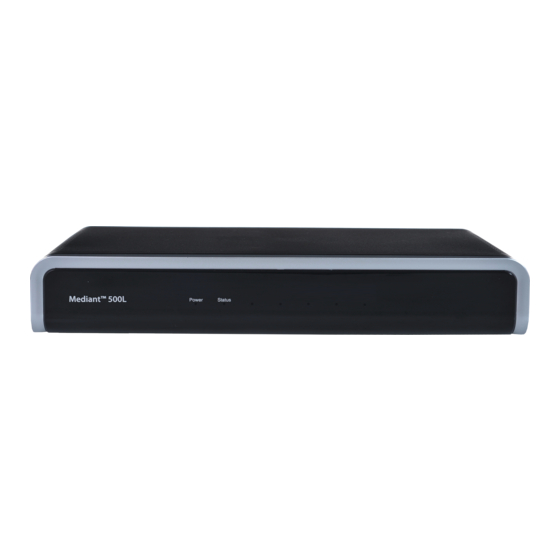
Page 7: Installing The Hardware
POWER 12V - AC power supply plug entry to connect to the external AC power supply - 3A adapter. ON / OFF Power button which powers on the device when pressed in and powers BroadCloud Hosted UC AudioCodes Mediant CRP... -
Page 8: Cabling
S1 / FE LAN port 3. Connect the other end to your local network LAN layer 2 switch port. This port will be used to communicate with the IP-Phones and/or ATA Devices. AudioCodes Mediant CRP Document #: LTRT-29836... -
Page 9: Connecting To The Power Supply
Press down on the bottom part of the plug until a click is heard, indicating that the plug is securely inserted in the housing slot. To remove the plug, push and slide down the OPEN plug release lever (3). BroadCloud Hosted UC AudioCodes Mediant CRP... -
Page 10: Powering The Device On / Off
Press in the power button; the device receives power and the Power LED on the front panel lights up. To power off the device: Press out the power button; the device powers off and the Power LED goes off. AudioCodes Mediant CRP Document #: LTRT-29836... -
Page 11: Mediant 500
Figure 2-8: Rear Panel – Earth and Power Table 2-6: Rear Panel Item # Label Description Protective earthing screw. I / 0 Power switch (O is off; I is on). 100-240V~50-60Hz 0.8A Three-prong AC power supply entry. Max. BroadCloud Hosted UC AudioCodes Mediant CRP... -
Page 12: Cabling
Connect one end of a straight-through RJ-45 Cat 5e or Cat 6 cable to the RJ-45 port labeled S1 / LAN GE port 1. Connect the other end to the DMZ port assigned by the IT administrator. AudioCodes Mediant CRP Document #: LTRT-29836... -
Page 13: Connecting To The Power Supply
To connect the device to the power supply: Connect the line socket of the AC power cord (supplied) to the device's AC power socket (labeled 100-240V~50-60 Hz 0.8A), located on the rear panel. BroadCloud Hosted UC AudioCodes Mediant CRP... - Page 14 Connect the plug at the other end of the AC power cord to a standard electrical outlet. Press the power switch to on (I) position so that the device receives power; the POWER LED on the front panel is lit green. AudioCodes Mediant CRP Document #: LTRT-29836...
-
Page 15: Mediant 800B
The device is operational and in Standalone mode (not in High- Availability mode). Flashing Initial rebooting stage. Slow Flash HA mode - LED on Active device. Slow-Fast HA mode - LED on Redundant device. Flash Boot failure. Advanced rebooting stage. BroadCloud Hosted UC AudioCodes Mediant CRP... -
Page 16: Rear Panel
Connect the other end to a protective earthing (according local regulations). 2.3.4.2 Connecting to Ethernet Up to four 10/100/1000Base-T (Gigabit Ethernet) RJ-45 ports supporting half- and full- duplex modes, auto-negotiation, and straight or crossover cable detection, allow connecting to the LAN/WAN. AudioCodes Mediant CRP Document #: LTRT-29836... -
Page 17: Powering Up
50 to 60 Hz AC Input Current 1.5A Warning: • The device must be connected to a socket-outlet providing protective earthing. • Use only the AC power cord that is supplied with the device. BroadCloud Hosted UC AudioCodes Mediant CRP... - Page 18 Figure 2-16: Connecting to the Power Supply Connect the plug at the other end of the AC power cord to a standard electrical outlet. After cabling and powering up, the POWER LED on the front panel lights up green. AudioCodes Mediant CRP Document #: LTRT-29836...
-
Page 19: Mediant 2600
Description AC power supply inlet (100-240V~2.5A, 50-60 Hz) for power supply module No. 1. AC power supply inlet (100-240V~2.5A, 50-60 Hz) for power supply module No. 2. Electrostatic Discharge (ESD) socket. Protective earthing screw. BroadCloud Hosted UC AudioCodes Mediant CRP... -
Page 20: Cabling
If the device's IP isn't configured yet, connect as shown in Section If the device's IP has already been configured: Connect one end of a straight-through RJ-45 Cat 5e or Cat 6 cable to the RJ-45 port labeled LAN GE port 3. AudioCodes Mediant CRP Document #: LTRT-29836... -
Page 21: Connecting To The Power Supply
PS module and connecting this to a different supply circuit. Turn on the power at the power source (if required). Check that the POWER LED on each PS module (front panel) is lit green. This indicates that the device is receiving power. BroadCloud Hosted UC AudioCodes Mediant CRP... - Page 22 BroadCloud Hosted UC This page is intentionally left blank. AudioCodes Mediant CRP Document #: LTRT-29836...
-
Page 23: Connecting To The Management Interface
To connect to the embedded Web server: Connect Port 1 (leftmost LAN port) located on the front panel directly to the network interface of your computer, using a straight-through Ethernet cable. Figure 3-1: Connecting to the Embedded Web Server BroadCloud Hosted UC AudioCodes Mediant CRP... -
Page 24: Change Default Management User Login Passwords
SIP settings such as proxy server addresses. Therefore, to prevent an attacker from obtaining sensitive SIP settings that could result in possible call theft etc., change its default login password to a hard-to-hack string. AudioCodes Mediant CRP Document #: LTRT-29836... -
Page 25: Configuring The Device
Navigation tree: Setup menu > Administration tab > Maintenance folder > Software Upgrade. Figure 4-1: Start Software Upgrade Wizard Screen Click Start Software Upgrade; the Wizard starts, prompting you to load a .cmp file: BroadCloud Hosted UC AudioCodes Mediant CRP... - Page 26 Select the file, and then click Open. Click Load File; the device begins to install the .cmp file. A progress bar displays the status of the loading process and a message informs you when file load successfully completes. AudioCodes Mediant CRP Document #: LTRT-29836...
- Page 27 In the Wizard's page for loading the Call Progress Tones (CPT) file, click Choose File, and then navigate to where the call_progress_xxxxx.dat (‘xxxxx’ being the country name) file is located on your computer. Select it and click Load File; the device loads BroadCloud Hosted UC AudioCodes Mediant CRP...
- Page 28 Click Reset to burn the files to the device's flash memory; the 'Burn and reset in progress' message is displayed and the device 'burns' the newly loaded files to flash memory and then resets. AudioCodes Mediant CRP Document #: LTRT-29836...
- Page 29 Enter your login username and password (Admin, Admin respectively), and then click Login; a message box appears informing you of the new .cmp file version. Click OK; the Web interface becomes active, reflecting the upgraded device. BroadCloud Hosted UC AudioCodes Mediant CRP...
-
Page 30: Step 2: Configure A Network Interface For The Device
(public address) IP-Address (e.g. ITSP) RTP service: 6000-8500 / (e.g. ITSP) Local-DMZ- <any> SIP service: 5060 / UDP Global <any> <as original> IP-Address Address (e.g. ITSP) RTP service: 6000-8500 / (e.g. ITSP) (public address) AudioCodes Mediant CRP Document #: LTRT-29836... -
Page 31: Step 2A: Configure Network Interfaces
Subnet mask in bits, e.g.24 (subnet mask in bits for 255.255.255.0) Default Gateway The local LAN default gateway IP address Primary DNS Server IP Address Primary DNS IP address (optional) Secondary DNS Server IP Address Secondary DNS IP address (optional) Click Apply. BroadCloud Hosted UC AudioCodes Mediant CRP... -
Page 32: Step 2B: Configure Nat
To configure the Global address Open the NAT Translation table (Setup menu > IP Network tab > Core Entities folder > NAT Translation). Click New; the following dialog appears: Figure 4-9: NAT Translation Table - Dialog Box AudioCodes Mediant CRP Document #: LTRT-29836... - Page 33 WANSP (the interface to apply this rule to) Target IP Address Global-IP-address. Defines the global (public) IP address. Source Start Port (leave empty) Source End Port (leave empty) Target Start Port (leave empty) Target End Port (leave empty) Click Apply. BroadCloud Hosted UC AudioCodes Mediant CRP...
-
Page 34: Step 3: Configure The Udp Ports For Rtp Between Crp And Ip-Phones And/Or Ata Devices
MRLan (descriptive name) IPv4 Interface Name Voice Port Range Start 6000 (as required by the IP-Phones) Number of Media Session Legs 250 (media sessions assigned with port range) Figure 4-10: Configuring Media Realm for LAN AudioCodes Mediant CRP Document #: LTRT-29836... - Page 35 AudioCodes Mediant 4. Configuring the Device The configured Media Realms are shown in the figure below: Figure 4-11: Configured Media Realms in Media Realm Table BroadCloud Hosted UC AudioCodes Mediant CRP...
-
Page 36: Step 4: Adopt Classification Policy For Crp Users (If Required)
Open the Classification table (Setup menu > Signaling & Media tab > SBC folder > Classification). Configure Classification rules per customer requirement. The Classification rule example below classifies calls only from a specific subnet (192.168.2.*) as CRP users: Figure 4-12: Classification Rule Example Click Apply. AudioCodes Mediant CRP Document #: LTRT-29836... -
Page 37: Step 5: Check The Connectivity And Registration Status
> SBC Registered Users). Check the registration status in the SBC Registered Users Status Table. A successful registration will be shown in the CRP AOR Table (see the figure below). Figure 4-14: Successful IP-Phones Registration BroadCloud Hosted UC AudioCodes Mediant CRP... - Page 38 Check the WAN wiring. √ Make sure the DMZ configuration is correct on the firewall. √ Check the WAN IP address configuration (Setup menu > IP Network tab > Core Entities folder > IP Interfaces). AudioCodes Mediant CRP Document #: LTRT-29836...
-
Page 39: Step 6: Secure Device Access
Note: Due to the vast number of potential attacks (such as DDoS), security of your VoIP network should be your paramount concern. The AudioCodes device provides a wide range of security features to support perimeter defense. For recommended security configuration for your AudioCodes device, refer to AudioCodes' Security Guidelines document. -
Page 40: Step 7: Save The Configuration, Connect To Dmz
Ethernet cable from the device’s Ethernet port 1 (see Section 2) to the DMZ port provided by the local firewall and Ethernet port 3 to the local LAN network: Figure 4-16: Connecting the Device to DMZ AudioCodes Mediant CRP Document #: LTRT-29836... -
Page 41: A Configure Pstn Fallback (If Required)
Connect the RJ-45 cable to the device's BRI port on the rear panel (it's labeled S2 / BRI). Connect the other end of the cable to your ISDN PBX equipment. Figure A-1: Cabling BRI Ports BroadCloud Hosted UC AudioCodes Mediant CRP... -
Page 42: Connecting Isdn Pri (E1/T1) Trunk To The Mediant 500 And Mediant 800B
Connect the E1/T1 trunk cable to the device’s E1/T1 port. Connect the other end of the trunk cable to your PBX switch. Figure A-2: Mediant 500 Cabling E1/T1 Port Figure A-3: Mediant 800B Cabling E1/T1 Port AudioCodes Mediant CRP Document #: LTRT-29836... -
Page 43: Step 2: Configure Pstn Trunk Settings
Q931 Layer Response Behavior 0x8000000 Outgoing Calls Behavior Incoming Calls Behavior 0x11000 Select Receiving of Overlap Dialing Local Receiving Figure A-4: Configuring BRI PSTN Interface Repeat for all BRI ports available on the device (Mediant 500L) BroadCloud Hosted UC AudioCodes Mediant CRP... -
Page 44: Step 2B: Configure Pcm Law Select
Open the TDM Bus Settings page (Setup menu > Signaling & Media tab > Media folder > TDM Bus Settings). From the 'PCM Law Select' drop-down list, select Alaw for E1/BRI or MuLaw for T1 trunks. Figure A-5: Configuring PCM Law Select Click Apply to apply definitions. AudioCodes Mediant CRP Document #: LTRT-29836... -
Page 45: Step 2C: Configure The Pri Pstn Interface
Network side or User side (according to remote ISDN Termination Side side definitions) Figure A-6: Configuring the PRI PSTN Interface Repeat for PRI trunk #2 if applicable (Mediant 800B) Reset the device with a save-to-flash for your settings to take effect. BroadCloud Hosted UC AudioCodes Mediant CRP... -
Page 46: Step 3: Configure Trunk Group Parameters
Configure each Trunk Group as required. If more than one PRI port is available, on line 1 of the table above, set 'To Trunk' to the last PRI port (2) to be used PSTN Fallback. AudioCodes Mediant CRP Document #: LTRT-29836... -
Page 47: Step 4: Configure Crp Gateway Routing
Open the Admin page: Append the case-sensitive suffix 'AdminPage' to the device’s IP address in your Web browser’s URL field (e.g., http://10.15.77.10/AdminPage). In the left pane of the page that opens, click ini Parameters. Figure A-10: Enable CRPGatewayFallback Parameter BroadCloud Hosted UC AudioCodes Mediant CRP... -
Page 48: Step 5B: Update The Crp Gateway Proxy Set
Configure a Proxy Address and port for Proxy Set for CRP Gateway: Parameter Value Index Proxy Address CRP LAN IP address and port e.g. 10.15.77.10:5070 Transport Type UDP (leave as is) Figure A-11: CRP Gateway Proxy Address Click Apply to apply definitions. AudioCodes Mediant CRP Document #: LTRT-29836... -
Page 49: B Troubleshooting
To enable the device to send the error messages (e.g. Syslog messages) to the CLI console, use the following commands: Start the syslog on the screen by typing: debug log Enable SIP call debugging debug sip 5 Stop Syslog on the screen by typing: no debug log BroadCloud Hosted UC AudioCodes Mediant CRP... - Page 50 Website: www.audiocodes.com © 2017 AudioCodes Ltd. All rights reserved. AudioCodes, AC, HD VoIP, HD VoIP Sounds Better, IPmedia, Mediant, MediaPack, What’s Inside Matters, OSN, SmartTAP, User Management Pack, VMAS, VoIPerfect, VoIPerfectHD, Your Gateway To VoIP, 3GX, VocaNom, AudioCodes One Voice and CloudBond are trademarks or registered trademarks of AudioCodes Limited.