
Related Manuals for BIG ASS FANS i6


Summary of Contents for BIG ASS FANS i6
- Page 1 READ AND SAVE THESE INSTRUCTIONS À LIRE ET À CONSERVER EN LIEU SÛR LEA Y CONSERVE ESTAS INSTRUCCIONES EXCEPTIONALLY ENGINEERED B IGASS FA N S . C OM...
- Page 2 BEFORE YOU START AVANT DE COMMENCER | ANTES DE COMENZAR ☑ Turn off Power at Breaker Coupez le courant au niveau du disjoncteur | Corte la energía desde el interruptor Input Voltage: 100–277 VAC, 1 Φ, 50~60 Hz Tension d’entrée : 100–277 V CA, 50~60 Hz | Tensión de entrada: 100–277 VCA, 50~60 Hz. Do not connect the fan to a damaged power source.
- Page 3 ☑ Gather Tools Préparez les outils nécessaires | Busque las herramientas Provided with fan Fourni avec le ventilateur Provisto del ventilador ☑ Check Outlet Box Vérifiez la boîte de dérivation | Verificar la caja de distribución Mount to an outlet box marked acceptable for fan support of 70 lb (31.8 kg). Assembler à...
- Page 4 UNIVERSAL MOUNT FIXATION UNIVERSELLE | MONTURA UNIVERSAL Safety Cable & Shackle Élingue de sécurité et manille Cable de seguridad y grillete Mounting Bracket Support de fixation Stabilizer Soporte de montaje Stabilisateur Estabilizador Flat Ceiling Wiring Cover Trim Wiring Cover Enjoliveur de couvre-fils pour plafond non incliné Couvre-fils Pieza de acabado para techo plano Tapa del cableado...
- Page 5 1. Install Mounting Bracket Mise en place du support de fixation | Instalar el soporte de montaje Outlet Box Boîte de dérivation | Caja de distribución WARNING: Mount only to an outlet box marked acceptable for fan support (70 lb [31.8 kg]). AVERTISSEMENT : Assembler uniquement à...
- Page 6 2. Connect Safety Cable, Ground Wire, and Wiring Harness Raccordement de l’élingue de sécurité, du fil de terre et du faisceau de fils Conectar el cable de seguridad, el cable de tierra y el arnés del cableado 1. Connect safety cable from downrod to motor shaft with bolt. 2.
- Page 7 3. Install Downrod Montage de la tige de prolongation | Instalar la varilla separadora 1. Tuck wiring up into bottom of downrod. 2. Lower downrod onto motor shaft, aligning yellow arrow sticker on downrod with arrow tab on motor shaft. Make sure wires are protruding 2–3 in. (51–76 mm) from top of downrod.
- Page 8 4. Install Motor Cover Mise en place du cache moteur | Instalar la cubierta del motor Lower motor cover onto motor unit. Secure with (4) bolts. Positionnez le cache moteur sur le bloc-moteur et fixez-le à l’aide de (4) vis. Baje la cubierta el motor hasta la unidad del motor.
- Page 9 5. Prepare Wiring Cover and Trim Préparation du couvre-fils et de son enjoliveur Preparar la tapa del cableado y la pieza de acabado Select sloped ceiling wiring cover trim or flat ceiling wiring cover trim. Insert wiring cover trim into wiring cover. Slide wiring cover and trim down downrod and rest on motor cover.
- Page 10 6. Hang Fan Suspension du ventilateur | Colgar el ventilador 6.1. Raise fan to mounting bracket. Align rib in mounting bracket with slot in mounting ball, position mounting ball, and let fan hang freely. Gently twist downrod to ensure it is properly seated and will not twist during fan operation.
- Page 11 7. Wire Fan Câblage du ventilateur | Cablear el ventilador Disconnect power before wiring fan. Coupez l’alimentation avant de procéder au câblage du ventilateur. Desconecte la alimentación eléctrica antes de cablear el ventilador. Connect wires from downrod to supply power wires. Connect earth/ground wire from mounting bracket to earth/ground wire from downrod.
- Page 12 8. Secure Safety Cable Mise en place de l’élingue de sécurité | Asegurar el cable de seguridad Option 1: Secure safety cable from downrod to tab on mounting bracket with thumb screw. 1re possibilité : à l’aide de la vis moletée, attachez l’élingue de sécurité...
- Page 13 Building Structure Structure du bâtiment | Estructura del edificio Wrap upper end of safety cable around building structure. Secure with shackle. Acceptable building structures include a wooden beam or a metal mounting brace secured between two beams. In some cases it may be necessary to install additional structural material to provide attachment points.
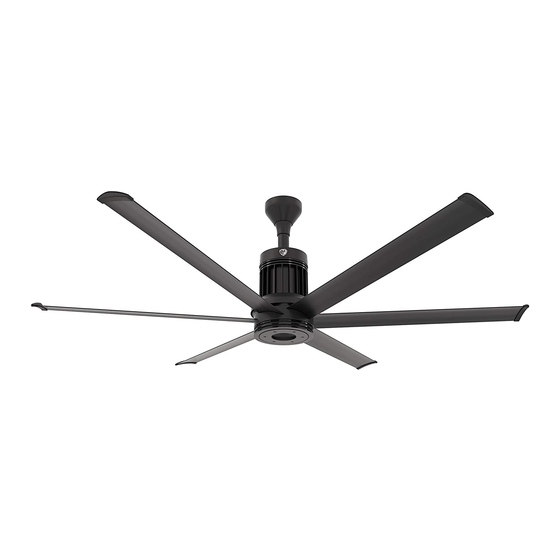
- Page 14 10. Install Airfoils Montage des pales | Instalar las aspas aerodinámicas 10.1. Slide airfoils into slots on sides of motor unit. Install each airfoil on opposite side of fan from previous airfoil to prevent fan from tilting. Make sure numbered sticker on each airfoil matches corresponding slot number on bottom of fan.
- Page 15 11. Install Light Kit or Lower Cover Mise en place du kit d’éclairage ou du cache inférieur Instalar el kit de iluminación o la cubierta inferior CAUTION: To reduce the risk of electric shock, disconnect power to fan before installing light kit. ATTENTION : Afin de prévenir tout risque de choc électrique, coupez l’alimentation du ventilateur avant d’installer le kit d’éclairage.
- Page 16 12. Secure Guy Wires (Outdoor Fans*) Fixation des haubans (ventilateurs extérieurs*) Asegurar los cables de sujeción (ventiladores para exteriores*) Attach eye bolts to mounting structure so Eye Bolt Piton that guy wires will be approximately 45° Perno de argolla from downrod when viewed from the side and approximately 90°...
- Page 17 Congratulations! Félicitations ! | ¡Felicitaciones! Installation is now complete. Test your fan using the remote control. L’installation est terminée. Vous pouvez à présent tester votre ventilateur en utilisant la télécommande. Ha terminado la instalación. Pruebe el ventilador usando el control remoto. For operation, maintenance, and troubleshooting information, visit bigassfans.com/support Pour obtenir les informations relatives au fonctionnement, à...
- Page 18 FLUSH MOUNT MONTAGE AFFLEURANT | INSTALACIÓN A RAS Wiring Harness Mounting Plate Faisceau de fils Plaque de fixation Arnés de cableado Placa de montaje Safety Clips (2) Attaches de sécurité (2) Ganchos de seguridad (2) Wiring Cover Couvre-fils Tapa del cableado Safety Cable &...
- Page 19 1. Install Wiring Harness and Mounting Plate Installation du faisceau de fils et de la plaque de fixation Instalar el arnés del cableado y la placa de montaje Disconnect power before wiring fan. Coupez l’alimentation avant de procéder au câblage du ventilateur. Desconecte la alimentación eléctrica antes de cablear el ventilador.
- Page 20 Outlet Box Boîte de dérivation | Caja de distribución Wiring Harness WARNING: Mount only to an outlet box marked Faisceau de fils acceptable for fan support (70 lb [31.8 kg]). Arnés de cableado AVERTISSEMENT : Assembler uniquement à une boîte de sortie jugée acceptable pour retenir un ventilateur (31,8 kg [70 lb]).
- Page 21 2. Prepare Wiring Cover Préparation du couvre-fils | Preparar la tapa del cableado Wiring Cover Rest wiring cover on top of motor unit. Couvre-fils Amenez le couvre-fils sur la partie supérieure du Tapa del cableado bloc-moteur. Apoye la tapa del cableado en la parte superior de la unidad del motor.
- Page 22 3.2. Connect wiring harness from fan to wiring harness from ceiling. Connect earth/ ground wire from fan to earth/ground wire tab on mounting plate. Ensure terminal is fully seated on tab. If wiring fan for 0–10 V control, see page 26 before proceeding. 3.2.
- Page 23 Option 2: Some local safety codes require ceiling fans to be secured directly to the building structure (Canada, Singapore). Check your local safety code if you are unsure. Contact Customer Service for help. If required, loop provided safety cable through safety cable from fan and route other end to building structure.
- Page 24 Building Structure Structure du bâtiment | Estructura del edificio Wrap upper end of safety cable around building structure. Secure with shackle. Acceptable building structures include a wooden beam or a metal mounting brace secured between two beams. In some cases it may be necessary to install additional structural material to provide attachment points.
- Page 25 6. Install Airfoils Montage des pales | Instalar las aspas aerodinámicas 6.1. Slide airfoils into slots on sides of motor unit. Install each airfoil on opposite side of fan from previous airfoil to prevent fan from tilting. Make sure numbered sticker on each airfoil matches corresponding slot number on bottom of fan.
- Page 26 7. Install Light Kit or Lower Cover Mise en place du kit d’éclairage ou du cache inférieur Instalar el kit de iluminación o la cubierta inferior CAUTION: To reduce the risk of electric shock, disconnect power to fan before installing light kit. ATTENTION : Afin de prévenir tout risque de choc électrique, coupez l’alimentation du ventilateur avant d’installer le kit d’éclairage.
- Page 27 Congratulations! Félicitations ! | ¡Felicitaciones! Installation is now complete. Test your fan using the remote control. L’installation est terminée. Vous pouvez à présent tester votre ventilateur en utilisant la télécommande. Ha terminado la instalación. Pruebe el ventilador usando el control remoto. For operation, maintenance, and troubleshooting information, visit bigassfans.com/support Pour obtenir les informations relatives au fonctionnement, à...
- Page 28 0–10 V Wiring (for fans ordered with 0–10 V option) Câblage 0-10 V (pour les ventilateurs commandés avec l'option 0-10 V) Cableado de 0–10 V (para ventiladores encargados con la opción de 0–10 V) The fan and light are programmed for sinking 0–10 V control by default. To change to sourcing control, contact Customer Service or visit bigassfans.com/support •...
- Page 29 2. Wire fan Câbler le ventilateur | Cablear el ventilador Universal Mount Fans: Route 0–10 V wiring into downrod and connect to 0–10 V wires on motor unit before securing downrod to fan (Universal Mount steps 2 and 3). Flush Mount Fans: Route 0–10 V wiring through mounting plate and connect to 0–10 V wires on motor unit after hanging fan (Flush Mount step 3).
- Page 30 Removing Covers and Light Kit Dépose du couvre-fil, du cache moteur et du kit d’éclairage Retirar las cubiertas y el kit de iluminación Use a long, thin object such as a small allen wrench or pen tip to press tab on wiring cover, light kit, or lower cover.
- Page 31 CONTACT US Nous contacter | En contacto con nosotros United States Canada 2348 Innovation Drive 2180 Winston Park Drive Lexington, KY 40511 Oakville, Ontario L6H 5W1 Canada 877-244-3267 1 844-924-4277 Outside the U.S. (+1 859-233-1271) bigassfans.com bigassfans.com Singapore Australia 18 Tampines Industrial Crescent #06-07 35 French Street Singapore 528 605 Eagle Farm, Brisbane...
- Page 32 ISM-INST-268-MUL-01 REV. D 12/05/2019...