Table of Contents
Advertisement
Advertisement
Table of Contents

Related Manuals for Gerber EDGE 2


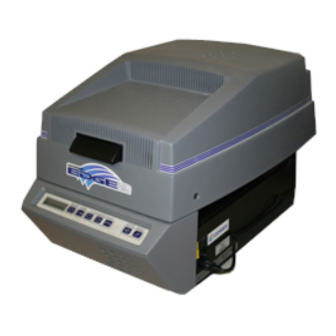
Summary of Contents for Gerber EDGE 2
- Page 1 Owner’s Guide...
- Page 2 This document is furnished to support the GERBER EDGE 2. In consideration of the furnishing of the information contained in this document, the party to whom it is given...
- Page 3 FCC NOTICE Warning: Changes or modifications to this unit not expressly approved by the party responsible for compliance could void the user’s authority to operate the equipment. Note: This equipment has been tested and found to comply with the limits for a Class A digital device, pursuant to Part 15 of the FCC rules.
-
Page 4: Table Of Contents
Conventions used in this manual ................... 2 Safety ............................3 Unpacking or repacking the EDGE 2 ..................3 Chapter 2: Connecting and Installing the EDGE 2..........5 Connecting to a PC ........................5 Installing the EDGE 2 into GRAPHIX ADVANTAGE ............7 Chapter 3: Material Handling.................. -
Page 5: Chapter 1: Introduction
Because a job can incorporate characters, shapes, scanned images, and clip art, the EDGE 2 opens up a wide array of possibilities for your customers and your business. In this manual This book is divided into the following chapters:... -
Page 6: Getting Help
Material handling describes how to put a roll of vinyl onto the tensioner assembly, load the vinyl into the EDGE 2, and position it correctly. It also describes the procedure for loading and unloading a foil cartridge. Operating the EDGE 2 describes the controls on the EDGE 2 keypad, how to print a job from GRAPHIX ADVANTAGE, and how to print old GA™... -
Page 7: Safety
Gerber Field Service Department at 800- 828-5406. Contents of the shipping boxes The GERBER EDGE 2 is shipped in two boxes: an EDGE 2 box and a system components box. The EDGE 2 box contains cushioning material and an inner box. The... - Page 8 CHAPTER 1 Introduction An EDGE 2 printer cable Thermal printhead cleaning kit An EDGE 2 accessory package consisting of: Two 10 amp fuses GERBER EDGE 2 Owner's Guide Getting Started with the EDGE 2 Lint-free cloth Cutter registration mark eyepiece (bombsight)
-
Page 9: Chapter 2: Connecting And Installing The Edge 2
Do not connect the EDGE 2 through the GRAPHIX ADVANTAGE security block. Do not connect any other printer, device, or switch box to the printer port you select. The EDGE 2 may not print or the print quality may be unacceptable. - Page 10 2 Align and plug the printer cable connector without thumbscrews into the receptacle on the back of the EDGE 2. Snap the wire bail locks up into their seats on the connector so they hold it firmly in place.
-
Page 11: Installing The Edge 2 Into Graphix Advantage
5 In the Ports box, click the option button for the correct port. 6 Click on Add. The EDGE 2 is added to the Installed Vinyl Printers list. 7 In the Installed Vinyl Printers list box, click on GERBER EDGE 2, then click on Preference. -
Page 12: Chapter 3: Material Handling
Tip: An easy way to clean the material before printing is to slew as much as you are going to use through the EDGE 2 and back again. The vinyl squeegee will leave a line of accumulated dust and dirt on the material where the slewing stopped. -
Page 13: The Foil
Do not soak the foil spray it just enough to blow the dust off. If the cartridge is in the EDGE 2, use FOIL SLEW to advance the foil several inches so that the dirt buildup is rolled beyond the printhead and onto the take-up spool. -
Page 14: Loading Material Into The Edge 2
2 Push in the cover latch and raise the cover. 3 Push the bail arm latch button toward the rear of the EDGE 2 and lift the bail arm to the raised position. Printhead... - Page 15 7 Lower the bail arm and push the bail arm latch toward the rear of the EDGE 2 so the latch locks the bail arm down. 8 Slew the vinyl back and forth so that the squeegees clean the area to be printed.
-
Page 16: Loading A Foil Cartridge
Substituting a material type or a foil color will result in an incorrect print setting being applied to it. 2 If there is a cartridge already mounted in the EDGE 2, dismount it by Mounted foil pushing the three cartridge... - Page 17 10 Close the cover. Note: You can check the Viewing hole amount of foil remaining by looking through the viewing hole on the end of the roll that would be on the bottom when the cartridge is mounted in the EDGE 2.
-
Page 18: Chapter 4: Operating The Edge 2
GAPlot32. Using GAPlot32, open the job file and make your normal plot selections. These selections are for both the EDGE 2 and the plotter (if the job is to be cut). Send the job to the EDGE 2 for printing. -
Page 19: Designing Jobs For The Edge 2
Choosing the right print mode Adjusting darkness with settings Because of the extremely tight tolerances on the EDGE 2, it is very important that all these factors are taken into account when printing an EDGE 2 job. Following the guidelines below will help you produce good output and cut down on wasted materials. -
Page 20: Understanding The Control Panel
The VINYL SLEW keys work when the EDGE 2 is offline, or online but waiting for you to load a new color cartridge. The keys are also used to make selections in the Setup menu. -
Page 21: Printing A Job
3 Press ONLINE. Load the foil cartridge called for in the display. (See “Loading a foil cartridge” on page 12.) 4 Press ONLINE. Printing starts. After the EDGE 2 prints the first color, it rewinds the vinyl and the display prompts for the next color. -
Page 22: Pausing And Restarting A Job
Pausing and restarting a job Pressing ONLINE while printing pauses the EDGE 2. The job stops printing and you can: look at the job while it is still in the EDGE 2 and before printing is complete slew the foil To restart printing at the same location where printing was interrupted, press ONLINE. -
Page 23: Cutting The Printed Job On A Plotter
Note: A Slow Slew mode is a feature of newer Gerber plotters. Slow Slew helps you align the knife with the print registration mark. Please check your owners guide or contact your Gerber distributor for details. -
Page 24: Using The Setup Menu
Using the setup menu When you press the SETUP key from the Offline mode, the EDGE 2 enters the Setup menu. Many parameters are accessed through the Setup menu. The only three you should attempt to change without the help of... - Page 25 OFF which matches the default setting of the EDGE 2. However, spool (SPL) files from GA version 4.1 have a checksum setting of ON. Unless you reset the checksum on the EDGE 2 you will not be able to print these files. You will get a...
-
Page 26: Matching A Print Created On An Older Edge
If it is necessary to match a job printed on an older EDGE, use the spool file (SPL) created for the older print. The EDGE 2 will recognize it as an old file and use the same speed and print settings that were used on the older EDGE. -
Page 27: Chapter 5: Troubleshooting
RESET. The EDGE 2 returns to offline and you must resend the job from the computer. Before pressing ONLINE to restart printing, you can: look at the job while it is still in the EDGE 2 and before printing is complete slew the foil The following is a list of messages which may appear on the message display and your response to each message. - Page 28 Gerber software checksum setting (refer to “Changing the checksum” on page 21). 3 Terminate all EDGE 2 jobs in Gerber Spooler. 4 Press RESET. The EDGE 2 is offline. 5 Press ONLINE. The EDGE 2 is online.
-
Page 29: Correcting Typical Problems
Print Order icon in the Plot program. Click on Settings in the Print Order dialog box, then choose a dark or darker setting. If the problem persists, please call your distributor or the Gerber Field Service Department. -
Page 30: Startup Problem
If your EDGE 2 is connected to the PC through an Iomega® ZipPLUS™ drive, Windows might fail to start if the EDGE 2 is already turned on while the computer is starting up. If you have this arrangement, turn off the EDGE 2 when starting the computer. -
Page 31: Chapter 6: Maintenance
When this happens, printing quality is degraded and a more thorough cleaning is necessary. Use the Thermal Printhead Cleaning Kit provided with your EDGE 2. If you need additional cleaning kits, contact your Gerber distributor or the Gerber Field Service Department. -
Page 32: Cleaning The Platen
Refer to the illustration to locate the areas to clean. Replacing fuses Two spare 10 amp fuses are provided with the EDGE 2. If you need to replace one, locate the fuse carrier immediately above the power switch on the right side of the machine. It is labeled “T10A 250V” and has a... - Page 33 Fuse carrier plate 3 Remove the blown out fuse(s) from the carrier and insert new fuse(s). 4 Insert the fuse carrier into the EDGE 2 with the notch down and snap into place. 5 Reconnect the power cord.
-
Page 35: Index
......14 cleaning ..........27 Getting help ..........2 location ..........12 GSP Setup, installing EDGE 2 ....7 Darkness setting, adjusting ....... 15 Data error message ........21 DPI, setting..........15 Heat and humidity........8... - Page 36 Home key ..........16 storage............. 8 substituting..........15 Messages confirm reset ......... 18 Installing the EDGE 2 ........ 7 data error..........21 Interrupting a job ........18 error ............23 Iomega ............26 Multiple color printing......17 Jobs Normalizing material ........8 aborting..........
- Page 37 Sprocket, movable ........11 Startup problem ........26 Registration Substituting color to color ........18, 25 foil........... 12, 15 cut to print ..........25 material ........... 10, 15 Repacking........... 3 Support,getting..........2 Reset key ..........16 Resolution, setting ........15 Restarting a job......... 18 Telephone assistance........
- Page 38 Gerber EDGE 2 Owner’s Guide COMMENT CARD Please take a moment to complete this questionnaire and mail it to Gerber Scientific Products or fax it to 860-290-5568 We are working hard to produce documentation that will meet your needs. We value your comments.
- Page 39 NO POSTAGE NECESSARY IF MAILED IN THE UNITED STATES BUSINESS REPLY MAIL FIRST CLASS PERMIT NO. 532 MANCHESTER, CT POSTAGE WILL BE PAID BY ADDRESSEE ATTN: TECHNICAL COMMUNICATIONS Gerber Scientific Products, Inc. 151 Batson Drive Manchester, CT 06040-9822 USA...
- Page 40 Gerber Scientific Products, Inc. 151 Batson Drive Manchester, CT 06040 www.gspinc.com P70488A Rev A...