Table of Contents
Advertisement
Quick Links
Advertisement
Table of Contents

Related Manuals for Gerber Solara ion


Summary of Contents for Gerber Solara ion
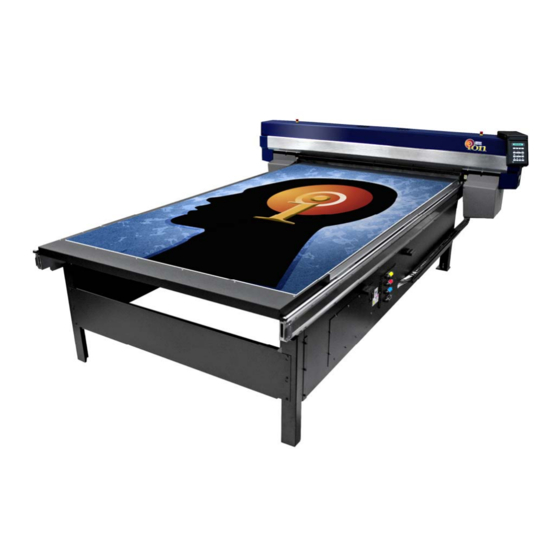
- Page 1 V ™ Gerber Solara ion UV Ink Jet Printer Owner’s Guide 4/29/10 Rev G...
-
Page 2: Additional Documentation
Additional Documentation Further documents, and updates to current documentation, will be available with each new firmware release. For the most up-to-date literature, contact your Gerber Service representative or check the eService Document Library which can be accessed from the Support section of the Gerber web site: www.gspinc.com. -
Page 3: Copyright Notice
Gerber Solara ion, GerberCAT, Cold Fire Cure Technology, FastFacts, ImageRIP, OMEGA, Support First, and Matched Technology System are trademarks and GSP is a registered trademark of Gerber Scientific Products. Onyx and PosterShop are registered trademarks and ProductionHouse is a trademark of Onyx Graphics. -
Page 4: Fcc Compliance
FCC Compliance Warning: Changes or modifications to this unit not expressly approved by the party responsible for compliance could void the user’s authority to operate the equipment. Note: This equipment has been tested and found to comply with the limits for a Class A digital device, pursuant to Part 15 of the FCC rules. -
Page 5: Table Of Contents
Exploring the printer's menu system ....................24 Status............................25 Setup............................25 Calibration ..........................25 Maintenance..........................26 The Gerber Solara ion web pages ......................27 Starting and stopping the printer ......................27 Firmware startup and internal diagnostics ..................28 Automatic ink level check .........................28 Automatic printhead cleaning check ....................28 Sleep/Idle mode ..........................28... - Page 6 Loading rigid material ..........................55 Uniform Print Gap & Elimination of Gap Between Prints............56 Understanding printing margins......................59 Chapter 5: Printing Jobs on the Gerber Solara ion ............61 Using RIP software and profiles ......................61 Print mode options ..........................61 Printer operations ..........................62 UV lamp automatic shut-off or Continuous mode ................62...
- Page 7 Filling the ink lines ..........................109 Preparing a printer that will not be used for up to two weeks............113 Steps for preparing the Solara ion for two weeks of idle time ...........113 Steps for restarting the Solara ion after two weeks of idle time..........113 Shutting down the printer for more than two weeks ..............114...
- Page 8 Determining the category of problems .....................163 Printer issues ............................164 Printer will not turn on ........................164 Printer is stuck on “Gerber” screen at power-up .................164 Printer is stuck on “Check the Shelf” screen.................164 Printer is stuck on “Warming” screen ...................164 Job will not print ..........................164 Winder does not roll up the material .....................165...
- Page 9 Small text quality is poor .........................170 Ink not curing ............................171 The ink forms small puddles on the print ..................171 Ink mist at front left corner of material..................171 Image easily scratches off the material ..................171 Entire print smudges when touched....................171 First few inches (50-100cm) of the job is not curing ..............172 One side of the print is not curing well ..................172 Job data errors ............................173 Data errors and interruptions during printing ................173...
-
Page 10: Quick Print Checklist
Quick Print Checklist After you have setup your Gerber Solara ion for the first time, use this checklist to help guide you through the steps required for getting the machine ready for printing. Refer to the page numbers provided next to each step for more information. -
Page 11: Chapter 1: Introduction
In addition the roll-to-roll option expands the length of the flatbed to 120" (3m/304.8cm). The Gerber Solara ion produces all kinds of durable, outdoor or indoor graphics on a wide variety of materials which meet the following standards: ... -
Page 12: In This Manual
Chapter 3: Setting up the Gerber Solara ion directs you in setting up the Gerber Solara ion to run on a network and other user-controlled options. -
Page 13: Safety Information
Turn printer off and unplug it from the power source before servicing. Unplug any communications cables before servicing. Never open covers affixed by screws unless directed by Gerber service personnel. Doing so may result in electric shock or damage to the printer. -
Page 14: Printer Ventilation
Never operate the Gerber Solara ion with any of the covers removed. Never operate the printer with the rubber light shields (flaps) missing or damaged. Contact Gerber if any of the rubber light shields (flaps) need to be replaced. Technical support If you have questions regarding using, maintaining, or troubleshooting the Gerber Solara ion please contact your Gerber distributor or Gerber Service. -
Page 15: Chapter 2: Product Overview
Size and weight You must have enough room to maneuver the packed Gerber Solara ion to its final location where you can unpack and assemble it. CAUTION: The Gerber Solara ion is packaged in several crate assemblies that vary based on the printer’s configuration. -
Page 16: Ambient Conditions
Noise level when operating vacuum table: ~77-78 Db Note: Installations in which the Gerber Solara ion will be placed on carpeting require the use of commercial or industrial rubber mats under and around the printer. This is to guard against excessive static electricity potentially interrupting system operation. -
Page 17: Printer Orientation
230 V lines and are also subject to +/- 10% current fluctuations. These below specification fluctuations of 208V lines do not to provide the Gerber Solara ion with adequate power to consistently cure ink. You must provide a 230 V line. -
Page 18: Computer And Software Requirements
Gerber Solara ion. If the computer is not configured properly, if it does not have a network card, or if the proper data cable is not used, you can run a test print on the Gerber Solara ion but you cannot send jobs from the computer. -
Page 19: Uv Ink Technology
Yellow (Y), Magenta (M), Cyan (C), and Black (K). The eight printhead system dedicates two printheads per ink color. The ink is supplied in one liter pouches that are used to refill the Gerber Solara ion ink reservoirs. Four color-coded ink drawers contain receptacles to accept the ink pouches. -
Page 20: Material Storage
Gerber Solara ion control panel The Gerber Solara ion has two control panels for ease of use: the main control panel and the auxiliary keypad. The main control panel is located on the printhead gantry, rotates 180 and has an adjustable viewing angle for ease of use. -
Page 21: Main Control Panel
CHAPTER 2 Product Overview Main control panel Printer Ready Screen interface for status messages, printer progress, and setup controls. Navigational keys for screen interface. If the BACK ENTER printer's Menu is activated, these controls also navigate through the sub-menus for printer setup, calibration, status, and maintenance. -
Page 22: Control Panel Keys
CHAPTER 2 Product Overview Control Panel keys The Screen shows menus, instructions, system and To move through menus: job status, and messages. An icon in the lower right BACK moves up through the menu tree corner indicates the type of message or sub-menu. ... - Page 23 The CLEAN HEADS yellow LED Use the SLEW key to move the Press the LOAD/UNLOAD key to blinks to indicate that it has been gantry along the table on the X prepare the printer for loading or four hours since the last Clean axis (front to back).
-
Page 24: Power-Up Functions
This menu system is not necessary for day-to-day operation of the Gerber Solara ion. When navigating through the sub-menus, an icon displays on the bottom right corner of the screen to indicate your location within the menu structure. -
Page 25: Status
The Setup section of the printer's menu provides access to UV lamp controls as well as displaying the Network Configuration settings. To change the network settings, you must use the Gerber Solara ion web pages. See the “Network Settings” on page 129 for detailed instructions. -
Page 26: Maintenance
See page 102. Inspect Nozzles to view and clean the area around the printheads. See page 88. Clear Ink Lines used by a Gerber technician to remove all ink from the printer. See page 106. Fill Ink Lines to initially load ink when the system is new or after ink has been removed from the system. -
Page 27: The Gerber Solara Ion Web Pages
The Clean Heads LED blinks as a reminder to run the clean heads procedure. Gerber recommends that you leave the Gerber Solara ion powered on at all times. Do not turn the printer off, even for extended periods of down time. If the printer will not be in use for longer than two weeks, you must follow the special procedures described in “Shutting down... -
Page 28: Firmware Startup And Internal Diagnostics
After 10 minutes of idle time When the Solara ion is idle for 10 minutes it will automatically go into idle mode. When in idle mode, the UV lamps, vacuum blowers, and roll-to-roll fans turn off and the gantry rises to its home position. -
Page 29: Emergency Stop
CHAPTER 2 Product Overview Emergency Stop There are two emergency stop button located on either end of the gantry. Press either button to immediately shut down the UV lamps and abort printing. The screen flashes the following Emergency Stop message: Emergency Stop Maintenance shelf and head access door emergency stop Opening the maintenance shelf or the head access door will also cancel a job which is printing. -
Page 31: Chapter 3: Setting Up The Gerber Solara Ion
Tip: When a live network cable is plugged into the computer, the RJ45 jack LED will light. Setting fixed (static) network addresses When the Gerber Solara ion arrives from the factory, it is set to use fixed (static) network addresses. You will need to obtain and assign the correct addresses in order for the computer to be able to communicate with the printer. - Page 32 1 Open a web browser on a computer connected to the Gerber Solara ion. (The internet connection does NOT have to be active.) 2 Enter the IP address for the specific Gerber Solara ion that you wish to access as a web address in the web browser. (Do not use any slashes or colons.) 3 Press Enter and the Home page should appear on your web browser.
-
Page 33: Setting The Ip Address And Subnet Mask Of Your Computer
Setting the IP Address and Subnet Mask of your computer When using Fixed network settings, the default IP address of the Gerber Solara ion is 192.168.000.050 and the default Subnet mask is 255.255.255.000. The following procedure uses 192.168.000.001 for the computer's IP address and 255.255.255.000 for the Subnet mask. - Page 34 CHAPTER 3 Setting up the ERBER OLARA ION 3 Click Network and Sharing Center. 4 Click the Manage network connections task on the left side of the screen to open the Network Connections screen. 4/29/10 Rev G...
- Page 35 CHAPTER 3 Setting up the ERBER OLARA ION 5 Right click the Local Area Connection and choose Properties to display the Local Area Connection Properties dialog box. 6 Select Internet Protocol Version 4 (TCP/IPv4) and then click Properties. The following dialog box displays.
- Page 36 CHAPTER 3 Setting up the ERBER OLARA ION 4 Click Internet Protocol (TCP/IP) in the list. 5 Click Properties to open the Internet Protocol (TCP/IP) Properties dialog box. 6 Click Use the following IP address: 7 Enter 192.168.0.1 for IP Address. 8 Press Tab to automatically enter the correct Subnet Mask (255.255.255.0).
-
Page 37: Checking Network Connections
OLARA ION Checking network connections You can check the network connections to be sure that the computer and Gerber Solara ion can communicate. If you experience any difficulty with network communications, disconnect and reconnect the network cables to ensure that they are seated properly before continuing. - Page 38 CHAPTER 3 Setting up the ERBER OLARA ION 2 Press the or key until the screen displays. Press ENTER to display Setup Lamp screen. Delay Setup 3 Press ENTER to display the screen. IP Address IP Address 192.168.0.50 4 Press the ...
-
Page 39: Chapter 4: Loading Inks And Materials
Consult the MSDS sheets and local codes for proper disposal. Gerber Solara ion uses four GerberCAT ink colors: Cyan (C), Magenta (M), Yellow (Y), and Black (K), supplied in one liter pouches. The ink pouches are installed in color-coded ink drawers that fill the four internal reservoirs. -
Page 40: Checking The Ink Level
Replacing ink pouches when ink remains in the reservoir When a pouch level is low, the Ink Level LED is solidly lit on the Gerber Solara ion control panel indicating that you will need to replace the pouch soon. The Ink Level LED blinks when a pouch is empty. - Page 41 CHAPTER 4 Loading Inks and Materials 1 Open the color-coded ink pouch drawer located on the side of the Gerber Solara ion. You should not open the ink drawer more than 10 times per pouch as excessive opening and closing can damage the pouch and cause ink leakage in the drawer CAUTION: Do not attempt to open the ink pouch door when the printer is actively printing and the gantry is moving towards the drawer.
-
Page 42: Replacing An Ink Pouch When The Reservoir Is Empty
Tip: In the event of an ink reservoir failing to fill, the amount of ink remaining in the pouch is no longer set to zero. The ink pouch status will remain as it was prior to the fill failure. Loading the material The Gerber Solara ion is a flat bed printer with an optional roll-to-roll configuration. - Page 43 CHAPTER 4 Loading Inks and Materials equipped), which makes use of both the roll material loader bar and the automatic winder unit. The roll-to-roll configuration uses eight pinch and grit wheels to grip and pull the material through the printer's roll-to-roll assembly. When printing, fans under the material create a vacuum to hold the material firmly against the printer's flat bed or roll-to-roll platen to maintain its position during printing.
-
Page 44: Printer/Graphic Orientation
CHAPTER 4 Loading Inks and Materials Printer/graphic orientation It is important to understand the position of the graphic sent from the RIP software and its orientation on the flatbed table. The flatbed portion of the table with the maintenance shelf is considered the front of the printer. -
Page 45: Choosing A Material Type
When printing on rigid substrates you have the option of full bleed printing which allows the Gerber Solara ion to print a job larger than the sign blank, resulting in the printed area extending beyond the edges of the material. -
Page 46: Normalizing Material
CHAPTER 4 Loading Inks and Materials recommended by Gerber are not covered by the Gerber Solara ion warranty. See the Gerber web site, www.gspinc.com, for a complete list of recommended materials. Normalizing material The size of material can change depending on the temperature and/or humidity of the working environment. - Page 47 CHAPTER 4 Loading Inks and Materials 4 Wait until the cleaning solution fully evaporates before loading or printing on the substrate. Complete evaporation of the solution may take several minutes to several hours. Refer to the substrate’s product bulletin for specific instructions. 4/29/10 Rev G...
-
Page 48: Using Material Hold-Down Devices For Roll Material
Cleaning rolled material Flexible substrates are both rolled and sheet materials of many types including vinyl, banner, paper and textiles. Due to the variety of flexible substrates, Gerber recommends following the manufacturer’s specifications for storage and cleaning. Following are instructions for preparing vinyl for printing. -
Page 49: Loading Roll Material In The Roll-To-Roll Configuration
Loading Inks and Materials Adjusting the UV shield for rigid material The Gerber Solara ion comes with a sliding UV shield that protects the printer from over- exposure to UV light. Material hold-down devices are not required for rigid material. -
Page 50: Using The Material Roller
CHAPTER 4 Loading Inks and Materials Using the material roller When loading roll material onto a material roller, place the roll on a flat surface. Never load a roll of material onto a roller standing on end as it can damage the material and the roller. CAUTION: Material rolls can be heavy. -
Page 51: Loading Roll Material Into The Printer
The following procedure applies to both sheet and roll-fed material. Note: The Gerber Solara ion does not detect material size (length or width). Material size must be set in the RIP and the user must be careful to load the correct size material to accommodate the job. -
Page 52: Using The Winding Unit
CHAPTER 4 Loading Inks and Materials 8 The right edge of the material should be approximately ¼" (6mm) underneath the right hold-down which is located at the far right edge of the platen. Right material hold-down device Slide the left hold-down so that it is ¼" (6mm) over the material to ensure that the material does note curl or bend during printing. - Page 53 CHAPTER 4 Loading Inks and Materials the printed material loop passes in front of the sensor, the winding unit turns on and winds the excess material onto the take-up roll. To load material on the winding unit 1 If the winder has been previously activated it may attempt to wind the material while you are trying to tape it onto the roller.
-
Page 54: Removing Material From The Winding Unit And Printer
CHAPTER 4 Loading Inks and Materials Removing material from the winding unit and printer The optional Roll-to-Roll system is equipped with a cut-off blade groove along the width of the platen for easy removal of printed material from the supply roll. Cut-off blade groove To unload roll material from the winder and printer 1 Using a hand-held cut-off blade in the blade groove (or a pair of scissors), carefully cut... -
Page 55: Loading Rigid Material
There are no extra precautions necessary when printing long jobs using the roll-to- roll configuration. Note: The Gerber Solara ion does not detect material size (width or length). Material size must be set in the RIP. When loading material, you must verify that there is sufficient material for the completion of the job. -
Page 56: Uniform Print Gap & Elimination Of Gap Between Prints
CHAPTER 4 Loading Inks and Materials Alignment guidelines 4 Press the LOAD/UNLOAD key to turn on the table vacuums. You can use the auxiliary keypad or the main control panel. If the vacuum does not completely pull down the material, tape the edges of the material to the table using a light adhesive tape. - Page 57 CHAPTER 4 Loading Inks and Materials Carriage Print heads CORRECT UV lamps Carriage motion Reflected UV UV shield Board Carriage Print heads INCORRECT UV lamps Carriage motion Reflected UV UV shield Board Similarly, avoid arranging boards on the table with gaps. Leaving gaps between boards will result in UV light reflecting back into the print head and causing nozzle blockages.
- Page 58 CHAPTER 4 Loading Inks and Materials CORRECT Carriage Print heads UV lamps Reflected UV Carriage motion UV shield Board Sacrificial material Board to be printed Arrange the boards on the table in order to avoid gaps and prevent reflected UV light by using sacrificial material or butting the boards next to each other.
-
Page 59: Understanding Printing Margins
56. The Gerber Solara ion is able to print on a wide variety of materials at widths ranging from 12" (30.5cm) to 64" (162.6cm). -
Page 61: Chapter 5: Printing Jobs On The Gerber Solara Ion
Gerber-authorized software has been approved to work with the Gerber Solara ion and Gerber inks and materials. Following is a list of approved software at the time of this manual’s printing. Consult the GSP web site www.gspinc.com for an up-to-date listing. -
Page 62: Printer Operations
Printer operations There are some behavioral characteristics of the Gerber Solara ion that you should be aware of before printing a job. UV lamp automatic shut-off or Continuous mode The UV lamps are designed to automatically turn off upon completion of a job. -
Page 63: Lamp Spec Mode
Lamp Spec mode is set in the Setup section of the printer Menu or on the System Settings web page. The default setting for Lamp Spec Mode is Normal. Note: Lamp Spec mode may or may not increase the curing success of some materials. Gerber suggests using Gerber-qualified materials for the best results. -
Page 64: Large Field Mode
CHAPTER 5 Printing Jobs on the GERBER SOLARA ION Large Field mode Large Field located in the Setup menu improves the print quality of large solid areas of color, especially light blue or green. By default, Large Field is disabled and the printer is set to normal mode which enhances details and small text in a print. -
Page 65: Gantry Adjustment
CHAPTER 5 Printing Jobs on the GERBER SOLARA ION Setup 3 Press ENTER to display the screen. Lamp Delay 4 Press the arrow keys until the screen displays and then press ENTER. Step Blending Step Blending: 5 Use the arrow keys to select and then press ENTER. -
Page 66: Uv Lamp Warm-Up
After 10 minutes of idle time When the Solara ion is idle for 10 minutes it will automatically go into idle mode. When in idle mode, the UV lamps, vacuum blowers, and roll-to-roll fans turn off and the gantry rises to its home position. -
Page 67: Cleaning The Printheads
Change material between jobs Advance the material before the next job After a job prints, the Gerber Solara ion waits for you to begin the next job when it is received at the printer (see “Printing a single job” on page 67). -
Page 68: Viewing Job Information At The Printer
If a job does not start when running in Continuous mode When the Gerber Solara ion is printing in Continuous mode, the next job will not begin if one of the following conditions occurs: ... -
Page 69: Printing A Single Roll-To-Roll Or Flat Bed Job
Printing a single Roll-to-Roll or Flat Bed job When printing on rigid or roll-to-roll substrates job setup is quick and easy. The Gerber Solara ion automatically sets the proper lamp height and print gap for the loaded material without user intervention. - Page 70 CHAPTER 5 Printing Jobs on the GERBER SOLARA ION requested material and size. Job information is only available after the job is received and when printing or warming. Ready - <job name> Duration 20 Min 4 When printing in roll-to-roll mode, if the vacuum is currently off, the following message displays giving you the option to turn the vacuum on before printing.
-
Page 71: Media Feed Adjustment On A Roll-To-Roll Job
8 As the job prints, the job status line scrolls to display additional job information and the progress bar updates. Every 10 minutes while the printer is on, the Gerber Solara ion clears the printhead nozzles by spitting ink in the waste ink tray. If the printer is actively printing, it pauses at the end of a swipe, moves carriage to the spitting location and clears the nozzles. -
Page 72: Printing A Full Bleed Flat Bed Job
Printing a full bleed Flat Bed job When in FLAT BED mode the Gerber Solara ion has the ability to print full bleed which prints a job which is larger than the sign blank, resulting in the printed area extending beyond the edges of the material. -
Page 73: Printing Double-Sided, Full-Bleed
CHAPTER 5 Printing Jobs on the GERBER SOLARA ION Tip: If ink does contact the table when printing in full bleed mode, carefully remove the ink with a straight edge razor blade. It should lift off easily if you remove it promptly. The longer the ink remains on the table, the stronger it adheres, and the more difficult it can be to remove. - Page 74 CHAPTER 5 Printing Jobs on the GERBER SOLARA ION 4 Load the sign blank by aligning it to the table alignment marks/holes. Press the Load/Unload button on the printer when finished. 5 In order to protect the job from printing directly on the table, you need to protect the printer’s flat bed with tape and scrap...
-
Page 75: Printing Multiple Roll-To-Roll Jobs In Continuous Mode
CHAPTER 5 Printing Jobs on the GERBER SOLARA ION 6 Using the new page size, send the job to the printer and start printing by pressing the Run Job button in the Solara ion. When the Solara ion asks you to move the UV shield, move the UV shield so that it is aligned with the scrap material, not the substrate’s... - Page 76 CHAPTER 5 Printing Jobs on the GERBER SOLARA ION For complete details on Continuous mode, see “Continuous mode” on page 67. To print multiple Roll-to-Roll jobs 1 Press the ROLL-TO-ROLL key on the control panel until the Cont. LED lights. The ROLL-TO-ROLL key toggles between Single and Cont.
-
Page 77: Canceling A Job
CHAPTER 5 Printing Jobs on the GERBER SOLARA ION Canceling a job Cancel a job by pressing the CANCEL key on the control panel. After confirming the cancel the printer stops and the job is cleared from the queue. You can clear other jobs in the queue by pressing the CANCEL key as the jobs are received. -
Page 78: Chapter 6: Routine Printer Maintenance
Chapter 6: Routine Printer Maintenance Regularly performing recommended maintenance tasks will help keep the Gerber Solara ion running at peak performance. This chapter describes required daily, weekly, and monthly printer maintenance. Following is a chart of maintenance terms, their definition and intended usage. -
Page 79: Gerber Solara Ion V Regular Preventive Maintenance
Be aware that damage caused by use of unapproved swabs or wipes will not be covered under the standard 12 month warranty for the Solara ion or a Gerber Service Contract. Always use new, clean wipes and swabs on different colored printheads. Never reuse wipes and swabs. - Page 80 Consumables items Daily Maintenance Solution GerberCAT Ink Cyan 1 Liter Pouch Gerber Clean Solution GerberCAT Ink Yellow 1 Liter Pouch Impervious nitrile gloves at least 8 mils thick GerberCAT Ink Black 1 Liter Pouch ...
- Page 81 X Gantry Adjustment The Gerber Solara ion should be left powered on for 24/7 in order to maintain ink vacuum The printer has a sleep mode in which heaters are turned off after two hours of idle time. Shut down for more than two weeks If you need to shut down the printer for more than two weeks you must follow the procedure “Shutting...
-
Page 82: Daily Maintenance
CHAPTER 6 Routine Printer Maintenance Daily maintenance Note: The Clean Heads Procedure and End of Day Clean only need to be performed when the printer is being utilized. Tips for Clean Heads procedure 1) What is the purpose of the Clean Heads procedure? ... - Page 83 Skipping Clean Heads Procedure and End of Day Clean. Using the wrong swabs and/or wipes (use ONLY Gerber approved Fisher Brand foam tip swabs and Anticon® Gold heavy-weight, clean room wipes). Ensure they are covered with an Anticon wipe when the procedure calls for it.
-
Page 84: Clean Heads Procedure
CHAPTER 6 Routine Printer Maintenance CAUTION: It is imperative that the End of Day Clean is performed to prevent ink buildup. A Clean Heads procedure must be performed whenever the Clean Heads LED is blinking. Perform this simple maintenance procedure to maximize printhead life and ensure high quality prints. - Page 85 CHAPTER 6 Routine Printer Maintenance Note: Both job length and material thickness affect the frequency of Clean Heads procedures required to maintain healthy printheads: shorter length jobs and/or thicker materials will increase the frequency of need for Clean Heads procedures due to greater UV exposure to the printheads under these conditions.
-
Page 86: End Of Day Clean
OK or not. If it is OK, proceed as normal. If NOT, check ink levels via front panel (see page 40). Replace any empty pouches and repeat the Clean Heads procedure. If none are empty and print quality of Nozzle Out job is poor, contact Gerber Service. End of Day Clean CAUTION: All 4 heads MUST be cleaned at the end of every print day. - Page 87 CHAPTER 6 Routine Printer Maintenance Note: A shortcut for Steps 1-4 below can be performed be depressing the PAUSE key and holding it while depressing the CLEAN HEADS key simultaneously. 1 From the main control panel press the MENU key. The screen displays.
-
Page 88: Cleaning The Sliding Uv Shield And Side Plates
CHAPTER 6 Routine Printer Maintenance CAUTION: Never reuse old swabs to clean the printhead. Never use the same swab on two different color printheads. 9 Repeat the previous steps for the remaining heads, moving from left to right, and using a new Anticon-covered swab for color printhead. Note: Prior to raising the Maintenance Shelf, be sure to complete all steps for all printheads and check the UV shield and side plates for presence of wet and/or cured ink. - Page 89 CHAPTER 6 Routine Printer Maintenance disposed of after one hour of exposure time. Wear safety goggles to protect your eyes. Dispose of used gloves according to local laws and regulations. 1 From the main control panel press the MENU key. The screen displays.
- Page 90 CHAPTER 6 Routine Printer Maintenance Left side plate between waste tray and table Right side plate 9 Dispose of ink and wipes according to state and local laws and regulations. 10 Wipe down the side plates and sliding UV shield with an all-purpose wipe that has been dampened with water.
-
Page 91: Cleaning Individual Color Printheads
CHAPTER 6 Routine Printer Maintenance Cleaning individual color printheads You can choose to clean one or more color printheads by selecting Clean Heads from the Maintenance section of the Printer menu. When cleaning printheads by color, both printheads using that color ink will be cleaned. The Clean Heads procedure timer does not get reset unless all of the printheads are cleaned. - Page 92 CHAPTER 6 Routine Printer Maintenance 4 Press the or key until the screen displays. Clean Heads Clean Heads screen. Use the or key until the correct 5 Press ENTER to display the Choose color color displays. Choose color: Magenta 6 Press ENTER to select that color.
-
Page 93: Emptying And Cleaning The Waste Ink Tray
Nozzle Out job is poor, contact Gerber Service. Emptying and cleaning the waste ink tray Every ten minutes while the printer is on, the Gerber Solara ion clears the printhead nozzles by spitting ink in the waste ink tray. - Page 94 CHAPTER 6 Routine Printer Maintenance 1 When the printer is idle, remove the head access and set it aside on an all-purpose wipe. Note: Removing the head access door when a job is printing will cancel the job. 2 The printer displays Check Shelf, Access Door, and E- stops.
-
Page 95: 40 Hour Maintenance
Process overview Print Angled Nozzle job Identify print head(s) with Angled Nozzle Apply Gerber Daily Maintenance Solution (DMS) – 3 cycles Apply Gerber Clean Solution (GCS) – 5 cycles Perform routine Clean Heads Procedure Print Angled Nozzle Job and evaluate results... - Page 96 CHAPTER 6 Routine Printer Maintenance CAUTION: This procedure is for Cyan (C), Magenta (M), and Black (K) heads only. To determine print heads with angled nozzles 1 Go to Calibration > Test jobs > Angled Nozzle job. 2 Print the Angled Nozzle job and evaluate the nozzles. Only treat the print heads that show angled nozzles.
-
Page 97: Cleaning The Flat Bed
5 Repeat steps 1-4 for a total of five cycles for each print head requiring treatment. To complete the process 1 After finishing the Gerber Clean Solution steps above, wait 5 minutes with the shelf down before continuing. 2 Raise the shelf after 5 minutes. -
Page 98: Cleaning The Ink Drawers
Note: A color shift may be noticeable over time. Cleaning the outside of the Gerber Solara ion As needed, the covers of the Gerber Solara ion can be wiped down with a soft lint-free cloth to remove dust and fingerprints. -
Page 99: Monthly Maintenance
CHAPTER 6 Routine Printer Maintenance Monthly maintenance This section describes the recommended monthly maintenance. CAUTION: A Purge must be performed on all printheads once a month to ensure ink line and nozzle health. Follow the Purge procedure which starts on page 102. 4/29/10 Rev G... -
Page 100: Six Month Maintenance
CHAPTER 6 Routine Printer Maintenance Six month maintenance This section describes the recommended six month maintenance. Cleaning the table rails Every six months clean the two table rails from end to end with an all-purpose wipe moistened with isopropyl alcohol. Cleaning the Roll-to-Roll grit wheels Every six months, if the printer is equipped with a Roll-to-Roll unit, clean the Roll-to-Roll grit wheels with a stiff brush and adhesive remover to remove any vinyl adhesive or other residue... -
Page 101: Cleaning The Roll-To-Roll Rubber Drive Wheels
Lower drive wheels with rubber inserts Upper drive wheels with rubber inserts Yearly maintenance Most yearly maintenance procedures are performed by an authorized Gerber service engineer. The yearly maintenance requirements are listed on the chart located on page 101. Replacing the light shields (flaps) Each year or whenever a rubber light shield (flap) is damaged you should replace them. -
Page 102: Purging Ink Lines To Remove Air
Wear safety goggles to protect your eyes. Dispose of used gloves according to local laws and regulations. CAUTION: It is very important to use only Gerber-recommended wipes and swabs when purging the printheads. Use of wipes and swabs other than what is recommended could damage the printheads. - Page 103 CHAPTER 6 Routine Printer Maintenance Maintenance 3 Press ENTER to display the screen. End of Day Clean End of Day Clean 4 Press the or key until the screen displays. Purge Purge 5 Press ENTER to display the Choose Color screen. Use the keys to select the printhead color that you wish to purge.
- Page 104 Close the purge valve fully and re-open ¾ to 1 full turn using the Allen wrench. Check the ink flow again. If ink still does not flow in a steady stream, contact Gerber Service. 11 The printer then prompts you to Close all purge valves.
- Page 105 CHAPTER 6 Routine Printer Maintenance remaining ink and prevent it from dripping during printing and/or curing on the Purge Block. Press ENTER when done. After purging, use a Daily Maintenance Solution-moistened swab to wipe the Purge Block 15 Dispose of swab according to state and local laws and regulations. 16 The printer now begins to calibrate the ink level and reestablishes ink pressure.
-
Page 106: Clearing The Ink Lines
OK or not. If it is OK, proceed as normal. If NOT, check ink levels via front panel (see page 40). Replace any empty pouches and repeat the Clean Heads procedure. If none are empty and print quality of Nozzle Out job is poor, contact Gerber Service. Clearing the ink lines In the event that you must remove the ink from the printer, use the Clear Ink Line command in the Maintenance menu. - Page 107 CHAPTER 6 Routine Printer Maintenance CAUTION: During maintenance procedures, always wait for printer prompts before lowering the maintenance shelf or opening the head access door. Performing either of these actions prior to the prompts will cause an emergency stop and require you to redo maintenance procedures from the beginning.
- Page 108 CHAPTER 6 Routine Printer Maintenance 9 The printer prompts you to . Remove the waste ink tray, empty Check the Ink Waste Tray it if necessary, replace the two all-purpose wipes if they are saturated, and reinstall tray (see page 93). 10 The screen prompts you to Open “INK COLOR”...
-
Page 109: Filling The Ink Lines
CHAPTER 6 Routine Printer Maintenance 15 The screen prompts you to select another ink color line to clear. If you wish to clear another ink line, use the arrow keys to select . The screen displays and Choose Color you can begin the Clear Ink Line sequence again with a different color. If you are done, select to continue. - Page 110 CHAPTER 6 Routine Printer Maintenance Status 3 Press the or key until the screen displays. Maintenance Maintenance 4 Press ENTER to display the screen. End of Day Clean End of Day Clean 5 Press the or key until the screen displays.
- Page 111 CHAPTER 6 Routine Printer Maintenance WARNING: Use care when opening the ink valves as it is easy to push the printhead carriage away from the waste ink tray causing ink to drip on the printer electronics and cause damage. The carriage should not move during this procedure. The bottom of the carriage has a shield, hold the shield in place with your fingers while turning the purge valve set screw.
- Page 112 CHAPTER 6 Routine Printer Maintenance After purging, use a Daily Maintenance Solution-moistened swab to wipe the Purge Block 17 Dispose of swab according to state and local laws and regulations. 18 The printer now begins to calibrate the ink level and reestablishes ink pressure. This process may take two to three minutes and a progress bar displays.
-
Page 113: Preparing A Printer That Will Not Be Used For Up To Two Weeks
Preparing a printer that will not be used for up to two weeks Gerber strongly recommends that this procedure be performed if you will not use the Gerber Solara ion for up to two weeks. Steps for preparing the Solara ion for two weeks of idle time... -
Page 114: Shutting Down The Printer For More Than Two Weeks
Gerber strongly recommends that the Solara ion remain powered on even for short periods when it is not in use. This procedure should be performed if you need to shut down the Gerber Solara ion for more than two weeks. The procedure is divided into two parts: Steps for shutting down the Solara ion ... - Page 115 Close the purge valve fully and re-open ¾ to 1 full turn using the Allen wrench. Check the ink flow again. If ink still does not flow in a steady stream, contact Gerber Service. 12 When the ink clearing is complete the screen prompts you to Close all purge valves.
- Page 116 CHAPTER 6 Routine Printer Maintenance Note: The Front Panel may display depending upon how quickly Depressurizing, please wait... valves are closed/opened and ENTER is pressed. 13 The printer prompts you to Empty tray as necessary, replace Check the Ink Waste Tray. two all-purpose wipes, and reinstall tray (see page 93).
- Page 117 CHAPTER 6 Routine Printer Maintenance 21 Place 3-5 drops of Daily Maintenance Solution onto a new Anticon-covered swab. See photo above. 22 Wipe the left-most printhead from back to front 2 times at a 45 angle, using light pressure, by holding the swab in the middle of the stick, between the thumb and index finger as pictured below.
- Page 118 CHAPTER 6 Routine Printer Maintenance 5 Press the or key until the screen displays. Fill Ink Line screen. Use the or keys to display 6 Press ENTER to display the Choose Color (all lines will be filled sequentially with GerberCAT Flush). Press ENTER to Colors, select , and the working icon displays.
- Page 119 CHAPTER 6 Routine Printer Maintenance 13 When the purge is complete the screen prompts you to Close all purge valves. Press ENTER Use the 2mm Allen wrench to close valve and press ENTER. when done. 14 Repeat the previous steps for all colors. 15 When all line clearing is complete, the system prompts you to Clean the Purge Block.
- Page 120 CHAPTER 6 Routine Printer Maintenance CAUTION: Never reuse old swabs to clean the printhead. Never use the same Anticon-covered swab on two different color printheads. 23 Repeat the previous steps for the remaining heads, moving from left to right, and using a new Anticon-covered swab for each color printhead.
- Page 121 CHAPTER 6 Routine Printer Maintenance 9 After pressing ENTER, the screen prompts you to Open both ‘‘INK COLOR’’ Purge Valves. Press ENTER when done. 10 Open the 1 purge valve for the color you wish to purge using the 2mm Allen wrench. Turn the wrench ¾...
- Page 122 CHAPTER 6 Routine Printer Maintenance 16 Dispose of used swab according to local laws and regulations. 17 The printer begins automatic maintenance of the ink delivery system. This process takes two to three minutes and a progress bar displays. 18 When finished, the system prompts you to Replace Head Access Door.
-
Page 123: Steps For Restarting Your Solara Ion
OK or not. If it is OK, proceed as normal. If NOT, check ink levels via front panel (see page 40). Replace any empty pouches and repeat the Clean Heads procedure. If none are empty and print quality of Nozzle Out job is poor, contact Gerber Service. Steps for restarting your Solara ion Use the Fill Ink Line command in the Maintenance section of the printer’s menu to load... -
Page 124: Chapter 7: Gerber Solara Ion Web
1 Open a web browser menu on the connected computer. (The internet connection does not have to be active.) 2 Enter the IP Address for the specific Gerber Solara ion you wish to access as the web address in the web browser. (Do not use any slashes or colons.) Note: The following illustration is an example of a typical IP address for the printer. -
Page 125: Home Page
4 Click a link to open the corresponding web page. Home page This page displays the printer name, the status, and contains links to other Gerber Solara ion web pages. Example IP address Links to other... -
Page 126: System Status Page
Gerber Solara ion Web Pages System Status page The System Status page is available from a link on the Gerber Solara ion Home web page. The Printheads section of System Status page displays the status of each printhead including its current temperature. -
Page 127: System Settings Page
Gerber Solara ion Web Pages System Settings page The System Setting page is available from a link on the Gerber Solara ion Home web page. Click the link to open the System Settings page where you can modify: Printer Name ... -
Page 128: Choosing The Numeric Units
Gerber Service for diagnostic purposes. Choosing the numeric units The units used on the Gerber Solara ion and on the web pages can be chosen via the System Settings page. The choices are: Inches, Feet, and Yards. The default numeric unit is Inches. -
Page 129: Network Settings
Gerber Solara ion Web Pages Network Settings The Network Settings page is available from a link on the Gerber Solara ion Home web page. Click the link to open the Network Settings page. The network settings of the Gerber Solara ion allow you to send jobs to the printer or communicate with the printer using the web interface. -
Page 130: Other Settings
CAUTION: The device ID number (last octet or last two octets depending on the network) of the Gerber Solara ion IP Address should not be the same address as any other computer or system on the network or it will cause problems for the network. -
Page 131: Diagnostics Page
Diagnostics page The Diagnostics page is available from a link on the Gerber Solara ion Home web page. Click the link to open the Diagnostics page where there are links to: Restore Factory Default Settings ... -
Page 132: Restoring Factory Default Settings
Gerber Solara ion Web Pages Restoring Factory Default Settings Click the Restore Settings button to return all settings of the Gerber Solara ion to the original settings that existed when the printer shipped from the factory. Alternately, you can restore factory settings via the printer’s control panel as described in the following procedure. -
Page 133: Version Information
Gerber Solara ion Web Pages Version Information The Version Information page is available from a link on the Gerber Solara ion Diagnostics web page. This page displays the printer’s name and version, as well as detailed data about individual boards that comprise the system. This information is helpful when evaluating the need to update the printer to the latest firmware revision, or when troubleshooting the printer along with a service engineer. -
Page 134: View System Log
The View Log link displays the system Message Log. The Message Log records information and error messages sent from the Gerber Solara ion. You can modify the System Log Level from 1 (lowest) to 9 (highest) using the System Settings web page. The default setting is 1 (lowest) which records only the major errors and should be adequate for most users. -
Page 135: View Satellite Log
CHAPTER 7 Gerber Solara ion Web Pages View Satellite Log The View Satellite Log link displays the Satellite Message Log which records information and error messages sent from the following components: Ballast board Carriage board Front panel board ... -
Page 136: Sensors
Gerber Solara ion Web Pages Sensors The Sensors page is available from a link on the Gerber Solara ion Diagnostics web page. The Sensors web page provides the status of many sensors used throughout the printer and is used in conjunction with Gerber Service to determine if the sensors are working properly. - Page 137 Ink Overflow is the status of the overflow reservoir which is designed to collect any excess ink in the event of an ink system failure. The status is OK or Overflow. In the event of an overflow, contact Gerber Service for assistance. The bottom section includes the following sensors: ...
-
Page 138: Configuration Info Page
This information is for viewing only and can not be changed. USB Test page The USB Test page is available from a link on the Gerber Solara ion Diagnostics web page. The USB Test web page allows the operator to test the USB communication with the printer’s circuit boards. - Page 139 CHAPTER 7 Gerber Solara ion Web Pages 4/29/10 Rev G...
-
Page 140: Statistics
Gerber Solara ion Web Pages Statistics The Statistics page is available from a link on the Gerber Solara ion Diagnostics web page. It provides links to detailed statistics pages for many of the printer components. These statistics are to be used in conjunction with Gerber Service. -
Page 141: Error History Page
Gerber Solara ion Web Pages Error History page The Error History page is available from a link on the Gerber Solara ion Diagnostics web page. It provides a list of the 124 most recent errors. The list includes the error number, time of the error relative to when the printer was powered on, and the number of power cycles when the error occurred. -
Page 142: Calibration Web Page
Gerber Solara ion Web Pages Calibration web page The Calibration web page is available from a link on the Gerber Solara ion Home web page and includes settings and calibrations that can be updated by the operator and/or service engineer. -
Page 143: Gantry Adjustment
CHAPTER 7 Gerber Solara ion Web Pages Roll-to-Roll Z Offset is a setting performed by a service engineer via Table Z Map page. Y Carriage Park Offset is an alignment performed by a service engineer via the printer’s front panel. -
Page 144: Y Carriage Steps/Inch-Y Encoder Calibration
CHAPTER 7 Gerber Solara ion Web Pages To set the X Gantry Adjustment factors of the printer 1 Determine whether there are white spaces or darker bands on a print. 2 Click on arrow of dropdown box for the corresponding pass mode. Choose negative factors to close the gap and eliminate white spaces. - Page 145 Y Scale Factor has been set to 2880.91 vary from this example.) Note: If the Encoder Test encounters errors the Set Y Scale Factor button does not display. The encoder strip may need to be cleaned. Contact Gerber Service. 4/29/10 Rev G...
-
Page 146: Calibrating The Location Of A Printed Image (Print Pos Offset Front And Side)
8 On the Gerber Solara ion’s Calibration web page enter the measurements (in inches) in the fields labeled Dist to Table Front (in) and Dist to Table Side (in) -
Page 147: Calibrating The Printhead Park Position
CHAPTER 7 Gerber Solara ion Web Pages 9 Click the Set Print Pos button to accept the entered values. Note that the resulting calibration values are computed from the entered measurements and will differ from the values that were entered. - Page 148 CHAPTER 7 Gerber Solara ion Web Pages Calibration 4 Press ENTER to display the screen. Test Jobs Test Jobs 5 Press the or key until the screen displays. Park Position Cal Park Position Cal 6 Press ENTER to begin the calibration sequence. The...
-
Page 149: Calibrating Image Quality
CHAPTER 7 Gerber Solara ion Web Pages 11 Press ENTER to save the offset value from the Y encoder edge. The screen displays The offset value displays on the Calibration web page as the Y Calibration is set! Carriage Park Offset. This calibration can only be completed using the printer. It is not possible to enter the offset value manually on the web page. - Page 150 3 Open the web browser on the computer connected to the printer and enter the IP address of the Gerber Solara ion printer to open the Gerber Solara ion Home web page. 4 Click the Calibration link on the Home page to open the Calibration web page.
- Page 151 CHAPTER 7 Gerber Solara ion Web Pages Note: The UNI-DIR Black 1 Right should always be set at Zero. 6 Enter the corresponding number into the field in the UNI-DIR section on the left side of the web page. For example, if CL aligns best at –5, that number should be added to the current values in the Cyan Left field.
- Page 152 3 Open the web browser on the computer connected to the printer and enter the IP address of the Gerber Solara ion printer to open the Gerber Solara ion Home web page. 4 Click the Calibration link on the Home page to open the Calibration web page.
- Page 153 CHAPTER 7 Gerber Solara ion Web Pages add the new value (-5) to it, and enter -7 in Cyan Left field. Continue to enter the new alignment values for all the color print heads, Left and Right in the BI-DIR columns.
- Page 154 3 Open the web browser on the computer connected to the printer and enter the IP address of the Gerber Solara ion printer to open the Gerber Solara ion Home web page. 4 Click the Calibration web page, click the Print head CAL PAGE button to open the Head Calibration web page.
- Page 155 CHAPTER 7 Gerber Solara ion Web Pages 6 Reprint the job and make adjustments to values on Head Calibration page until all the unidirectional box prints show best alignment position to be at zero position (center of box), +/- 1.
-
Page 156: Update Page
Gerber Solara ion Web Pages Update page The Gerber Solara ion Update page is available from the Update link on the Home page. Click the link to enter the Gerber Solara ion Update program which installs internal firmware upgrades to the printer. When you are updating the printer’s firmware you can not print a job or use the printer’s control panel. - Page 157 1 Open the Gerber Solara ion web pages by opening a web browser and entering the printer’s IP address in the address bar. 2 On the Home page, click the Update link and wait for the system to enter the Gerber Solara ion Firmware Update page. (This may take one to two minutes.)
- Page 158 CHAPTER 7 Gerber Solara ion Web Pages 7 The update process may take three to five minutes to complete as the new firmware is loaded onto the printer’s master board. The following screen appears on your computer while the firmware is updating.
- Page 159 CHAPTER 7 Gerber Solara ion Web Pages 10 The printer will automatically restart and the Solara ion Home web page displays with the printer Status of “Updating.” This portion of the update process could take 30 minutes or more as each board is checked and updated.
-
Page 160: Starting The Printer In Bootloader Mode
3 The screen on the control panel remains blank when in Bootloader mode. Access the Bootloader via the Gerber Solara web page that will display. 4 From the Bootloader web page you can view the System Log to obtain additional system information or update the printer’s firmware. -
Page 161: Downloading New Color Profiles
SolaraION_PrnInst_V72_092008.zip file. Choose Click Here to Download File. Contacts web page The Gerber Solara ion Contacts page is available from the Contacts link on the Home page. The Contacts page contains important Gerber contact information including Customer Service and Gerber Service. -
Page 163: Chapter 8: Troubleshooting
Running the control panel screen test RIP software issues A variety of RIP software programs work with the Gerber Solara ion, GerberCAT inks, and qualified materials. Refer to the software documentation provided with the RIP program you have chosen regarding its operation. -
Page 164: Printer Issues
Plug in the power cord. See “Power requirements” on the printer and plugged into an active page 15. outlet? Is the Gerber Solara ion power switch Turn on the power switch. See “Starting and stopping the turned on? printer” on page 27. -
Page 165: Winder Does Not Roll Up The Material
Reload the material. See “Loading the material” (straight) into the left side of the printer? on page 42. Is the Gerber Solara ion being used in Use the printer within the See ”Ambient conditions” on adverse environmental conditions? strict environmental page 15. - Page 166 CHAPTER 8 Troubleshooting Ink is leaking near the ink supply box Problem Solution Notes Is the ink pouch installed correctly? Ensure that the pouch spout See “Loading the inks” on is inserted properly in the page 39. If the problem drawer.
-
Page 167: Quality Of Printed Output
Print Angled the Missing or angled nozzle Nozzle Job on vinyl and section. If problem persists, send to Gerber Service for seek technical assistance. evaluation. Banding in roll-to-roll prints Problem Solution... -
Page 168: Missing Or Angled Nozzles
See “Periodic Maintenance Maintenance Process? Maintenance Process Process to correct angled whenever angled nozzle are nozzles on the Gerber Solara observed. ion” on page 95. Is there air trapped in the ink lines? Perform a purge on the See “Purging ink lines to problem ink line. -
Page 169: The Print Is Blurred
Seek technical assistance. connection problem. The print is blurred Problem Solution Notes Is the material damp? Replace with dry, Gerber- See “Material storage” on approved material. Store page 20 and ”Ambient material in correct conditions” on page 15. environmental conditions. -
Page 170: Objects Are Printing In The Wrong Place
Notes Are you using the correct Use the correct See “Networking your Gerber communications cable? communications cable. Solara ion printer” on page 31. Color balance is different between software and print Problem Solution Notes Did you use Gerber-approved material? If not, replace with new, See “Choosing a material... -
Page 171: Ink Not Curing
99% material to thoroughly dry isopropyl alcohol or IP Surface before printing. Cleaner. Clean vinyl with distilled water. Is the material a Gerber-approved Use Gerber-approved See “Lamp Spec Mode” on material? material or try High Lamp page 63. -
Page 172: First Few Inches (50-100Cm) Of The Job Is Not Curing
Is the environment marginally within the Try running in High Lamp See “Lamp Spec mode” on specifications? Spec mode. page 63. Are you using Gerber-approved Use Gerber-approved See “Choosing a material material? material or try running in type” on page 44 and See High Lamp Spec mode. -
Page 173: Job Data Errors
144. assistance. Objects are printing in the wrong place Problem Solution Notes Are you using the correct Use the correct See “Networking your Gerber communications cable? communications cable. Solara ion printer” on page 31. 4/29/10 Rev G... -
Page 174: Prints Are Not The Correct Size
Connections” on page 37. necessary. Messages The following messages may appear on the Gerber Solara ion display. The first group of messages is Job Status Messages. The second group of messages is Common Printer Messages. Job Status Messages Description Printer Ready The system is ready to print a job. - Page 175 CHAPTER 8 Troubleshooting Printing – job name Job is printing. A progress bar displays. This job information displays after pressing the key at the Job Ready, Material Size/Material Warm-up, or Printing screen. Type Canceled By User Job has been canceled by pressing the CANCEL key. Canceling job.
- Page 176 CHAPTER 8 Troubleshooting Cannot fill ink Ink filling can not occur due to a problem with the system which could include failure to set ink vacuum pressure, waste ink tray not installed, an empty ink line or a problem with another ink component. Check Message Log and fix condition.
- Page 177 CHAPTER 8 Troubleshooting 4/29/10 Rev G...
-
Page 178: Error Messages
Troubleshooting Error Messages The following error messages may appear on the Gerber Solara ion display indicating a problem. Follow the recommended action to correct the error. If the error persists, seek technical assistance from an authorized dealer or Gerber Service. - Page 179 CHAPTER 8 Troubleshooting Error Message Description Recommended Action Ink Pump Error An ink supply pump is not working Cycle power. If problem persists seek properly or connected properly. technical assistance. Ink Solenoid Error An ink solenoid is not working Cycle power. If problem persists seek properly or connected properly.
-
Page 180: Running The Control Panel Screen Test
If there is a problem with the printer’s control panel you can run a screen test to check operation. Run this test under the direction of a Gerber-authorized service engineer. During the test, the screen displays all of the possible screens and messages, one after the other, in a continuous loop. - Page 181 4/29/10 Rev G...
-
Page 182: Printer Menu Tree - Rev G Version
Printer Menu Tree – Rev G Version “Printer Ready” (Main Screen) Status Setup Calibration Maintenance Park Firmware End of Day Test Jobs Lamp Delay Position Cal Version Clean Lamp Spec Nozzle Out Clean Heads Mode Step Angled Purge Blending Nozzle Job 360 Horiz. - Page 183 4/29/10 Rev G...
-
Page 184: Index
Index Ambient conditions ......16 Control panel........20 Auxiliary keypad ......21 Control panel screen test ....180 Bidirectional printing ......61 Conventions........12 Bootloader mode ......160 Data starvation ......... 67 Calibration menu ......25 Default settings ......132 Calibration web page Diagnostics web page....131 Calibration........142 Draft mode........ - Page 185 Ink drawers, cleaning ......98 standards........45 Ink Level troubleshooting ......165 key ..........24 Menu key .......... 24 screen ..........40 Menu system ........24 Installation requirements ....15 Calibration ........25 Introduction ........11 Maintenance ......... 26 Setup ........25, 37 canceling........77 Status ..........25 information ........68 Menu tree ........
- Page 186 Print heads Rigid material cleaning all ......83, 86 cleaning ......... 46 cleaning individual ......91 loading........... 55 purging ........102 normalizing........46 Print mode.........61 RIP software ........61 bidirectional ........61 downloading profiles ....161 choosing.........67 graphic orientation ....17, 44 continuous........75 troubleshooting ......163 single ..........67 Roll material uni-directional ......61...
- Page 187 Starting a job ........67 ink level ......... 40 Start-up purging ........102 diagnostics........28 replacing........40 ink check........28 reservoir empty ......42 Static network settings ....129 storage ........... 19 Statistics web page ......140 technology........19 Status menu........25 troubleshooting ......171 Status web page......126 UV lamp Storage automatic shut off ......
- Page 188 USB test........138 removing material ....... 54 version information ....133 troubleshooting ......165 Web site address.......14 Winding unit ........52 Weekly maintenance....95, 99 X gantry steps calibration ..... 143 Weight X scale calibration ......143 printer ..........15 Y carriage steps calibration ..144 roll material........50 Y encoder calibration.....
- Page 189 P82595A Rev G 83 Gerber Road South Windsor, CT 06074-9864 USA www.gspinc.com 4/29/10 Rev G...