Table of Contents

Related Manuals for Vivitar ViviCam 8400


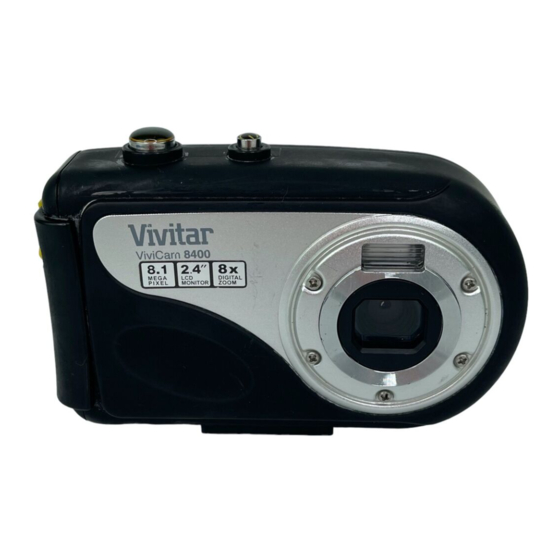
Summary of Contents for Vivitar ViviCam 8400
- Page 1 ViviCam 8400 Digital Camera Owner’s Manual © 2009 Sakar International, Inc. All rights reserved. Windows and the Windows logo are registered trademarks of Microsoft Corporation. All other trademarks are the property of their respective companies.
-
Page 2: Table Of Contents
Playback Mode ... 28 Playback Mode Functions ... 30 Setup Mode ... 37 Install the Vivitar Experience Image Manager Software ... 44 Connect your camera to the computer ... 47 Get photos and videos from your camera to your computer ... 47 Get started! ... -
Page 3: Introduction
Introduction Thank you for purchasing the ViviCam 8400 Digital Water Resistant Camera. With your camera you can take individual photos and shoot video clips. In addition, to expand the memory capacity of your camera a SD compatible memory card of up to 8GB needs to be inserted. -
Page 4: What Your Digital Video Camera Includes
What your digital video camera includes Digital Camera USB / AV cable Vivitar Experience Image Manager software Installation CD Quick Start Guide Wrist strap Computer System Requirements for Windows XP To be able to download photos and videos to your PC, you will need the following minimum configuration: ... -
Page 5: Computer System Requirement For Windows Vista
Computer System Requirement for Windows Vista To be able to download photos and videos to your PC your will need the following minimum configuration: Windows Vista 800MHz processor and 512 MB of system memory 20GB hard drive with at least 15GB of available space ... -
Page 6: A Quick Look At Your Digital Video Camera
A Quick Look at your Digital Video Camera 1: Shutter button 2: Power button 3: Flash strobe 4: Lens 5: Up/Zoom in button 6: Right/Flash button 7: OK/Menu button 8: Playback button 9: Lock device 10: Trip socket 11: Power/charging LED 12: LCD screen 13: Left/Mode button 14: Down/Zoom out button... -
Page 7: Preparing Your Camera For Use
Preparing Your Camera for Use Battery Installation Your camera requires 2 “AA” batteries (not included). It is recommended that alkaline batteries be used. Important: Before installing the batteries make sure you are not near water and that your hands are dry. Turn the camera around so that the battery cover on the side is facing you. - Page 8 Gently open the battery cover door from right to left. In order to open the battery compartment, locate the OPEN arrow pointing down on the battery compartment door and press down in the direction of the arrow. The battery compartment door will spring up and open.
- Page 9 Return and close the battery compartment cover pressing gently in a downwards and then an upwards direction. Now close the battery door from left to right making sure the top lock is still in the unlock position. 10. Press and hold the battery door down as shown in diagram (a).
- Page 10 Important: It is important that the battery cover be sealed properly before using the camera underwater. Note: As this is a special underwater camera, all the buttons can rotate. We strongly recommend downloading your photos and videos regularly to your computer.
-
Page 11: Inserting An Sd Memory Card
For instructions on how to set the date and time that will appear on your photos, set the language that you want your camera`s menu to appear with or other setup options please refer to the Setup section later on in this manual. Inserting an SD Memory Card Your Digital Camcorder has a limited built-in flash memory. - Page 12 Close the battery compartment and cover an explained in steps 8 to 10 of the Battery Installation section above. Important: It is important that the battery cover be sealed properly before using the camera underwater. Note: After you insert an SD memory card, the SD card icon will appear on the bottom left side of the LCD, indicating that your SD memory card has been installed successfully.
-
Page 13: Dv Function Control
Press the OK/Menu button to revert back to Camera mode. DV Function Control The Power button is situated on the top of the camera. Power on Press the Power button to turn on your camera. The LCD monitor will light up indicating that your camera is ready for use. Power off Press the Power button to turn your camera off. -
Page 14: Taking Still Photos
MODE selection Press the MODE (left) button to select the camera`s mode – Camera Capture or Video. By default the Camera mode appears when powering on the camera. Press the MODE button to switch to the Video mode and again to revert back to the Camera mode. - Page 15 7. When the camera`s internal memory is full, “Memory Full” will appear on the LCD screen when you attempt to press the Shutter button to take a photo. Either download the photos to your computer using the Vivitar Experience Image Manager software as described below in the section “Transfer photos and videos to your computer”...
- Page 16 2. Press the Right (Flash)/Left (MODE) buttons to toggle through the images. For more information on how to use the Playback mode to view and delete images see the Playback mode section of this manual. Flash The flash feature only operates in Camera mode. 1.
-
Page 17: Camera Mode Functions
Digital Zoom ou may zoom in or out of the object by using the 8X digital zoom feature. 1. Press the Zoom In function button to zoom into your object. 2. Press the Zoom Out function button to zoom out of your object. 3. - Page 18 In Camera mode, press the OK/Menu button on the top right of the camera. The LCD will display 2 mode tabs – IMAGE and SETUP. By default the IMAGE tab will open with the menu options for that tab appearing: Resolution, Quality, White Balance, Color Effect, Exposure, Date Stamp, Self Timer, and Burst Snapshot Resolution...
- Page 19 The icon for the resolution choice appears beneath the camera icon on the left side of the LCD. Quality Press the Up/Down button to select the Quality mode. Press the Right button for the 3 Quality options submenu to appear: Super, Fine, Normal Press the Up/Down button to highlight and select the Quality option you desire.
- Page 20 Auto, Day Light, Tungsten, Fluorescent, and Cloudy The background of the submenu changes automatically on screen to show the effect when choosing one of the options Press the Up/Down button to highlight and select the White Balance option you desire. Press the OK/Menu button to confirm and save your choice.
- Page 21 Exposure Press the Up/Down button to select the Exposure mode. Press the Right button for the Exposure option submenu arrows to appear (-2.0 to +2.0): -2.0, -1.5, -1.0, -0.5, Auto, +0.5, +1.0, +1.5, +2.0 Press the Up/Down button to select the Exposure setting you desire. Press the OK/Menu button to confirm and save your choice.
- Page 22 If enabled, the icon for the Date Stamp choice appears on the right side of the LCD. Self Timer This feature allows you to set up the camera so that you can also be included in the shot. It is best to use a tripod or place the camera on a flat and sturdy surface. Press the Up/Down button to select the Self Timer mode.
-
Page 23: Capturing Videos
Press the Up/Down button to select the Burst Snapshot mode. Press the Right button for the Burst Snapshot options submenu to appear: Single, Burst Press the Up/Down button to highlight and select the Burst Snapshot option you desire. Press the OK/Menu button to confirm and save your choice. Press the OK/Menu button to exit. - Page 24 Prepare the scenery or object you wish to record. Press the Shutter button on the top of the camera to start shooting. A red icon will appear. The amount of time left to record at that resolution will appear on the top right on the LCD. You can zoom in or out using the Zoom control buttons.
- Page 25 3. A icon will appear and the time of that video clip will appear at the top of the LCD to indicate that the file is a video. 4. To play the video, press the Shutter button. 5. Press the Shutter button again to stop the video. 6.
-
Page 26: Video Mode Functions
14. Press the Shutter or OK/Menu button. 15. If you selected “Yes”, the image(s) is deleted. 16. Press the Playback button again to close the thumbnail view and revert to the Camera mode. Video Mode Functions In Video mode, press the OK/Menu function button on the top right of the camera. The LCD will display 2 mode tabs –... - Page 27 Resolution This setting allows you to control the size of your images. Press the Down button to select the Resolution mode. Press the Right button for the Resolution submenu options to appear: 640*480 , 320*240. Press the Up/Down button to highlight and select the Resolution option you desire. Press the OK/Menu button to confirm and save your choice.
- Page 28 Press the Up/Down button to highlight and select the Frame Rate option you desire. Press the OK/Menu button to confirm and save your choice. Press the OK/Menu button to exit. Your videos will now be captured with the selected frame rate. White Balance This setting is used to adjust the color of your videos as per your light source Press the Up/Down button to select the White Balance mode.
-
Page 29: Playback Mode
Playback Mode Press the Playback button on the camera in order to playback the media captured with your camera. The playback screen will appear. You can playback the photos and videos in your camera. To view all the media on your camera: The last image taken with your camera will be the first image to appear on the LCD when pressing the Playback button Press the Left/Right buttons to select the images you wish to view or... - Page 30 Once zoomed in you can use the zoom out button to revert to the actual size. Use the Up/Down/Left/Right buttons to navigate your photos Use the Zoom Out button to have all the images appear as thumbnails Use the Up/Down/Left/Right buttons to move between the thumbnails.
-
Page 31: Playback Mode Functions
An Erase confirmation message appears - “Yes” to erase and “No” to exit to the thumbnail screen without erasing. Press the Left/Right button to choose Yes or No. Press the Shutter or OK/Menu button. If you selected “Yes”, the image(s) is deleted. Note: If there are no images in your memory the “No Image”... - Page 32 Press the Right button for the Delete Current options submenu to appear: Yes, No Press the Up/Down button to highlight and select the Delete Current option you desire. Press the OK/Menu button to confirm. If you choose Yes, the selected file is now deleted. Important: The file is deleted without a confirmation message.
- Page 33 Important: The files are deleted without a confirmation message. Please use this feature with caution as deleted files cannot be recovered unless they have been downloaded to the PC first. The camera reverts back to the Play menu mode. Lock This mode is used to protect files from accidentally being deleted 1.
- Page 34 This mode is used to select the size of the matrix view the thumbnails will appear on the LCD when the thumbnail option is selected by pressing the Zoom Out button in the Playback mode Press the Up/Down button to select the Thumbnail mode. Press the Right button for the Thumbnail matrix options submenu to appear 2X2, 3X3, 4X4 Press the Up/Down button to highlight and select the Thumbnail option you desire.
- Page 35 Press the Right button for the Set Logo options to appear: Yes, No Press the Up/Down button to highlight and select the Set Logo option you desire. Press the OK/Menu button to confirm and save your choice. Press the OK/Menu button to exit and return to the Playback mode. The next time you turn your camera on the photo selected will appear for a second before the camera is ready for use.
- Page 36 Slideshow You can use this feature to select and play all the media in your memory as a continuous slideshow. Press the Up/Down button to select the Slideshow mode. Press the Right button for the first Slideshow options submenu to appear. On , SetUp Press the Up/Down button to highlight and select the Slideshow option you desire.
- Page 37 An Interval submenu will appear for you to choose one of the options: 1 Sec, 10 Sec Press the Up/Down button to select the interval you desire and press the OK/Menu button to save your interval choice. The Interval submenu will close. Press the OK/Menu button once to exit the SetUp submenu To play the slideshow with the new parameters select the On option and watch All the media in the memory begin to play in the direction and according to the time...
-
Page 38: Setup Mode
7. A message will appear on the LCD to “ 8. Connect your camera to a compatible printer with the USB cable provided to begin printing. 9. Press the Shutter button to exit if you do not want to print. Setup Mode You can change the Setup options of your camera from the Camera, Video or Playback modes. - Page 39 Press the Down button to select the Language option. Press the Right button for the 9 Language options submenu to appear: English ,French,German ,Spanish,Italian ,Portuguese ,Dutch ,Turkish ,Russian. Press the Up/Down button to highlight and select the Language option you desire.
- Page 40 turn off. If left on for an extended period of time without turning it off yourself this will lead to the batteries being drained quicker. TV Out (no Audio output) Select the TV settings for the TV that you will be connecting your camera to in order to view your media files.
- Page 41 Press the Up/Down button to highlight and select the Play Logo option you desire. Press the OK/Menu button to confirm and save your choice. Press the OK/Menu button to exit. Frequency Select the light frequency for the local environment. Generally, 60HZ is for the U.S.
- Page 42 Date Format, Date Setup Select the Date Format option and press the Right button to open the Date Format submenu: DD/MM/YY , MM/DD/YY , YY/MM/DD Press the Up/Down button to select your choice and press the OK/Menu button to save your date format and revert back to the Date / Time submenu. To set the Date and Time on your camera select the Date Setup option and press the Right button Press the Right/Left button to highlight and select each of the different Date /...
- Page 43 Press the Up/Down button to highlight and select the Buzzer option you desire. Press the OK/Menu button to confirm and save your choice. Press the OK/Menu button to exit. Format Formatting the memory of the camera or if there is a SD card inserted. All the saved data files sitting in the memory will be wiped off.
- Page 44 Press the Up/Down button to select the Default mode. Press the Right button for the Default options submenu to appear: Yes , No. Press the Up/Down button to highlight and select the Default option you desire. If you select Yes the camera will reset itself to the original factory setting. Press the OK/Menu button to confirm and save your choice.
-
Page 45: Install The Vivitar Experience Image Manager Software
Warning: Do not plug your camera into the computer until the software installation is complete. You must be connected to the internet to install and run the Vivitar Experience Image Manager software. Insert the installation CD into your CD-ROM drive. The installation screen should... - Page 46 On Macintosh: Click the icon to install the Vivitar Experience Image Manager. If you do not have internet access at the time of inserting the CD-ROM, connect to the internet and then click the “Install Vivitar Experience Image Manager” button to begin the installation Note: If you do not have internet access, you can still download media from the camera.
- Page 47 On Macintosh: Click the “I accept the terms of this license agreement” and then click “Next” to continue. 10. On PC only: Let the “Vivitar Experience Image Manager” installer create the folder to where the program will be installed, and then click “Install”.
-
Page 48: Connect Your Camera To The Computer
Follow the instructions to install the driver. On Macintosh: Click the “Quit” button when the installation is complete. 13. Click the “Launch Vivitar Experience Image Manager” to open the application or close the window and run the Vivitar Experience Image Manager from your computer. - Page 49 The “Get media from device” window opens. You can select to download photos, videos or both. Select your camera (removable disk) from the device window. If your camera is the only USB device connected then it will be selected automatically. Select a location on the computer where to place the new photo and video files.
-
Page 50: Get Started
Edit images using automatic and manual tools. Use automatic “Geotagging” with built in Google Maps. For more details on how to use the Vivitar Experience Image Manager open the Help file or click the “Take the Tour” button on the application`s Home page. -
Page 51: Transfer Media From My Camera To My Computer Manually (Using Macintosh)
We recommend that you copy the images into the Pictures/My Pictures folder and the videos into the Videos/My Videos folder. Do not disconnect the cable during transfer. Doing so will cancel the transfer of any files on their way to your computer. Transfer media from my camera to my computer manually (Using Macintosh) Use the USB cable that came with your camera to connect your camera to your computer. -
Page 52: Using Your Device As A Pc Camera (On Windows Only)
Simply plug the USB/TV-out cable (supplied) to the digital camera`s USB slot and the other end of the cable to the video ports of your TV. The LCD screen will turn blank and the image that appeared on the LCD will now appear on your TV screen. Connect the digital camera to a TV via the TV-out cable (supplied). -
Page 53: Camera Maintenance
You can use this PC cam to video conference using most instant messaging software programs. Chat with friends and family, sending live video feeds straight to them. The camera does not have a built in microphone. Camera Maintenance Always keep your camera and accessories in proper working condition. Camera ... - Page 54 The factors that influence the lifetime of the battery: The frequency of use and time the LCD is active The frequency of use of the flash Quantity of image shooting Temperature (the lifetime of the battery when the camera is used in low temperature environment is shortened).
- Page 55 Memory card formatting The format is necessary in the following situations: 1. Unformatted SD card 2. Reformat the card when it does not work in camera properly although it has been formatted before; 3. It is important to format the card first when using it in another camera. Attention: please keep the card in “unlock”...
-
Page 56: Sakar Warranty Card
For phone support in the US please call 1-800-592-9541, in the UK call 0800 917 4831. If you would like to call from anywhere else, please visit www.vivitar.com for your local toll free number. -
Page 57: Technical Specifications
Technical Specifications Image Resolution Video Resolution Monitor Display Capture Internal Memory External Memory Sensitivity Lens Shutter Speed White Balance Exposure control Photo effect Flash Digital Zoom Self-timer File Format TV out Interface PC Camera resolution System Requirements Battery OSD Language Auto power off Working Temperature Storage Temperature... -
Page 58: Faq - Frequently Asked Questions
FAQ – Frequently Asked Questions Power does not turn on. 1. The Battery has insufficient power to power on. The digital camera does not take pictures. 1. The Memory is full. 2. The Memory card is not formatted correctly. Image is blurry or out of focus. 1.The digital camera was moving when the image was captured. -
Page 59: Trouble Shooting
If the photos are saved to the SD memory card then all the photos should appear. Q: I deleted images using the Vivitar Experience Image Manager. The photo was also deleted from my computer. How do I recover photos that I accidently deleted? All images deleted using the Vivitar Experience Image Manager are sent to your computer`s Recycle or Trash Bin and can be retrieved from there.