Table of Contents
Advertisement
Quick Links
Advertisement
Table of Contents

Related Manuals for Vivitar VIVICAM 8025


Summary of Contents for Vivitar VIVICAM 8025
- Page 1 ViviCam 8025 Digital Camera Owner Manual © 2009 Sakar International, Inc. All rights reserved. Windows and the Windows logo are registered trademarks of Microsoft Corporation. All other trademarks are the property of their respective companies.
-
Page 2: Table Of Contents
Table of Contents Introduction ... 2 Key Features ... 2 What your camera includes ... 2 Computer System Requirements for Windows XP ... 3 Computer System Requirements for Windows Vista ... 3 Computer System Requirements for Macintosh ... 4 A Quick Look at Your Camera ... 5 Preparing Your Camera for Use ... -
Page 3: Introduction
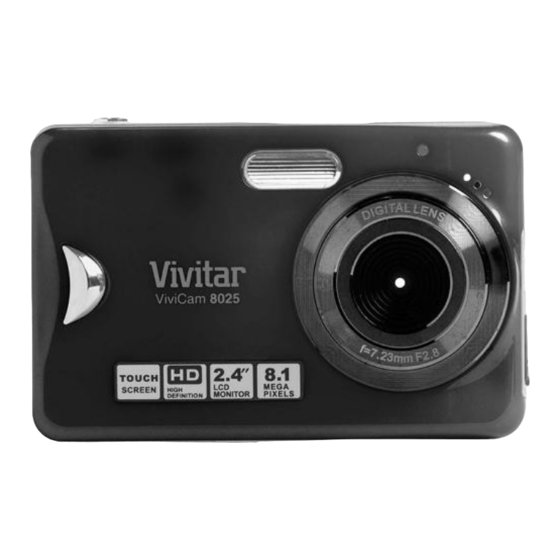
Thank you for purchasing the ViviCam 8025 8.1 Mega-Pixel Touch Screen Digital Camera. Everything you need to take quality digital photos and videos is included with your camera. Your digital camera can also be used as a removable disk. It enriches your life. Vivitar makes capturing those special moments so easy. -
Page 4: Computer System Requirements For Windows Xp
User’s manual and Quick Start Guide Strap Computer System Requirements for Windows XP To be able to download photos to your PC, you will need the following minimum configuration: Pentium III process or above with Windows XP 128 MB RAM, with 150MB of free disk space Available USB interface CD-ROM Drive 1024 x 768 Recommended screen resolution... -
Page 5: Computer System Requirements For Macintosh
Computer System Requirements for Macintosh Power Macintosh G3 500 MHz or higher Mac OS X version 10.2.6 or later 128 MB or more available system RAM (256 MB recommended), 150 MB free disk space 800 x 600 or higher-resolution monitor displaying millions of colors Note: This hardware is plug and play compatible when used on a Mac, however, the included software can be used on Windows operating systems only. -
Page 6: A Quick Look At Your Camera
A Quick Look at Your Camera... -
Page 7: Preparing Your Camera For Use
Preparing Your Camera for Use Install lithium battery Your digital camera needs a lithium battery in order to operate. The battery is found separately in the packaging. To install it correctly see the diagram below: Slide and open the battery door. Insert the battery correctly with the correct polarity facing up. -
Page 8: Installing Sd Memory Card
loses power and turns off or when the battery door is opened to replace the battery. Charge lithium battery Please charge the battery as below 2 methods: A. Charge with USB cable Insert the lithium battery into your camera correctly, and connect your camera to computer with USB cable. The red LED of camera will be light on indicating that your camera is in charging status, the LED will be off when charge full. - Page 9 Push the card in until you feel it “click” into position. The top of the card should be flushed with the surface of the camera. An icon Once the external memory card is inserted into the camera all the images taken with the camera will be stored on the card.
-
Page 10: Starting Your Digital Camera
Don’t remove the SD card during formatting as this may damage the card and render it unusable. When your card is full, download the media on the SD card to your PC and delete the photos and videos from it in order to continue using your camera Starting Your Digital Camera Power on Press the Power button on the top of the camera once to turn on your camera. - Page 11 Mode selection Your digital touch screen camera has 4 main modes – Still Image mode, Video mode, Playback mode and Set up mode. The Still Image mode is for you to take still photos. You can shoot video files while in Video mode. In Playback mode you can preview photos and videos as well as being able to delete, rotate, protect, crop and print your photos.
-
Page 12: This Is The Default Mode When You Power On Your Camera
Touch the icon function area to enter Playback mode. Touch the icon function area to enter Still Image (Camera) mode. Touch the icon function area to enter Movie (Video) mode. Touch the icon function area to enter the Setup menu. Note: If you are in the Playback or Video mode, pressing the Home button will exit these modes and open the Still Image mode. - Page 13 After each photo is shot (when the camera returns to icon mode) the numbers of photos left to shoot at the selected resolution is displayed on the LCD screen. When the camera's memory (photo capacity) is full, the LCD screen will display a message - “Memory Full, Insert a SD memory card to Transfer and Take More Photos!”...
- Page 14 For close up shooting slide the switch to the indicates that the macro shooting mode is on. For far shooting slide the Macro/Far switch to the indicate that the far shooting mode is on. Flash In low light conditions it is best to use the built-in flash. You can also use the flash to compensate for backlight conditions.
- Page 15 To turn off the flash function touch the icon LCD screen displaying You can touch the “DIS” function area on the screen repeatedly to hide or show the icons of the LCD screen. Self-Timer You can include yourself in a photo by using this feature to delay the time between you pressing the shutter button and when the photo is actually taken.
- Page 16 seconds or 10 seconds Press the Menu/OK button to confirm. The self-timer icon (per your selection) will now appear on the screen. Press the Shutter button to start the self-timer. Your camera will count down 2, 5 or 10 seconds as per your choice and then automatically take the photo.
- Page 17 Touch the icon function area to select the scene you want to use. Press the Menu/OK button to confirm, save and exit to the camera standby mode. Image Size The image size and quality settings determine the number of photos that can be saved and the amount of memory required for each photo.
- Page 18 The image size icon will appear on the LCD screen. Your camera has “7M” and “2M” high definition image size. Anti-Shake Your Digital Camera has a function that prevents photos coming out blurry as a result of trembling or shaking when taking the photo.
- Page 19 Face Detection Your camera supports face detecting that allows you to take better portrait photos. Press the Menu/OK button. Touch the icon function area to select next page until you see the “Face Detection” option. Touch the icon function area to enter the Face Detection menu. Touch the icon function area to select the Face Detection On/Off.
- Page 20 Touch the icon function area to enter the Setup Menu. Exposure This setting allows you to control the brightness of your images. Touch the first icon function area to enter the “Exposure” option. Touch the icon function area to select an exposure value (from +3 to -3). Press the Menu/OK button to confirm, save and exit to the camera standby mode.
- Page 21 This is a special function that allows you to compensate the light conditions when the light source is not good and you also specifically do not wish to use a flash or tripod. When using ISO sensitization, please choose the low value ISO to prevent spots or blotches appearing on your photo.
- Page 22 Touch the icon function area to enter the Sharpness setting. Touch the icon function area to select one of Normal/Soft/Sharp. Press the Menu/OK button to confirm, save and exit to the camera standby mode. Quality The quality of your photos also affects the number of shots you can take. A HIGH setting means you can take fewer photos, but they will be of better quality.
- Page 23 Auto Power off By default, if your camera is idle for 60 seconds it will automatically be powered off. Use the Auto Off option to change this setting: Touch the icon function area until you see the “Auto Power off” option. Touch the icon function area to enter the Auto Power off menu.
- Page 24 Press Menu/OK button to confirm and save the changes. Format This function will format the memory card and will erase all files in memory including files that have been protected. Important: Please use this function with caution. Once formatted all the images stored in the memory will be erase.
- Page 25 Press the Menu/OK button to confirm, save and exit to the camera standby mode. If you selected Yes, all the images sitting on the card will have been erased. Default Setting You can restore your camera to the original factory settings. Touch the icon function area repeatedly until you see the “Default Setting”...
- Page 26 Press the Shutter button to begin shooting videos. The elapse time will be shown on the top right of the LCD screen and the icon LCD screen. Press the Shutter button again to stop and save this file in AVI format. Note: You can play this AVI file in playback mode or on your computer using Quick Time and Windows Media Player.
- Page 27 Touch the “WB” area to enter the White Balance menu. Touch the icon function area to select the best white balance for shooting. Press the Menu/OK button to confirm, save and exit to the video standby mode. Image Size Your camera supports 2 video resolutions- 640x480 (VGA) pixels, 320x240 (QVGA) pixels. Press the Menu/OK button.
- Page 28 PictBridge. Note: The message, “No File Exist” will be displayed on the LCD screen if there are no photos or videos in your camera. Press the Home button to return to the Still Image mode and begin to take photos. Full screen to Thumbnail display When the camera is in the Playback Mode and an image appears on the LCD screen: Touch the...
- Page 29 Delete current photo or video In full screen display mode: Touch the icon function area to delete the current photo or video displayed on the LCD screen. Touch the appears. Press the Menu/OK button to confirm. The selected image is deleted. Operation for still photos Select the still photo you want to delete, rotate, protect, crop or print.
- Page 30 Touch the icon function area to enter the Rotate menu. Touch the icon function area to select one of 90/180/270 degrees. Press Menu/OK button to confirm. “Rotate & Saving” will appear on the screen. The photo will now be rotated. Note: You cannot rotate a protected file when “This File is Write-Protected”...
- Page 31 Touch the icon function area to enter the Protect menu. Touch the icon function area to select Lock or Unlock. Press the Menu/OK button to confirm. An icon will appear on the screen. Note: To “Unlock” the current file follow steps 1 through 4. Select “Unlock” and press the Menu/OK button to unlock the current file.
- Page 32 Note: you cannot delete the file which is locked. Crop Image Crop your photos to show and save a specific portion of an image or to highlight certain focal points. The Crop feature lets you zoom in on an image and then save that part of the image as a new photo. Press the Menu/OK button.
- Page 33 new file. Press the Menu/OK button. Touch the photo that you would like to crop. Press the Shutter button. 10. Press the Shutter button again to confirm and save it as a new photo or you can press the Menu/OK button to exit without saving.
- Page 34 Touch the icon function area until you see the Pictbridge option. Touch the icon function area to enter the menu. Touch the icon function area to select Pictbridge. From the Print message that appears select Print or Cancel Press the Menu/OK button to confirm. “Please connect to device” will appear on the LCD screen. Connect your camera with the USB cord to the compatible printer for printing.
-
Page 35: Installing Photags Express Software
Press the Shutter button to play the current AVI file. Touch the “C” icon function area to stop playing the AVI. Installing PhoTags Express Software NOTE: Before attempting to install the software, make sure that you do not have the camera’s USB cable attached to your computer. - Page 36 On the “PhoTags Express" screen, click the “Next” button. Please review the license terms and click the “I Agree” button to continue.
- Page 37 Let the “PhoTags Express” installer create the folder where the program will be installed to, and then click “Install”. Please wait while the application is being installed on your computer.
- Page 38 Once the application has been installed on your computer, click the “Finish” button to let the “PhoTags Express” installer finish the installation program. If you selected the option for the application to start after pressing the Finish button, the application will automatically launch.
- Page 39 If not, then in order to open the application you need to double click on the Photags Express icon on the desktop. The Welcome to Photags Express Product Registration screen will open. This screen will appear each time you open the application until you register. To register your product please click the “Register Online”...
-
Page 40: Everything You Need To Get The Most From Your Photos
Everything you need to get the most from your photos The “PhoTags Express” software that is installed on your computer allows you to edit existing photos that you have on your computer as well as the photos that you have captured with your camera. Plug one end of the USB cable into the USB port of the camera. - Page 41 Manage your photos by creating countless unique photo collections without duplicating any photos. Burn CD’s of any folders for backup and storage. Enhance your photos; Auto Enhance, Crop, Correct Red Eye, Manually Adjust and add Special Effects. Add Active Captions- add Text Captions, Frames, Shapes, Keywords… and more that can be viewed or hidden any time.
-
Page 42: Download Photos And Videos To Your Pc
your TV using your DVD player. Add background music to your slideshow. Download photos and videos to your PC Transfer Photos and video images from your camera to your PC using PhoTags Express. Select the “Get Photos” button from the top of the PhoTags Express Main Menu screen. The Get Photos Wizard opens. - Page 43 Select the device (removable disk) option in the Active Devices window on the left and then select either the “Custom” or “Express” copy radial button in the Copy methods box. CUSTOM COPY METHOD Select the “Custom” copy radial button. Click the “Next” button. Add Active Captions to your pictures.
- Page 44 Choose where to place your photos and videos. The default is to place all photos and videos into a folder under the C:\My Documents\ My Pictures folder with the date when the photos were taken as the folder name.
- Page 45 Click the “Finish” button to start the download process. A photos download progress bar appears showing the number of media (videos included) downloading to your computer.
-
Page 46: Viewing Videos
All the media – Photos and Videos on your camera are now downloaded to your computer to the selected folder. Open the “Select Photos” mode of Photags Express to view the thumbnails for all the media. You may now use PhoTags Express to edit your photos, create collections and Burn CD`s. To learn more of how to get the most out of your PhoTags application select the “Show Me How”... -
Page 47: Transferring Photos And Videos To Your Pc Manually
The video will begin to play automatically. To replay the video, use the media controls. Once all the Photos and Videos have been downloaded to the computer it is recommended that you delete them from the camera thereby preparing your camera to take more photos and videos. Transferring photos and videos to your PC manually Turn on your camera, Change your Still Image mode to Playback and connect your camera to the computer correctly with USB cable, the screen will be shown a window (Removable Disk F:) as below:... -
Page 48: Transferring Photos And Videos To Your Mac Manually
Choose “copy pictures to a folder on my computer” on the Removable Disk (F:) window. After you click “OK”, step by step instructions will appear. Follow the description and click the buttons that are defaulted by the system to finish transferring. Alternatively you can: 1. -
Page 49: Sakar Warranty Card
Sakar Warranty Card This warranty covers for the original consumer purchaser only and is not transferable. Products that fail to function properly UNDER NORMAL USAGE, due to defects in material or workmanship. Your product will be repaired at no charge for parts or labor for a period of one year. What Is Not Covered By Warranty: Damages or malfunctions not resulting from defects in material or workmanship and damages or malfunctions from other than normal use, including but limited to, repair by unauthorized parties, tampering, modification or... -
Page 50: Appendix B: Troubleshooting
Image Sensor Image Resolution Video Resolution File Format External Memory LCD Display Lens Zoom Exposure White Balance Scene Flash Self-timer Anti-Shake PictBridge Interface System Requirements Window XP/ Vista/ Mac OS X (10.2.6 or higher) Battery Working Temperature Appendix B: Troubleshooting CMOS Sensor 3264x2448pixels(8M),3648x2048pixels(7M),2592x1944 pixels(5M), 2048x1536 pixels(3M), 1920x1080 pixels(2M) and... - Page 51 Q: I have taken photos but my computer says, “No photos in camera.” What do I do? A: First ensure that you have in fact taken photos. Press the Shutter/OK button a few times to take some sample photos and then try downloading them again. If you still get a “no photos”...
- Page 52 If you are running XP: click on hardware and then Device Manager. If the camera is installed correctly, there will be a category listed for “Imaging Devices” and clicking on the “+” next to it should reveal your camera. If not, you will likely see “Digital Still Camera” under “Other Device” with a brightly colored marking next to it indicating it is not functioning correctly.