Advertisement
Quick Links
You will need 2 person(s) for this assembly. You will need a Phillips head screw driver.
Hardware:
A: Wood Screws(8) • B: Cam Pins(15) • C: Caps(15) • D: Glides(20) • E: Long Bolts & Washers(8) • F: Small Bolts(12)
G: Dowel Rods(16) • H: Cam Locks(15) • I: Flat Brackets(3) • J: Medium Bolts & Washers (12) • BB: Screw Bolt(24)
B
A
Parts:
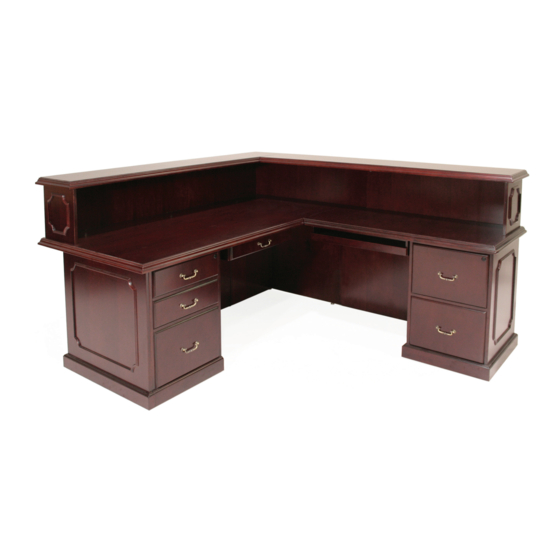
K: Desk Top • L: Desk Modesty • M: Left Desk Corner • N: Right Desk Corner • O: Return Corner • P: Return Top
Q: Return Modesty • R: Box/Box/File Ped • S: File/File Ped • T: Desk Drawer • U: Keyboard Drawer • V: Desk Transaction
Top • W: Return Transaction Top • X: Transaction Side Panel(2) • Y: Desk Transaction Modesty • Z: Return Transaction
Modesty 1 • AA: Return Transaction Modesty 2
K
L
Q
V
W
Figure 1: To open Cam, point
arrow toward Cam Pin hole.
To lock Cam, turn clockwise.
IMPORTANT NOTICE:
● Place all wooden parts on a clean and smooth surface such as a rug or carpet to avoid the parts from being scratched.
● Check to be sure that you have all parts and hardware.
● Remove all wrapping materials, including staples & packing straps before you start to assemble.
● Do not tighten all screws/bolts until completely assembled.
● Keep all hardware parts out of reach of children.
TVRD7236 • INSTRUCTIONS
C
D
E
M
R
Any problems or questions call Regency Office Furniture at 1-866-816-9822
F
G
H
N
S
T
X
Z
Figure 2: Insert Screw Bolt
into Lock and tighten by turning
black screw clockwise.
I
J
BB
O
U
Y
AA
P
Advertisement

Related Manuals for Regency TVRD7236


Summary of Contents for Regency TVRD7236
- Page 1 ● Remove all wrapping materials, including staples & packing straps before you start to assemble. ● Do not tighten all screws/bolts until completely assembled. ● Keep all hardware parts out of reach of children. Any problems or questions call Regency Office Furniture at 1-866-816-9822...
- Page 2 STEP 5 : Insert 4 Cam Locks(H), 2 Dowel Rods(G) & 4 Glides(D) STEP 6 : Insert 2 Cam Locks(H), 2 Dowel Rods(G) & 2 into the Return Corner(O). Glides(D) into Return Modesty(Q). Any problems or questions call Regency Office Furniture at 1-866-816-9822...
- Page 3 STEP 8 : Attach Return Modesty(Q) to Desk using 2 Medium Bolts & Washers(J). LEFT RETURN RIGHT RETURN STEP 9 : Insert 6 Cam Pins(B) into Return Top(P). LEFT RETURN RIGHT RETURN Any problems or questions call Regency Office Furniture at 1-866-816-9822...
- Page 4 STEP 10B : Secure Return Top(P) to Desk Top(K) using 2 Flat Brackets(I) and 4 Small Bolts(F) per Bracket. STEP 11 : Insert 4 Screw Bolts(BB) & 2 Dowel Rods(G) into Return Transaction Modesty 1(Z). LEFT RETURN RIGHT RETURN Any problems or questions call Regency Office Furniture at 1-866-816-9822...
- Page 5 STEP 13B : Connect Return Transaction Modesty 2(AA) to Return Transaction Modesty 1(Z) with Dowel Rods. Insert 2 Screw Bolts(BB) through pre-existing holes in Desk Top(K) to attach Return Transaction Modesty 2(AA). LEFT RETURN RIGHT RETURN Any problems or questions call Regency Office Furniture at 1-866-816-9822...
- Page 6 STEP 16 : Attach Desk Transaction Top(V) by inserting existing Screw Bolts on Modesty into Screw Bolt Locks on underside of top(V). Tighten Screw Bolt Locks(Figure 2). LEFT RETURN RIGHT RETURN Any problems or questions call Regency Office Furniture at 1-866-816-9822...
- Page 7 Find the black tabs at the end of the suspension. Press in on each tab and lift drawer up and out. STEP 19B : Repeat Step 19A for the File/File Ped(S). Replace all Drawers. NOTE: PEDESTAL ORIENTATION IS INTERCHANGEABLE. Suspension B Any problems or questions call Regency Office Furniture at 1-866-816-9822...
-
Page 8: Important Notice
● Remove all wrapping materials, including staples & packing straps before you start to assemble. ● Do not tighten all screws/bolts until completely assembled. ● Keep all hardware parts out of reach of children. Any problems or questions call Regency Office Furniture at 1-866-816-9822...