
Related Manuals for Cornelius OLYMPUS Series


Summary of Contents for Cornelius OLYMPUS Series
- Page 1 OLYMPUS Post-Mix Beverage Dispenser SERVICE MANUAL IMI CORNELIUS ( TIANJIN ) CO., LTD...
- Page 2 Internet: www.cornelius-asia.com E-mail: customerservice@cornelius.com.cn Trademarks and copyrights: Aurora, Cornelius, Decade, Hydro Boost, Olympus, Impulse, Sitco, Spirit, UF-1, Vanguard, Venture, and Vista are registered trademarks of IMI Cornelius. Optifill trademark is pending. This document contains proprietary information and it may not be reproduced in any way without permission from Cornelius.
-
Page 3: Table Of Contents
Connect Syrup, Water, CO and Carbonated Water Lines ................12 Routing And Connecting Lines ..........14 Primary And Secondary Co Regulator Settings ..................14 Connect Electrical Power ....................15 Check For Leaks ....................15 Reinstall Panels ................15 Adjust Water-To-Syrup Ratio 750300229 © 2005, IMI Cornelius Inc. - Page 4 .......................27 Double Liquid Check Valve Inspection & Cleaning ..........27 Check For Leaks ....................27 Check Ratio ......................27 Clean Condenser ....................27 Clean BIB Connectors ...................27 Adjustments ......................28 Connection ....................28 Primary And Secondary CO Regulator Settings ..........28 © 2005, IMI Cornelius Inc. 750300229...
- Page 5 Carbonator Pump Replacement ................36 Pump Motor Replacement ..................37 Agitator Motor Replacement ..................38 Controller Board Replacement ................39 Condenser Fan Motor Replacement ...............40 ILLUSTRATED PARTS LIST ..................41 REFERENCE MATERIAL ....................51 Wiring Diagram .......................51 Water Circuits ......................52 750300229 © 2005, IMI Cornelius Inc.
- Page 6 Olympus Service Manual NOTE © 2005, IMI Cornelius Inc. 750300229...
-
Page 7: Safety
• Learn how to operate the machine and how to use the controls properly. • Do not let anyone operate the machine without proper training. • Keep your machine in proper working condition and do not allow un- authorized modifications to the machine. © 2005, IMI Cornelius Inc. 750300229 - 1 -... -
Page 8: Authorized Service Personnel
For additional information on storage and handling, refer to Compressed Gas Association (CGA) pamphlet P-1, “Safe Handling of Compressed Gases in Containers,” available from the CGA. © 2005, IMI Cornelius Inc. 750300229 - 2 -... -
Page 9: Shipping And Storage
MUST NOT be cleaned by water jet. CAUTION — This equipment is top heavy and unstable when empty and MUST NOT be operated unless the unit is in place and the water bath is filled. © 2005, IMI Cornelius Inc. 750300229 - 3 -... - Page 10 Olympus Service Manual NOTE © 2005, IMI Cornelius Inc. 750300229 - 4 -...
-
Page 11: General Information
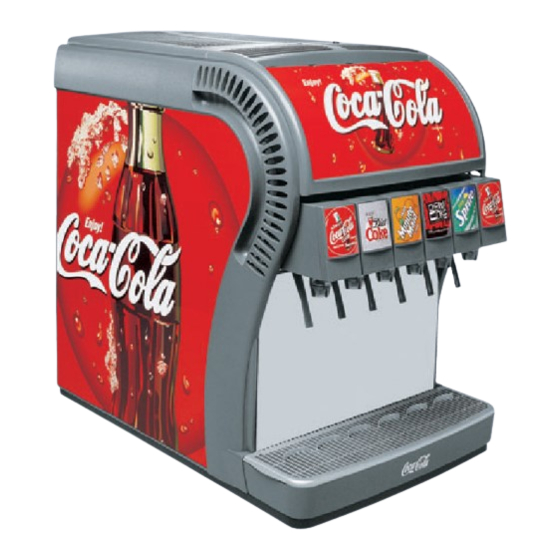
Adjustable water flow regulators and syrup flow regulators, located on standard LEV dispensing valves, are easily accessible. Key-Lock and ON/OFF Switches Lighted Merchandiser (optional) Removable Cladding 5 or 6 Valves Removable Drip Tray Built-in Carbonator and Removable Refrigeration Deck © 2005, IMI Cornelius Inc. 750300229 - 5 -... -
Page 12: Specification
Design Valve Flow Rate..85 g/sec (128 max) (3.0 oz./sec <4.5 max>) Standard Valve......LEV Cup Clearance......250 mm (9.8 inches) Safety Approvals.....CE,ETL,ETLC Sanitary Approvals....ETS (NSF 18) Electronic Controls....Electronic ice bank and liquid level control © 2005, IMI Cornelius Inc. 750300229 - 6 -... -
Page 13: Theory Of Operation
A still (non-carbonated) drink is dispensed in the same manner as the carbon- ated drink except plain water is substituted for carbonated water. © 2005, IMI Cornelius Inc. 750300229 - 7 -... - Page 14 Olympus Service Manual NOTE © 2005, IMI Cornelius Inc. 750300229 - 8 -...
-
Page 15: Installation
Electrical ..nominal 230 VAC, 50 or 60 Hz ...... 180 VAC min. operating voltage ....... 255 VAC max. operating voltage ....... nominal 115 VAC, 60 Hz ....... 90 VAC min. operating voltage .......130 VAC max. operating voltage © 2005, IMI Cornelius Inc. 750300229 - 9 -... -
Page 16: Electrical Requirements
(in a non-harsh environments). Avoid exposure to direct sunlight. CAUTION — If the unit is exposed to freezing temperature water in the unit will freeze and may damage the unit. CAUTION — Avoid spillage into the top vents. © 2005, IMI Cornelius Inc. 750300229 - 10 -... -
Page 17: Installation Procedure
5. Remove access cover and fill the water bath with water until it comes out the overflow tube. Make sure the overflow tube is not blocked or plugged. Use low-mineral tap water, not distilled or deionized water. © 2005, IMI Cornelius Inc. 750300229 - 11 -... -
Page 18: Connect Syrup, Water, Co And Carbonated Water Lines
NOTE -- Recommended supply water pressure is 4.5 bar (65 psi). Supply water pressures higher than 5.2 bar (75 psi) will require installation of a water pressure regulator to control the pressure to 4.5 bar (65 psi). © 2005, IMI Cornelius Inc. 750300229 - 12 -... - Page 19 3. Connect optional drip tray drain hose (if used). Be sure to drill out the stem in the drip pan if a drain hose is used (use a 11mm (7/16”) bit). Connect Optional Drip Tray Drain Hose © 2005, IMI Cornelius Inc. 750300229 - 13 -...
-
Page 20: Primary And Secondary Co Regulator Settings
2. Plug the dispenser into the power receptacle. 3. Reinstall wires to On/Off and key lock switches. Rest panel on top of unit. 4. Turn electrical power on. Turn On/Off and key lock switches ON. © 2005, IMI Cornelius Inc. 750300229 - 14 -... -
Page 21: Check For Leaks
4. Adjust carbonated water flow to the desired rate (such as 74 ml (2.5 oz) per second). Turn the flow adjuster 1/4 of a turn at a time and recheck the flow. To increase reading turn clockwise. © 2005, IMI Cornelius Inc. 750300229 - 15 -... -
Page 22: Dispenser Installation With Built-In Mini-Pumps
1. Position the Olympus™ dispenser on counter and remove drip tray and splash panel following the instructions in Section3.3.1. 2. Remove two face plate screws holding pump bracket assembly and remove assembly. Mini-Pump Base Face-Plate Screws © 2005, IMI Cornelius Inc. 750300229 - 16 -... - Page 23 NOTE -- Be sure lines do not kink as the assembly is reinstalled. 8. When the water bath is cool, ratio the valves. NOTE -- If there is a problem with ratioing the valves one possible problem is a blocked or restricted mini-pump. © 2005, IMI Cornelius Inc. 750300229 - 17 -...
-
Page 24: Miscellaneous
The control board will not restart the compressor until after the compressor has been off for at least 3 minutes to allow the refrigeration system pressures to equalize. © 2005, IMI Cornelius Inc. 750300229 - 18 -... -
Page 25: Carbonator Control
3-minute continuous run period has been exceeded (red LED ON). To reset the control board toggle the main power switch OFF, wait 15 seconds, then toggle to ON. © 2005, IMI Cornelius Inc. 750300229 - 19 -... - Page 26 Olympus Service Manual NOTE © 2005, IMI Cornelius Inc. 750300229 - 20 -...
-
Page 27: Operations
2. Insert key into key lock and turn to the ON to activate valves (and optional illuminated front merchandiser). Dispensing Product To dispense beverage press a cup or glass against the lever or push the button on the valve cover. Dispensing Lever © 2005, IMI Cornelius Inc. 750300229 - 21 -... -
Page 28: Replenishing Syrup Supply
LEV Diffuser LEV Nozzle • Wash external surfaces with mild soap solution, rinse with clean water, and wipe dry. Remove the drip tray, wash with mild soap solution, rinse and dry. © 2005, IMI Cornelius Inc. 750300229 - 22 -... -
Page 29: Sanitizing Syrup Systems
8. Connect tank containing potable water into one of the syrup circuits. CAUTION — Flush the system thoroughly — residual sanitizing solution left in the system could create a health hazard. © 2005, IMI Cornelius Inc. 750300229 - 23 -... -
Page 30: Sanitizing Bag-In-Box Syrup System
Continue to dispense from the dispensing valve until only sanitizing solution is dispensed from the syrup circuits, then close the valve. © 2005, IMI Cornelius Inc. 750300229 - 24 -... -
Page 31: Double Liquid Check Valve Inspection & Cleaning
1. Disconnect electrical power to the dispenser. 2. Shut off CO , syrup, and water supplies to the dispenser. 3. Dissemble valve. 4. Check seat and O-rings. Replace if necessary. 5. Reassemble valve. © 2005, IMI Cornelius Inc. 750300229 - 25 -... -
Page 32: Check For Leaks
4. Vacuum or use a soft brush to clean condenser coil. If available, use low pressure compressed air. 5. Clean around top of refrigeration assembly. 6. Reinstall merchandiser, wires to switches and top panel. © 2005, IMI Cornelius Inc. 750300229 - 26 -... -
Page 33: Service
Should be done whenever flavors are changed or any service is performed. Clean Condenser See the Operation section of this manual (page 26). Clean BIB Connectors See the Operation section of this manual (page 24). © 2005, IMI Cornelius Inc. 750300229 - 27 -... -
Page 34: Adjustments
NOTE -- The Impulse dispenser with integral cold carbonator requires CO supply pressure of 75 psi (5.2 bar). 3. Bleed air from the lines with the relief valves. 4. Check the system for gas leaks. © 2005, IMI Cornelius Inc. 750300229 - 28 -... -
Page 35: Trouble Shooting
5. Tapered washer inside 5. Replace tapered gasket. tube swivel nut connec- Make sure it seats tion distorted from being properly. over tightened restricting syrup flow. © 2005, IMI Cornelius Inc. 750300229 - 29 -... - Page 36 Allow ice to become “wet” before using. (refer to following NOTE). NOTE: Crushed ice also causes dispensing problems. When finished drink hits sharp edges of ice, carbonation is released from dispensed drink. © 2005, IMI Cornelius Inc. 750300229 - 30 -...
- Page 37 6. Dirty water supply. 6. Check water filter. Replace cartridge. 7. Finished drink above 7. Check refrigeration 4.4° C (40° F). systerm. © 2005, IMI Cornelius Inc. 750300229 - 31 -...
- Page 38 3. water, oil or dirt in CO 3. Have service person supply. remove contaminated supply, then clean system (lines, regulator, etc.) using a mild detergent. install a clean CO supply. © 2005, IMI Cornelius Inc. 750300229 - 32 -...
- Page 39 4. Inoperative carbonated 4. Replace probe (see water tank water level probe. note). 5. Inoperative carbonator 5. Replace pump or motor. pump or motor. 6. Inoperative control board. 6. Replace control board. © 2005, IMI Cornelius Inc. 750300229 - 33 -...
- Page 40 ” 10. Inoperative overload section. protector or start relay. 10. Replace inoperative part. 11. Inoperative ice bank 11. Replace ice bank probe. probe. 12. Inoperative control 12. Replace control board. board. © 2005, IMI Cornelius Inc. 750300229 - 34 -...
- Page 41 180-260(230 VAC unit) at compressor terminals when compressor is trying to start. 4. Loose, disconnected, or broken 4. Tighten connections or wiring. replace broken wiring. 5. Inoperative agitator motor. 5. Replace agitator motor. © 2005, IMI Cornelius Inc. 750300229 - 35 -...
-
Page 42: Component Service
4. Depressurize carbonator by removing the solenoid dust cover from any dispensing Press Valve valve and push down Solenoid to on the solenoid. Depressurize Pump Water 5. Disconnect water in and out lines. Connector © 2005, IMI Cornelius Inc. 750300229 - 36 -... -
Page 43: Pump Motor Replacement
• hood by removing one screw on the top and lifting up and forward. 3. Unplug motor harness. 4. Loosen the V - band clamp and remove pump. Pump V - Band © 2005, IMI Cornelius Inc. 750300229 - 37 -... -
Page 44: Agitator Motor Replacement
• hood by removing one screw on the top and lifting up and forward. 3. Unplug motor harness. 4. Remove mounting screw. Mounting Screw 5. Slide motor out of retainer slots and lift up. © 2005, IMI Cornelius Inc. 750300229 - 38 -... -
Page 45: Controller Board Replacement
• push back controller cover 4. Unplug all connectors. 5. Squeeze all four standoffs and remove the board. Connector In Each Corner 6. Install new controller board by reversing this procedure. © 2005, IMI Cornelius Inc. 750300229 - 39 -... -
Page 46: Condenser Fan Motor Replacement
1. Disconnect power to the unit. 2. Unplug motor harness. Fan Motor 3. Lift up Fan Motor Assembly. Assembly 4. Remove motor from Fan Cover. Mounting Screws 5. Install new motor by reversing this procedure. © 2005, IMI Cornelius Inc. 750300229 - 40 -... -
Page 47: Illustrated Parts List
COIL AND VALVE COMPONENTS (SEE FIGURE 5) HOOD AND PANEL COMPONENTS (SEE FIGURE 3) HOOD AND PANEL COMPONENTS (SEE FIGURE 3) WATER BATH COMPONENTS (SEE FIGURE 4) FIGURE 1. GENERAL ASSEMBLY © 2005, IMI Cornelius Inc. 750300229 - 41 -... - Page 48 Assy. plain/carb. water manifold 6F LARGE WATER COIL ASS’Y (2 PLAIN WATER) LARGE WATER COIL ASS’Y (3 PLAIN WATER) LARGE WATER COIL ASS’Y (ALL CARBONATED) WATER FIGURE 2. WATER COIL ASSEMBLY © 2005, IMI Cornelius Inc. 750300229 - 42 -...
- Page 49 Olympus Service Manual ILLUSTRATED PARTS LIST MEDIUM WATER COIL ASS’Y (1 PLAIN WATER) MEDIUM WATER COIL ASS’Y (2 PLAIN WATER) MEDIUM WATER COIL ASS’Y (ALL CARBONATED WATER) FIGURE 2. WATER COIL ASSEMBLY © 2005, IMI Cornelius Inc. 750300229 - 43 -...
- Page 50 Tank Assy. Foamed,6F 750900102 Decal, Rear, 5F 750300105 Merchdsr. Housing, 6F 750900101 Decal, Rear, 6F 750200252 Reflector, Lamp, 5F 750900301 Decal, Panel, Left 750300252 Reflector, Lamp, 6L 750900302 Decal, Panel, right © 2005, IMI Cornelius Inc. 750300229 - 44 -...
- Page 51 750200107 Drip Tray, 5F 50119 Hose, 0.625I.D. By 60in. 750300107 Drip Tray, 6F Long 750200110 Cup Rest, 5F 750200133 Tank Assy. Foamed 5F 750300110 Cup Rest, 6F 750300133 Tank Assy. Foamed,6F © 2005, IMI Cornelius Inc. 750300229 - 45 -...
- Page 52 Screw, Phil Truss Hd, No. 8-32 Carbonator 40944 Dispensing Valve Assy. 77400501 Double Check Valve Assy. 750300261 Liquid Level Probe Connector 620408220 Water Coil Assy. 5F O-Ring 620408225 Water Coil Assy. 6F © 2005, IMI Cornelius Inc. 750300229 - 46 -...
- Page 53 Olympus Service Manual ILLUSTRATED PARTS LIST CONDENSER COMPONENTS (SEE FIGURE 7) CARBONATOR AND CONTROL BOX COMPONENTS (SEE FIGURE 9) REFRIGERATION CHASSIS COMPONENTS (SEE FIGURE 8) FIGURE 6. REFRIGERATION ASSEMBLY © 2005, IMI Cornelius Inc. 750300229 - 47 -...
- Page 54 Agitator Blade 750300243 Tab Grounding 186116000 Hex Nut 750300401 Transformer Bracket 186294000 Lock Washer 449999999 Transformer, 120V 60Hz 186599000 Washer 560002114 Transformer, 230V 50Hz 620313388 Harn Agitator 230V 449999996 Transformer, 230V 60Hz © 2005, IMI Cornelius Inc. 750300229 - 48 -...
- Page 55 750200010 Spacer, 5F 752300010 Spacer, 6F 750300091 Spacer, 6F 750200079 Suction Line, 5F (not shown) 750300079 Suction Line, 6F (not shown) 560003860 Ice Bank Control Probe FIGURE 8. REFRIGERATION CHASSIS COMPONENTS © 2005, IMI Cornelius Inc. 750300229 - 49 -...
- Page 56 Carbonator Motor 6F 120/60 560002799 Carbonator Motor 6F 230/5/6 312996000 Pump, Carbonator 2792 Capacitor,Run, 5F, 120V 60Hz 2793 Capacitor, Run, 6F,230/50/60 2477 Holder Capacitor 5F FIGURE 9. CARBONATOR AND CONTROL BOX COMPONENTS © 2005, IMI Cornelius Inc. 750300229 - 50 -...
-
Page 57: Reference Material
Olympus Service Manual REFERENCE MATERIAL IRING IAGRAM © 2005, IMI Cornelius Inc. 750300229 - 51 -... -
Page 58: Water Circuits
Olympus Service Manual REFERENCE MATERIAL ATER IRCUITS OLYMPUS 5 VALVE WATER CIRCUIT OLYMPUS 6 VALVE WATER CIRCUIT © 2005, IMI Cornelius Inc. 750300229 - 52 -... - Page 59 Olympus Service Manual NOTE © 2005, IMI Cornelius Inc. 750300229 - 53 -...
- Page 60 Release Date: November, 2005 Publication Number: 750300229 Visit the IMI Cornelius Web Site at www.cornelius-asia.com for all your Literature needs. This manual applies to units which have a serial number from 89C0547OLXXX. OLYMPUS SERIES IMI CORNELIUS ( TIANJIN ) CO., LTD...