Advertisement
Quick Links
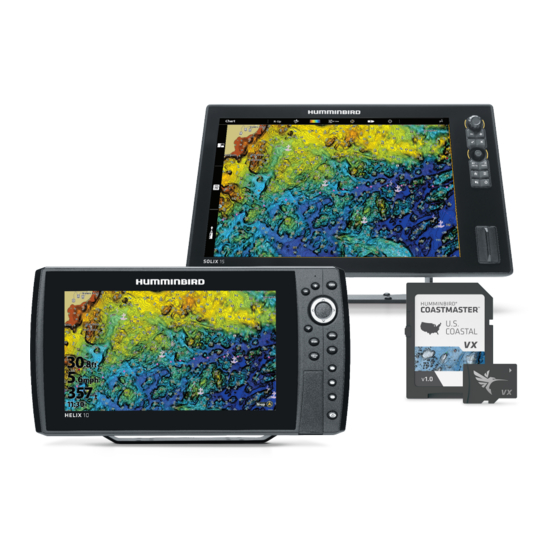
CoastMaster Chart Cards
Table of Contents
Overview . . . . . . . . . . . . . . . . . . . . . . . . . . . . . . . . . . . . . . . . . . . . 5
Set up the Control Head . . . . . . . . . . . . . . . . . . . . . . . . . . . . . . 5
Set up for the Day . . . . . . . . . . . . . . . . . . . . . . . . . . . . . . . . . . . 7
What's on the Map . . . . . . . . . . . . . . . . . . . . . . . . . . . . . . . . . . . 9
User Manual
Adjust the Map Display Settings . . . . . . . . . . . . . . . . . . . . . 12
Follow the Contour . . . . . . . . . . . . . . . . . . . . . . . . . . . . . . . . . 22
Save and Export Navigation Data . . . . . . . . . . . . . . . . . . . . 26
Contact Humminbird . . . . . . . . . . . . . . . . . . . . . . . . . . . . . . . 27
532749-1EN_B
Advertisement

Related Manuals for Humminbird CoastMaster Chart Cards


Summary of Contents for Humminbird CoastMaster Chart Cards
-
Page 1: Table Of Contents
Contact Humminbird . . . . . . . . . . . . . . . . . . . - Page 2 Thank You! Thank you for choosing Humminbird®, the #1 name in marine electronics . Humminbird has built its reputation by designing and manufacturing top quality, thoroughly reliable marine equipment . Your Humminbird is designed for trouble-free use in even the harshest marine environment .
- Page 3 CoastMaster™, HELIX®, Humminbird®, i-Pilot® Link™, and SOLIX® are trademarked by or registered trademarks of Johnson Outdoors Marine Electronics, Inc. Adobe, Acrobat, Adobe PDF, and Reader are either registered trademarks or trademarks of Adobe Systems Incorporated in the United States and/or other countries.
-
Page 5: Overview
3 . Select System Status from the Start-Up Options menu . Read the Humminbird Basemap version number . You must have version 2 .010 and later (for HELIX 7 and 8) or version 1 .031 and later (for all other compatible HELIX models) . - Page 6 CoastMaster purchase contains the control head software updates for SOLIX and HELIX control heads and the Humminbird Basemap update for HELIX control heads . Software updates are also posted to your account at humminbird.com . See your control head operations manual for additional information about updating software Review the following important information before proceeding with the updates: Δ...
-
Page 7: Set Up For The Day
1. Set up for the Day Use the following instructions to get started each time you go out on the water . Power On 1 . Press the POWER key . 2 . Choose your startup mode . If you are on the water with GPS reception, select Normal mode . (Normal mode is required for on-the-water use .) If you are off the water and don’t have GPS reception, select Simulator mode . - Page 8 Select a Chart Preset Use Chart Presets to quickly alternate between settings . You can use the default Fishing or Navigation settings provided, or you can create a custom User preset with your preferences . The Fishing and Navigation presets are also fully customizable . You can restore each preset back to its default settings at any time .
-
Page 9: What's On The Map
What’s on the Map The installed CoastMaster Chart Card provides multiple colors and icons to help you identify depth, contours, and fish attractions on the map . What’s on the CoastMaster Map (SOLIX) depth palette colors depth highlight 1 drying contour areas lines... - Page 10 Tips for Using the Map In addition to the chart and navigation features available with your Humminbird control head, use the following tips with your CoastMaster Chart Card . SOLIX HELIX Move Across the Chart Move the Joystick (SOLIX) or press any arrow on the 4-WAY Cursor Control key (HELIX) to move the cursor across the chart .
- Page 11 Search Your Map (SOLIX Only) Search the area for ports, services, tide stations, current stations, and other points of interest . You can also search for the nearest waypoints, routes, and tracks . 1 . From the Chart X-Press Menu, select Info . 2 .
-
Page 12: Adjust The Map Display Settings
Adjust the Map Display Settings When you install a CoastMaster Chart Card, menu options are added to your control head . You can show or hide contour lines, highlight a depth range on the map, highlight shallow water, set safe depth levels and more . Some of the menu options in this section may be displayed in other parts of the menu system so that you can access them quickly . - Page 13 Display Contour Lines and Adjust the Contour Density You can display or hide the contour lines on the map, and you can adjust the distance between each contour line . Show/Hide Contour Lines Show or hide water contour lines in Chart Views . SOLIX HELIX 1 .
- Page 14 Display Depth Colors and Adjust the Depth Range You can adjust the range of data shown on the chart by changing the minimum and maximum range on the display . The range you select affects how the depth colors are displayed . For related color options, see Change the Color Palette . Show/Hide Depth Colors Turn depth area colors in the Chart Views Off or On .
- Page 15 Adjust the Depth Range You can adjust the range of data shown on the chart by changing the minimum range and maximum range on the display . The range you select affects how the depth colors are displayed . For best results, set a narrow depth range threshold . For example, set the Palette Min Range to 100 and the Palette Max Range to 200 .
- Page 16 Set Depth Highlights Highlight deep and shallow waters in Chart View and Chart Combo Views using the following CoastMaster features . NOTE: Changing these settings will affect all presets, not just the active preset. Open the Depth Highlights Menu SOLIX HELIX 1 .
- Page 17 Highlight a Depth Range Depth Highlights allow you to select up to four depth ranges to be highlighted on the chart . SOLIX HELIX 1 . From the Depth Highlights Menu, select Depth Highlights . 1 . From the Depth Highlights Menu, select Depth Highlights . Tap the on/off button, or press the ENTER key, to show or Press the RIGHT or LEFT Cursor keys to show or hide depth hide depth highlights .
- Page 18 Change the Highlight Color If you’ve set Depth Highlights and they’re not easy to see with the color palette you’ve selected, you can change the Highlight Color . SOLIX HELIX 1 . From the Depth Highlights Menu, select the Color you 1 .
- Page 19 Filter Chart Objects Use Chart Objects to add or hide chart details and navaids on the Chart View . Open the Chart Objects Menu SOLIX HELIX 1 . From the Chart X-Press Menu, select Chart Options . 1 . Main Menu: Press the MENU key twice . 2 .
- Page 20 Show/Hide Spot Soundings Spot Soundings are depth measurements shown on the chart . SOLIX HELIX 1 . From the Chart Objects Menu, select Navigation > Spot 1 . From the Chart Objects Menu, select the Navigation tab . Soundings . 2 .
- Page 21 Show/Hide Drying Areas Tidal drying areas are highlighted on your map by a green and tan hatched pattern (Navigation Preset) or in seafoam green (Fishing and User Presets) . Drying areas can be turned on and off through the Natural Land Features option . SOLIX HELIX 1 .
-
Page 22: Follow The Contour
Contour Offset feature to stay a set distance from a contour line or shoreline . When you start i-Pilot Link navigation to Follow the Contour, all other types of navigation are stopped on the Humminbird control head and the Ethernet network . - Page 23 Selecting a Contour Line (SOLIX) Setting the Contour Offset (SOLIX) Setting the Contour Offset (HELIX) Start Follow the Contour Navigation You can start i-Pilot Link navigation if the boat position is within 1/4 mile of the selected contour . WARNING! If the selected contour is a shoreline, set the Contour Offset. See Preparation: Set the Contour Offset. WARNING! Contour Offset does NOT account for changes in water depth.
- Page 24 Starting Follow the Contour Navigation (SOLIX) submenu navigation option 1 (orange) navigation option 2 (purple) navigation option 1 (previewed in orange) navigation option 2 (previewed in purple) Starting Follow the Contour Navigation (HELIX) submenu navigation option 1 (orange) navigation option 2 (blue) navigation option 1 navigation option 2...
- Page 25 Adjust the Contour Offset during Navigation SOLIX HELIX 1 . Tap Chart in the status bar . Press the MENU key once . 2 . Select Go To > Contour Offset . Select Contour Offset from the Navigation X-Press Menu . 3 .
-
Page 26: Save And Export Navigation Data
Web site at 9 . See your control head operations manual or Waypoint humminbird.com . Management Guide for more information . These manuals are available on the CD provided with your control head, or you can download them from our Web site at humminbird.com . -
Page 27: Contact Humminbird
Contact Humminbird Contact Humminbird Technical Support in any of the following ways: Web site: humminbird .com E-mail: service@humminbird .com Telephone: 1-800-633-1468 Direct Shipping: Humminbird Service Department 678 Humminbird Lane Eufaula, AL 36027 USA Hours of Operation: Monday - Friday 8:00 a .m . to 4:30 p .m . (Central Standard Time) Social Media Resources: Facebook .com/HumminbirdElectronics...