
Related Manuals for Uniden WDECT 2345+1


Summary of Contents for Uniden WDECT 2345+1
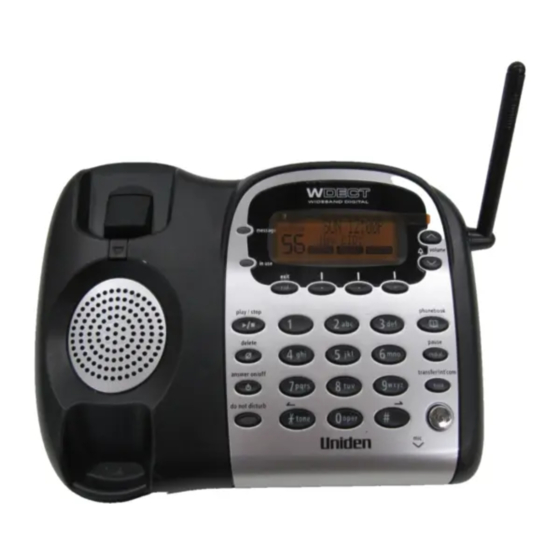
- Page 1 WDECT 2345+1 Corded Telephone and Digital Answering System with Wide Band Digital Cordless Handset OWNER'S MANUAL...
-
Page 2: Table Of Contents
Contents WELCOME/ FEATURES Making Calls Using the Phonebook TERMINOLOGY Speed Dialing CONTROLS & FUNCTIONS Editing or Erasing a Stored Name, Phone Number, DISPLAY AND ICONS Distinctive Ring and Speed Dial SOFT KEY FUNCTION (BASE ONLY) Copying Phonebook Locations GETTING STARTED CALLER ID Setting up the Phone Caller ID and CIDCW... -
Page 3: Welcome/ Features
Welcome Congratulations on your purchase of the Uniden Digital Expandable Cordless Telephone System! This is a "Corded/Cordless" Telephone unit. The corded handset (on base) can make/ receive calls during power failure. When the base unit is connected to AC power and a telephone line, it can support up to four cordless handsets. - Page 4 (walkie-talkies). Be sure to visit our web site: www.uniden.com.au, www.uniden.co.nz Your phone may be compatible with other Uniden Digital expandable systems Look for the technology icon on our boxes!
-
Page 5: Terminology
Terminology Standby Mode - The handset maybe sitting on or off the cradle, but is NOT in use. has not been pressed. The corded base handset is on the base and on the base has not been pressed. No dial tone is present. The handset is off the cradle and Talk Mode - talk/ flash... -
Page 6: Controls & Functions
Controls & Functions Handset Antenna Headset Jack Cover Beltclip Hole Hands-Free Speaker Handset Battery Compartment New Message LED Handset Earpiece LCD Display menu /del Key (ring) a. ringer volume control b. scroll keys for display screen select / call id talk/flash phonebook . - Page 7 play/ stop (P. 62) tone (P. 36 and 41) 24.In use LED 34. LCD Display 25.New Message LED 35. Base Antenna cid/ exit (P. 51) volume 27. Corded Base Handset (volume up/ down) 28. Base Speaker (P. 34 and 20) 29.
-
Page 8: Display And Icons
Display and Icons Example of the standby mode display ! Handset Day of the week and time/battery icon SUN 12:00A Handset ID and Banner Handset #1 Number of new Caller ID calls received New: Ringer off icon (when the ringer is off) :OFF •... - Page 9 Talk Mute icon appears when you mute the handset or the base. Talk Speaker icon appears when the handset speaker phone is used. Talk Booster icon appears when the Clarity Booster feature is in use. Talk Privacy icon appears when the Privacy Mode is turned on.
-
Page 10: Soft Key Function (Base Only)
Soft Key Function (Base only) "Soft" keys are keys that change function during the operation of the phone. There are three soft keys on the base. Soft keys allow you to: Access the main menu Find a handset Record Voice Memo The function of each soft key is determined by the icon that appears directly above it. -
Page 11: Getting Started
Setting up the Phone Do the following steps: A. Choose the best location B. Connect the base unit C. Install the rechargeable battery pack into the handset D. Connect the charger E. Mount the base unit on a wall A. Choose the best location Here are some important guidelines you should consider: Avoid heat sources, such as Avoid noise sources such as a window... - Page 12 B. Connect the base unit 1) Connect the handset cord to the left side of the phone and the corded base handset. Connect the telephone line cord to the Use only the Test Telephone Line Without Power supplied [AAD- Pick up the base handset and listen for a dial tone. 041S] AC If a dial tone is achieved after 2 seconds then base Adaptor.
- Page 13 4) Place the battery case cover back on the handset and slide it upwards until it clicks into place. [12] Use only the Uniden (BT- 446) rechargeable battery pack supplied with your cordless telephone.
- Page 14 D. Connect the charger The handset is powered by a rechargeable battery pack. The battery recharges automatically when the handset is placed in the charger. 1) Connect the AC adaptor to the DC IN Use only the jack and to a standard 240V AC wall supplied [AAD-600s] AC outlet.
- Page 15 E. Mount the Base Unit on a Wall Standard wall plate mounting This phone can be mounted on any standard wall plate. 1) Detach the wall mount adaptor from the bottom of the base. 2) Snap the wall mount adaptor into the notches on the base bottom as shown.
- Page 16 Direct wall mounting If you don't have a standard wall plate, you can mount your phone directly to the wall. Before doing this, consider the following: Avoid electrical cables, pipes, or other items behind the mounting location that could cause a hazard when inserting screws into the wall. Try to mount your phone within 1.5m of a working phone jack to avoid excessive lengths.
-
Page 17: Expanding Your Phone
All of the handsets ring when a call is received. Backward / Forward Compatibility Your phone may be compatible with other Uniden Digital Expandable Systems. Please visit our website at www.uniden.com.au, www.uniden.co.nz If you purchase a WDECT2305 or WDECT2380 expansion handset, please register the handset to the original/main base before use. -
Page 18: Register The Handset
Place handset on main base to register. with other you register an extra handset to the base, the handset ID will be assigned. Uniden Digital Expandable Systems. 1) Before registering the extra handset, the battery pack MUST be charged for 15- Please visit our 20 hours. -
Page 19: Changing The Digital Security Code
Changing the Digital Security Code The digital security code is an identification code used to connect the handset and the base unit. Normally, setting the code is not necessary. In the rare situation that you suspect another cordless telephone is using the same security code, you can change the code. -
Page 20: Main Menu Options
Main Menu Options Your phone has seven main menu options: DirectLink Mode, Room/ Baby Monitor, Handset Setup, Base Setup, Answ. Setup, System Reset (Handset only), Handset Registration(Base only) and Global Setup . You can change Room/ Baby Monitor, Answ. Setup , base or from any handset. -
Page 21: Setting Menu Options
Setting Menu Options Using the interface Below are some tips for using the software interface on your phone. Press menu/del (or the MENU soft key on the base) to access the main menu. /volume up/down scroll through options. Press select/ (or the soft key on the base)to make a selection. - Page 22 Handset or Base Setup The following submenu options must be set separately for each handset and the base. Selecting a Ringer Tone Ringer tone lets you choose from 10 melodies or 10 ringer tones. You must set the ! If you set the ringer tone separately on the base and on each handset.
- Page 23 Distinctive Ringer Setup Distinctive Ringer allows you to assign a designated ring tone to a stored phonebook number. When a call is received and the Caller ID information matches the information in one of the phonebook memory entries, the phone uses the distinctive ring assigned to that particular caller.
- Page 24 Setting Anykey Answer (Handset only) Anykey Answer allows you to answer the phone by pressing any number key, /tone/ on the handset. 1) Press menu/del Select the Handset Setup Anykey Answer Menu, and then the Anykey Answer submenu. Press /volume up/down to select 3) Press select/...
- Page 25 Adjusting the LCD Contrast (Base only) Contrast adjusts the Base LCD brightness. Choose one of the ten levels for optimum viewing. 1) Press the MENU soft key. Select the Base Setup menu, and then the LCD Contrast submenu. 2) Press /volume up/down to adjust the contrast of the LCD (ten levels).
-
Page 26: Global Setup
Global Setup If you change one of the global settings, you change that setting for all registered handsets and the base. Only one handset or the base can change global settings at a time. Setting Day and Time Day & Time sets the day and time of your display. 1) Press menu/del (or the MENU soft key on... - Page 27 2) Press /volume up/down to select CIDW or CIDCW Off. CWDX 3) Press the soft key on the base). CWDX You will hear a confirmation tone. Setting the Dial Mode (Australia Only) Dial Mode sets the dial mode to tone or pulse. Most phone systems use tone dialing;...
- Page 28 Setting the Insert Zero This feature adds '0' or '00' to the number, when you receive Caller ID messages. The default setting for New Zealand is On. The default setting for Australia is Off. 1) Press menu/del (or the MENU soft key on the base).
- Page 29 System Reset (Handset only) De-register the Handset Handset 1) Press menu/del Select the System Reset Handset menu then select the Deregister HS submenu. 2) Press /volume up/down to select the handset ID to be de-registered from the list, and then press select/ Deregister HS appears.
-
Page 30: Basics
Using Your Phone Power Failure Operation Because the phone is a corded/cordless combination phone, it can still perform several of its functions during a power failure. The following features will function It is important the even during a power failure: "Test Telephone Line without Power"... - Page 31 1) Remove the handset from the cradle. 2) Dial the number. If pause is required, press pause/redial display, which represents a pause 3) Press talk/flash. From the Handset Speakerphone 1) Remove the handset from the cradle. 2) Press 3) Listen for the dial tone. 4) Dial the number.
- Page 32 Receiving a call From the handset 1) Remove the handset from the cradle. (If AutoTalk is on, the phone will automatically answer the call when you pick it up.) 2) Press talk/ flash To set "Autotalk", see page 22 or to set "Anykey Answer"...
-
Page 33: Call Waiting
Call Waiting If you have Call Waiting service and a call waiting tone sounds while you are on a call: AUSTRALIA: Press talk/flash on the handset or the FLASH soft key on the base and then 2 to switch between callers. -
Page 34: Redialing A Call
Redialing a Call The last three phone numbers dialed can be quickly redialed from the handset or base. Redialing from Standby Mode If the number 1) With the phone in standby mode, press exceeds 32 digits, pause/redial. only the first 32 2) Press pause/redial /volume up/down... -
Page 35: Adjusting The Ringer, Earpiece And Speaker Volume
5) Press select/ menu/del (or the soft key on the base). The redialed number is deleted. Adjusting the Ringer, Earpiece and Speaker Volume Ringer volume Press /volume up/ down on the handset or on the base in standby mode. Your phone provides three ringer volumes (off, low, or high) on the handset, or four ringer volumes (off, low, medium, or high) on the base. -
Page 36: Muting The Ringer
Muting the Ringer Do Not Disturb (DND) do not disturb feature (DND) allows you to mute the ringer of the base and any registered handsets at the same time. The phone must be in standby mode. Press and hold do not disturb on the base. -
Page 37: Mute Microphone
Mute Microphone You can temporarily mute the microphone so that the caller cannot hear you. 1) Press menu/del (or the MENU soft key on the base) during talk mode (while the phone is in use). 2) Press /volume up/down to move the pointer to Mute (or the soft key on the base). -
Page 38: Traveling Out Of Range
Traveling Out of Range During a call, as you begin to move your handset too far from your base unit, noise may increase. If you pass the range limits of the base unit, you will hear a beep and see Out of Range on the display, and then the handset returns to standby mode. -
Page 39: Privacy Mode
Privacy Mode Privacy Mode prevents interruption from other registered handsets or the base. This works only when the phone is in use. 1) Press menu/del MENU soft key on the base) during talk mode. 2) Press /volume up/down to move the pointer to Privacy Mode select/ (or the... -
Page 40: Find Handset
From the base 1) Press on the base or the corded handset to join the conference call. 2) To hang up, press or return the corded handset to the base. The handset(s) will still be connected to the call. From the handset 1) Press talk/flash on the handset to join... -
Page 41: Phonebook : 50
Setting up the Phonebook You can store names and numbers in your phone’s phonebook, search for names alphabetically, and dial phonebook entries with just a few key presses. Phonebook memory is stored independently in the base and handsets. You can store up to 100 numbers in the base and in each handset. - Page 42 4) Enter the name (up to 16 characters) by using the number keypad. If a name is not required, go to step 5. <No Name> will be used as the name. Refer to the letters on the number keys to select the desired characters. With each press of a number key ( ), the displayed character appears in the following order: Upper case letters first, lower case letters next and finally the number...
- Page 43 5) Press select/ (or the soft key) to store the name; Store/Edit No appears. 6) Use the number keypad, /tone/ enter the phone number (up to 20 digits). To insert a 2-second pause in the dialing sequence, press pause/redial. If you make an error, use menu/del (or the DELETE...
- Page 44 9) Press select/ (or the soft key). You will hear a confirmation tone, and appears in the display. Storing Caller ID Messages in the Phonebook If a call comes in via a telephone system Messages shown in the Caller ID list (see page 51) can be stored in the that does not offer phonebook.
-
Page 45: Viewing The Phonebook
Viewing the Phonebook 1) Press 2) Press /volume up/down to scroll through the phonebook locations. Phonebook locations appear in alphabetical order (from first to last when you Press /volume down from last to first when you press You can also use the letters on the number keys to select the first letter of the desired name. -
Page 46: Making Calls Using The Phonebook
Making Calls Using the Phonebook 1) When the phone is in standby mode, view the phonebook location to dial (see Movies "Viewing the Phonebook" on page 44). 800 730 3456 2) Press talk/flash on the handset or Beethoven9/SPD1 press on the base (or pick up the corded handset). -
Page 47: Speed Dialing
Speed Dialing You can program up to ten speed dial numbers in each handset and the base. You must program a speed dial number before you can use the speed dialing feature. When the phone is in standby mode, press and hold a number key ( - ) associated with the speed dial location desired until the phone number appears;... -
Page 48: Copying Phonebook Locations
To delete the entry: From the base-press the DELETE , and press select/ (or the 5) If you are deleting the entry, you will hear a confirmation tone, and Deleted! appears in the display. If you are editing the entry, follow the steps 4 to 9 under Even if all 100 “Storing and Editing Phone Numbers, Names, Distinctive Rings and Speed Dial”... - Page 49 4) Press /volume up/down to select One Memory Memories , and the base), and then press soft key. If you select All Memory, Are you sure? appears on the display screen. Press /volume up/down to select , and then press the If you select , press /volume up/down...
-
Page 50: Caller Id
Caller ID and CIDCW (Caller ID on Call Waiting) You must subscribe to Caller ID services through your local telephone provider to use these features. CIDCW (Caller ID on Call Waiting) is available in Australia only. When the telephone rings, the Caller ID feature allows you to view the caller’s If you answer a call name, phone number, date and time of call. - Page 51 You may receive any one of the following messages: When a private name is received; Private When a private number is received; Private When a unknown name is received; unavailable When a unknown number is received; unavailable When invalid data is received; Incomplete Data When a overseas call (0000) is received (New Zealand only);...
-
Page 52: Viewing The Caller Id List
Viewing the Caller ID List The Caller ID list stores information for incoming calls - even unanswered calls. You can store up to 100 Caller ID messages and phonebook locations (including Speed Dials) for each handset and the base. You can view the Caller ID list The number of through the handset and base during a call or when the phone is in standby mode. - Page 53 To view the Caller ID messages with alphabetical search, press the number key pad ( and ) with the letter associated with the first letter of the desired message. Once you view the Caller ID list with alphabetical search, you cannot switch back to historical order unless you exit and re-enter the operation.
- Page 54 Deleting all Caller ID name/numbers 1) When the phone is in standby mode, press 2) Press menu/del (or the DELETE soft key on the base). Delete All? Appears. Once the Caller ID data has been 3) Press /volume up/down to choose deleted, the information cannot be retrieved.
- Page 55 Calling a Party from the Caller ID List 1) When the phone is in standby mode, select the 10/12 Caller ID message (see "Viewing the Caller ID Jane Smith List" on page 51). 255 222 1243 3) Press talk/flash on the handset or ,or pick up the corded handset.
-
Page 56: The Integrated Answering Device
The Integrated Telephone Answering Device The phone has a built- in answering system that answers and records incoming calls. You can also use your answering system to record a conversation, leave a voice memo message, or announce a special outgoing message to callers when you're away from your phone. - Page 57 Answering System Setup This main menu option allows you to set up the built in answering device. Record a Personal Outgoing Message (Base Only) Record Greeting allows you to record a personal messase (greeting) which the answering system automatically plays when you receive a call. 1) Press the MENU soft key.
- Page 58 Each time you press the CHANGE message between the prerecorded and the personal outgoing message. To delete the personal greeting, press the Setting a Security Code You need to select a two-digit security code in order to play your messages from a Through this remote location.
- Page 59 2) Press /volume up/down to select a Ring Time. 3) Press select/ (or the soft key on the base). You will hear a confirmation tone. Setting the Record Time Record Time sets the duration for recording the incoming messages. You have three record time options: "one minute"...
- Page 60 1) Press menu/del (or the MENU key). Select the Answ. Setup menu, and then the Message Alert submenu. 2) Press /volume up/down to select 3) Press select/ (or the soft key on the base). You will hear a confirmation tone. Turning the Message Alert tone off by pressing any key To quickly turn off the Message Alert tone, press any key on the base unit;...
- Page 61 Setting the Day and Time Stamp The Time stamp will not be heard until you have set the time. See "Setting The Day and Time" on page 25. [60]...
-
Page 62: Turning The Answering System On/Off
Turning the Answering System On/Off 1) To turn the answering system on, press answer on/off on the base when the phone is in standby mode or from the Answer Setup menu. and the number of Message messages stored in memory appear on the When the answering system LCD. -
Page 63: New Message Led
New Message LED The new message LED on the handset and base flashes when you have new messages in your answering system. The LED stops flashing when all new messages are played back. Using Your Answering System The message counter displays the number of messages stored in memory. - Page 64 2) When all new messages have been played, you hear a confirmation tone, and the system announces "End of messages." The system returns to standby. After you have reviewed your new messages, you can play your old messages by pressing play/ stop again.
- Page 65 2) Press the >>| soft key at anytime to skip to the next message. Each time you press the >>| soft key, the system scans forward one message. If you have several messages, press the >>| soft key repeatedly to find the message you want to play.
- Page 66 Voice memo The voice memo function allows the user to record messages (more than two seconds and less than four minutes). 1) With the phone in standby mode, press the 2) Press the START soft key. You will hear the announcement "Record Memo Message"...
-
Page 67: Remote Operation
1) After the answering system answers, the base speaker will let you hear the calls as the machine records the message. To adjust the volume, press up/ down If you set the answering system to off, you cannot screen a call. 2) To answer the call, pick up the corded handset or press To mute the Call Screen, press the MUTE... - Page 68 Remote access with the handset You can operate your answering system from another room using a handset. 1) When the phone is in standby mode, press Answering Machine operation The answering system announces the current time and the number of messages stored in the memory.
-
Page 69: Remote Access Away From Home
Remote Key Function Play incoming Messages Memo Record/Stop** Stop Operation Greeting Message Record/Stop** Play Greeting Message Help ** For the Memo Record and Greeting Message Record functions, the first time you enter the corresponding command, it starts the Recording function. If you want to stop the recording, enter the command again. - Page 70 Command Function then Repeat a Message* then Play incoming Messages then Skip a Message For your convenience a then Delete a Message remote operation card is provided then Stop Operation for you to use while away from home (refer to page 88). * For the Repeat a Message function, press # then repeat the previous message, or press # then repeat the current message.
-
Page 71: Multi-Handset Features
Multi-Handset Features The features in this section require a minimum Of two handsets to operate. To add additional handsets to your system, see “Expanding Your Phone” on page 16. Using DirectLink Mode In DirectLink Mode, a pair of handsets can function as two-way radios. You can have up to two pairs of handsets in DirectLink Mode at a time. - Page 72 DirectLink call 1) When the phone is in DirectLink standby mode, press talk/flash (example of DirectLink from handset #1). DirectLink mode 2) Select the handset to which you wish to To DirectLink DirectLink with by pressing the number keys a handset ).
-
Page 73: Intercom
Intercom The intercom feature lets you communicate with another handset or the base without using the phone line. Making an Intercom Page From a handset 1) With the phone in standby mode, press hold/transfer/int'com 2) Use volume up/down to select the base or To Intercom the handset you want to talk with, and then press... - Page 74 From a handset 1) Pick up the handset from the cradle. (If AutoTalk is enabled, the handset will automatically answer when you pick it up.) 2) Press talk/flash , or hold/transfer/int'com. From the base Pick up the corded base handset. To answer with the base speakerphone, press transfer/int'com/hold or the ANSWER...
- Page 75 From the base 1) During a call, press transfer/int'com/hold on the base. The Call will be put on hold. 2) Use volume up/down to select the handset you want to transfer the call to, and then press the soft key. If you select , all handsets will be paged.
-
Page 76: Room/Baby Monitor
Room/Baby Monitor This feature allows you to monitor sounds in another room. Place a handset or the base in the room you wish to monitor; it will function as a This feature only microphone. A second handset can be set to works when both function as a remote speaker, allowing you to handsets are... -
Page 77: Additional Information
When the operating time becomes short even after a battery is recharged, please replace the battery. With normal usage, your battery should last about one year. Please contact your place of purchase or the Uniden Parts Department for a replacement battery. -
Page 78: Low Battery Alert
Low Battery Alert When the battery pack is very low, the phone is programmed to eliminate functions in order to save power. The battery pack needs to be charged when: - The empty battery icon appears. - Low Battery appears in the display. If the phone is in standby mode, none of keys will operate. -
Page 79: General Information
Battery part number: BT- 446 Capacity: 800mAh, 3.6V • To avoid damage to the phone use only Uniden AAD-041S and BT- 446, and AAD-600S with your phone. • If the handset is left off of the base, the actual Talk mode duration will be reduced respective to the amount of time the handset is off the base. -
Page 80: Troubleshooting
Troubleshooting If your phone is not performing to your expectations, please try these simple steps first. If these steps do not solve your problem, visit our website for further information (www.uniden.com.au or www.uniden.co.nz). Symptom Suggestion The charge LED won't • Make sure the AC adaptor is plugged into the charger and wall outlet. - Page 81 Symptom Suggestion Severe noise interference. • Keep the handset away from microwave ovens, computers, remote control toys, wireless microphones, alarm systems, intercoms, room monitors, fluorescent lights, and electrical appliances. • Move to another location or turn off the source of interference. The Caller ID does not display.
- Page 82 Symptom Suggestion No sound on the base • Adjust the speaker volume on the base unit. unit speaker during call • Make sure the call screen feature is set to on. monitoring or message playback. Cannot access remote • Make sure you are using the correct PIN number. call- in features from •...
-
Page 83: Liquid Damage
DO NOT use a microwave oven to speed up the drying process. This will cause permanent damage to the handset, base and the microwave oven. After following these steps, if your cordless telephone does not work, please visit our website for further information (www.uniden.com.au or www.uniden.co.nz). [82]... -
Page 84: Memory List
Memory List [83]... - Page 85 Memo [84]...
- Page 86 Memo [85]...
- Page 87 Memo [86]...
-
Page 88: Index
Index Clarity Booster...37 Clock...25 Conferencing...38 Announce only feature...61 Answering system Date & Time...25 Deleting a message...64 De- register the Handset...28 Playing your messages...62 Dial mode...26 Recording a conversation...65 Digital security code...18 Remote access...66 DirectLink...70 Repeating a message...63 Distinctive ringer...22 Set up...56 E, F, G, H Skipping a message...63 Earpiece volume...34... -
Page 89: Remote Operation Card
[88]... - Page 90 [89]...
-
Page 91: Warranty
(C) Improperly installed, (D) Repaired by someone other than an authorized Uniden Repair Agent for a defect or malfunction covered by this warranty, (E) Used in conjunction with any equipment or parts or as part of a system not manufactured by Uniden. - Page 92 THANK YOU FOR BUYING A UNIDEN PRODUCT. (c) 2005 Uniden Australia Pty Limited. Uniden New Zealand Ltd. Printed in China UPZZ01381BZ...