Table of Contents
Advertisement
Quick Links
Advertisement
Table of Contents

Related Manuals for TRENDnet TEW-671BR


Summary of Contents for TRENDnet TEW-671BR
-
Page 2: Table Of Contents
RODUCT AYOUT INSTALLATION ... 4 2.1. YSTEM EQUIREMENTS 2.2. LAN & WAN... 4 2.3. TEW-671BR ... 5 OGIN TO SYSTEM ... 6 3.1..6 TATUS 3.2. LAN ... 7 3.3. DHCP ... 8 ... - Page 3 8.1. ETWORK DDRESS 8.2..34 APPING 8.3. ORWARDING 8.4. RIGGERING 8.5. PPLICATION AYER 8.6. UPNP ... 39 8.7. UALITY OF ERVICE 8.8..42 OUTING TOOLS SETUP ... 43 9.1.
-
Page 4: Introduction
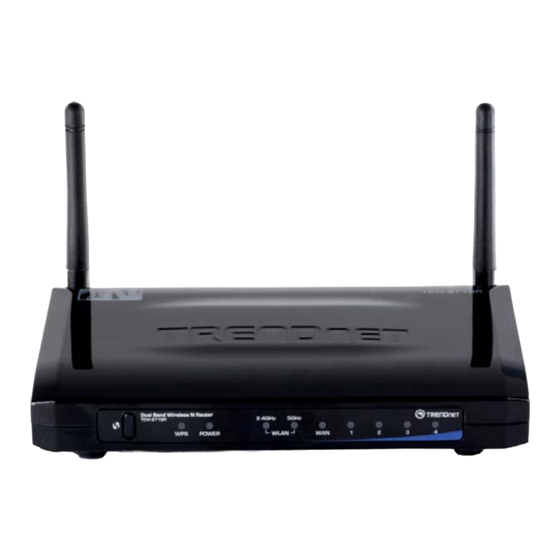
1. Introduction 1.1. Summary TEW-671BR is a Dual Band Concurrent Wireless 11N Broadband Router with dual CPU that offers user unprecedented network performance. WMM support boosts streaming and multimedia intensive services. It supports 2.4GHz band under 802.11 b/g/n modes while providing 5GHz band to guarantee an interference-free network access. -
Page 5: Wireless Performance Considerations
1.2. Wireless Performance Considerations There are a number of factors that can impact the range of wireless devices. 1. Adjust your wireless devices so that the signal is traveling in a straight path, rather than at an angle. The more material the signal has to pass through the more signal you will lose. 2. -
Page 6: Package Contents
Do not discard the packing materials, in case of return; the unit must be shipped back in its original package. ‐ TEW-671BR Dual Band Wireless N Router ‐ Multi-Language Quick Installation Guide ‐ CD-ROM (User’s Guide) ‐ Cat.5 Ethernet cable (1m / 3.2ft) ‐... -
Page 7: Installation
2. Installation 2.1. System Requirements To begin using the TEW-671BR, make sure you meet the following as minimum requirements: Operating System – Microsoft Windows 98SE/ME/XP/2000/VISTA One Free Ethernet port on your PC or a Wireless client adapter External xDSL (ADSL) or Cable modem with an Ethernet port (RJ-45). -
Page 8: Login To Tew-671Br
2.3. Login to TEW-671BR TEW-671BR provides web-interface for configuration through web browser, such as Internet Explorer (6.0 or above), Firefox or Safari. Open your browser (e.g. Internet Explorer). Type in http://192.168.10.1 in the address bar and click Enter. You will be prompt with login window, the default username and password is admin and admin. -
Page 9: System
This page allows you to monitor the current status of your router. You can use the status page to quickly see if you have the latest firmware available. (For most updated firmware, please visit http://www.trendnet.com/downloads) System: You can see the unit up time, hardware information, serial number as well as firmware version information. -
Page 10: Lan
3.2. LAN The LAN tab reveals LAN settings which can be altered at will. If you are an entry level user, try accessing a website from your browser. If you can access website without a glitch, just do not change any of these settings. LAN IP IP address: 192.168.10.1. -
Page 11: Dhcp
3.3. DHCP View the current LAN clients which are assigned with an IP Address by the DHCP-server. This page shows all DHCP clients (LAN PCs) currently connected to your network. The table shows the assigned IP address, MAC address and expiration time for each DHCP leased client. -
Page 12: Schedule
3.4. Schedule This page allows user to set up schedule function for Firewall and Power Saving. Add schedule, edit schedule options to allow configuration of firewall and power savings services. Fill in the schedule and select type of service. Click Apply to implement those settings. -
Page 13: Monitor
3.6. Monitor Show histogram for network connection on WAN, LAN & WLAN. Auto refresh keeps information updated frequently. -
Page 14: Wizard
Please make sure you have a valid internet connection from your ADSL/Cable modem to the WAN port of TEW-671BR with active LED. After the router finished scaning the WAN port, you will see either of the following 2 screens (section 4.1 & 4.2). -
Page 15: Wlan Setups
4.3. WLAN Setups We recommend you setting up the wireless encryptions immediately to protect your network. To change security levels, please point to the bars, you can extend the security by clicking next to the existing bar. Security options from Lowest security with no encryption, WEP (Open) then Medium security WEP (Shared Key), and High security WPA-PSK, and last Highest security WPA2-PSK. -
Page 16: Internet
5. Internet 5.1. Status This page shows the current Internet connection type and status Note: The Renew button works only when you have a Dynamic IP connection. When you want to remotely manage the router, you can use the IP address shown here to access. -
Page 17: Dynamic Ip
5.2. Dynamic IP Use the MAC address when registering for Internet service, and do not change it unless required by your Internet Services Provider (ISP). If your ISP used the MAC address of the Ethernet card as an identifier, connect only the PC with the registered MAC address to the broadband router and click the Clone MAC Address button. -
Page 18: Pppoe
5.4. PPPoE For PPPoE connection, you should have a login name and password assigned from your provider. Login / Password: Enter the PPPoE username and password (Case sensitive) Service Name: This is normally optional. Maximum Transmission Unit (MTU): This is the maximum size of the packets. Type: Enable the Auto-reconnect option to automatically re-establish the connection when an application attempts to access the Internet again. -
Page 19: Pptp
5.5. PPTP PPTP allows the secure connection over the Internet by simply dialing in a local point provided by your ISP provider. The following screen allows client PCs to establish a normal PPTP session and provides hassle-free configuration of the PPTP client on each client PC. Host Name: This is optional. -
Page 20: Wireless 2.4Ghz & 5Ghz
6. Wireless 2.4GHz & 5GHz TEW-671BR is a dual band concurrent product, therefore two wireless radio configurations are provided. Both radios share the same features except for open band and available channels under “Basic” section. 6.1. Basic... - Page 21 Radio: You can turn on/off wireless radio. If wireless Radio is off, you cannot associate with AP through wireless. Mode: In this device, we support two operation modes which are AP router and WDS. Band: You can select the wireless standards running on your network environment. 2.4G Band 2.4 GHz (802.11b/g): All 802.11b/g/n devices can connect to the router up to 54Mbps speed.
-
Page 22: Mode: Wds
WPA-PSK/WPA2-PSK Mixed mode. Note: TEW-671BR supports of up to 4 MAC addresses using WDS feature. All units have to enter the other units’ MAC address to create a point to point or point to multiple point bridge networks. -
Page 23: Advanced
6.3. Advanced This section allows you to set the advanced wireless options. The options included are Authentication Type, Fragment Threshold, RTS Threshold, Beacon Interval, and Preamble Type. You should not change these parameters unless you know what effect the changes will have on the router. -
Page 24: Security
WMM: Wi-Fi Multi-Media if enabled supports QoS for experiencing better audio, video and voice in applications. Encryption: When you choose to disable encryption, it is very insecure to operate TEW-671BR. - Page 25 Enable 802.1x Authentication IEEE 802.1x is an authentication protocol. Every user must use a valid account to login to this Access Point before accessing the wireless LAN. The authentication is processed by a RADIUS server. This mode only authenticates users by IEEE 802.1x, but it does not encrypt the data during communication.
- Page 26 Authentication Type: There are two authentication types: "Open System" and "Shared Key". When you select "Open System", wireless stations can associate with this wireless router without WEP encryption. When you select "Shared Key", you should also setup a WEP key in the "Encryption" page. After this has been done, make sure the wireless clients that you want to connect to the device are also setup with the same encryption key.
- Page 27 WPA-Radius Encryption Wi-Fi Protected Access (WPA) is an advanced security standard. You can use an external RADIUS server to authenticate wireless stations and provide the session key to encrypt data during communication. It supports TKIP (WPA) or AES (WPA2) encryptions. Press Apply button when you are done.
-
Page 28: Filter
6.5. Filter This wireless router supports MAC Address Control, which prevents unauthorized clients from accessing your wireless network. Enable wireless access control: Enable the wireless access control function Adding an address into the list Enter the "MAC Address" and "Comment" of the wireless station to be added and then click Add. -
Page 29: Wps (Wi-Fi Protected Setup)
6.6. WPS (Wi-Fi Protected Setup) WPS is the simplest way to establish a connection between the wireless clients and the wireless router. You don’t have to select the encryption mode and fill in a long encryption passphrase every time when you try to setup a wireless connection. You only need to press a button on both wireless client and wireless router, and the WPS will do the rest for you. -
Page 30: Client List
Interface: If device is set to repeater mode, you can choose “Client” interface to connect with other AP by using WPS, otherwise you may choose “AP” interface to do WPS with other clients. WPS via Push Button: Press the button to start the WPS process. The router will wait for the WPS request from the wireless devices within 2 minutes. -
Page 31: Isolation
6.8. Isolation Policy provides a list of control policies. These settings define whether wireless or wired clients are able to “see” each in the LAN. If you are offering Internet access to your clients, please enable WAN connection. If you allow communication between Wireless clients please enable the second item. If you allow communication between Wireless client and Wired client please enable the last item. -
Page 32: Firewall
7. Firewall 7.1. Enable The Broadband router provides extensive firewall protection by restricting connection parameters, thus limiting the risk of hacker attacks, and defending against a wide array of common Internet attacks. However, for applications that require unrestricted access to the Internet, you can configure a specific client/server as a Demilitarized Zone (DMZ). -
Page 33: Denial Of Service (Dos)
Enable DMZ: Enable/disable DMZ LAN IP Address: Fill-in the IP address of a particular host in your LAN Network that will receive all the packets originally going to the WAN port/Public IP address above. Click Apply at the bottom of the screen to save the above configurations. Note: When enabling DMZ, you are allowing your PC to be accessed by public without any protection. -
Page 34: Mac Filter
7.5. MAC Filter If you want to restrict users from accessing certain Internet applications / services (e.g. Internet websites, email, FTP etc.), and then this is the place to set that configuration. Access Control allows users to define the traffic type permitted in your LAN. You can control which PC client can have access to these services. -
Page 35: Ip Filter
7.6. IP Filter Enable IP Filtering: Check to enable or disable IP Filtering. Deny: If you select “Deny” then all clients will be allowed to access Internet accept for the clients in the list below. Allow: If you select “Allow” then all clients will be denied to access Internet accept for the PCs in the list below. -
Page 36: Url Filter
7.7. URL Filter You can block access to some Web sites from particular PCs by entering a full URL address or just keywords of the Web site. Enable URL Blocking: Enable or disable URL Blocking Add URL Keyword Fill in “URL/Keyword” and then click Add. You can enter the full URL address or the keyword of the web site you want to block. -
Page 37: Advanced
8. Advanced 8.1. Network Address Translation (NAT) Network Address Translation (NAT) allows multiple users at your local site to access the Internet through a single Public IP Address or multiple Public IP Addresses. NAT provides Firewall protection from hacker attacks and has the flexibility to allow you to map Private IP Addresses to Public IP Addresses for key services such as Websites and FTP. -
Page 38: Port Forwarding (Virtual Server)
Description: description of this setting. Local IP: This is the local IP of the server behind the NAT firewall. Type: This is the protocol type to be forwarded. You can choose to forward “TCP” or “UDP” packets only, or select “BOTH” to forward both “TCP” and “UDP” packets. Port Range: The range of ports to be forward to the private IP. - Page 39 Enable Port Forwarding: Enable or disable Port Forwarding. Description: The description of this setting. Local IP / Local Port: This is the LAN Client/Host IP address and Port number that the Public Port number packet will be sent to. Type: Select the port number protocol type (TCP, UDP or both). If you are unsure, then leave it to the default “both”...
-
Page 40: Port Triggering (Special Applications)
8.4. Port Triggering (Special Applications) Some applications require multiple connections, such as Internet games, video Conferencing, Internet telephony and others. In this section you can configure the router to support multiple connections for these types of applications. Enable Trigger Port: Enable or disable the Port Trigger function. Trigger Port: This is the outgoing (Outbound) range of port numbers for this particular application. -
Page 41: Application Layer Gateway (Alg)
Remove Port Triggering If you want to remove Special Application settings from the "Current Trigger-Port Table", select the Port Triggering settings you want to remove in the table and then click Delete Selected. If you want remove all Port Triggering settings from the table, just click the Delete All button. -
Page 42: Upnp
8.6. UPNP With UPnP, all PCs in you Intranet will discover this router automatically. So, you don’t have to configure your PC and it can easily access the Internet through this router. Enable/Disable UPnP: You can enable or Disable the UPnP feature here. After you enable the UPnP feature, all client systems that support UPnP, like Windows XP, can discover this router automatically and access the Internet through this router without having to configure anything. -
Page 43: Quality Of Service (Qos)
8.7. Quality of Service (QoS) QoS can let you classify Internet application traffic by source/destination IP address and port number. You can assign priority for each type of application and reserve bandwidth for it. The packets of applications with higher priority will always go first. Lower priority applications will get bandwidth after higher priority applications get enough bandwidth. - Page 44 Bandwidth Allocation: This can reserve / limit the throughput of specific protocols and port range. You can set the upper bound and Lower bound. Type: Specify the direction of packets. Upload or download. IP range: Specify the IP address range. You could also fill one IP address Protocol: Specify the packet type.
-
Page 45: Routing
8.8. Routing You can set enable Static Routing to let the router forward packets by your routing policy. Static Route is used when network administrators need to route the packets to a different subnet with certain path. This type of setups is not for home users, you can skip this section if this does not apply to you. -
Page 46: Tools Setup
9. Tools Setup 9.1. Password You can change the password required to log into the broadband router's system web-based management. By default, the password is: admin. Passwords can contain 0 to 12 alphanumeric characters, and are case sensitive. Current Password: Fill in the current password to allow changing to a new password. New Password: Enter your new password and type it again in Repeat New Password for verification purposes Remote management... -
Page 47: Time
9.2. Time The Time Zone allows your router to reference or base its time on the settings configured here, which will affect functions such as Log entries and Firewall settings. Time Zone: Select the time zone of the country you are currently in. The router will set its time based on your selection. -
Page 48: Power Savings
Enable/Disable DDNS: Enable or disable the DDNS function of this router Server Address: Select a DDNS service provider Host Name: Fill in your static domain name that uses DDNS. Username: The account that your DDNS service provider assigned to you. Password: The password you set for the DDNS service account above Click Apply at the bottom of the screen to save the above configurations. -
Page 49: Firmware
9.6. Firmware This page allows you to upgrade the router’s firmware. To upgrade the firmware of your Broadband router, you need to download the firmware file to your local hard disk, and enter that file name and path in the appropriate field on this page. You can also use the Browse button to find the firmware file on your PC. -
Page 50: Restart
9.8. Restart You can reset the router when system stops responding correctly or stop functions. -
Page 51: Appendix A - Fcc Interference Statement
Appendix A – FCC Interference Statement Federal Communication Commission Interference Statement This equipment has been tested and found to comply with the limits for a Class B digital device, pursuant to Part 15 of the FCC Rules. These limits are designed to provide reasonable protection against harmful interference in a residential installation. - Page 52 Return Material Authorization (RMA) number will be issued. An RMA number is required in order to initiate warranty service support for all TRENDnet products. Products that are sent to TRENDnet for RMA service must have the RMA number marked on the outside of return packages and sent to TRENDnet prepaid, insured and ...
- Page 53 Governing Law: This Limited Warranty shall be governed by the laws of the state of California. Some TRENDnet products include software code written by third party developers. These codes are subject to the GNU General Public License ("GPL") or GNU Lesser General Public License ("LGPL"). Go to http://www.trendnet.com/gpl or http://www.trendnet.com Download section and ...