Table of Contents
Advertisement
Advertisement
Table of Contents

Related Manuals for Xerox XC811


Summary of Contents for Xerox XC811
- Page 1 XC811/ XC822/ XC830/ XC855/ XC875/ XC1033/ XC1044/ XC1045/ XC1245...
- Page 2 X, and the identifying product names and numbers herein are registered trademarks of XEROX CORPORATION. Xerox Canada Ltd. is the licensee of all the trademarks. All non-Xerox brands and product names are trademarks or registered trademarks of their respective...
-
Page 3: Table Of Contents
Copying Oversized Documents............21 Bound Original Copying (XC822/ XC830/ XC855/ XC875/ XC1033/ XC1044/ XC1045/ XC1245).. 21 Paper Tray Bypass (XC811/ XC822/ XC830/ XC855/ XC1033/ XC1044)22 Alternate Paper Tray (XC875/ XC1045/ XC1245)........23 Two-Sided Copying................25 Customising Your Copier ..............26 Programmable Features .............. - Page 4 Clearing the Paper Path ............. 32 A1 - A2 Set Document Feeder Misfeed..........33 Toner Cartridge Replacement ............ 34 Toner Cartridge Yield................35 Drum Cartridge Replacement ............37 Problem Solving................... 38 Problem Solving Chart................ 38 Status Code Chart ................40 Packing the Copier................
-
Page 5: Safety Notes
Safety Notes Your copier and supplies have been designed and tested to meet strict safety requirements. These include safety agency examination and approval, and compliance to established environmental standards. Please read the following instructions carefully before operating your copier and refer to them as needed to ensure the continued safe operation of your copier. - Page 6 Safety Notes • YOUR COPIER is equipped with an energy saving device to conserve power when the machine is not in use. The copier may be left on continuously. • DO NOT allow anything to rest on the power cord. Do not locate the copier where persons will step on the cord.
- Page 7 Safety Notes • OZONE: A small amount of ozone is produced within the copier during operation. The amount of ozone emitted by the copier is below the maximum emission level allowed under the International Electrotechnical Commission 950 Standard. This emission level is insufficient to cause any health hazard. However, when the copier is performing below specification the ozone odor may be objectionable.
-
Page 9: Getting To Know Your Copier
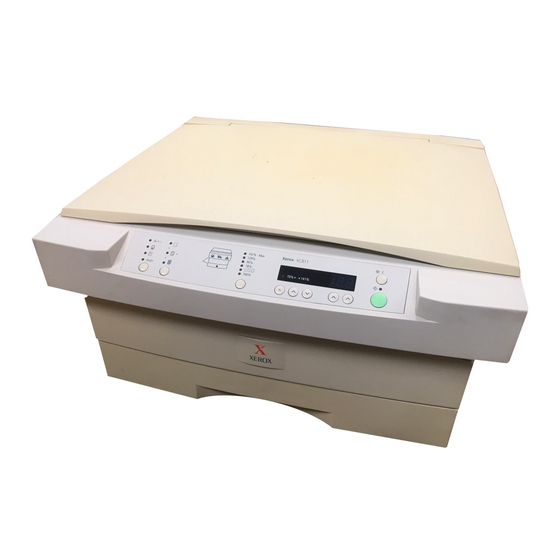
Getting to Know Your Copier SDF Original SDF Exit Tray Document cover Guides Power switch SDF Input Tray Document glass Control panel Serial Number Paper guides Alternate Paper Tray Exit Tray Release lever Drum cartridge Paper Tray Bypass Toner cartridge Fuser Transfer corotron Transfer corotron... -
Page 10: Copier Equipment Listing
Copier Equipment Listing Copier Paper Tray Paper Tray Alternate Bound Document Number Capacity Bypass Paper Tray Original Feeder Copying XC811 250 sheets single sheet — XC822 250 sheets single sheet — XC830 100 sheets single sheet — XC855 250 sheets single sheet —... -
Page 11: Installation
Installation IMPORTANT: Save the carton and packing materials. They should be used to repack the copier if it has to be shipped for se rvicing. Packing SDF Exit Tray Starter material Power Cord Toner Cartridge User Guide Copier Packing material Carton Carton... - Page 12 Installation Copier location For reliable copier operation and copy quality, Xerox recommends: • Place your copier in a well-ventilated room. • Recommended environment: – Temperature: 50°F to 90°F / 10°C to 32°C. – Humidity: 20% to 85%. • Place the copier on a flat, level surface.
- Page 13 Installation 1. Remove the copier from the bag. 2. Hold the exit tray (left side) in position while you remove the tape. Remove the cardboard from under the exit tray. Lower the exit tray. CAUTION: If the exit tray is not fully opened during copying, a paper misfeed or improper fusing may occur.
- Page 14 Installation 7. Open the document cover and remove the packing material. 8. Press the release lever to open the copier. 9. Remove the toner cartridge from the bag. Vigorously shake the cartridge to loosen the toner. • Thoroughly shaking the cartridge will assure maximum copies per cartridge.
- Page 15 Installation 11. Slide the toner cartridge into the copier until it locks into place. 12. Close the copier by gently pushing down the upper half. 13. Lift and pull open the paper tray. Turn and remove the pressure plate lock. CAUTION: Paper will misfeed if the pressure plate lock is not removed.
- Page 16 Installation 18. Plug the power cord into the copier and then into an earthed outlet. 19. Turn on the power switch. When the Ready Indicator lights copying is possible. Note: Save the carton and packing materials. They should be used to repack the copier if it has to be shipped for servicing.
-
Page 17: Power Reduction / Auto Clear
Power Reduction / Auto Clear Power Reduction Modes automatically reduce power consumed by the copier when the copier has not been used for a set period of time. There are two modes. 1. Power Save Mode – In this mode, the fuser is maintained at a lower heat level, thereby saving power. -
Page 18: Control Panel
Control Panel The control panel has keys and lights that are used to control and display the conditions of the copier. 1. Exposure Mode: The Exposure mode is used to adjust the amount of background that will be copied. Auto contrast – for copying originals with a coloured background. Text –... - Page 19 Control Panel 6. Preset Reduction/Enlargement: Press this key to select any of the preset reductions or enlargements. 7. Variable Percentage Indicator: Lights when a variable percentage is selected. 8. % Key: Press this key to display the selected reduction/enlargement. 9. Variable Percentage: Press the Variable Percentage key to increase or decrease the reduction or enlargement by 1% increments.
-
Page 20: Copy Paper Specifications
Copy Paper Specifications Paper Storage Note: Paper affected by humidity, and curled paper can cause jams and copy quality problems. For reliable copier operation and good copy quality, Xerox recommends that paper be stored: • on a flat surface. •... -
Page 21: Loading Copy Paper
Loading Copy Paper 1. Lift and pull open the paper tray. 2. Push down on the shiny plate until it locks in position. 3. Adjust the paper guides to the desired paper size. • Squeeze the side guide. • Lift and insert the rear guide. •... -
Page 22: Flashing
Loading Copy Paper 4. Fan the copy paper and insert it into the tray. • Ensure that the paper corners are under the corner snubbers. • Do not fill above the max line. 5. Close the Paper Tray. Flashing will flash in the copy quantity display and the green indicator in the copier diagram will flash when: •... - Page 23 When the Alternate Paper Tray runs out of paper, or the paper misfeeds, the P will flash in the display and the green indicator in the copier diagram will flash. Alternate Paper Tray (XC875/ XC1045/ XC1245) 1. Add paper if the Alternate Paper Tray is empty.
-
Page 24: Making Copies
Making Copies 1. Lift the Document Cover. 2. Place the original face down and align it with the registration guide on the document glass. 3. Close the Document Cover. Note: Leaving the Cover open while copying will affect copy quality and toner consumption. -
Page 25: Making Copies On The Set Document Feeder (Xc855/ Xc875/ Xc1044/ Xc1045/ Xc1245)
Making Copies on the Set Document Feeder (XC855/ XC875/ XC1044/ XC1045/ XC1245) Use the Set Document Feeder (SDF) to make one collated copy of originals. The SDF holds up to 20 originals (80 gsm) in one job. Ensure originals are in good condition, and that all staples and paper clips have been removed. -
Page 26: Copy Quality
Copy Quality If input documents are poor quality, on coloured paper or a photograph, then the Exposure mode features described below can be used to improve the copies. Auto Select Auto when copying from originals with a coloured background. Note: When Auto is selected, the copier Auto automatically varies the contrast of your copies. - Page 27 Copy Quality Copy Contrast The copy contrast key lightens or darkens copies while in the Text, Photo, or Toner Save settings. Note: When Auto is selected the copy contrast settings are not available. • There are 5 contrast settings represented by 3 indicator lights.
-
Page 28: Reduction/Enlargement
) is 70%. Refer to 100% Customising Your Copier for information about changing this. Variable Percentage Xerox Press the down key to decrease the 141% percentage. Press the up key to increase the percentage. Any percentage from 70% to 141% may be selected. -
Page 29: Copying Oversized Documents
Copying Oversized Documents The document cover may be removed in order to position an oversized document on the document glass. 1. Lift the document cover straight up. Note: Do not leave the cover off for extended periods of time. 2. Reattach the document after use. Bound Original Copying (XC822/ XC830/ XC855/ XC875/ XC1033/ XC1044/ XC1045/ XC1245) This can be used to copy facing pages of a document onto separate... - Page 30 Paper Tray Bypass (XC811/ XC822/ XC830/ XC855/ XC1033/ XC1044) Use the Paper Tray Bypass to copy onto paper that is different from that loaded in the copier and to copy onto special stock such as labels or transparencies. The maximum copy paper size is 216×356mm. The minimum copy size is 89×140mm.
-
Page 31: Alternate Paper Tray (Xc875/ Xc1045/ Xc1245)
Alternate Paper Tray (XC875/ XC1045/ XC1245) Use the alternate paper tray to feed multiple sheets of standard paper or single sheets of special or heavy paper. The alternate paper tray holds up to 50 sheets of (standard weight) copy paper ranging in size from 89×140mm to 216×356mm. Predrilled paper: holes toward the front of the copier. - Page 32 Alternate Paper Tray (XC875/ XC1045/ XC1245) 4. Insert the copy paper all the way into the alternate paper tray until it stops. • 50 sheets max. Note: When loading transparencies or labels insert one sheet at a time. 5. Press the Paper Supply button to select the alternate paper tray.
-
Page 33: Two-Sided Copying
Two-Sided Copying 1. Place side 1 original face down on the Document Glass, with the TOP toward the LEFT. Lower the document cover. Note: 60 gsm copy paper is not recommended for two-sided copying. 2. Select quantity required. 3. Press Start to copy side 1. 4. -
Page 34: Customising Your Copier
Customising Your Copier Programmable Features The default settings for various copier features may be changed to suit your needs. Each of the programmable features, along with its program number and options are contained in the chart below. The procedure to change these settings follows the chart. - Page 35 Feature Prog- Option Number ramme * Default Manual Exposure Adjustment: The 0 – +4 steps light copy exposure range may be adjusted 1 – +3 steps light when the copy image is consistently 2 – +2 steps light too dark or too light. This program is 3 –...
-
Page 36: Programmable Feature Settings 0 - 9 And 12
The light next to Auto mode will light. • The lights within the Copier Diagram Auto will flash. 3. Press the left-hand quantity key to select Xerox the Program Number of the feature to be changed. 141% • You will not be given the choice to change an option if your copier does not have the feature. -
Page 37: Programmable Feature Setting 10
The light next to Auto mode will light. • The lights within the Copier Diagram Auto will flash. 3. Press the left-hand quantity key until the Xerox number 10 is displayed. 141% 4. Press Start. • The current Reduction/Enlargement setting will flash. -
Page 38: Copier Care
Cleaning the Document Glass and Cover Keeping the document glass clean helps ensure the best possible copies. Xerox suggests that you clean the document glass at the start of each day and during the day as needed. CAUTION: Do not pour or spray water directly onto any part of the copier. -
Page 39: Cleaning The Transfer Corotron
Copier Care Cleaning the Transfer Corotron If copies start getting streaks or blotches, the transfer corotron may be dirty. 1. Press the release lever to open the copier. 2. Remove the green transfer corotron cleaning tool from inside the copier (on the right-hand side near the front) and insert it into the transfer corotron unit. -
Page 40: Clearing The Paper Path
Clearing the Paper Path If the Misfeed Indicator flashes and the copier stops, a paper misfeed has occurred. Be careful not to damage the Drum or the Corotron during the clearance of a misfeed. Also take care not to touch the Fuser. 1. -
Page 41: A1 - A2 Set Document Feeder Misfeed
A1 – A2 Set Document Feeder Misfeed When a misfeed occurs in the SDF, the red SDF misfeed indicator flashes on the Copier Diagram, and an A1 or A2 status code will flash in the display window. The status code indicates the number of originals that must be returned to the SDF after clearing the misfeed. -
Page 42: Toner Cartridge Replacement
4. Save the box and the cover to return the empty cartridge to Xerox for recycling. 5. Slide the new toner cartridge in until it locks in place. 6. Gently close the upper half of the copier. -
Page 43: Toner Cartridge Yield
Toner Cartridge Yield Low printed Medium High printed Very high printed area area area area The main factor affecting toner cartridge yield is the printed area of a document. The graph above is a representation of how the number of copies per cartridge decreases as the printed area increases. - Page 44 Toner Cartridge Yield To get the most from your toner cartridge: • Always copy with the document cover closed. • Leave the copier on during the day. Switch off the copier at the end of the working day. • Copy with the exposure control set to Auto exposure unless you need to adjust for the background of your original.
-
Page 45: Drum Cartridge Replacement
Drum Cartridge Replacement The useful life of the drum cartridge is 12,000 copies. When the drum cartridge indicator lights a replacement cartridge will be needed soon. Copies can continue to be made, but you should keep a replacement cartridge. After a further 1,000 copies, the Ready indicator will go out, the drum cartridge indicator will flash, and the copier will stop operating until the drum cartridge is replaced. -
Page 46: Problem Solving
The following chart lists some conditions that may occur and the recommended solutions. Follow the suggested solutions until the problem is corrected. Refer to the Status Code Chart in this section for status code information. If the problem persists, please call the local Xerox helpline or representative for assistance: Condition... - Page 47 Condition Suggested solutions Replace paper in paper tray with a fresh Frequent paper supply, or turn the stack of paper over in the jams. tray. Check/adjust paper guides. Ensure that the paper is within the recommended weight range. 80 gsm bond paper is optimum.
-
Page 48: Status Code Chart
Problem Solving Status Code Chart Status Suggested Solution Code Ensure that there is paper in the selected paper tray. Ensure that the Paper Tray is closed properly. Paper may not have fed all the way into the copier. (Refer to Loading Copy Paper and Flashing Copy paper has misfed. -
Page 49: Packing The Copier
Packing the Copier 1. Disconnect the power cord. Remove the SDF tray. Note: When carrying the copier, do not hold onto the exit tray and do not insert your hand into the exit tray. 2. Press the release lever to open the copier. - Page 50 Packing the Copier 8. Fold up and securely tape the exit tray,alternate paper tray and close the document cover. 9. Pack the copier by reversing the Unpacking instructions. (Refer to Installation.)
-
Page 51: Technical Data
Technical Data Machine Dimensions Width×Depth×Height XC830 510×470×245mm 510×470×270mm XC811/ XC822/ XC1033 550×470×310mm XC855/ XC875/ XC1044 XC1045/ XC1245 Machine Weight (Includes Drum and Toner Cartridge) XC830 18.7kg XC811/ XC822/ XC1033 19.0kg XC855/ XC875/ XC1044 22.5kg XC1045/ XC1245 Power Consumption Standby: 5 Watts (Power Shut - Off Mode) - Page 53 Multinational Professional Services Xerox Technical Centre Bessemer Road Welwyn Garden City Hertfordshire AL7 1HE United Kingdom 602P25100 1 / 1998...