Xerox DocuColor 240 Supplementary Manual
Xerox docucolor 240: supplementary guide
Hide thumbs
Also See for DocuColor 240:
- Quick start manual (47 pages) ,
- Release note (34 pages) ,
- Evaluator manual (18 pages)
Table of Contents
Advertisement
Quick Links
Download this manual
See also:
Installation Manual
Advertisement
Table of Contents

Related Manuals for Xerox DocuColor 240


Summary of Contents for Xerox DocuColor 240
- Page 1 ® DocuColor 240/250 Training and Information Guide...
-
Page 2: Table Of Contents
Simple Network Scanning ... 17 1. Load your document..17 2. Press the Network Scanning button..17 3. Select the template..17 4. Select the features... 17 DocuColor 240/250 Training and Information Guide DocuColor 240/250 Table of Contents... - Page 3 North America... 24 Europe ... 24 Legal and Safety ... 25 Safety Notes... 25 Ozone Safety... 27 Safety Standards... 28 Illegal Copying... 29 Laser Safety ... 31 ENERGY STAR... 32 How To…... 33 DocuColor 240/250 Training and Information Guide DocuColor 240/250...
- Page 4 Output Orientation ... 69 Folding... 70 Job Assembly ... 71 Build Job ... 71 Sample Set ... 72 Large Volume Documents ... 73 Delete Outside/Delete Inside ... 74 Scan Options... 76 Book Copying ... 76 DocuColor 240/250 Training and Information Guide DocuColor 240/250...
- Page 5 Loading Paper and Media ... 110 Auditron... 112 Overview ... 112 Auditron Setup... 113 Account Management ... 114 Create Accounts ... 115 Delete and Reset Data ... 117 Enable Auditron Mode ... 118 User Details Setup... 119 DocuColor 240/250 Training and Information Guide DocuColor 240/250...
- Page 6 Loading Staples - Professional Finisher with Booklet Maker... 148 Auto Gradation Adjustment ... 149 Consumables ... 150 Replacing the Drum Cartridges ... 150 Replacing the Toner Cartridges... 152 Replacing the Fuser ... 153 DocuColor 240/250 Training and Information Guide DocuColor 240/250...
- Page 7 Hole Punch Jams ... 177 Document Feeder Jams ... 177 Bypass Tray Jams or Misfeeds ... 178 Envelope Jams... 179 Problem Statement ... 180 Help... 182 Copyright Statement... 182 Glossary ... 183 Index ... 191 DocuColor 240/250 Training and Information Guide DocuColor 240/250...
-
Page 8: Getting Started
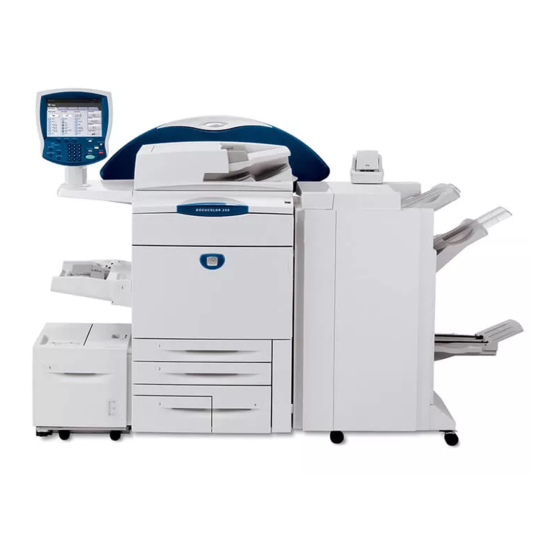
Product Overview Your machine is not simply a conventional copier. It is a digital device capable of being used for copying, scanning and printing. If your needs change, your machine can be upgraded accordingly. Your machine will print/copy 50 color prints per minute and 65 black and white prints per minute. -
Page 9: Bypass Tray
You can access the file from your desktop for further processing or inclusion in your document. This kit also includes Scan to E-mail, which allows you to send your scanned images to any valid E-mail address. DocuColor 240/250 Training and Information Guide... -
Page 10: Hole Punch Option Kit
The actual touch screen will vary depending on the pathway buttons selected and the options available on your machine. The touch screen also displays important messages about the current condition of the machine, no matter what pathway has been selected. DocuColor 240/250 Training and Information Guide... -
Page 11: Power On
The touch screen goes out, and the Power Saver button on the control panel lights. To use the machine, press the Power Saver button. The Power Saver button goes out to indicate that the Power Saver feature is canceled. DocuColor 240/250 Training and Information Guide DocuColor 240/250... -
Page 12: Sleep Mode
Low Power mode. The factory default setting of 60 minutes is customer changeable within the range of 0 to 120 minutes. The Auto Off feature is NOT available for networked machines. DocuColor 240/250 Training and Information Guide DocuColor 240/250... -
Page 13: Control Panel
The actual touch screen will vary depending on the pathway buttons selected and the options available on your machine. The touch screen also displays important messages about the current condition of the machine, no matter what pathway has been selected. DocuColor 240/250 Training and Information Guide... -
Page 14: Power On And Off
If there are any jobs in the queue, a second pop-up screen is displayed. NOTE: To re-activate the machine when in this mode, touch a button on the touch screen or the Power Save button. DocuColor 240/250 Training and Information Guide... -
Page 15: Loading Paper
• Before loading paper into the paper trays, fan the edges. This procedure separates any sheets of paper that are stuck together and reduces the possibility of paper jams. DocuColor 240/250 Training and Information Guide DocuColor 240/250... -
Page 16: Simple Copying
Press the Job Status button on the control panel to display the print queue. Your job will be displayed in the queue. If there are no jobs in the queue your job may have already been processed. DocuColor 240/250 Training and Information Guide DocuColor 240/250... -
Page 17: Simple Network Scanning
Your job will be displayed in the queue. If there are no other jobs in the queue your job may have already been processed. NOTE: Network scanning is an optional feature and may not be available on your machine. DocuColor 240/250 Training and Information Guide... -
Page 18: Machine Setup
The touch screen display brightness knob is located on the left side of the Control Panel. Rotate the knob as required to adjust the touch screen display brightness. DocuColor 240/250 Training and Information Guide DocuColor 240/250... -
Page 19: Productivity
- Variety of print/output options available (e.g. collated, 2 sided, stapled, hole punched, covers, booklets, multi-up) - Upgrade your existing machine to include optional features, enabling your machine to grow as your requirements grow. DocuColor 240/250 Training and Information Guide... - Page 20 And More! - Handles tasks with superior quality and functionality - A suite of software tools and services for system administrators and users that brings the power of the machine to the desktop - Online address book stores details such as e-mail addresses, etc... DocuColor 240/250 Training and Information Guide...
-
Page 21: Specifications
Print Speed from Paper Tray 1 DocuColor 250:8.5"x11" LEF: 65 ppm one-sided black and white, 50 ppm one- sided color DocuColor 240:8.5"x11" LEF: 55 ppm one-sided black and white, 40 ppm one- sided color First Print Out Time Black and White: 6.6 seconds maximum Color: 9.2 seconds maximum... -
Page 22: Warm-Up Time
Labels 1; Labels 2; Hole Punched; Tab Stock 1; Tab Stock 2; Coated 1; Coated 2; Custom Tray 3 Capacity: 870 sheets of 20lb bond. Paper Sizes: A4 LEF, 8.5" x 11" LEF, 7.25" x 10.5" LEF DocuColor 240/250 Training and Information Guide... -
Page 23: Tray 4
Capacity lower tray: 3000 sheets of 20lb bond 8.5" x 11" size Paper Sizes: 4"x6" SEF to 12"x19" SEF Paper Weights: 17lb bond - 110lb index Stapling: 50 sheets of 24lb bond Staples: 5000 per cartridge Hole Punch: 2/4 hole or 2/3 hole punch option DocuColor 240/250 Training and Information Guide... -
Page 24: Professional Finisher (With Booklet Maker)
Electrical Specifications North America Voltage: 120 VAC plus/minus 10% Frequency: 50/60 Hz plus/minus 3% Power Consumption: 2.112 KVA maximum Europe Voltage: 220-240 VAC plus/minus 10% Frequency: 50/60 Hz plus/minus 3% Power Consumption: 2.2 KVA maximum DocuColor 240/250 Training and Information Guide... -
Page 25: Legal And Safety
They also identify and explain the legal and safety regulations that apply to this machine. Safety Notes Your Xerox product and supplies have been designed and tested to meet strict safety requirements. These include safety agency approval, and compliance to established environmental standards. Please read the following instructions carefully before operating the product and refer to them as needed to ensure the continued safe operation of your product. - Page 26 This equipment is to be used on a 120V, 20A branch circuit. If this machine needs to be moved to a different location, contact a Xerox service representative or your authorized local representative or service support organization.
-
Page 27: Ozone Safety
Xerox installation procedure will ensure that the concentration levels meet safe limits. If you need additional information about ozone, please request the Xerox publication Ozone by calling 1-800-828-6571 in the United States and Canada. In other markets, please contact your authorized local dealer or Service Provider. -
Page 28: Safety Standards
Changes or modifications to this equipment not specifically approved by the Xerox Corporation may void the user’s authority to operate this equipment. ICES-003 This Class "A" digital apparatus complies with Canadian ICES-003. -
Page 29: Illegal Copying
Further information of these provisions may be obtained from the Copyright Office, Library of Congress, Washington, DC 20559 (circular R21) DocuColor 240/250 Training and Information Guide DocuColor 240/250 with the campaign for the sale of cancelled revenue stamp, this may... - Page 30 9.Copyrighted material or trademarks of any manner or kind without the consent of the copyright or trademark owner. DocuColor 240/250 Training and Information Guide DocuColor 240/250...
-
Page 31: Laser Safety
This product contains laser warning labels. These labels are intended for use by Xerox Service Representatives and are placed on or near panels or shields that require special tools for removal. Do not remove any of the panels. There are no operator serviceable areas inside these covers. -
Page 32: Energy Star
Xerox product is part of the program. For more information about Xerox environmental programs, visit www.xerox.com/environment.html If you are managing the disposal of your Xerox Product, please note that the product contains lead, mercury and other materials whose disposal may be regulated due to environmental considerations. -
Page 33: How To
Contact your system administrator if none of the templates have been set 6. If you need to change the scan settings, follow the instructions provided in your optional Network Controller documentation. 7. Touch the Start button on the Control Panel. DocuColor 240/250 Training and Information Guide DocuColor 240/250 How To…... -
Page 34: How To Print
1. Select your machine from the Printer list. The default name of the printer is Xerox DocuColor 250 but your System Administrator may have customized the name to help you locate the machine. If you are unsure, ask your System Administrator. -
Page 35: How To Load Paper And Media
You can use the arrow buttons on the touch screen to change the X and Y dimension values for the paper you load. After you have changed your Paper Size information, touch the Save button. DocuColor 240/250 Training and Information Guide DocuColor 240/250... -
Page 36: Loading Paper Trays 3 And 4
For standard paper sizes, you will not need to change the Paper Size settings. However, you will need to specify a Paper Size value if you load a non- standard paper size. DocuColor 240/250 Training and Information Guide DocuColor 240/250... -
Page 37: Loading Paper In The Bypass Tray
The Paper Size screen allows you to specify the size of the paper you load into the paper tray. The Auto Size Detect option allows standard sized paper loaded in the trays to be automatically detected by the machine. DocuColor 240/250 Training and Information Guide DocuColor 240/250... -
Page 38: Loading Paper In The High Capacity Feeder
This paper tray automatically detects the dimensions of standard sized paper. For standard paper sizes, you will not need to change the Paper Size settings. However, you will need to specify a Paper Size value if you load a non-standard paper size. DocuColor 240/250 Training and Information Guide DocuColor 240/250... -
Page 39: How To Perform Maintenance
DocuColor 240/250 How to Perform Maintenance Instructions for performing maintenance procedures are available in the Maintenance section of this document. DocuColor 240/250 Training and Information Guide... -
Page 40: Tutorials
C button and enter the correct quantity. 5. Press Start Once you have pressed Start, each document is scanned once. A screen is displayed showing information about your copy job. DocuColor 240/250 Training and Information Guide DocuColor 240/250 Tutorials... - Page 41 Press the Job Status button on the control panel to display the print queue. Your job will be displayed in the queue. If there are no jobs in the queue your job may have already been processed. DocuColor 240/250 Training and Information Guide...
-
Page 42: Loading Documents
2. Select the 100% Reduce/Enlarge ratio and Auto Paper Supply and the machine will automatically make copies that are the same size as the originals. DocuColor 240/250 Training and Information Guide DocuColor 240/250... -
Page 43: Using The Document Glass
When you have input the size of your document, you can use the auto reduce/enlarge or the auto paper supply features. So, for example, you can auto enlarge your document to fit a specific size of paper. DocuColor 240/250 Training and Information Guide... -
Page 44: Scanning Bound Originals
When you have saved your selections, apply a light pressure to the spine of the document and press the Start button. DocuColor 240/250 Training and Information Guide DocuColor 240/250... - Page 45 (either left or right) for your 2 Sided Book Copying job. When you have saved your selections, apply a light pressure to the spine of the document and press the Start button. DocuColor 240/250 Training and Information Guide DocuColor 240/250...
-
Page 46: Sided Copying
Document Handler or the document glass. The two-sided option enables you to select your output in book or calendar orientation. The 2 Sided Copying options can be accessed on the Basic Copying tab. DocuColor 240/250 Training and Information Guide... - Page 47 Use the 1>2 option if your originals are printed on one side and you want two- sided copies. Use the 2>2 option if you want to make two sided copies from two-sided originals. Use the 2>1 option if you want to make one-sided copies from two-sided originals. DocuColor 240/250 Training and Information Guide...
-
Page 48: Reduction/Enlargement
If this option is selected you must also select a specific paper tray. The Preset % buttons can be customized by your Administrator to display the reduction ratios that you most frequently use. DocuColor 240/250 Training and Information Guide... - Page 49 Use the touch screen keypad buttons to enter a percentage value from 25% to 400% in 1% increments. The Independent X-Y% option allows you to specify different height and width ratios to scale the height and width independently. DocuColor 240/250 Training and Information Guide...
-
Page 50: Image Quality
Photo option allows you to further define your original photo as Halftone, Photograph, or Xerographic Copy. The Map setting can be used for making copies of documents that have text on colored backgrounds such as maps. DocuColor 240/250 Training and Information Guide... -
Page 51: Lighten / Darken
Press the right arrow button to lighten the copy, for example, to copy more details from dark areas in the original or to suppress the lines from pasted or newspaper originals. DocuColor 240/250 Training and Information Guide... -
Page 52: Image Quality Presets
The Auto Contrast setting sharpens the image by adjusting the brightness and hue of the original. Once you have made an Image Quality Preset selection, touch the Save button. DocuColor 240/250 Training and Information Guide DocuColor 240/250... -
Page 53: Contrast
The lower contrast settings reproduce more detail in light and dark areas of the original while higher contrast settings produce more vivid blacks and whites for sharper text and lines but less detail in pictures. DocuColor 240/250 Training and Information Guide... -
Page 54: Auto Exposure
Selecting the On button will cause the background of documents such as newspapers and colored paper documents to be erased. NOTE: The Auto Exposure option is not available when the Original Type option is set to Photo. DocuColor 240/250 Training and Information Guide DocuColor 240/250... -
Page 55: Gloss Level
The Gloss Level feature is accessed from the Image Quality tab. Selecting the Normal button enables the default settings for output quality. Selecting the Enhanced button will add a glossy touch to your output. This option will cause a decrease in printing speed. DocuColor 240/250 Training and Information Guide... -
Page 56: Output Format
These features are accessed by touching the Finishing button on the Booklet Creation screen. In addition to finishing, you can also include a Binding Shift, or create Subsets (sub-dividing a large booklet into subsets) on the Booklet Creation screen. DocuColor 240/250 Training and Information Guide DocuColor 240/250... -
Page 57: Covers
Tray Settings button. From this screen you can select the tray that contains the cover stock. Save all the selections you have made and the machine will be enabled to add covers to your copy job. DocuColor 240/250 Training and Information Guide DocuColor 240/250... -
Page 58: Multiple Up
1 Up to 8 Up - on the Multiple Up screen. You can also select the Image Order and Original Orientation options on this screen. When you have made your selections you must select Save so that you can program any other features you may require from the control panel. DocuColor 240/250 Training and Information Guide... -
Page 59: Transparency Separators
Paper Tray Settings button. The system selects the highest priority tray for the separator stock. Selecting the Paper Tray Settings button allows you to change the separator stock selection. DocuColor 240/250 Training and Information Guide... -
Page 60: Poster
The Enlargement % button allows you to enter specific height and width percentage values (from 100% to 400%) for your final poster size. NOTE: Be sure to touch the Save button after you have made your enlargement selection. DocuColor 240/250 Training and Information Guide DocuColor 240/250... -
Page 61: Repeat Image
You can specify from 1 to 23 repeats along the short side (Y) and from 1 to 33 repeats along the long side (X). DocuColor 240/250 Training and Information Guide... -
Page 62: Annotation
You can access the Annotation feature by selecting the Output Format tab and the Annotation button. The Annotation screen, shown above, allows you to access three separate options: • Stamp • Date • Page Number DocuColor 240/250 Training and Information Guide DocuColor 240/250... - Page 63 You can select one of eight existing stamped messages to be printed on the first page or all pages of your copied sets. You can also change the position and appearance of the stamped message using the Position and Detailed Settings buttons. DocuColor 240/250 Training and Information Guide...
- Page 64 The printed date is the date that the copies are made. You can also change the position and appearance of the date using the Position and Size buttons. DocuColor 240/250 Training and Information Guide...
- Page 65 Position, Style, and Size buttons. After making any annotation selections, be sure to touch the Save button to store your settings DocuColor 240/250 Training and Information Guide...
-
Page 66: Watermark
You can access the Watermark feature by selecting the Output Format tab and the Watermark button. The Watermark screen, shown above, allows you to access four separate watermark options: • Control Number • Text • Date and Time • Serial Number DocuColor 240/250 Training and Information Guide DocuColor 240/250... - Page 67 Enabling the Serial Number option allows you to make copies with the machine's Serial Number printed on each page. This feature is useful if you want to track the copies coming from a certain machine. DocuColor 240/250 Training and Information Guide DocuColor 240/250...
-
Page 68: Tab Margin Shift
You can change the amount of shift required by using the Shift Value arrow keys on the touch screen. For both shift options, you can specify the Tab Stock Size and Tab Stock Type using the buttons on the touch screen. DocuColor 240/250 Training and Information Guide DocuColor 240/250... -
Page 69: Output Orientation
The Face Up Reverse Order button causes all output to be delivered face up, with the last page on the top of the output stack. This setting may not be available, depending on how your system administrator configures the machine. DocuColor 240/250 Training and Information Guide... -
Page 70: Folding
The Print Outside button folds the output so the image is printed on the outside of the folded copies. NOTE: Be sure to touch the Save button after you have made your folding selection. DocuColor 240/250 Training and Information Guide DocuColor 240/250... -
Page 71: Job Assembly
After the last segment has been scanned, touch the Last Original button on the touch screen to end the build job. The machine will complete the quantity selected. DocuColor 240/250 Training and Information Guide DocuColor 240/250... -
Page 72: Sample Set
If the sample set is acceptable, select the Start button. The programmed number of sets will be produced. If the sample set is unacceptable, select the Cancel button. DocuColor 240/250 Training and Information Guide... -
Page 73: Large Volume Documents
If you select the On button, the Next Original option will be highlighted on the copy screen when scanning is in process. When you have finished scanning all of your document subsets, touch the Last Original button. DocuColor 240/250 Training and Information Guide... -
Page 74: Delete Outside/Delete Inside
Use the Area Settings buttons to define the areas you want deleted from your copies. Use the Target areas of originals buttons to specify which sides of your 2 Sided originals you want to be targeted for deletion. DocuColor 240/250 Training and Information Guide... - Page 75 When you have defined all coordinates, press the Save button. You can clear a deletion area by selecting the Clear Area 1, Clear Area 2, or Clear Area 3 buttons. When all of your areas are defined, touch the Save button. DocuColor 240/250 Training and Information Guide...
-
Page 76: Scan Options
When you have saved your selections, apply a light pressure to the spine of the document and press the Start button. DocuColor 240/250 Training and Information Guide DocuColor 240/250... -
Page 77: Sided Book Copying
(either left or right) for your 2 Sided Book Copying job. When you have saved your selections, apply a light pressure to the spine of the document and press the Start button. DocuColor 240/250 Training and Information Guide DocuColor 240/250... -
Page 78: Original Size
When you have input the size of your document, you can use the auto reduce/enlarge or the auto paper supply features. So, for example, you can auto enlarge your document to fit a specific size of paper. DocuColor 240/250 Training and Information Guide... -
Page 79: Mixed Size Originals
2. Select the 100% Reduce/Enlarge ratio and Auto Paper Supply and the machine will automatically make copies that are the same size as the originals. DocuColor 240/250 Training and Information Guide DocuColor 240/250... -
Page 80: Edge Erase
This option allows you to specify an equal amount to be erased from each of the top, bottom, left, and right edges. The amount to be erased from the center of the image can be also be specified. DocuColor 240/250 Training and Information Guide... -
Page 81: Image Shift
You can also use the Fine Adjustment arrows on the screen to move your image. Variable Shift allows you to shift the image up to 2 inches to specified top/bottom and left/right values. DocuColor 240/250 Training and Information Guide... -
Page 82: Image Rotation
On During Auto When Reduce/Enlarge or Paper Supply is set to Auto, this option causes the image of the original to be rotated to match the orientation of the paper in the selected paper tray. DocuColor 240/250 Training and Information Guide... -
Page 83: Mirror/Negative Image
If the Output Color is set to Full Color, then the complementary colors are reversed on the printed image. This feature is useful for documents that have a substantial amount of dark background and/or light text and images, saving on toner usage. DocuColor 240/250 Training and Information Guide... -
Page 84: Original Orientation
Select the Head to Left option when the top edge of your document is closest to the left side of the document glass or document feeder. Once you have selected your Original Orientation option, touch the Save button. DocuColor 240/250 Training and Information Guide... -
Page 85: Sided Copying
Document Handler or the document glass. The two-sided option enables you to select your output in book or calendar orientation. The 2 Sided Copying options can be accessed on the Scan Options tab. DocuColor 240/250 Training and Information Guide... - Page 86 Use the 1>2 option if your originals are printed on one side and you want two- sided copies. Use the 2>2 option if you want to make two sided copies from two-sided originals. Use the 2>1 option if you want to make one-sided copies from two-sided originals. DocuColor 240/250 Training and Information Guide...
-
Page 87: Network Scanning
7. Access the electronic version of the document at your workstation. The electronic file is accessed from the file destination as specified in the template. Depending on the output format of the imaged file, use the appropriate software to open the file. DocuColor 240/250 Training and Information Guide DocuColor 240/250... -
Page 88: Print
Print Introduction Your Xerox printer will produce high quality prints from your electronic documents. However, the advanced print features of this machine will enable you to create professionally finished documents at the click of a mouse button. For example you can: •... -
Page 89: Print Drivers
To display context sensitive help click on the ? symbol. The ? symbol will attach itself to your cursor. When you then click on the area of the screen you want to learn about a pop-up window will appear containing information about that feature. DocuColor 240/250 Training and Information Guide DocuColor 240/250... - Page 90 1. Select Print from the File menu option at the top of your screen. A Print window will be displayed. 2. Select the Xerox DocuColor 240/250 print driver from the Printer - Name drop down menu. If you do not know which one to choose ask your System Administrator.
-
Page 91: Finishing Options
If COLLATED is selected, your output will be stacked in the output tray in sets, 123..., 123..., 123... If UNCOLLATED is selected, your output will be stacked in the output tray in stacks, 111..., 222..., 333... DocuColor 240/250 Training and Information Guide... -
Page 92: Offsetting Catch Tray
If COLLATED is selected, your output will be stacked in the output tray in sets, 123..., 123..., 123... If UNCOLLATED is selected, your output will be stacked in the output tray in stacks, 111..., 222..., 333... DocuColor 240/250 Training and Information Guide... -
Page 93: Advanced Finisher
Each sheet is punched individually so there is no limit to the numbers in the set. Hole punching can only be selected for 8.5" x 11" long edge feed and 11" x 17" paper and can be combined with a stapling option. DocuColor 240/250 Training and Information Guide... - Page 94 For example, collated will be automatically selected when the Document Feeder is used. The Collated/Stapling/Punching button provides the options of collation, stapling, and hole punching. Select Uncollated for your copies to be sorted into stacks 1,1,1...2,2,2...3,3,3. DocuColor 240/250 Training and Information Guide...
-
Page 95: Professional Finisher With Booklet Maker
Each sheet is punched individually so there is no limit to the numbers in the set. Hole punching can only be selected for 8.5" x 11" long edge feed and 11" x 17" paper and can be combined with a stapling option. DocuColor 240/250 Training and Information Guide... - Page 96 For example, collated will be automatically selected when the Document Feeder is used. The Collated/Stapling/Punching button provides the options of collation, stapling, and hole punching. Select Uncollated for your copies to be sorted into stacks 1,1,1...2,2,2...3,3,3. DocuColor 240/250 Training and Information Guide...
-
Page 97: Paper And Media
To position the front and rear guides, squeeze the clamp mechanism and slide the guide to touch the edge of the stock. DocuColor 240/250 Training and Information Guide DocuColor 240/250... -
Page 98: Trays 3 And 4
The trays do not automatically measure the size of stock loaded in the trays. NOTE: Your machine will not warn you if the wrong sized stock is loaded. DocuColor 240/250 Training and Information Guide... -
Page 99: Tray 5 (Bypass Tray)
Your machine also alerts you if the Bypass Tray is selected for a print job where the stock selected does not match the stock currently loaded. It also warns you if the Bypass Tray runs out of stock during a job. DocuColor 240/250 Training and Information Guide DocuColor 240/250... -
Page 100: Tray 6 (High Capacity Feeder)
Your machine also alerts you if the High Capacity Feeder is selected for a print job where the stock selected does not match the stock currently loaded. It also warns you if the Feeder runs out of stock during a job. DocuColor 240/250 Training and Information Guide... -
Page 101: Stock Types
The label stock should be left in the printing environment for 72 hours before using it in the printer to allow it to adjust to the ambient temperature. Leave labels sealed in their plastic wrapping until they are loaded in the printer. DocuColor 240/250 Training and Information Guide DocuColor 240/250... -
Page 102: Transparency Stock
(left). Load hole punched paper in the Bypass Tray face up, with the holes on the leading edge (right). Be sure to select Hole Punched as the paper type on the touch screen. DocuColor 240/250 Training and Information Guide DocuColor 240/250... -
Page 103: Envelopes
DocuColor 240/250 Envelopes Envelopes can only be loaded into the Bypass Tray. Place the envelopes into the Bypass tray face up. The flaps should ALWAYS be closed and on the leading (right) edge. DocuColor 240/250 Training and Information Guide... -
Page 104: Storage And Handling
• Fan transparencies and shuffle labels before loading to prevent jamming or multi-sheet feeding. • Fanning of paper edges is not required, but may be beneficial with certain stocks in dry environments. DocuColor 240/250 Training and Information Guide DocuColor 240/250... -
Page 105: Stock And Tray Selection
If the auto tray switching feature has been enabled by your System Administrator and the same size and type of stock is loaded in another tray, the machine will automatically switch from one tray to the other when stock in the active tray runs out. DocuColor 240/250 Training and Information Guide... -
Page 106: Paper Tray Attributes And Image Quality
The Image Quality screen allows you to select and change the settings for a each of the papers listed to optimize image quality. To change the settings for a specific paper, select the paper in the list, then touch the Change Settings button. DocuColor 240/250 Training and Information Guide DocuColor 240/250... - Page 107 Heavyweight 1 (105-176gsm): Heavyweight 1A (105-128gsm) Heavyweight 1B (129-176gsm) Heavyweight 1 (S1) special 1 - can be set by a Xerox Service Representative Heavyweight 1 (S2) special 2 - can be set by a Xerox Service Representative Heavyweight 1 (Side 2) (105-176gsm):...
- Page 108 Plain A (64-80gsm) Plain B (81-104gsm) Plain C - lightweight coated Plain (S1) special 1 - can be set by a Xerox Service Representative Plain (S2) special 2 - can be set by a Xerox Service Representative Recycled A (64-104gsm)
- Page 109 Plain A (64-80gsm) Plain B (81-104gsm) Plain C - lightweight coated Plain (S1) special 1 - can be set by a Xerox Service Representative Plain (S2) special 2 - can be set by a Xerox Service Representative Recycled A (64-104gsm)
-
Page 110: Loading Paper And Media
The Paper Size screen allows you to specify the size of the paper you load into the paper tray. The Auto Size Detect option allows standard sized paper loaded in the trays to be automatically detected by the machine. DocuColor 240/250 Training and Information Guide DocuColor 240/250... - Page 111 Bypass tray face up. The flaps should ALWAYS be closed and on the leading (right) edge. Your machine can feed the following types of envelopes: • C4 (LEF): 229mm x 324mm • C5 (LEF): 229mm x 162mm DocuColor 240/250 Training and Information Guide DocuColor 240/250...
-
Page 112: Auditron
The Auditron feature of the machine is used for auditing purposes. This feature electronically records the number of copies or prints made for each user account and controls the access and use of the printer/copier. Enable the Auditron to: • Create, change, and delete up to 1000 user accounts •... -
Page 113: Auditron Setup
Auditron usage. Account names and passwords must be unique from other account names and passwords. To access Auditron features, select the Log In/Out button and enter the correct password. Select System Settings and then Login Setup/Auditron Administration. DocuColor 240/250 Training and Information Guide DocuColor 240/250... -
Page 114: Account Management
• Color Access: Set whether or not to restrict color copying or B/W copying. • Account Limit: Set the maximum number of copies that can be made with this account. The account limit can be set between 100 - 1999900, in 100 page increments. DocuColor 240/250 Training and Information Guide DocuColor 240/250... -
Page 115: Create Accounts
System Settings screen, select Login Setup/Auditron Administration. To create an account, select Create/Check User Account. Select the Number for which you want to register a user, and select Create/Delete. The Number is a user control number. DocuColor 240/250 Training and Information Guide... - Page 116 • Color: You can set from 1 to 9,999,999 pages (7 digits) in 1 sheet increments. • Black: You can set from 1 to 9,999,999 pages (7 digits) in 1 sheet increments. Selecting Next causes the input to switch to the next item. DocuColor 240/250 Training and Information Guide DocuColor 240/250...
-
Page 117: Delete And Reset Data
If you select Yes, the account will be deleted. To cancel, select No. When Reset Total Impressions is selected, the number of copies made for the selected account is reset and returned to 0. A reset cannot be undone. DocuColor 240/250 Training and Information Guide... -
Page 118: Enable Auditron Mode
• Local Machine Access: The Auditron administration is carried out using the authenticated users already registered on the machine. • Auditron Mode: For the services for which you want to enable the administration feature, select On. DocuColor 240/250 Training and Information Guide DocuColor 240/250... -
Page 119: User Details Setup
Select Failed Access Log, select On and with the numeric keypad enter the number of failures. Store User Details: You can set the destination to save authentication information. Select NVM or hard disk. DocuColor 240/250 Training and Information Guide... -
Page 120: Account Data
For a user of the machine, you can control the use of output color, or set a limit on the number of pages. For each registered user, you can also check the cumulative number of pages. DocuColor 240/250 Training and Information Guide... -
Page 121: Delete And Reset Account Data
You can delete all registered information for all registered users in a single operation, or reset the auditron. You can access the Reset User Accounts button on the Login Setup / Auditron Administration screen. DocuColor 240/250 Training and Information Guide... - Page 122 All Color Access Settings: Resets the Color Access settings for all users to Free Access. All Account Limits: Resets the maximum number of pages for all users to the default (9,999,999 pages). Print the Auditron Report: An auditron report of all services is printed. DocuColor 240/250 Training and Information Guide...
-
Page 123: Machine Administration
The Login Setup/Auditron Administration menu allows administrators to access and enable all of the Auditron feature settings, including options for creating, checking , and resetting User Accounts, the Administrator Copy Meter, User Details Setup, Password Entry, and Login Setup. DocuColor 240/250 Training and Information Guide DocuColor 240/250... -
Page 124: Accessing The System Settings Menu
Confirm button. The factory preset password is 11111. It is strongly recommended that you change the password. Touch the System Settings button to enter the System Settings Menu. Once you are in the System Settings Menu, you can select any of the system functions. DocuColor 240/250 Training and Information Guide... -
Page 125: System Settings
System Administrator Password Maximum Login Attempts Login Setup / Auditron Administration Create/Check User Accounts Reset User Accounts System Administrator Copy Meter User Details Setup Password Entry from Control Panel Login Setup/Auditron Mode DocuColor 240/250 Training and Information Guide DocuColor 240/250... -
Page 126: Machine/Job Status
The tasks performed at the machine are identified by the machine mode used, for example Copy or Print Report. For print tasks you have submitted to your machine via the print driver, the job type is identified by the filename or document title. DocuColor 240/250 Training and Information Guide DocuColor 240/250... -
Page 127: Other Job Lists
To view the Completed jobs on the machine, select the Completed Jobs tab. The completed jobs are shown on the screen. When you touch a job listed on this screen, you can view detailed information about that job. DocuColor 240/250 Training and Information Guide... -
Page 128: Machine Status
The Machine Information screen provides you with the telephone number used to contact your local Xerox representative. You can also view the Machine Serial Number on this screen. The Machine Configuration screen allows you to check the status and availability of various configurable machine options, such as finishing options, feeding options, and memory options. -
Page 129: Paper Tray Status
• Empty - The tray is empty. The last size, type and color used in the tray are displayed as the attributes. The information displayed on the Tray Status screen is automatically updated if the status of any tray changes. DocuColor 240/250 Training and Information Guide DocuColor 240/250... -
Page 130: Billing Meters
The meters vary depending on your machine configuration and setup. To access the Billing Meters: 1. Select the Machine Status button on the Control Panel. 2. Touch the Billing Meter/Print Report tab. 3. Touch the Billing Meter button. DocuColor 240/250 Training and Information Guide DocuColor 240/250... -
Page 131: Print Report / List
To print any of the reports shown, simply touch the corresponding report button on the touch screen, then press the Start button on the control panel. NOTE: The reports available will differ depending on your machine configuration. DocuColor 240/250 Training and Information Guide DocuColor 240/250... -
Page 132: Overwrite Hard Disk
Overwriting is performed after every copy job that includes more than one set, and after each scan job is transferred to the network controller. The "standby" status indicates the completion of the overwriting process. DocuColor 240/250 Training and Information Guide... -
Page 133: Faults
Faults tab is via the Machine Status button on the control panel. To print the report, touch the Error History Report button on the touch screen, then press the Start button on the control panel. DocuColor 240/250 Training and Information Guide... -
Page 134: Consumables
Access to Consumable information is via the Machine Status button on the control panel. The consumables information shown is based on your machine's average daily usage and the customer replaceable unit's life-span. DocuColor 240/250 Training and Information Guide... -
Page 135: Using Color
The following sections describe the color features available on the DocuColor 240/250. Output Color You can select one of several Output Color options from the Basic Copying tab, or select the More... option to see all of the available selections. DocuColor 240/250 Training and Information Guide... - Page 136 The Output Color options are shown here. The Auto option enables the copier to determine if the document is black and white or color. If the document is black and white, the Black option is selected automatically. If the document is colored, the Full Color option is selected. The DADF must be closed for the Auto option to function.
-
Page 137: Color Shift
If you select one of the Cool buttons, the red colors shift toward the magenta hue, the blue colors shift toward the cyan hue, and the green colors shift toward the yellow hue. Again, all colors between these original colors also shift in the same direction. DocuColor 240/250 Training and Information Guide... -
Page 138: Color Balance
The Color Balance feature allows you to adjust the balance between colors and the overall amount of color on the output copies. You can adjust the levels of all four process colors (Yellow, Magenta, Cyan, and Black) for their low, medium and high density ranges. DocuColor 240/250 Training and Information Guide... -
Page 139: Color Sharpness/Saturation
The Sharpness feature allows you to adjust the amount of edge definition on the copies. The Color Saturation feature allows you to adjust the overall richness of color on the copy. There are five levels of adjustment for each feature. DocuColor 240/250 Training and Information Guide... -
Page 140: Maintenance
Locating the Serial Number When ordering supplies or contacting Xerox for assistance you will be asked to supply your machine serial number. The serial number can be located from the touch screen as follows: 1. Select the Machine Status button on the Control Panel. -
Page 141: Billing Meters
4. Select the Machine Status button on the Control Panel. 5. Touch the Billing Meter/Print Report tab. 6. Touch the Billing Meter button. Customers can view the various billing meters, and the machine serial number for tracking purposes. DocuColor 240/250 Training and Information Guide DocuColor 240/250... -
Page 142: Ordering Supplies
US Customers should contact the Metered Customer Support Center at 1-800- 599-2198 to order Toner (black, cyan, magenta and yellow) and Staples if they are included as part of your Xerox Agreement. Contact the Welcome Center at 1- 800-821-2797 to order Drum Cartridge A1, Drum Cartridge A2, Drum Cartridge A3, Drum Cartridge A4, Waste Toner Container, and the Fuser. -
Page 143: Cleaning Your Machine
Use a lint-free cloth, lightly dampened with Xerox Anti-Static or General Cleaning Fluid or another suitable non-abrasive glass cleaner, to clean the glass area. Use a lint-free cloth, lightly dampened with water, Xerox Cleaning Fluid or Xerox Film Remover, to clean the under side of the Document Cover and in the Document Handler. -
Page 144: Cleaning The Control Panel, Touch Screen, Document Handler, And Trays
To remove fingerprints and smudges, clean the touch screen and control panel with a soft, lint-free cloth, lightly dampened with water. Use a lightly dampened cloth to clean the Document Handler, output trays, paper trays and the outside areas of your machine. DocuColor 240/250 Training and Information Guide DocuColor 240/250... -
Page 145: Adjusting Tray 3 And 4
5. Touch the Paper Tray Attributes button on the touch screen. 6. Select the desired paper tray whose paper tray settings are to be changed, and touch Change Settings. Select the appropriate Paper Type and Paper Color. 7. Touch the Save button. DocuColor 240/250 Training and Information Guide DocuColor 240/250... -
Page 146: Loading Paper And Media
DocuColor 240/250 Loading Paper and Media Instructions for loading paper and media can be found in the How To Load Paper and Media section of this document. DocuColor 240/250 Training and Information Guide... -
Page 147: Loading Staples
3. Insert the staple cartridge while gripping the orange lever until you hear it click into place. 4. Close the Finisher Front Door. The use of staple cartridges not recommended by Xerox may impair quality and performance. Use only staple cartridges recommended for the machine. DocuColor 240/250 Training and Information Guide... -
Page 148: Loading Staples - Professional Finisher With Booklet Maker
Return the unit to its original position and close the Finisher Front Door. DocuColor 240/250 Training and Information Guide DocuColor 240/250... -
Page 149: Auto Gradation Adjustment
11. To continue automatic gradation adjustment for other screen types, repeat steps 3 to 10 as required. 12. Exit the Auto Gradation Adjustment screens and make a copy or print to confirm the image quality. DocuColor 240/250 Training and Information Guide DocuColor 240/250... -
Page 150: Consumables
10. Press both ends of the drum cartridge to place it in a horizontal position. 11. Immediately close the Drum Drawer to protect the other drums from light. DocuColor 240/250 Training and Information Guide DocuColor 240/250... - Page 151 12. Return the Release Handle to its original position. 13. Return the R1-R4 handle to the original position and close the front door. 14. Insert the used drum cartridge into an empty container for recycling. DocuColor 240/250 Training and Information Guide DocuColor 240/250...
-
Page 152: Replacing The Toner Cartridges
Never use a vacuum cleaner when you clean spilled toner. It can cause explosion as the toner fills the vacuum cleaner and gets sparks. Use a broom or a cloth moistened with a neutral detergent. DocuColor 240/250 Training and Information Guide DocuColor 240/250... -
Page 153: Replacing The Fuser
7. Insert the Fuser into the Transfer Module while holding the Amber- Gold handle. 8. Close the Transfer Module. 9. Turn Handle #2 to the locked position. 10. Close the Front Door. DocuColor 240/250 Training and Information Guide DocuColor 240/250... -
Page 154: Replacing The Charge Corotron
Do not touch or scratch the surface of the drum. Doing so may result in unsatisfactory printing. 12. Return the R1-R4 handle to the original position and close the front door. 13. Insert the used Charge Corotron into an empty container for recycling. DocuColor 240/250 Training and Information Guide DocuColor 240/250... -
Page 155: Replacing The Waste Toner Container
6. Hold the center part on the top of a new container and insert it until it comes to a stop. 7. Close the waste toner container cover. 8. Close the Front Door. DocuColor 240/250 Training and Information Guide DocuColor 240/250... -
Page 156: Further Assistance
Further Assistance For additional help visit our Customer Web Site at www.xerox.com or contact the Xerox Welcome and Support Center quoting the machine serial number. The customer support number and machine serial number can be viewed by: 1. Touching the Machine Status button on the control panel. -
Page 157: Troubleshooting
ON. Be aware that any incomplete jobs in the queue will be lost. WARNING: Use only the ON/OFF switch to reboot your machine. Damage may occur to your machine if power is removed by other means. DocuColor 240/250 Training and Information Guide DocuColor 240/250 Troubleshooting... -
Page 158: Fault Codes
If an error code appears that is not listed in the table below, or if an error persists after following the listed solution, then contact your Xerox Customer Support Center. If an error code is displayed, all print data of the machine as well as print data stored in the machine's built-in memory is discarded. - Page 159 003-760 003-761 003-763 003-795 005-274 012-211 012-260 DocuColor 240/250 Training and Information Guide DocuColor 240/250 Cause/Remedy Cause: An incompatible combination of features are specified in the document scan conditions. Remedy: Check the selected options. Cause: The paper size of the tray...
- Page 160 016-220 016-454 016-704 016-708 016-710 016-712 016-713 DocuColor 240/250 Training and Information Guide DocuColor 240/250 Cause/Remedy Cause: An error occurred on the software settings. Remedy: Power- cycle the machine. If the machine is not improved by performing the relevant remedy, Contact your Xerox Customer Support Center.
- Page 161 016-748 016-755 016-756 016-757 016-758 016-759 016-764 DocuColor 240/250 Training and Information Guide DocuColor 240/250 Cause/Remedy Cause: Specified mailbox does not exist. Remedy: Create a new mailbox or specify the existing mailbox. Cause: An error occurred during print processing. Probable causes are as follows: 1.
- Page 162 016-766 016-767 016-768 016-769 016-773 016-774 016-775 016-777 DocuColor 240/250 Training and Information Guide DocuColor 240/250 Cause/Remedy server administrator. Cause: Could not send mail because the hard disk on the SMTP server was full. Remedy: Contact the SMTP server administrator.
- Page 163 016-779 016-780 016-786 016-788 016-789 016-791 016-792 DocuColor 240/250 Training and Information Guide DocuColor 240/250 Cause/Remedy Cause: Conversion processing of scanned image was interrupted, because of insufficient disk space. Remedy: Remove unnecessary data from the hard disk to increase free disk space.
- Page 164 027-452 027-453 027-700 027-701 027-702 027-703 DocuColor 240/250 Training and Information Guide DocuColor 240/250 Cause/Remedy Cause: The hard disk has run out free space. Remedy: Either remove unnecessary data from the hard disk to increase free disk space, or initialize the hard disk.
- Page 165 027-721 027-722 027-723 027-725 027-727 027-728 027-750 DocuColor 240/250 Training and Information Guide DocuColor 240/250 Cause/Remedy Cause: Unable to find the server of an application interface destination. Remedy: Check DNS server address. Or check whether an application interface (CentreWare Flow Service) installed on the computer is registered by DNS server or not.
- Page 166 027-796 027-797 047-210 062-210 062-211 062-220 062-277 DocuColor 240/250 Training and Information Guide DocuColor 240/250 Cause/Remedy Cause: When following the job flow, an error occurred. Remedy: Check the settings for the job flow. Cause: The print data cannot be processed because of PDL error.
- Page 167 062-790 063-210 065-210 065-215 065-219 071-210 072-210 DocuColor 240/250 Training and Information Guide DocuColor 240/250 Cause/Remedy Cause: An error occurred in the document feeder. Remedy: Power- cycle the machine. If the machine is not improved by performing the relevant remedy, contact your Xerox Customer Support Center.
- Page 168 073-210 074-210 075-211 078-250 116-210 116-212 116-704 DocuColor 240/250 Training and Information Guide DocuColor 240/250 Cause/Remedy Cause: The Tray 3 malfunctioned. Remedy: Check paper loaded in the Tray 3, and power-cycle the machine. If the machine is not improved by...
- Page 169 116-780 116-790 123-400 124-705 124-706 124-709 127-210 DocuColor 240/250 Training and Information Guide DocuColor 240/250 Cause/Remedy Refer to 016-795. Cause: 2 sided print could not be made due to insufficient memory. Remedy: Print each side. Cause: Job was divided and printed due to insufficient disk space.
- Page 170 Fault Code switch01 switch02 switch03 DocuColor 240/250 Training and Information Guide DocuColor 240/250 Cause/Remedy Switch off the machine. Cause: An error occurred. Remedy: Turn off the power, wait until the touch screen goes dark, and then turn on power again. If the message persists, record the displayed contents.
-
Page 171: Jam Clearance
4. Open the Tray 6 Top Cover and remove any jammed paper. NOTE: If paper is torn, check for any torn pieces of paper inside the machine. 5. Close the Tray 6 Top Cover and gently move Tray 6 to its original position. DocuColor 240/250 Training and Information Guide DocuColor 240/250... -
Page 172: Tray 5 Paper Jams
5. Pull down Handle 2b and remove the jammed paper. 6. Return Handle 2a and Handle 2b to their original position. Push in the transfer module completely and turn Handle 2 to the left. 7. Close the front cover. DocuColor 240/250 Training and Information Guide DocuColor 240/250... -
Page 173: Document Feeder Paper Jams
This section describes how to clear paper jams that occur in the Output Tray. 1. Remove jammed paper from the Output Tray. 2. If paper is torn, check for any torn pieces of paper inside the machine. DocuColor 240/250 Training and Information Guide DocuColor 240/250... -
Page 174: Bottom Right Cover Paper Jams
This may cause machine malfunction. Check where the paper jam occurred before clearing the problem. 2. Remove the jammed paper. 3. Push the tray in gently until it comes to a stop DocuColor 240/250 Training and Information Guide DocuColor 240/250... -
Page 175: Finisher Area 1 Paper Jams
Finisher. 1. Open Finisher Front Door. 2. Move Handle 3 to the down position. 3. Remove any paper. 4. Return Handle 3 to its original position. 5. Close the Finisher Front Door DocuColor 240/250 Training and Information Guide DocuColor 240/250... -
Page 176: Finisher Area 4 Paper Jams
Tray area of the Professional Finisher. 1. Open Finisher Front Door 2. Turn Knob 4a to the right. 3. Remove any sheets from the Booklet Maker Tray. 4. Close the Finisher Front Door DocuColor 240/250 Training and Information Guide DocuColor 240/250... -
Page 177: Staple Jams
NOTE: If using computer fanfold forms ensure that the perforations down each side of the sheet have been removed. When removed the forms can be loaded either short edge feed or long edge feed. DocuColor 240/250 Training and Information Guide DocuColor 240/250... -
Page 178: Bypass Tray Jams Or Misfeeds
NOTE: Do not add paper to the tray when paper is already loaded. Instead, remove the paper and combine the additional paper with the paper from the tray and reload. DocuColor 240/250 Training and Information Guide DocuColor 240/250... -
Page 179: Envelope Jams
3. Check that the envelopes are within specification. For more information about envelope specifications go to the Stock Type, Envelope topic in the Paper and Media section. NOTE: Some wrinkle is expected on the back of the fed envelope. DocuColor 240/250 Training and Information Guide DocuColor 240/250... -
Page 180: Problem Statement
The Touch Screen is Completely Dark Check to see if the machine is in Power Saver mode. Press the Power Saver button on the control panel DocuColor 240/250 Training and Information Guide DocuColor 240/250... - Page 181 Documents will not feed correctly If you are experiencing problems feeding certain types of document ensure that the document media is suitable for the Document Handler. Alternatively you can place the documents on the Document Glass. DocuColor 240/250 Training and Information Guide...
-
Page 182: Help
Xerox Corporation. Product names and trademarks of other companies are hereby acknowledged. While the information in this document is correct at the time of publication. Xerox reserves the right at any time to change the information without notice. Changes are made periodically to this document. -
Page 183: Glossary
Calendar format - a multi page 2 sided document that opens upwards rather than to the left. May also be known as Head to Toe. CCD - Charge-Coupled Device, converts the image of the document into a digital image. DocuColor 240/250 Training and Information Guide... - Page 184 Default Settings - the settings used by the machine when the user does not specify settings. Dialing Characters - special characters which apply only to Xerox machines that support fax mailboxes. Digital Copier - a copier that scans an image only once to make one or many copies.
- Page 185 . Foreign Interface Device - a device (such as a magnetic card reader, coin- operated device, or bill acceptor) that is connected to the exterior of the machine and used to track machine usage. DocuColor 240/250 Training and Information Guide...
- Page 186 Internet Fax - a walk up fax service that will send the facsimile to another internet fax machine or PC. IOT - Image Output Terminal. Contains the Charge, Exposure, Development, Transfer, Cleaning and Fusing elements of the Xerographic Process DocuColor 240/250 Training and Information Guide...
- Page 187 Multipage TIFF - this is a special type of TIFF file which results from combining single page TIFF formatted files into one file. NCU - Network Control Unit Node - a number that identifies a network component. It works like an address. DocuColor 240/250 Training and Information Guide...
- Page 188 Print to Edge - this feature allows the machine to print an image on the paper up to the very edge of the paper stock. Protocol - the rules that control the transmitting and receiving of data. DocuColor 240/250 Training and Information Guide...
- Page 189 Server Fax - a walk up fax service which uses a Third Party Fax Server. Sharpness - sharpness adjusts the amount of edge definition on the output. If the image appears slightly out of focus, increasing the Sharpness value may make the image clearer. DocuColor 240/250 Training and Information Guide...
- Page 190 A Trayless Duplex system significantly reduces the likelihood of jams. Uncollated - output programming where the specified number of copies for each page is delivered in the order the documents were placed in the Document Handler. DocuColor 240/250 Training and Information Guide...
-
Page 191: Index
Laser Safety, 31 Legal and Safety, 25 Loading Paper, 15 Loading Staples, 147 Locating the Serial Number, 140 Machine Administration, 123 DocuColor 240/250 Training and Information Guide DocuColor 240/250 Machine Configurations, 21 Machine Setup, 18 Machine Space Requirements, 21 Machine Weight, 21...