Table of Contents
Advertisement
Advertisement
Table of Contents

Related Manuals for Navien NR-10P


Summary of Contents for Navien NR-10P
-
Page 3: Table Of Contents
Safety Instructions Safety Instructions All safety messages will refer to potential hazards. Remote Controller Follow the instructions exactly to avoid the risk of injury. LCD Display Icon Remote controller ON / OFF Setting the Clock Room Temp. Setting Supply Temp. Control Program (24th Timer) Indicates an imminent hazardous K-Factor (Options) -
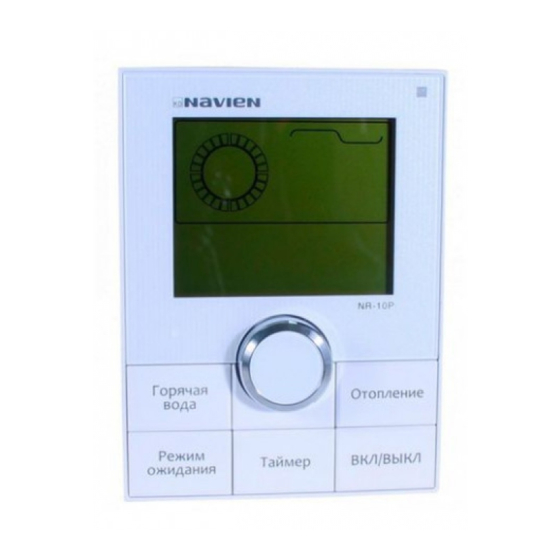
Page 4: Remote Controller
Remote Controller LCD Display Icon Timer display for Room temperature set 24 hour clock LCD Display LED Indicator Indicates functions and Flashing green LED Space heating Return water Clock current status indicator – Burners on temperature Flashing red LED indicator - Error Temperature Hot water “In use”... -
Page 5: Remote Controller On / Off
Remote Controller ON / OFF Setting the Clock Press the ”ON/OFF” button to turn the LCD When the “ON/OFF” button is pressed, the Press and hold “Program” button for 3 seconds, Use the center dial to move around the “minutes” on and off. -
Page 6: Room Temperature Setting
Room Temperature Setting Supply temperature Control Tap “Heating” until “Supply temperature Tap “Heating” and when “Supply temperature Tap “Heating” until “room temperature heating” Tap “Heating” and when “room temperature heating” icon appears. Leave alone and the heating” icon is blinking use the center dial to icon appears. - Page 7 PROGRAM(24h timer) Setting for Space Heating Tap the “Program” button to set the “24 hour” When the “clock” is flashing with the cursor, Tap the “Heating” button to enable (solid) or After setting the timer to the desired time disable (blank) the specified time frame. frames, leave the remote alone and the timer.
-
Page 8: Stand By
K Factor (Option) STAND BY When the need for heat is not needed, the unit will set itself to operate in “stand by” mode. Tap “Heating” until “K Factor” icon appears. Tap “Heating supply” icon is blinking use the Leave alone and the display will automatically center dial to set the desired value between To Enable: Tap “Stand By”... -
Page 9: Remote Operation By Telephone - Setting The Number Of Ringing
Remote Operation by Telephone – Setting the number of ringing Please turn off the power of Remote Controller Press “DHW” and “Stand By” buttons at the Rotate the dial till “10: tC” displays When “10 : tC” is blinking, press “Program” by pressing “ON/OFF”... -
Page 10: Remote Operation By Telephone- Setting Password
Remote Operation by Telephone– Setting Password 3-digit number can be set. Remote Operation by Telephone is a convenient function that can run a boiler with telephone. To use Remote Operation by Telephone function, please set the number of ringing first. Rotate the dial between “5~15”... - Page 11 Rotate the dial till “9: tL” displays on the clock When “9 : tL” is blinking, press “Program” Rotate the dial between “0~9” and select the After first-digit of the password is selecting, icon. button, then first digit of the password blinks. first password number press “Program”...
- Page 12 Rotate the dial between “0~9” and select the After second-digit of the password is Rotate the dial between “0~9” and select the After third-digit of the password is selecting, second password number selecting, press “Program” button, then third password number press “Program”...
-
Page 13: Remote Operation By Telephone - Turn On Boiler By Phone
Remote Operation by Telephone – turn on boiler by phone If boiler is connected with fixed phone In case boiler is normal, there is a short beep With correct password, there is a short beep Press "#" button three times. number, boiler will be operated after selected sound once. -
Page 14: Remote Operation By Telephone - Turn Off Boiler By Phone
Remote Operation by Telephone – turn off boiler by phone If boiler is connected with fixed phone In case boiler is normal, there is a short beep With correct password, there is a short beep Press “ " button three times. number, boiler will be operated after selected sound once. -
Page 15: Hot Water Temperature Setting
Hot Water Temperature Setting DHW Pre-heating Setting If the “DHW” button is pressed, ‘hot water’ icon When the “hot water” icon flickers turn the flickers and temperature of hot water (30~50 dial to set desire hot water temperature. After ℃) is displayed. If temperature over 50℃ is Enabling pre-heating function (when icon is Disable pre-heating function (when icon is on) : a few seconds, the desire temperature is... -
Page 16: Heat Capacity Control
Heat Capacity Control When the heating capacity is small, the desired heat capacity can be controlled by the use of the remote controller Rotate the dial till “3:HC” displays on the clock When “3 : HC” is blinking, press “Program” Please turn off the power of Remote Controller Press “DHW”... -
Page 17: Supply Water Pressure Setting
Supply water pressure setting Please follow the this procedure if setting up supply water pressure is needed Please turn off the power of Remote Controller Press “DHW” and “Stand By” buttons at the Rotate the dial between “20~100” % for by pressing “ON/OFF”... - Page 18 Rotate the dial between “0.5~2.0” for setting Rotate the dial till “5:PS” displays on the clock When “5 : PS” is blinking, press “Program” up supply water pressure, and the value will icon. button, then the supply water pressure value be saved automatically after 5 second or by blinks.
-
Page 19: Setting Of Pump Overrun Time
Setting of pump overrun time Please turn off the power of Remote Controller Press “DHW” and “Stand By” buttons at the same Rotate the dial till “6:Pr” displays on the clock When “6 : Pr” is blinking, press “Program” button. by pressing “ON/OFF”... -
Page 20: Setting Of Dhw Post Delay Time
Setting of DHW post delay time Rotate the dial between “3~40” minutes or Please turn off the power of Remote Controller Press “DHW” and “Stand By” buttons at the setting up desired time, and the value will be by pressing “ON/OFF” button. same time for 3 seconds. - Page 21 Rotate the dial between “0~10” minutes or Rotate the dial till “7: Hd” displays on the clock When “7 : Hd” is blinking, press “Program” setting up desired time, and the value will be icon. button, then DHW post delay time(minutes) saved automatically after 5 second or by blinks.
-
Page 22: Setting Of Anti-Cycling Time
Setting of Anti-cycling time Please turn off the power of Remote Controller Press “DHW” and “Stand By” buttons at the Rotate the dial till “8 : rH” displays on the clock When “8 : rH” is blinking, press “Program” by pressing “ON/OFF” button. same time for 3 seconds. -
Page 23: Lock
Lock This feature is a safety feature to prevent children from altering the settings which may in turn lead to harmful activity by the unit. Rotate the dial between “0~10” minutes or To Enable: Press and hold “Stand By” for 3 To Disable: Press and hold “Stand By”... -
Page 24: Basic Troubleshooting And Frequently Asked Questions
Basic Troubleshooting and Frequently Asked Questions Problem Possible Cause(s) What to do The water is too hot. Problem Possible Cause(s) What to do There is no water at all when the hot water tap is opened. When the tap is opened, there is no... -
Page 25: Error Code Guide
Error Code Guide Problem Possible Cause(s) What to do Error Code Reason Self-diagnostic / Action Water is boiling inside the heat 1. Clean the inlet water strainer (part#25). Is the system running for domestic When the unit is heating for DHW, the heating E001 exchanger. - Page 26 Error Code Reason Self-diagnostic / Action Error Code Reason Self-diagnostic / Action DHW Hot water supply: 1. Check the thermostat. 1. Check power supply E015 Abnormal PCB board E008 2. Check the power switch thermostat -short 2. Replace the thermostat. 1.
- Page 27 “OFF” then “ON”. Abnormal activity of the gas 1. Check gas line. E035 pressure sensor Communication failure 1. Contact to Navien tech. dept. E036 1. Close DHW cold water main. Water leak Inside unit E037 2. Replace leaking parts.