
Related Manuals for Daikin Altherma 3 H HT Series


Summary of Contents for Daikin Altherma 3 H HT Series
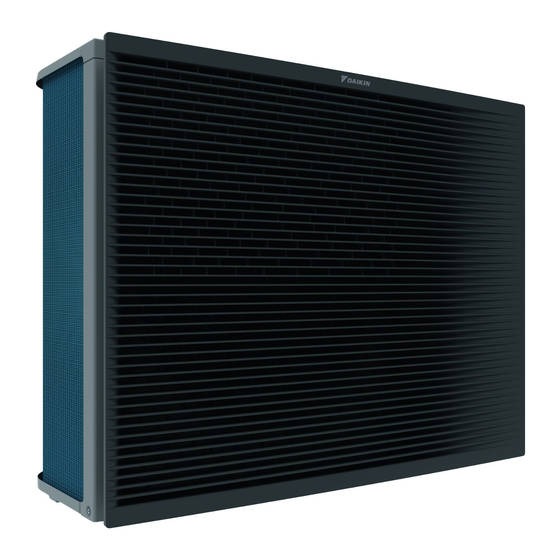
- Page 1 Installation manual Daikin Altherma 3 H HT https://daikintechnicaldatahub.eu EPRA14DAV3 EPRA16DAV3 EPRA18DAV3 EPRA14DAW1 Installation manual EPRA16DAW1 English Daikin Altherma 3 H HT EPRA18DAW1...
- Page 2 ≤500 ≤500 General ≥500 ≥1000 ≥300 Top-side obstacle ≤500 ≤500 ≥300 ≥300 ≥1000 ≥150 ≥500 No top-side obstacle ≥500 ≥500 ≥300 ≥100 ≥500 (mm) 3D124412...
- Page 3 2P586101-1...
- Page 4 2P586101-1...
-
Page 5: Table Of Contents
To insulate the water piping ........10 Latest revisions of the supplied documentation may be available on 5 Electrical installation the regional Daikin website or via your dealer. About electrical compliance............10 The original documentation is written in English. All other languages Guidelines when connecting the electrical wiring...... -
Page 6: About The Box
Installation manual – Discharge grille Make sure installation, servicing, maintenance and repair NOTICE comply with instructions from Daikin and with applicable legislation (for example national gas regulation) and are Unpacking – Front corners. When you remove the front executed only by authorised persons. -
Page 7: To Install The Outdoor Unit
Additionally, make sure the unit is positioned at least 100 mm above the expected level of snow. Use the drain plug (with O-ring) and a hose for drainage. 4× 2 Fix the unit to the installation structure. EPRA14~18DAV3+W1 Installation manual Daikin Altherma 3 H HT 4P586100-1B – 2019.09... -
Page 8: To Open The Outdoor Unit
To fill the water circuit The transportation stays (2×) protect the unit during transport. During installation they must be removed. See the installation manual of the indoor unit, or the installer reference guide. Installation manual EPRA14~18DAV3+W1 Daikin Altherma 3 H HT 4P586100-1B – 2019.09... -
Page 9: To Protect The Water Circuit Against Freezing
▪ Normally closed valves (located indoors near the piping entry/exit hot water tank points) can prevent that all water from indoor piping is drained when the freeze protection valves open. EPRA14~18DAV3+W1 Installation manual Daikin Altherma 3 H HT 4P586100-1B – 2019.09... -
Page 10: To Insulate The Water Piping
▪ Connect the wires to the terminal block. The distance between the high voltage and low voltage ▪ Fix the cable with a cable tie. cables should be at least 50 mm. Installation manual EPRA14~18DAV3+W1 Daikin Altherma 3 H HT 4P586100-1B – 2019.09... - Page 11 ▪ Connect the wires to the terminal block (make sure the numbers match with the numbers on the indoor unit) and the earth screw. ▪ Fix the cable with a cable tie. Wires: (3+GND)×1.5 mm² — EPRA14~18DAV3+W1 Installation manual Daikin Altherma 3 H HT 4P586100-1B – 2019.09...
-
Page 12: In Case Of W1 Models
▪ Connect the wires to the terminal block. ▪ Fix the cable with a cable tie. Use the factory-mounted cable. Wires: 3N+GND Maximum running current: Refer to name plate on unit. — Installation manual EPRA14~18DAV3+W1 Daikin Altherma 3 H HT 4P586100-1B – 2019.09... -
Page 13: To Reposition The Air Thermistor On The Outdoor Unit
▪ Fix the cable with cable ties. Required accessory (delivered with the unit): Wires: (2+GND)×0.75 mm². Wiring must be double insulated. Thermistor fixture. Maximum power allowed for drain tube heater = 115 W (0.5 A) — Click EPRA14~18DAV3+W1 Installation manual Daikin Altherma 3 H HT 4P586100-1B – 2019.09... -
Page 14: Finishing The Outdoor Unit Installation
Install the lower part of the discharge grille 1 Insert the hooks. 2 Insert the ball studs. 9 Fix the 6 remaining screws. 3 Fix the 2 lower screws. 6× 2× Installation manual EPRA14~18DAV3+W1 Daikin Altherma 3 H HT 4P586100-1B – 2019.09... -
Page 15: To Remove The Discharge Grille, And Put The Grille In Safety Position
"6.3 To remove the discharge grille, and put the grille in position" [ 4 15] safety 4 Align the ball stud and hook on the grille with their counterparts on the unit. EPRA14~18DAV3+W1 Installation manual Daikin Altherma 3 H HT 4P586100-1B – 2019.09... -
Page 16: Technical Data
High pressure sensor Electronic expansion valve (main) Electronic expansion valve (injection) Solenoid valve (4-way valve) Solenoid valve (hot gas bypass) Solenoid valve (low pressure bypass) Solenoid valve (liquid injection) Installation manual EPRA14~18DAV3+W1 Daikin Altherma 3 H HT 4P586100-1B – 2019.09... -
Page 17: Wiring Diagram: Outdoor Unit
Printed circuit board (noise filter) Electronic expansion valve (main) Printed circuit board (leakage current) Electronic expansion valve (injection) Printed circuit board (ACS) Solenoid valve (4‑way valve) Printed circuit board (flash) EPRA14~18DAV3+W1 Installation manual Daikin Altherma 3 H HT 4P586100-1B – 2019.09... - Page 18 S1NPH High pressure sensor S1PH, S2PH High pressure switch S1PL Low pressure switch Current transfo V1R, V2R (A2P) IGBT power module V3R (A2P) Diode module X1M, X2M Terminal strip Installation manual EPRA14~18DAV3+W1 Daikin Altherma 3 H HT 4P586100-1B – 2019.09...
- Page 20 4P586100-1 B 0000000Y 4P586100-1B 2019.09...