Advertisement
Quick Links
Installation Instructions
THIS APPLIANCE MUST BE INSTALLED BY A QUALIFIED INSTALLER. Improper installation,
adjustment, alteration, services, or maintenance can cause injury or property damage. Consult a
qualified installer, service agent, or the gas supplier.
The use of suitable protective clothing/gloves is recommended when handling or installing this
appliance.
Tools Needed for Installation (not supplied with the appliance)
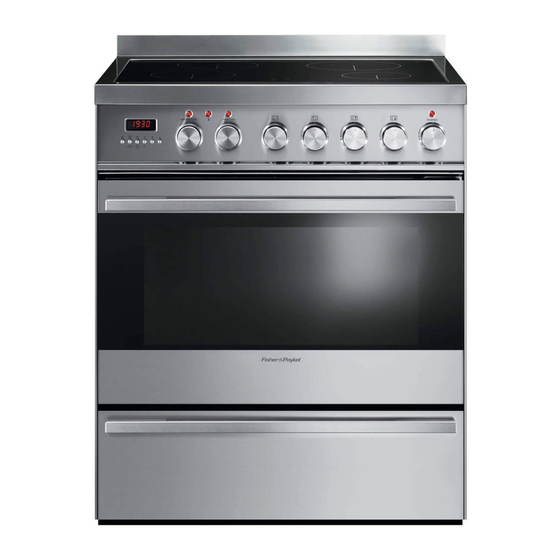
Dimensions and Clearances
• The cooker must be installed no less than 2" (50 mm) away from any side walls which exceed the height of the
cooktop.
https://producthelp.fisherpaykel.com/us/Cook/Ranges/Induction/OR30SDPWIX2/User_Guide_OR30SDPWIX2/02_installation...
Updated: Fri, 06 Dec 2019 03:20:08 GMT
Powered by
1
Advertisement

Related Manuals for Fisher & Paykel OR30SDPWIX2


Summary of Contents for Fisher & Paykel OR30SDPWIX2
- Page 1 Tools Needed for Installation (not supplied with the appliance) Dimensions and Clearances • The cooker must be installed no less than 2” (50 mm) away from any side walls which exceed the height of the cooktop. https://producthelp.fisherpaykel.com/us/Cook/Ranges/Induction/OR30SDPWIX2/User_Guide_OR30SDPWIX2/02_installation… Updated: Fri, 06 Dec 2019 03:20:08 GMT Powered by...
- Page 2 THE RIGHT above the 36” (914 mm) high countertop; or there must be a minimum of 2” (50 mm) side clearance from the range to such combustible surfaces TO THE LEFT above the 36” (914 mm) high countertop. https://producthelp.fisherpaykel.com/us/Cook/Ranges/Induction/OR30SDPWIX2/User_Guide_OR30SDPWIX2/02_installation… Updated: Fri, 06 Dec 2019 03:20:08 GMT Powered by...
- Page 3 30” (762 mm) above the countertop with a minimum width of 30” (762 mm) and must be centered with the range. Side wall cabinets above the range must be a minimum of 18” (457 mm) above the countertop. https://producthelp.fisherpaykel.com/us/Cook/Ranges/Induction/OR30SDPWIX2/User_Guide_OR30SDPWIX2/02_installation… Updated: Fri, 06 Dec 2019 03:20:08 GMT...
-
Page 4: Moving The Cooker
Take extra care not to damage the door sensor (top right of oven). Correctly Lifting the Cooker Incorrectly Lifting the Cooker Incorrectly Moving the Cooker https://producthelp.fisherpaykel.com/us/Cook/Ranges/Induction/OR30SDPWIX2/User_Guide_OR30SDPWIX2/02_installation… Updated: Fri, 06 Dec 2019 03:20:08 GMT Powered by... - Page 5 1. Before assembling, remove any protective film/ adhesive tape. 2. Assemble the backguard “C” as shown 3. Screw in the two screws “A”, interposing the spacers. 4. Screw in the central screw “B”. Assembling the Backguard https://producthelp.fisherpaykel.com/us/Cook/Ranges/Induction/OR30SDPWIX2/User_Guide_OR30SDPWIX2/02_installation… Updated: Fri, 06 Dec 2019 03:20:08 GMT Powered by...
-
Page 6: Leveling The Range
Leveling the Range The range is equipped with 4 LEVELING FEET and may be leveled by screwing or unscrewing the feet. Follow the directions below. https://producthelp.fisherpaykel.com/us/Cook/Ranges/Induction/OR30SDPWIX2/User_Guide_OR30SDPWIX2/02_installation… Updated: Fri, 06 Dec 2019 03:20:08 GMT Powered by... - Page 7 AND on the rear wall by no. 8 (eight) suitable screws (not supplied). 2. After fixing the anti-tip bracket, slide range into place. Be sure the rear left foot slides under the anti-tip bracket attached. https://producthelp.fisherpaykel.com/us/Cook/Ranges/Induction/OR30SDPWIX2/User_Guide_OR30SDPWIX2/02_installation… Updated: Fri, 06 Dec 2019 03:20:08 GMT Powered by...
-
Page 8: Connecting The Power Supply Cable
If replacing the power cord, use only a suitable UL or CSA approved one. Tighten the power cord using the power cord strain relief bracket supplied with the appliance. Allow enough slack to easily attach the cord terminals to the terminal block. https://producthelp.fisherpaykel.com/us/Cook/Ranges/Induction/OR30SDPWIX2/User_Guide_OR30SDPWIX2/02_installation… Updated: Fri, 06 Dec 2019 03:20:08 GMT Powered by... -
Page 9: Wiring Diagram
SUPPLY ROTARY SELECTOR INTERFACE PROGRAM THERMOSTAT RELAY1 IUTB INDUCTION UNIT TERMINAL BLOCK COOLING/OVEN FAN RELAY2 IHTO INDUCTION HOB THERMAL OVERLOAD DOOR LOCK/UNLOCK RELAY3 OVEN LAMP FUNCTION STATE RELAY THERMOSTAT ENCODER https://producthelp.fisherpaykel.com/us/Cook/Ranges/Induction/OR30SDPWIX2/User_Guide_OR30SDPWIX2/02_installation… Updated: Fri, 06 Dec 2019 03:20:08 GMT Powered by... - Page 10 ENERGY REGULATOR PROBE DOOR LOCK MOTOR WIRES P5B(1)+P5B(2)+P5B(3) SL/U STATUS LOCK/UNLOCK LINE PILOT LAMP WARMING DRAWER ELEMENT SAFETY THERMOSTAT EL.P ELECTRONIC PROGRAMMER DOOR STATUS, OPEN/CLOSED OVEN DOOR LATCH AIR SWITCH https://producthelp.fisherpaykel.com/us/Cook/Ranges/Induction/OR30SDPWIX2/User_Guide_OR30SDPWIX2/02_installation… Updated: Fri, 06 Dec 2019 03:20:08 GMT Powered by...