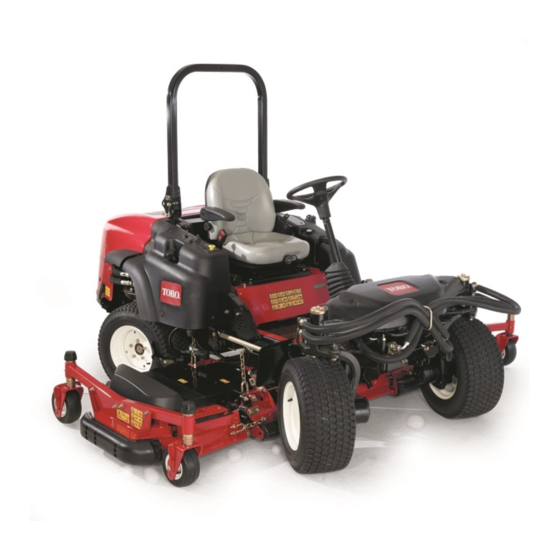
Toro Groundsmaster 360 Series Operator's Manual
60in, 62in, or 72in rotary mower
Hide thumbs
Also See for Groundsmaster 360 Series:
- Operator's manual (28 pages) ,
- Installation instructions (2 pages) ,
- Operator's manual (24 pages)
Table of Contents
Advertisement
Quick Links
Register at www.Toro.com.
Original Instructions (EN)
60in, 62in, or 72in Rotary Mower
Groundsmaster
Traction Unit
Model No. 30353—Serial No. 403373001 and Up
Model No. 30456—Serial No. 403373001 and Up
Model No. 30457—Serial No. 403373001 and Up
Model No. 30481—Serial No. 403373001 and Up
Form No. 3424-939 Rev A
®
360 Series and 7200 Series
*3424-939* A
Advertisement
Table of Contents

Related Manuals for Toro Groundsmaster 360 Series


Summary of Contents for Toro Groundsmaster 360 Series
- Page 1 360 Series and 7200 Series Traction Unit Model No. 30353—Serial No. 403373001 and Up Model No. 30456—Serial No. 403373001 and Up Model No. 30457—Serial No. 403373001 and Up Model No. 30481—Serial No. 403373001 and Up *3424-939* A Register at www.Toro.com. Original Instructions (EN)
-
Page 2: Table Of Contents
Whenever you need service, genuine Toro parts, or additional information, contact an Authorized Service Dealer or Toro Customer Service and have the model and serial numbers of your product ready. The model and serial numbers are stamped into a plate that is mounted on the cutting unit housing. -
Page 3: Safety
Safety • Wear appropriate clothing, including eye protection; substantial, slip-resistant footwear; long pants, and hearing protection. Tie back long This machine has been designed in accordance with hair and do not wear loose jewelry. ANSI B71.4-2017 and EN ISO 5395:2013. •... -
Page 4: Safety And Instructional Decals
Safety and Instructional Decals Safety decals and instructions are easily visible to the operator and are located near any area of potential danger. Replace any decal that is damaged or missing. decal93-6687 93-6687 1. Do not step here. decal93-7818 93-7818 1. - Page 5 decal133-8061 133-8061 decal112-1461 112-1461 1. Belt routing decal117-4979 117–4979 1. Entanglement hazard, belt—stay away from moving parts, keep all guards and shields in place. decal120-6604 120-6604 1. Thrown object hazard—keep bystanders away from the machine. 2. Cutting/dismemberment hazard of hand, mower blade—stay away from moving parts, keep all guards and shields in place.
-
Page 6: Setup
Setup Carefully slide the retainer pin from the carrier frame and the pull link (Figure Note the location of the HOC pin in the HOC Note: Determine the left and right sides of the bracket for assembly purposes (Figure machine from the normal operating position. Remove the HOC pin from the HOC bracket. -
Page 7: Installing The New Cutting Unit
Start the engine and fully raise the cutting unit. Shut off the engine and remove the key from the ignition switch. Note: Place a wood block or similar shim under each link to hold it in the raised position. CAUTION The pull link torsion springs may cause some rotation of the pull links during installation. -
Page 8: Operation
Operation Note: Determine the left and right sides of the machine from the normal operating position. Adjustments Adjusting the Height-of-Cut The height-of-cut is adjusted from 2.5 to 15.8 cm (1 to 6 inches) in 6 mm (1/4 inch) increments by relocating the stop pin into different hole locations. - Page 9 Adjusting the Rear Anti-Scalp located in the second row. This does not add 6 mm (1/4 inch) to the 15.8 cm (6 inch) position. Rollers Adjust the anti-scalp rollers and skids as Whenever you change the height-of-cut, adjust the required. height of the rear anti-scalp rollers.
- Page 10 g004658 Figure 9 g004487 1. 38 mm (1-1/2 inches) 3. 63 mm (2-1/2 inches) Figure 10 2. 51 mm (2 inches) 4. 76 mm (3 inches) and All Cutting Units higher 1. Front roller 2. Roller shaft Install the flange nut bushing, spacer, and bolt. Torque to 54 to 61 N∙m (40 to 45 ft-lb) (Figure Adjusting the Rollers...
- Page 11 g004925 Figure 13 Side-discharge cutting units only 1. Bolt 4. Nut 5. Bracket 2. Chute-side roller 3. Spacer g004924 Figure 14 Side-discharge cutting units only 1. Bolt 3. Under-cutting unit roller (2) 2. Roller shaft 4. Bracket Install the fasteners as illustrated.
-
Page 12: Operating Tips
This also helps disperse clippings damage. Sharpen the blades as necessary. If a blade which enhances decomposition and fertilization. is damaged or worn, replace it immediately with a genuine Toro replacement blade. Refer to Servicing the Cutting Blades (page 17). -
Page 13: Maintenance
Maintenance Note: Determine the left and right sides of the machine from the normal operating position. WARNING If you raise the machine using only a jack to support it while you work under the cutting unit, the jack could tip, causing the mower deck to fall, crushing you or bystanders. -
Page 14: Recommended Maintenance Schedule(S)
Recommended Maintenance Schedule(s) Maintenance Service Maintenance Procedure Interval • Check the condition of the blade drive belts on the cutting unit. After the first 50 hours • Check the cutting unit blades. Before each use or daily • Clean the cutting unit. •... -
Page 15: Lubrication
Lubrication Dusty and dirty operating conditions could cause dirt to get into the bearings and bushings, resulting in accelerated wear. Lubricate the grease fittings Greasing the Bearings and immediately after every washing, regardless of interval specified. Bushings Wipe the grease fittings clean so foreign matter Service Interval: Every 50 hours cannot be forced into the bearing or bushing. - Page 16 g004646 Figure 17 Note: Bearing life can be negatively affected by improper wash down procedures. Do not wash the unit when it is still hot and avoid directing high-pressure or high volume spray at the bearings or seals.
-
Page 17: Replacing The Blade Drive Belts
If a blade is damaged or worn, replace it immediately idler pulleys, are very durable. However, after many with a genuine Toro replacement blade. hours of use, the belts will show signs of wear. Signs of a worn belt include squealing when the belt is... - Page 18 To ensure optimum operating position. performance and continued safety conformance of Rotate the blades until the ends face forward the machine, use genuine Toro replacement blades. and backward (Figure 20). Measure from a level...
- Page 19 Installing the Blades Disengage the PTO, release the traction pedal, and engage the parking brake. Install the blade onto the spindle shaft (Figure Move the throttle lever to the S position, 23). shut off the engine, remove the key, and wait Important: The curved part of the blade for all moving parts to stop before leaving the...
-
Page 20: Cleaning Under The Cutting Unit
Remove the covers from the top of the cutting units. Rotate the blade on each spindle until the ends face forward and backward. Measure from the floor to the front tip of the cutting edge. Adjust the jam nuts securing the cutting unit yokes/chains to the mower until the cutting unit is level (Figure... -
Page 21: Storage
Storage Use a jack to raise the front of the machine and support it with jack stands. Thoroughly clean the underside of the cutting Disengage the PTO, release the traction pedal unit with water. to the neutral position, and engage the parking brake. - Page 22 The method of transmission shall be electronic transmittal. This machinery shall not be put into service until incorporated into approved Toro models as indicated on the associated Declaration of Conformity and in accordance with all instructions, whereby it can be declared in conformity with all relevant Directives.
- Page 23 While the exposure from Toro products may be negligible or well within the “no significant risk” range, out of an abundance of caution, Toro has elected to provide the Prop 65 warnings. Moreover, if Toro does not provide these warnings, it could be sued by the State of California or by private parties seeking to enforce Prop 65 and subject to substantial penalties.
- Page 24 Countries Other than the United States or Canada Customers who have purchased Toro products exported from the United States or Canada should contact their Toro Distributor (Dealer) to obtain guarantee policies for your country, province, or state. If for any reason you are dissatisfied with your Distributor's service or have difficulty obtaining guarantee information, contact the Toro importer.