Sony Ericsson P910i User Manual
Sony ericsson mobile phone user's guide
Hide thumbs
Also See for P910i:
- User manual (211 pages) ,
- Quick manual (9 pages) ,
- Working instruction, mechanical (62 pages)

Related Manuals for Sony Ericsson P910i


Summary of Contents for Sony Ericsson P910i
-
Page 1: User Guide
This is the Internet version of the user’s guide. © Print only for private use. P910i User Guide... - Page 2 This is the Internet version of the user’s guide. © Print only for private use. Letters Lowercase letters are written below the arrow and uppercase letters in line with the arrow. Note Start each stroke at the dotted end. Accented letters Write the character as described above, then write the accent above the arrow.
-
Page 3: Table Of Contents
SIM card ... 12 Battery ... 12 Care instructions ... 13 First time start-up... 14 Turning your P910i on and off ... 14 Importing phone book entries... 14 Flip closed mode... 15 Flip open mode ... 16 Flip removed... 17 Screen areas ... - Page 4 This is the Internet version of the user’s guide. © Print only for private use. Music player... 73 Playing sound files... 73 Managing sound files... 74 Internet ... 77 Using the browser view ... 78 Using the bookmark view... 81 Preferences...
- Page 5 PC Suite and Content and Application ... 129 Sony Ericsson PC Suite ... 129 Content and Application CD ... 130 Installing applications ... 131 Installing applications on your P910i ... 131 Removing applications from your P910i... 133 Sony Ericsson Update Service... 133 Connecting to other devices... 134 Connection via SyncStation...
- Page 6 Automatically set up service provider and messaging ... 172 Manually set up service provider... 172 Manually set up messaging... 173 Setting up WAP accounts ... 174 Using your P910i as a modem ... 174 GPRS - connection information... 176 EFERENCE Troubleshooting ... 178 Guidelines for safe and efficient use...
- Page 7 Sony Ericsson P910i User Guide Second edition (December 2004) This User Guide is published by Sony Ericsson Mobile Communications AB, without any warranty. Improvements and changes to this User Guide necessitated by typographical errors, inaccuracies of current information, or improvements to programs and/or equipment, may be made by Sony Ericsson Mobile Communications AB at any time and without notice.
- Page 8 Sony Ericsson does not guarantee the accuracy, integrity or quality of any additional content or any other third-party content. Under no circumstances will Sony Ericsson be liable in any way for your improper use of additional content or other third party content.
-
Page 9: Overview
Extra memory is available through a Memory Stick also serves as a convenient way to exchange content and applications such as Java™ games. The P910i can be used as a corporate phone with PBXes such as Ericsson MD110. The P910i also contains an organizer,... -
Page 10: Getting To Know Your P910I
Note If your package does not include all the listed items above, please contact your retailer. Note Before you can use your P910i you need to insert the SIM card, and insert and charge the battery. Always detach the charger before you insert or remove the SIM card. -
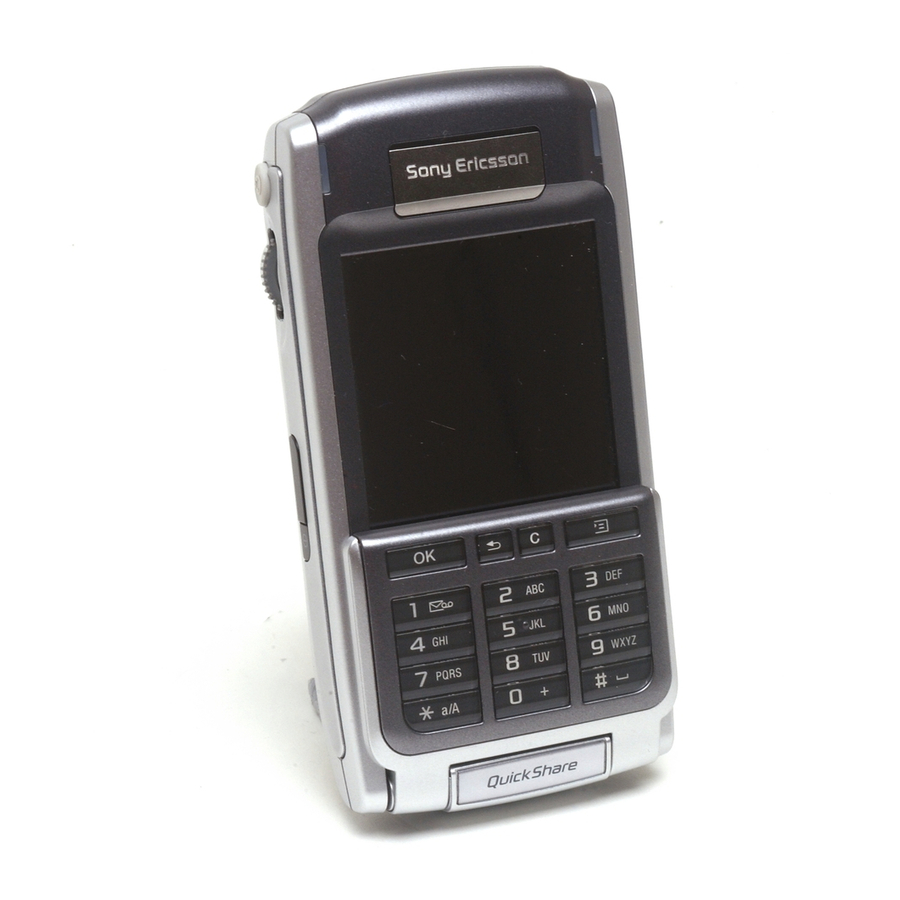
Page 11: P910I Overview
G Slot for Memory Stick A Stylus B External antenna connector C CommuniCorder D Battery compartment E Connector for accessories and charger F Connector for stereo headset G Jog Dial H Infrared port On/Off button Getting to know your P910i... -
Page 12: Sim Card
P910i. Open the battery cover by pressing sligthly on its upper part and slide it down the P910i. Insert the SIM card as shown in the picture. Some subscriptions are limited to call only predefined numbers, so-called Fixed Dialling Numbers (FDN). -
Page 13: Care Instructions
However, using your P910i while charging increases the charging time. To charge the battery The P910i can be charged either when it is switched on or off. 1. Make sure the battery is inserted in your P910i and the cover is closed. -
Page 14: First Time Start-Up
Importing phone book entries You may want to import existing contact information from another mobile phone to your P910i. You can do this in several ways: • Beam the phone book entries from the other phone by infrared or Bluetooth wireless technology and save the set to . -
Page 15: Flip Closed Mode
D Shortcut to the Calendar application E Shows all applications available in flip closed mode With the keypad flip closed, the P910i can be used as a conventional mobile phone using the keypad to dial and the Jog Dial to navigate. For more information please see ‘Jog Dial’ on page 19 and ‘Keypad functions’... -
Page 16: Flip Open Mode
D Shortcut to the Calendar application E Shortcut to the Internet application F Shows all applications available in flip open mode You can change the shortcuts A-E. See ‘Changing your application shortcuts’ on page 144. Getting to know your P910i Applications Edit CommuniCorder Pictures Video... -
Page 17: Flip Removed
When the flip is removed, the P910i works in flip open mode. Note Turn off the P910i before you remove the flip to avoid to damage your phone. To remove and attach the flip, refer to the separate instructions. -
Page 18: Screen Areas
Displays six icons for quick and easy access to the picker most common applications. These can be customized. Getting to know your P910i B Menu bar Usually contains two menus on the left, and a folder menu on the right. The two left-hand menus contain: •... -
Page 19: Jog Dial
Flip closed: Brings up the Options menu. Press forwards and hold takes you to the Applications list. Flip open: Toggles the Application, Edit and Category menus. Press and hold takes you to the Application launcher. Down Inwards in flip Backwards Forwards Getting to know your P910i... -
Page 20: Keypad Functions
• Mute the ring signal during an incoming call. • Pause/play the melody when the Music player is open. • Press and hold to put the P910i into silent mode, when in the standby view. P T I O N S •... -
Page 21: Indicators And Status Bar Icons
Divert all calls notification Icon Function Calls screened SMS notification MMS notification Email notification SMS overflow Time Time, alarm set Keylock Magic word Keyboard Multimedia volume Speakerphone Muted microphone Silent mode Home network Voicemail notification Getting to know your P910i... -
Page 22: Memory Stick
Memory Stick PRO Duo in your P910i. Memory ™ ™ Sticks used in P800 or P900 can be used in P910i but you cannot use a P910i Memory Stick PRO Duo in P800 or P900. You can ™ save pictures, video clips, music, and voice recordings as well as computer data and applications on a Memory Stick and use it to store or transfer the contents for many different purposes. - Page 23 Other devices must access the same folder structure to interact with the P910i files. If you are using a PC, this is easily done by browsing to the required folder on the Memory Stick.
-
Page 24: Connecting The Accessories
This is the Internet version of the user’s guide. © Print only for private use. Connecting the accessories Getting to know your P910i A The travel charger is connected to the SyncStation or to the P910i. Note The design of the charger will differ depending on the market. -
Page 25: Services
You can uninstall the demo application and also reinstall it from the Content and Application CD. See ‘Removing applications from your P910i’ on page 133 for how to uninstall the demo application and ‘Installing applications on your P910i’ on page 131 for how to reinstall it. - Page 26 Jog Dial to get more information about a selected entry or to change days. Tasks Keeps track of your tasks. Set due date, alarm, priority, and so on, for all your tasks and let your P910i remind you in time.
- Page 27 Set the way you communicate with your PC or other devices. Select between infrared, Bluetooth wireless technology and cable. In the cable menu, you can also select whether the P910i synchronizes with a PC or acts as a wireless modem.
-
Page 28: Updating The Software
P910i and Memory Stick. You might want to move or copy sound files into a sound track folder to store on a Memory Stick. As you may notice, if you connect your P910i to a PC and view the contents of your P910i in... -
Page 29: Managing Your Files
Managing your files Using the File Manager, you can handle the content and organization of media, both in the P910i and on the Memory Stick. See ‘File manager’ on page 126. You can also use the Storage manager in the Control Panel. See ‘Storage manager’... -
Page 30: Sending And Receiving Items
Sorting your files You can sort the files you have stored in your P910i. By sorting your files, you choose in which order you want the files to be displayed on the screen. You can choose between sorting by, for example type, size, date, or name. - Page 31 Messages. Select Beamed Delete Methods for storing data Your P910i can store data in different ways: • Internal memory. Used for storing pictures, messages, music, applications, and so on. • Memory Stick (expansion memory). • SIM card, for phone numbers and associated names. See ‘Copying contacts to and from the SIM card’...
-
Page 32: Entering Text With The Flip Closed
When you are editing text you can: • Press and select Text options > Input type input type. Getting to know your P910i • Press to switch between the input types in text edit mode. Inserting symbols When you are editing text you can press on the application, choose to select an item from the symbol selector table. -
Page 33: Entering Text With The Flip Open
There are three ways of entering text with the flip open: • Use the on-screen keyboard screen. • Write directly on the screen using the stylus. • Use the keyboard on the inside of the flip. located at the bottom of the Getting to know your P910i... -
Page 34: Handwriting Recognition
The keyboard top bar also contains a drop-down menu with When copying or cutting, the text Copy Paste. must be selected first. Getting to know your P910i Handwriting recognition Handwriting recognition Unfiled translates stylus gestures into letters, numbers or... - Page 35 Other such characters, for example, ö and ü, follow the same principle. Note Start each stroke at the dotted end. Numbers Numbers are written above the arrow. & " Note Start each stroke at the dotted end. Getting to know your P910i...
-
Page 36: Flip Keyboard
Press and hold to delete several characters and then whole words. Getting to know your P910i Press the space key to enter a character space to the right of the cursor. Press and hold the space key to move the cursor forward by inserting 6 space characters at a time. -
Page 37: P910I Locks
P910i on, or to have the SIM card unlocked. Your PIN (Personal Identification Number) code consists of four to eight digits. If you activate the SIM card lock, the P910i will ask for the PIN code every time you turn it on. You unlock the SIM card by entering the PIN code. -
Page 38: Device Lock
P910i asks you to enter the code to unlock the P910i before you can use it. This means that if someone steals your P910i and puts another SIM card into it, they will not be able to use it. -
Page 39: Change Code
Automatic keylock This option locks the keys on your P910i when the flip is closed. This is to protect the device if the keys are accidentally pressed. When this setting is active, the keypad will become automatically locked after a period of inactivity. -
Page 40: Phone
Calendar and Jotter while talking. Phone • Flight mode which enables the P910i to be used as a PDA in situations where radio transmitters may not be used. The GSM and Bluetooth transmitters (and receivers) are switched off. - Page 41 2. When you hear a short tone, say the voice command linked to the number you want to call. The P910i will connect you with the matching contact. You can use voice control when the P910i is handheld, used...
-
Page 42: Incoming Calls
This is the Internet version of the user’s guide. © Print only for private use. wireless technology headset. Magic word cannot be used together with a Bluetooth wireless technology headset. Read more about this in ‘Voice control’ on page 53. To make an emergency call Enter the emergency number on the keypad and press the Jog Dial. -
Page 43: Call Handling With The Flip Open
• – Paste a copied number to be used for the next Paste number call. • – You can use the P910i as a Speakerphone On/Off speakerphone. See ‘Speakerphone’ on page 48. • – Open another application, and, for example, Applications paste a copied phone number into a Jotter entry. - Page 44 , if you want to show it. Show my number If a call is not successfully connected, the P910i can be set to automatically retry to connect the call. When a retry is successful, the P910i alerts you with a single ring signal.
-
Page 45: Handling Two Or More Calls
Vibrating alert • – All sounds, for example ring signals, will be Silent mode turned off. • – Activate the P910i as a speakerphone. Speakerphone • – Turn the microphone on or off. Mute microphone Handling two or more calls During a call, you can make a second call, or answer an incoming call. -
Page 46: Conference Calls
This is the Internet version of the user’s guide. © Print only for private use. When an active call is finished, you are asked to retrieve the held call. If you do not respond within a few seconds, the held call will also be finished. -
Page 47: Call List And Call Log
The currently selected view is not shown as an option. Tip With the flip closed you can press call list. Press twice to call the last number used in the P910i. To view the Call log with the flip open: 1. In the Phone application, select from the button bar. -
Page 48: Hints And Smart Functions
If you open the flip during a call, the speakerphone function is activated and the volume will increase. This lets you continue the conversation while using other functions of the P910i. Close the flip or tap to switch off the speakerphone. -
Page 49: Flight Mode
You cannot make and receive calls, but most of the other functions in the P910i are available. A Power menu asks you if you want to start the P910i in normal mode or flight mode each time you turn on the P910i. See ‘Flight mode’... - Page 50 It may be necessary to use an adapter between the TTY device and the P910i. You can still make normal calls with the P910i in TTY mode but other accessories such as handsfree will not work properly. Do not open the flip during a TTY call. It will impair the quality of the connection.
- Page 51 Switch to line 1 depending on the previously preset line. to line 2 Corporate phone services in P910i The P910i can be used in a corporate environment like centrex, mobile centrex and corporate switchboards (PABX) equipped with a mobile extension facility (like Ericsson MD110 or Ericsson BusinessPhone).
- Page 52 When talking on the P910i, you may hand over the call to the desk phone by calling that phone, answering it and hanging up the P910i. You can also hand over a call from the desk phone to your P910i.
-
Page 53: Preferences
Say the ‘magic word’ and then the name of the person you want to call, and the P910i will try to call the person. Instead of the magic word you can also press and hold the Jog Dial or press the handsfree set call button. -
Page 54: Add To Contacts
, you are asked if you would like to Contacts add it. Set the function Handsfree Specify how to manage calls when the P910i is used with a handsfree kit connected. Phone • – Select the option you want. Answering mode –... -
Page 55: Accept Calls
• – The P910i sends a busy tone to the calling party. Restrict calls You can set restrictions for calls made from or to your P910i. list You can, for example, protect it from being used for long- Accept callers distance calls. -
Page 56: Calling Cards
P910i starts sending tones. Some international calling card services instruct their users to select a language by pressing a digit. When using the P910i calling card feature, you can insert such a digit in one of these places: •... - Page 57 TTY Accessory Select the check box when you want to use the P910i together with a TTY accessory. Teletype (TTY) accessory, text phone, is an aid for deaf and speech-impaired people.
- Page 58 This is the Internet version of the user’s guide. © Print only for private use. Not all networks provide charging information to the phone during a call. If your network provides this service and your subscription is for Advice of Charge Charging, you cannot make or receive any chargeable calls if you are roaming in a network that does not provide charging information.
-
Page 59: Media
PC. It is also possible to exchange video clips and pictures between the P910i and the Web. The pictures in your P910i can be set as background, wallpaper, or they can be added to the contacts in your phone book. See ‘Personalizing your P910i’... - Page 60 This is the Internet version of the user’s guide. © Print only for private use. You can also press the Jog Dial, or, when the flip is open, tap the capture button at the bottom of the screen to record a video clip.
-
Page 61: Taking Pictures
This is the Internet version of the user’s guide. © Print only for private use. Video status Above the viewfinder, you will find the video status. Icons show whether the CommuniCorder is ready or busy, video quality, and audio quality. A number indicates how much time you have left. The calculation is based on the current settings plus available space on the storage location you have selected (internal or the Memory Stick). -
Page 62: Image Status
This is the Internet version of the user’s guide. © Print only for private use. Delay timer CommuniCorder has a delay timer with a delay of 1-25 seconds. The delay time is the time between the moment you activate the shutter release and the moment when the picture is taken. -
Page 63: Camera Settings
This is the Internet version of the user’s guide. © Print only for private use. Camera settings You may want to change some of these settings if, for example you are taking a picture in daylight or in dark surroundings. You can also choose what resolution, size and quality, you want for the pictures you take. -
Page 64: Pictures And Image Editor
Pictures and Image editor The thumbnail view gives an overview of all the pictures in your P910i while the list view shows a more compact list. At the bottom of the screen you can see how many pictures you have saved in the current folder. - Page 65 This is the Internet version of the user’s guide. © Print only for private use. To rename a picture 1. Select Pictures > Rename picture Pictures Chat Edit 2. Enter a picture name > Done Note Two or more pictures cannot have the same name.
-
Page 66: Image Editor
This is the Internet version of the user’s guide. © Print only for private use. To copy, delete or move multiple pictures • In the thumbnail and list views, select the check boxes beside the picture names. Then select Pictures > want. - Page 67 This is the Internet version of the user’s guide. © Print only for private use. To zoom in and out This is not available in all formats. • Tap to zoom in. • Tap and drag the zoomed picture to view specific details in the picture.
-
Page 68: Video
Playing video clips The Video player opens in the list view. In this view, you get an overview of all the MPEG-4 video clips in your P910i. You can search for specific video clips, zoom the video clip names and sort them by name, date, or size. -
Page 69: Managing Video Clips
In this view you can send, rename, delete or move your video clips. Only the video clips saved in your P910i or on the Memory Stick (that is not streamed) can be handled in the detail view. To rename a video clip 1. -
Page 70: Streaming
When you play video clips that you have received via email or multimedia messaging, or that you have downloaded to your P910i from the Web, the viewer detail view is automatically launched. From the viewer detail view you can then save the video clip to your P910i. -
Page 71: Preferences
Custom setting When you download a video clip to your P910i, it is saved in the download cache memory. When this memory is full, you have to empty it to be able to download new video clips to your P910i. - Page 72 This is the Internet version of the user’s guide. © Print only for private use. 3. Select Clear Cache > Done When you view a video clip from a Web site, you may have to set the proxy settings. To change the proxy settings 1.
-
Page 73: Music Player
This is the Internet version of the user’s guide. © Print only for private use. Music player Your P910i has mobile music in the form of a stereo music player. With the music player you can listen to single music tracks or entire folders with tracks. -
Page 74: Managing Sound Files
Beautiful Night Rooster following tracks in the folder. Song for you Use the slider to move Sony Ericsson theme forwards and backwards in Standing Still the track. Select Music > to move to the Manage tracks file list view. - Page 75 1. Select Music > Rename track 2. Enter a track name and tap Done Two or more tracks cannot have the same name. To delete a track from the P910i 1. Select Music > Delete track 2. Select Viewer If you play sound tracks remotely, for example music on an Internet site, a view similar to the detail view displays.
- Page 76 When you receive sound files in other applications, such as email and multimedia messages, you activate the viewer in your P910i. From the viewer you can then save the sound file to your P910i. To save a track from another application 1.
-
Page 77: Internet
Java script in the Web page will not work properly. You can save bookmarks to viewed pages, to be able to access them easily. You can also save pages in the P910i for off-line viewing. The browser uses folders for categorising information. The folders used are bookmarks, saved pages, signed documents, and Push messages. -
Page 78: Using The Browser View
This is the Internet version of the user’s guide. © Print only for private use. Using the browser view The P910i can display the Internet page in normal view or full screen view. Use the Internet button to change Internet Edit... - Page 79 – Add the active link URL to the Add to bookmarks bookmark list. • Loaded picture (with or without link) – – Save the picture in the P910i. Save image – – Copy the picture to the clipboard. Copy image –...
- Page 80 This is the Internet version of the user’s guide. © Print only for private use. • Not loaded picture (with or without link) – – Load the picture. Load image • Voice call link – – Place a call according to the link. Call –...
-
Page 81: Using The Bookmark View
This is the Internet version of the user’s guide. © Print only for private use. To view information on the open page 1. Select Internet > Page information 2. Select the tab to view the page information. Content 3. Select the tab to view information on the Connection connection. - Page 82 – – Categorize your bookmarks in folders Edit folders (business, personal and so on). The contents in the Folders menu can change depending on the pages and bookmarks stored in the P910i. Internet Icons Bookmark Saved page Push message from the WAP service provider...
-
Page 83: Preferences
Internet service provider to send you an auto setup message containing the required setup information. The accounts will then be set up automatically on your P910i. To guarantee the integrity of the settings, a PIN may be used. For security reasons, some WAP pages and services, for example on-line banking, can only be accessed from a particular WAP account. - Page 84 This is the Internet version of the user’s guide. © Print only for private use. Advanced settings – Select if you want to be able to receive messages from your WAP service provider. – Select if you want to automatically open the URL in WAP Push messages.
-
Page 85: Games
There are two pre-installed games in your P910i. Traditional Chess and the card game Solitaire. More games are available on the Content and Application CD in your original P910i box. You can also install games from other developers, see ‘Installing applications’ on page 131. Chess You can play Chess against the P910i, or against another P910i user via SMS. -
Page 86: Solitaire
This is the Internet version of the user’s guide. © Print only for private use. Solitaire Solitaire is a card game played with a standard deck of 52 cards and up to 4 Jokers. The purpose of Solitaire is to remove all the cards from the piles to the layout card while scoring as many points as possible. -
Page 87: Business
MMS (Multimedia Message Service) messages. A multimedia message can contain text, graphics, animations, photographic images, audio clips and ring melodies. Email messages. Your P910i mail client supports POP3 and IMAP4 mail servers, MIME attachments and SMTP for sending mail. You also use... -
Page 88: Folders In Messages
P910i. You can also use the Web phone setup-message generator on www.SonyEricsson.com. Received auto-setup messages are stored in the Auto setup See ‘Getting started with Internet and Messages’... -
Page 89: The Accounts In Messages
Text messages can be sent to one or more people (not more than thirty, we recommend), and you can request a delivery report when your text messages have been delivered to the recipients. The delivery report arrives on your P910i as a text message. Get&send Create SMS,... -
Page 90: Handling Multimedia Messages
This is the Internet version of the user’s guide. © Print only for private use. If you leave the message before sending it, it will automatically be stored in the folder (unless you edit a message which Draft was already located in Outbox). Tip To enter several addresses manually (without using Contacts) in a text message, multimedia message or in an email: enter a comma between each address. -
Page 91: Incoming Multimedia Messages
Phones can, for example, only receieve pictures of a maximum size, video and sound. Your P910i can help you to create messages which conform to standard and therefore are more likely to reach recipients. Set to warn or restrict you. See “MMS Advanced Content alert settings tabs”... - Page 92 This is the Internet version of the user’s guide. © Print only for private use. To create a new multimedia message 1. In select . (You can also select Messages Create MMS . or open an existing message and select Message >...
- Page 93 This is the Internet version of the user’s guide. © Print only for private use. • – Prevent your phone number from being Hide number displayed in the recipient’s phone. (Subscription dependent). • – Request a receipt when the recipient has opened Read report your message.
-
Page 94: Handling Email
Select Send > Send immediately If your P910i is connected to the Internet when you send an email, it will be sent immediately and your P910i will remain connected to the Internet. If not, your P910i will connect to the Internet and then send the email. - Page 95 Email must be fetched from the email server on the Internet or at your office. This can be done manually using the function or automatically by requesting the P910i to check for new email at certain times. When you forward an email, you can choose whether or not to forward the attachment.
- Page 96 The icon next to an attachment in the list identifies the type of attachment. To view an attachment you need a viewer for that type of file.Your P910i comes with pre-installed viewers for Microsoft Word, Excel, and Adobe Acrobat (PDF) files. To save an attachment, for example a picture 1.
- Page 97 2. Select Message > Delete message. 3. Select The message is deleted in your P910i and in your email server and will no longer be visible in your message list. Downloading email automatically You can schedule your email messages to be downloaded automatically at certain times.
-
Page 98: More About Messaging
Full screen view Use the command and MMS in full screen. You can also edit email in full screen. Set your P910i to open email messages in full screen view by default, see “Email account Inbox tab settings” on page 161, Get&send... - Page 99 4. Select If your service provider or network is unavailable Sometimes a message cannot be sent because your P910i cannot connect to a network. Please check that the Messaging Account and Internet Account information in the Control Panel is correct.
-
Page 100: Area Information
This is the Internet version of the user’s guide. © Print only for private use. Area information Area information messages are text messages that are sent to all subscribers in a certain network area, for example, a local traffic report. When you receive an area information message, the message automatically appears on the screen. -
Page 101: Contacts
These numbers are useful for service and information, and are accessible from the SIM within Contacts. You can synchronize the contents in Contacts with one of the PIM applications in your PC supported by the P910i. See ‘Synchronization and backup’ on page 139. Using Contacts with the flip... - Page 102 This is the Internet version of the user’s guide. © Print only for private use. • – Send the active contact using infrared or Bluetooth Send as wireless technology. • – Delete the active contact. Delete contact • – Will access the application list view. # Applications Menu options in SIM •...
-
Page 103: Using Contacts With The Flip Open
This is the Internet version of the user’s guide. © Print only for private use. To add a contact You can create a new contact using information from a recently received voice call or message. See also ‘Add to contacts’ on page 54. -
Page 104: Creating And Editing Contacts
This is the Internet version of the user’s guide. © Print only for private use. – Select or the URL to open a Web page. – Select to send a multimedia message. – Select to send a text message. Using service and information numbers To call an Information number or Service number on the SIM card 1. - Page 105 This is the Internet version of the user’s guide. © Print only for private use. 1. Select at the bottom of the screen. 2. Select a number. 3. Tap the button and record a voice command after the Record tone. 4.
-
Page 106: Managing Contacts
This is the Internet version of the user’s guide. © Print only for private use. 2. Select Contacts > Delete contact. To create or edit a contact on the SIM card 1. Select from the menu. Folders 2. Create or edit the contact as described above. All options are, however, not available for the SIM card contacts. -
Page 107: Making An Owner Card
This is the Internet version of the user’s guide. © Print only for private use. 2. Select Edit > Copy to SIM card 3. If the contact has multiple phone numbers, each number will be created as a separate entry in the SIM phone book. 4. -
Page 108: Calendar
- Specify a location or select a location you have Location used before. – - Select the check box if you want your P910i to Alarm alert you about the entry with a sound. Select the time and date that appears for your settings. -
Page 109: Managing Calendar Entries
This is the Internet version of the user’s guide. © Print only for private use. – - Select the check box to prevent the item from Private being viewed by others than yourself if you synchronize your calendar with, for example, your PC. 4. -
Page 110: Sending And Receiving Calendar Entries
This is the Internet version of the user’s guide. © Print only for private use. To move a Calendar item to Tasks 1. Open the entry and select Calendar > Move to Tasks 2. The entry is moved, not copied. If you move an entry with an alarm, the alarm will also sound in Tasks. -
Page 111: Tasks
Select the date that appears to get a calendar where you can set a due date. – – Select the check box if you want your P910i to Alarm alert you about the task. Select the time and date that appears for your settings. -
Page 112: Managing Task Entries
This is the Internet version of the user’s guide. © Print only for private use. Managing task entries To open an existing entry Select the entry in the Tasks list. To mark an entry as completed Select the check box to the left of the entry in the Tasks list. To sort the entries Select Edit >... -
Page 113: Sending And Receiving Task Entries
This is the Internet version of the user’s guide. © Print only for private use. Sending and receiving task entries You can send and receive task entries using ‘Sending and receiving items’ on page 30. Preferences Select to change the settings. The following Edit >... -
Page 114: Jotter
This is the Internet version of the user’s guide. © Print only for private use. Jotter The Jotter works as a notebook where you can write notes and draw pictures. The folders help you to separate different types of notes. A Jotter entry consists of two pages. -
Page 115: Drawing Pictures
Tap the eraser again to re-activate the pen. All jotter files (both text and drawings) are automatically stored in the P910i. The list view will be presented to you as soon as you start the Jotter application. Managing notes To delete a note 1. -
Page 116: Tools
This is the Internet version of the user’s guide. © Print only for private use. OOLS Sound recorder In Sound recorder you can record and listen to your own sound recordings. You can also send your recordings to other devices via Bluetooth wireless technology, infrared communication, email or multimedia message, and use a sound recording as a ring signal. -
Page 117: Using Sound Recordings As Ring Signals
2. Select how you want to send the sound recording. See ‘To send an item using Send as’ on page 30 for more information. Note All other sound media on your P910i is handled via the application. You can send sound items from Music player... -
Page 118: Calculator
This is the Internet version of the user’s guide. © Print only for private use. Calculator The Calculator is a standard 12-digit calculator. You can add, subtract, multiply, divide, calculate square roots and percentages. It also has a memory function. To use the calculator 1. -
Page 119: Time
The time and date are always displayed on the flip closed standby screen. You can customize the display of times and dates throughout your P910i. You can set your current location and another location of your choice. It is also possible to set three different alarms. -
Page 120: Specifying Workdays
Setting number formats You can choose how you want the measurements and numbers in your P910i to be displayed in all your applications. Distances can be displayed using the imperial or the metric system and different punctuation marks can be used as separators. -
Page 121: Setting Alarms
5. Tap Done Setting alarms You can set up to three different alarms in your P910i. You can choose to activate one of the preset alarms, or set a new alarm with your own definitions. You can choose to set a silent alarm, where only a message is displayed when it goes off, or you can set a sound alert. -
Page 122: Viewers And Editors - Quickoffice
This is the Internet version of the user’s guide. © Print only for private use. Viewers and editors – Quickoffice Your phone contains the following viewers and editors: • Quickword – view and edit Microsoft Word documents ™ • Quicksheet –... -
Page 123: Quickword
In the detail view, from the toolbar at the bottom of the screen, select the edit icon The first time you edit a document (in native Microsoft Word format) transferred to your P910i, you have to rename it. When you select , your P910i copies the document with the new name. -
Page 124: Quickpoint
This is the Internet version of the user’s guide. © Print only for private use. Quickpoint Store large presentations on the Memory Stick to leave the phone memory available for running applications. Animations and embedded objects will be shown as plain text. To handle a presentation file 1. -
Page 125: Pdf
This is the Internet version of the user’s guide. © Print only for private use. Pdf+ To save and copy a received document 1. In the detail view, from the toolbar at the bottom of the screen, select the save icon 2. -
Page 126: File Manager
File manager delete files and folders on the P910i. You can also add folders, send files and rename and format the Memory Stick. Initially, the root view is shown, with the sub folders: •... - Page 127 This is the Internet version of the user’s guide. © Print only for private use. To delete one or more folders or files Note Only empty folders can be deleted. 1. Select the folders or files to delete. 2. Select File >...
-
Page 128: Online Services
This function is network- or subscription-dependent. Online services provides a mechanism that allows applications that exist on the SIM to interact and operate with the P910i. It may provide services ranging from weather forecasts to the latest information from the stock market. -
Page 129: Advanced Functions
This is the Internet version of the user’s guide. © Print only for private use. DVANCED UNCTIONS PC Suite and Content and Application Sony Ericsson PC Suite The Sony Ericsson PC Suite CD delivered with your P910i contains a set of useful applications: • – Synchronization of Calendar, Notes, Synchronization Contacts and Tasks against Microsoft Outlook, Lotus Notes and Lotus Organizer. -
Page 130: Content And Application Cd
This is the Internet version of the user’s guide. © Print only for private use. Content and Application CD CD contains a number of applications Multimedia for P910i and files to be installed in, or downloaded to, your P910i and used together with its applications. • Games • Audio files •... -
Page 131: Installing Applications
This is the Internet version of the user’s guide. © Print only for private use. Installing applications It is possible to install new applications in your P910i. These applications can be obtained in several ways, for example: • from the Internet. - Page 132 From the P910i Program packages, for example, games, can also be downloaded to your P910i from the Internet or from a Memory Stick. When downloading a file from the Internet, the installation will start automatically when the file is completely downloaded to your P910i.
-
Page 133: Removing Applications From Your P910I
SyncStation and an Internet-connected PC (preferably via broadband). To update the P910i software 1. Connect the SyncStation to your PC and place your P910i into it. 2. Visit Sony Ericsson P910i support site on www.SonyEricsson.com/support 3. -
Page 134: Connecting To Other Devices
Sony Ericsson PC Suite CD contains the necessary software. Put your P910i in the SyncStation. A new wizard starts which helps you to connect your P910i if this is the first time. appears in the status area to the right on the taskbar when the P910i is connected. -
Page 135: Connection Via Infrared Port
Both your P910i and the device you connect to must have their infrared ports activated before communication can begin. -
Page 136: Connection Via Bluetooth Wireless Technology
This process is called pairing (other documentation may refer to it as bonding). The paired devices are remembered by your P910i even after you have turned it off so you do not need to repeat the process for every connection with those devices. The reason for pairing is to simplify future connections and to make them secure –... - Page 137 – Devices that are within range but unknown are shown with a preset name. 4. Select the device you want your P910i to pair with, and enter a passcode when asked for it. When the passcode is accepted, the pairing process is complete, see ‘Passcodes’ on page 138.
-
Page 138: Send And Receive
Messages Bluetooth share You can make it possible for other users to transfer items from your P910i. To make an item accessible, select . The item is then copied to the Bluetooth Shared accessible by other users. When a user requests to access your... -
Page 139: Synchronization And Backup
This is the Internet version of the user’s guide. © Print only for private use. Synchronization and backup With Sony Ericsson PC Suite installed in your PC, your P910i can synchronize with the following PC applications, also called Personal Information Managers (PIMs): •... - Page 140 This is the Internet version of the user’s guide. © Print only for private use. Local synchronization settings Local synchronization is initiated from the PC and all settings are made in the P910i PC software (included on the Sony Ericsson PC Suite CD). The easiest way to synchronize is to set the Synchronization to automatically make a synchronization every time your P910i is connected.
-
Page 141: Remote Synchronization
This is the Internet version of the user’s guide. © Print only for private use. Remote synchronization Remote synchronization takes place over the air and is the ideal way to keep the P910i up-to-date while on the move. Using GPRS, the P910i can be continuously connected to the remote synchronization server. -
Page 142: Backing Up Data
P910i to your computer. Keeping backups of your P910i contents on your computer means that you have a separate copy of the contents of the P910i, which can be restored into the P910i. Backups should be made on a regular basis. -
Page 143: Restoring Data
Memory Stick can only be restored to a Memory Stick. To restore a backup 1. Turn on your P910i and connect it to the PC via cable. 2. In the PC, click on on the PC taskbar and select and restore 3. -
Page 144: Settings
This is the Internet version of the user’s guide. © Print only for private use. ETTINGS Personalizing your P910i There are a number of ways you can give your P910i a personal touch and change its settings to suit your requirements. Themes Themes control the colour of screen and text, the icons, and the background picture, the wallpaper. -
Page 145: Setting A Screen Saver
Your P910i can play both iMelody format and polyphonic ring signals in WAV, AU, AMR, MIDI, RMF, and MP3 sound file formats. When you choose a ring signal, your P910i will scan 11:03 the internal and Memory Stick storage and present you with a list of ring signals that are in these formats. -
Page 146: Alarm Tones And Sound Notification
You may change the default ring signal that is played in all other cases. To do this, see ‘Sounds and alerts’ on page 149. Note If your P910i finds that you have renamed, moved or deleted a ring signal, it will play the default instead. -
Page 147: Control Panel
The Control Panel is the location for all the main settings on your P910i that are system-wide and affect more than one application. This is the main place to go to initially set up your P910i, and to change settings at any point thereafter. To access it, select Applications >... -
Page 148: Screen Tab
1. Select if the flip closed or flip open wallpaper should be changed. 2. Tap the image showing the current picture. 3. Browse to see picture files available on your P910i. 4. Select a picture and tap Select Read more about background in ‘Personalizing your P910i’ on page 144. -
Page 149: Flight Mode
Use these settings to turn the flight mode on or off and also to activate the Power menu. When activated, the Power menu will ask you if you want to start the P910i in normal mode or flight mode each time you turn on the P910i. Also, when you press the On/Off button when your P910i is on, the Power menu will ask you if you want to turn off the P910i, or switch to another mode. - Page 150 2. Tap again to stop playback. To change the default ring tone or alert 1. Tap the drop-down menu. 2. Select for the P910i default or Default Melody select a new one. 3. If required, change folder. 4. Select the required sound 5.
-
Page 151: Text Input
– Select the default alarm sound. Default alarm Text input There are several standard ways of entering text in your P910i. See ‘Entering text with the flip closed’ on page 32 and ‘Entering text with the flip open’ on page 33. -
Page 152: Time & Date
This is the Internet version of the user’s guide. © Print only for private use. Time & date Adjusting the time and date here sets these throughout your P910i. The dialog has three tabs. You can set: Time & date The current time and date. -
Page 153: User Greeting
Week and Month views in Calendar. User greeting Your P910i can show a user greeting on the standby screen when you turn it on. Use this dialog to turn this function on or off. You can define your own user greeting text (up to 32 characters). -
Page 154: Cable
• Set the baud rate, parity, number of stop bits, character length and type of flow control required for the connection. When connecting your P910i via the SyncStation to a USB port on your PC, use the following (default) settings:... -
Page 155: Infrared
Web site address that your P910i automatically uses to access the Internet. You need to set up an Internet account before you can: • Access Web pages and download multimedia messages. - Page 156 Internet accounts for Internet Messages Whenever you connect to the Internet, your the account that your P910i prompts you to use. To create a new Internet account 1. On the tab, select Accounts 2.
- Page 157 The DNS address uniquely identifies your Internet Service Provider (ISP)'s computers, which your P910i uses to connect to the Internet. Your P910i can normally fetch these addresses automatically from most ISPs. If, after setting up an Internet account, you cannot...
- Page 158 Secure Token in this dialog: 1. Select the To create or delete Secure Tokens on your P910i, select Control panel > Other >Secure tokens 2. Select the vendor and token names of the Secure Token that you want to link to this account from the drop-down lists.
-
Page 159: Messaging Accounts
Preferred mode (bearer preference) Please note that your P910i can be used for either voice (or GSM data) calls or transferring GPRS data, but not both at the same time. It may, however, still be connected to GPRS. As an example, during GPRS data transfer (Icon: not receive incoming calls. - Page 160 You can choose one of your email accounts as will be the email account that your P910i uses when you use to send an entry as email directly from one of your P910i Send as...
- Page 161 This is the Internet version of the user’s guide. © Print only for private use. Email account Inbox tab settings Username Your Internet Service Provider (ISP) supplies you Password with your username, your password, and its Incoming server incoming server address, which identifies the address computer where your incoming email messages are stored.
- Page 162 This is the Internet version of the user’s guide. © Print only for private use. Email account Advanced tab settings Incoming mail Normally 110. Do not change unless your ISP port instructs you to. Secure A secure connection means that all information password (including your username, password, and all authentication...
-
Page 163: Advanced Settings
Hide number number. Read report your messages. Delivery report receivers of your messages. Reply with history to make settings about how your P910i will for your messages, that is, Validity period is the default. Priority Normal High for the multimedia messages you... - Page 164 Information services. The availability of Cell and Area Information Services is operator-dependent. Your network may broadcast the area code as cell information. Your P910i can display it below the network name in the flip closed standby view. Control panel Area Information is a type of text message that is sent to all subscribers in a certain network area, for example a local traffic report.
-
Page 165: Wap Accounts
WAP account. The dialog has two tabs: Basic Preferred. Basic tab The dialog shows a list of all the WAP accounts on your P910i. You can add a account to the list and Edit existing account. Note You access WAP pages through an Internet Service... -
Page 166: The Other Tab
If the manager certificates do not match, your P910i informs you, and gives you the following choices: • Prevent the page being loaded or the software being installed. -
Page 167: Flip Settings
P910i has been removed. Format disk This dialog primarily lets you rename and format any Memory Stick that you install in your P910i. Your P910i comes with one Memory Stick. When you format a disk, you delete all the information on it, including any applications that you may have installed. -
Page 168: Master Reset
This is the Internet version of the user’s guide. © Print only for private use. To conserve storage space only a limited set of languages is loaded on your P910i at delivery. When you select one of the languages from the list the unused languages in the set are deleted from the memory of your P910i. -
Page 169: Storage Manager
This is the Internet version of the user’s guide. © Print only for private use. you use your P910i as a Hard Token). You can configure as many tokens as needed. Tip Dialog details when using secure access are vendor, system and network-specific. -
Page 170: Wim Pin Settings
2. Select the application to uninstall. 3. Select Uninstall. Note You cannot uninstall the standard applications that come with your P910i. WIM PIN settings WIM (WAP Identity Module) is used for performing security functions, especially to store and process information needed for user identification and authentication. -
Page 171: Getting Started With Internet And Messages
• A private service provider such as your company or your bank. You will need to enter specific service provider details into your P910i to set up an Internet account. It can hold the details of multiple service providers, for example, you may have separate Internet and corporate accounts. -
Page 172: Automatically Set Up Service Provider And Messaging
This is the Internet version of the user’s guide. © Print only for private use. Automatically set up service provider and messaging The easiest way to set up your P910i is automatically, through your service provider. settings your P910i supports automatic setup Messages •... -
Page 173: Manually Set Up Messaging
This is the Internet version of the user’s guide. © Print only for private use. First collect all the information you will need. You can obtain this information from your ISP (Internet Service Provider), or if you are connecting to a corporate network, your information services department. -
Page 174: Setting Up Wap Accounts
WAP, and another to access your bank's WAP service. The easiest way to set up a WAP account on your P910i is automatically, through your service provider. Check your service provider's Web site for information or contact their support desk and ask about automatic setup. - Page 175 Since Bluetooth is wire-free and requires no line-of-sight alignment, you can place the laptop in a comfortable position and let your P910i remain in your pocket, briefcase, or even be placed up to 10 metres away. If you wish to use an infrared link, the range is typically up to one metre.
-
Page 176: Gprs - Connection Information
Connecting To connect using a DUN entry created by the wizard 1. If you are connecting by cable, set your P910i to connection mode, see ‘Cable’ on page 154. 2. Use any conventional method to make a connection: – Click the Desktop shortcut created by the wizard. -
Page 177: Gprs Data Log
This is the Internet version of the user’s guide. © Print only for private use. GPRS status information When the signal strength icon is selected, network, GPRS status information and, if applicable, GPRS error text appear. GPRS data log A new GPRS data log entry is created when a GPRS account establishes a connection for the first time. -
Page 178: Reference
To improve performance, you can update the software of your P910i. See “Sony Ericsson Update Service” on page 133. If you need to hand in your P910i for repair, please note that you may lose information and content that you have saved in your P910i. -
Page 179: Communication Problems
Your P910i and its holder, the fuse in the fuse holder, and/or the external antenna. Does not flash If the indicator light at the top of your P910i does not flash and no network is displayed there is no network within range. See ‘Telephone does not work’... - Page 180 ‘Divert calls’ on page 54 for more information. • Make sure potential fax callers do not try to send a fax to your P910i as they can experience a number of retries before the fax transmission is stopped.
- Page 181 Cannot transfer Place the P910i in the SyncStation. In the PC, open pictures My P910i and browse through the P910i file system to find the picture.
- Page 182 Ericsson PC Suite. See also Knowledge base on www.SonyEricsson.com/support Memory full When your P910i has no more space available to save or store information, the icon the status bar. You must then free up memory to ensure the proper functioning of the P910i.
- Page 183 Display > Screen tab > Calibrate screen follow the instructions. Cannot change • The first time you start the P910i you select a language language. All other languages are then deleted, in order to free memory. You can find all languages on the Sony Ericsson PC Suite CD.
-
Page 184: Guidelines For Safe And Efficient Use
Antenna Only use an antenna that has been specifically designed by Sony Ericsson for your mobile phone. Use of unauthorized or modified antennas could damage your mobile phone and may violate regulations, causing loss of performance and SAR levels above the recommended limits (see below). - Page 185 However, it will eventually wear out – this is not a defect. When the talk-time or standby time is noticeably shorter, it is time to replace your battery. Sony Ericsson recommends that you use only batteries and chargers approved by Sony Ericsson.
-
Page 186: Limited Warranty
Product, will, at their option, either repair or replace the Product in accordance with the terms and conditions stipulated herein. Sony Ericsson and its service partners reserve the right to charge a handling fee if a returned Product is found not to be under warranty according to the conditions below. - Page 187 EU country where an identical Product is sold by an authorized Sony Ericsson distributor. To find out if your Product is sold in the EU country you are in, please call the local Sony Ericsson Customer Care Centre.
-
Page 188: Fcc Statement
For more environmental information, look at the Environmental Declaration for www.SonyEricsson.com P910i at Guidelines for safe and efficient use Declaration of Conformity We, Sony Ericsson Mobile Communications AB of Nya Vattentornet S-221 88 Lund, Sweden declare under our sole responsibility that our product Sony Ericsson type FAB-1021012-BV and FAB-1021012-CN and in combination with our accessories, to which this declaration relates is in conformity with the appropriate standards 3GPP TS 51.010-1, EN 301489-7,... -
Page 189: Terms And Definitions
A version of HTML optimised for small devices. Calling Line Identity. Shows the number of the person calling you in your mobile phone display. Your P910i will also display the name and photograph of the caller if they are in Contacts. - Page 190 This is the Internet version of the user’s guide. © Print only for private use. Cascading Style Sheet. A feature of browsers. DTMF Dual Tone Multi Frequency. A method of coding digits as a combination of two audible tones. Dial-Up Networking. The dial-up networking capability in Windows.
- Page 191 IrDA The Infrared Data Association is dedicated to developing standards for wireless, infrared transmission systems between devices. With IrDA ports, a device such as your P910i can exchange data with other devices without a cable connection. IrDA requires line-of-sight transmission.
- Page 192 This is the Internet version of the user’s guide. © Print only for private use. Multiple Bit Map. Symbian OS bitmap format. Mobile Electronic Transactions. An initiative founded by Ericsson, Nokia and Motorola to establish a secure and consistent framework for mobile transactions. MIDI MIDI (Musical Instrument Digital Interface) is a protocol designed for recording and playing back music on digital...
- Page 193 Post Office Protocol 3 is a standard client/server protocol for receiving email. The email is received and held for you by your POP server. Periodically, the P910i Messages application can check your mail-box on the server and download any mail.
- Page 194 This is the Internet version of the user’s guide. © Print only for private use. SGML A generic markup language for representing documents. A SIM (Subscriber Identity Module) card is a ‘smart card’, inserted into GSM phones, that contains your phone account information.
- Page 195 This is the Internet version of the user’s guide. © Print only for private use. PIMs/PDAs and group schedulers. vCalendar is specified by IETF. vCard vCard automates the exchange of personal information typically found on a traditional business card, for use in applications such as Internet mail, voice mail, Web browsers, phone applications, call centres, video conferencing, PIMs /PDAs, pagers, fax, office equipment, and smart cards.
- Page 196 This is the Internet version of the user’s guide. © Print only for private use. WTLS Wireless Transport Layer Security. Part of WAP, WTLS provides privacy, data integrity and authentication on transport layer level between two applications. The main standards body for the WWW. xHTML Extensible Hypertext Markup Language.
-
Page 197: Technical Data
This is the Internet version of the user’s guide. © Print only for private use. Technical data General Product P910i standard version, Latin character set Size 115 x 57 x 26 mm Weight 155 grams with battery and flip. System and power class E-GSM 900 Class 4... -
Page 198: Infrared Transceiver
This is the Internet version of the user’s guide. © Print only for private use. Infrared transceiver Data transmission rate Max speed between phone and IrDA device (that is a PC or another phone) SIR: up to 115,200 bps GPRS Maximum Data Rates (kbps) CS-1 CS-2 CS-3... -
Page 199: Video Player
This is the Internet version of the user’s guide. © Print only for private use. Video player File Format MP4 (MPEG4), 3GP (3GPP PSS) Streaming RTSP according to 3GPP transport Music player File Format MP3, MP4, M4A,WAV, AAC, AU, AMR and G-MIDI level 1 with 24 voices polyphony, RMF, iMelody Integrated browser... - Page 200 This is the Internet version of the user’s guide. © Print only for private use. Email Incoming mail server support POP3, IMAP4 Outgoing mail server support SMTP Content coding MIME compliant Security SMTP authentication, SSL encrypted IMAP4 and SMTP Attachments Receiving and sending Document viewer and editor Microsoft®...
-
Page 201: Index
This is the Internet version of the user’s guide. © Print only for private use. Index Battery Accented letters - charging 13 - handwriting 2 - information 185 Accepted callers 55 - inserting 12 Accessories 24 - removing 12 Add to contacts 54 Bluetooth wireless Alarm tones 146 technology 136... - Page 202 - bookmarks 81 - browser view 78 - browsing 77 - signing documents 81 - user authentication request 81 Introduction to P910i 9 IP security manager 166 Jog Dial 19 Jotter 114 - creating and editing notes 114 - drawing pictures 115...
- Page 203 P910i overview 11 Messaging P910i package 10 - accounts 89 PC connectivity software MMS 87 Mobile music 73 PC Suite for P910i 129 Index Pdf documents - viewing 122 Personalizing your P910i Phone book - importing entries 14 Pictures 64...
- Page 204 This is the Internet version of the user’s guide. © Print only for private use. Sound notification 146 Sound recorder 116 T9® text input 32 Sound recordings 116 Tasks 111 - sending and receiving Technical data 197 Text input 32 - using as ring signals Text messages 89 Themes 144...