
Related Manuals for NETGEAR Orbi Pro Ceiling Satellite


Summary of Contents for NETGEAR Orbi Pro Ceiling Satellite
- Page 1 User Manual Orbi Pro Ceiling Satellite Model SRC60 NETGEAR, Inc. March 2019 350 E. Plumeria Drive 202-11917-01 San Jose, CA 95134, USA...
- Page 2 Do not use this device outdoors. If you connect cables or devices that are outdoors to this device, see http://kb.netgear.com/000057103 for safety and warranty information. Trademarks © NETGEAR, Inc., NETGEAR, and the NETGEAR Logo are trademarks of NETGEAR, Inc. Any non-NETGEAR trademarks are used for reference purposes only.
-
Page 3: Table Of Contents
Sync your satellite using the Sync button........14 Sync your satellite using the Orbi Pro router web interface..16 Set up your Orbi network with the NETGEAR Insight mobile app.18 Chapter 2 Manage Your Orbi Pro Ceiling Satellite Update the Orbi Pro Ceiling Satellite and Orbi Pro router firmware....................20... - Page 4 Orbi Pro Ceiling Satellite Network disruption occurs when you use link aggregation..35 Appendix A Supplemental Information Factory settings...................37 Technical specifications..............38...
-
Page 5: Chapter 1 Overview
Overview This manual covers how to set up your Orbi Pro Ceiling Satellite model SRC60 and configure its settings from the Orbi Pro router web interface. For information about how to configure your Orbi Pro router, see the user manual for your Orbi Pro router, which you can download by visiting https://www.netgear.com/support/download/default.aspx. -
Page 6: Supported Orbi Pro Routers And Satellites
The Orbi Pro Router (SRR60), Orbi Pro Satellites, and the Orbi Outdoor Satellite support the Orbi Pro Ceiling Satellite. You must own an Orbi Pro router to add the Orbi Pro Ceiling Satellite to your WiFi network. The Orbi Tri-Band Mesh WiFi Router (RBR20) and the Orbi Tri-Band Cable Modem Router (CBR40) do not support the Orbi Pro Ceiling Satellite. -
Page 7: Hardware Overview
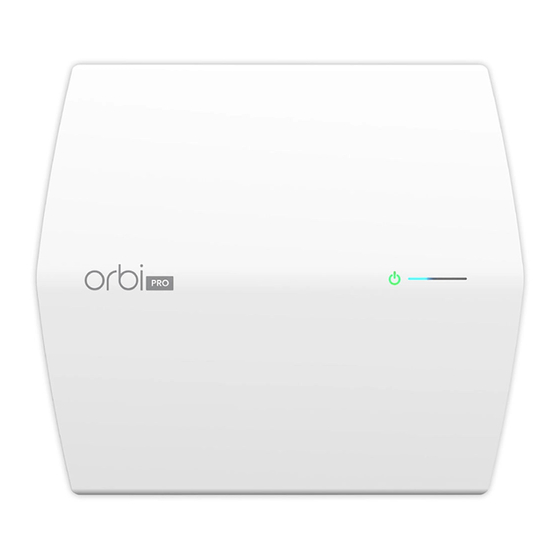
Orbi Pro Ceiling Satellite 3. Metal bracket with T-bar and lock screw and four short screws. The metal bracket with T-bar and lock screw are for ceiling mounting. The four short screws are used to attach the plastic mount to the metal bracket. - Page 8 Orbi Pro Ceiling Satellite Figure 3. Bottom panel (facing the ceiling or wall) and back panel 1. Power LED. For more information, see Power LED on page 9. 2. LED bar. For more information, see LED Bar on page 9.
-
Page 9: Power Led
Orbi Pro Ceiling Satellite 6. Reset button. For more information, see Reset the satellite to factory defaults on page 28. 7. Sync button. For more information, see Sync your satellite using the Sync button on page 14. Power LED The Power LED is located to the left of the LED bar on the top panel. The following table describes the behavior for the Power LED bar. -
Page 10: Satellite Label
Orbi Pro Ceiling Satellite Table 3. Sync colors Color LED Behavior Blue The Orbi Pro router and satellite synced, and the connection between the router and satellite is good. Amber The Orbi Pro router and satellite synced, and the connection between the router and satellite is fair. -
Page 11: Mount The Satellite On A Drop Ceiling
Orbi Pro Ceiling Satellite Note: If you are mounting the satellite on a hard ceiling, follow the instructions in Mount the satellite on a wall on page 13. Mount the satellite on a drop ceiling To mount the satellite on a drop ceiling: 1. - Page 12 Orbi Pro Ceiling Satellite 5. Use the four short screws to attach the plastic mount to the metal bracket. 6. Slide the satellite onto the plastic mount. 7. Use the retaining clip to lock the satellite into place. 8. Cable the satellite to your network.
-
Page 13: Mount The Satellite On A Wall
Orbi Pro Ceiling Satellite Mount the satellite on a wall To mount the satellite on a wall: 1. Place the plastic mount on the wall. 2. Mark the wall where the two mounting holes are. 3. If needed, drill holes. -
Page 14: Sync Your Satellite With Your Orbi Pro Router
Sync your satellite with your Orbi Pro router Use the Sync button on your Orbi Pro Ceiling Satellite to sync your satellite with your Orbi Pro router. You can also log in to your Orbi Pro router and use the router web interface to sync your satellite. - Page 15 Orbi Pro Ceiling Satellite To sync your satellite using the Sync button on both the Orbi Pro router and the satellite: 1. For the sync process, place your Orbi Pro satellite in an area near your Orbi Pro router. For example, place your satellite in the same room as your router, but not too close to the router.
-
Page 16: Sync Your Satellite Using The Orbi Pro Router Web Interface
Orbi Pro Ceiling Satellite Color LED Behavior Blue The Orbi Pro router and satellite synced, and the connection between the router and satellite is good. Amber The Orbi Pro router and satellite synced, but the connection between the router and satellite is only fair. - Page 17 Orbi Pro Ceiling Satellite Either connect the power adapter to the satellite and to a power source, or connect PoE+ LAN port 1 on the satellite to an Ethernet cable and to a Power over Ethernet Plus (PoE+) switch that can provide 802.3at (PoE+) power.
-
Page 18: Set Up Your Orbi Network With The Netgear Insight Mobile App
Set up your Orbi network with the NETGEAR Insight mobile app You can use the NETGEAR Insight mobile app version 5.5 or a newer version to set up your Orbi Pro network. Note: The NETGEAR Orbi app does not support the Orbi Pro Ceiling Satellite. -
Page 19: Chapter 2 Manage Your Orbi Pro Ceiling Satellite
Manage Your Orbi Pro Ceiling Satellite This chapter describes how to manage your Orbi Pro Ceiling Satellite’s settings from your Orbi Pro router web interface. The chapter contains the following sections: • Update the Orbi Pro Ceiling Satellite and Orbi Pro router firmware •... -
Page 20: Update The Orbi Pro Ceiling Satellite And Orbi Pro Router Firmware
Orbi Pro Ceiling Satellite Update the Orbi Pro Ceiling Satellite and Orbi Pro router firmware You can use the router web interface to check if new firmware is available and update your Orbi Pro satellite and Orbi Pro router, or you can manually update the firmware for your Orbi Pro satellite and Orbi Pro router. -
Page 21: Manually Update Firmware
To manually update the firmware on your Orbi router and satellite, follow these high level steps: 1. Visit netgear.com/support and download the firmware for both your Orbi Pro router and satellite. 2. Update the firmware on your Orbi Pro satellite. -
Page 22: Manually Update The Router Firmware
Orbi Pro Ceiling Satellite The Firmware Update page displays. 5. Select the check box next to your satellite’s model name. 6. Click the Update button. 7. If the browser asks you for the admin password, enter the same user name (admin) and password that you entered for the router. -
Page 23: Enable The Sync Button
Orbi Pro Ceiling Satellite 5. Click the Browse button. 6. Locate and select the router firmware file you downloaded. The firmware file name ends in .img. 7. Click the Upload button. The firmware is updated. Enable the Sync button After your satellite syncs with your router, the satellite’s Sync button is disabled for security reasons. -
Page 24: Turn The Satellite Leds On Or Off
Orbi Pro Ceiling Satellite Turn the satellite LEDs on or off By default, the satellite Power LED and bar LED on the top panel are enabled (see Power LED on page 9 and LED Bar on page 9). You can turn off these LEDs completely, for example, to keep the room dark. -
Page 25: Change The Satellite Device Name
Orbi Pro Ceiling Satellite Change the satellite device name You can change the satellite’s device name. The default device name is Ceiling Orbi Pro-1. The device name is the name that displays in a file manager when you browse your network. - Page 26 Orbi Pro Ceiling Satellite To view information about your satellite using the router web interface: 1. Launch a web browser from a computer or mobile device that is connected to your Orbi network. 2. Enter orbilogin.com. A login window opens.
-
Page 27: View The Satellite Status In The Satellite Web Interface
Orbi Pro Ceiling Satellite View the satellite status in the satellite web interface The satellite web interface lets you view satellite status information that you cannot view from the router web interface. You can find the IP address of the satellite in the router web interface. You can then launch a new web browser window, enter the satellite IP address, and access the satellite web interface. -
Page 28: Reset The Satellite To Factory Defaults
Orbi Pro Ceiling Satellite The Connected Devices page displays. For each device, the page displays the IP address, device name, MAC address, and connection type. Reset the satellite to factory defaults Under some circumstances (for example, you move the satellite to a different network), you might want to erase the configuration and reset the satellite to factory default settings. - Page 29 Orbi Pro Ceiling Satellite You can set up a link aggregation connection between the satellite and a switch by doing the following: 1. On the switch, configure either static link aggregation or Link Aggregation Control Protocol (LACP) on the two Ethernet ports that you intend to use for the LAG connection to the satellite.
-
Page 30: Chapter 3 Troubleshooting
Troubleshooting This chapter provides information to help you diagnose and solve problems you might experience with your Orbi Pro Ceiling Satellite. If you do not find the solution here, check the NETGEAR support site at netgear.com/support/ for product and contact information. -
Page 31: You Cannot Log In To The Orbi Pro Router To Configure The Satellite
Orbi Pro Ceiling Satellite You cannot log in to the Orbi Pro router to configure the satellite If you cannot access www.orbilogin.com, follow these troubleshooting tips: • Make sure that your Orbi devices are plugged into an active power source. Unless you turned off the LEDs, when your Orbi devices are powered on, the Power LED lights green. -
Page 32: The Router And Satellite Do Not Sync
Orbi Pro Ceiling Satellite The router and satellite do not sync If you are experiencing difficulty syncing the Orbi Pro router and satellite, check the following: 1. Make sure that the Sync button is enabled. If the Sync button on the satellite is disabled, the button is unresponsive and the LED bar pulses magenta. - Page 33 Orbi Pro Ceiling Satellite • Solid white. The satellite finished booting and is ready to sync with your router. 4. Press the Sync button on the back of your satellite, and within two minutes, press the Sync button on the back of your router.
-
Page 34: The Power Led Is Blinking Red
If the Power LED is blinking red, the firmware is corrupted. Reset the satellite to factory defaults (see Reset the satellite to factory defaults on page 28) to see if that resolves the situation. If it does not, contact NETGEAR support. For more information, visit https://www.netgear.com/support/. -
Page 35: Network Disruption Occurs When You Use Link Aggregation
Orbi Pro Ceiling Satellite • The PoE power budget of the 802.3at (PoE+) switch might be oversubscribed. Disconnect some other PoE devices from the switch to see if the satellite Power LED turns solid green. • Use a lower-numbered PoE port on the switch. For example, if the satellite is connected to PoE port 8, connect the satellite to PoE port 1. - Page 36 Supplemental Information This appendix covers the following topics: • Factory settings • Technical specifications...
- Page 37 Orbi Pro Ceiling Satellite Factory settings The following table shows the factory default settings for the Orbi Pro Ceiling Satellite. Table 4. Factory default settings Orbi Pro Ceiling Satellite Feature Default Setting Router and satellite User login URL orbilogin.com or orbilogin.net...
-
Page 38: Technical Specifications
Technical specifications The following table shows the technical specifications for the Orbi Pro Ceiling Satellite. Table 5. Technical specifications Orbi Pro Ceiling Satellite Feature... - Page 39 Orbi Pro Ceiling Satellite Table 5. Technical specifications Orbi Pro Ceiling Satellite (Continued) Feature Description Power adapter 120V, 60 Hz, input 12V, 2.5A DC, output Dimensions (H x W x D) 10.52 x 9.39 x 1.60 in (267.15 x 238.59 x 40.72 mm) Weight 1.90 lb (0.863 kg)